
Download Article
Download Article
This wikiHow teaches you how to bypass the trial version of Windows XP, either by using a stock product key or by using software to display your own product key. Note that you should only use the following information if you are unable to activate even though you have a legally-purchased copy of Windows XP.
Note: The three methods presented here may need to be used together depending on the situation:
- Changing the Windows XP Product Key Manually — includes instructions for how to use a stock product key to activate Windows XP.
- Using the Windows Key Finder — provides the detailed steps to get the product key from your device using Windows Key Finder.
- Fixing the Windows Activation Loop — is only required if you have already reached the time limit for activation and need to reset the loop.
-

This will open the «Run» program from which you can access your PC’s registry.
-
[1]
Advertisement
-
Doing so will launch the Registry Editor tool.
-
You’ll need to navigate through several of the folders listed here in order to reach your destination.[2]
- Since the registry holds most of your computer’s sensitive system information, consider clicking File and then Export in the top left corner of your screen to back up your registry before proceeding.
-
Note that you’ll need to click the + sign to the left of the folder to expand it—don’t click the folder itself.[3]
-
Each folder you need to expand after this point will be inside of the previous folder (for example, «SOFTWARE» was inside of «HKEY_LOCAL_MACHINE» and so on).
-
-
[4]
-
[5]
-
Don’t expand this one. You should see its contents listed in a window on the right side of the Registry Editor page.
-
-

-
These should be several pairs and sequences of random numbers.
-
This should remove the values listed here.
-
It doesn’t matter what you put here, but you’ll need to keep the format consistent (for example, if you deleted four characters, you’ll need to replace that section with four characters).
-
This will save your changes.
-
-
Remember, you can hold ⊞ Win and tap R to do so.
-
Exclude the quotation marks. Entering this command opens the Windows XP activation wizard.
- For best results, simply copy and paste this text into the Run field.
-
-
This option should say «Yes, I want to telephone a customer service representative to activate Windows» and there should be a clickable check box to the left of it.
- If you see a note that says «Windows XP is already activated», changing your key manually isn’t working. Please proceed to the Windows Key Finder method.
-
-
This is at the bottom of the «Activate» window.
-
Note that you may have to attempt this step a few times with different keys.
- If you don’t know the version of Windows XP your computer is currently running, consult your computer’s manual to verify before you proceed with trying the linked product keys.
-
This will generate a new Windows XP ID for your computer. After this process completes, you’ll need to confirm your activation of Windows XP.
-

-

This will allow you to activate your version of XP quickly.
- Note that calling Microsoft using the «telephone a customer representative» option likely won’t work since Microsoft discontinued support for Windows XP on April 8th, 2014.
-
After you’ve completed your Windows XP activation, you should be able to use it without getting locked out of the system.


Advertisement
-
Open the Winkey Finder website. Winkey Finder is a free, no-install program that can locate and retrieve your Windows XP product key.
-
As of January 2017, this is version 2.0.
- Since this version is currently in beta, you can also download the final version of 1.75.
-
You should see this button at the bottom of the Winkey version page.
-
It should be wherever you chose to save it when you clicked Download (e.g., your Desktop).
-
Doing so will extract the locked file’s contents onto your desktop.
-
This is the one you just extracted.
-
It should be the only executable («.exe») file in this folder.
-
Running the Winkey Finder program should immediately display your Windows XP product key, allowing you to apply the key to the Windows XP activation wizard the next time Windows asks you to update.
- To be safe, be sure to write down the product key when you see it.


Advertisement
-
You can choose this option from the Start menu, or you can simply hold down your computer’s power button until it turns itself off and then press the button again.
-
You’ll need to do this during the first time the logo appears after rebooting.
- Keep tapping F8 until you see the advanced options menu pop up.
-
Starting up your computer in this mode will bypass the Windows activation loop long enough for you to reset the timer for your XP trial.
-
You’ll need to wait a minute or so for Safe Mode to load.
-
Exclude the quotation marks.
-
You should see a dialogue window pop up after doing so.
- You may need to wait for a minute or so before the window comes up.
-
This may also say OK. After doing so, you should notice that your desktop interface is now accessible.
-
This will bring up the Run tool from which you can complete the fix.
-
This command resets the Windows XP trial clock to 30 days.
-
-
When your welcome screen finishes loading, you should be able to log in like usual rather than being stuck in the activation loop.


Advertisement
Add New Question
-
Question
Why is Windows XP is stuck at the login screen in an activation loop?
You have a certain period of time to activate Windows. After this period, Windows will be stuck on the login screen in an activation loop.
-
Question
Can I do this more than once? I have already done the 30 days one, a.k.a. Step 3. Nothing I do is working this time around.
You can only rearm the timer up to four times while in the grace period, or two times in safe mode.
-
Question
How can I force Windows XP to update?
You can go to Start Button > All Programs > Windows Update and update it from there.
See more answers
Ask a Question
200 characters left
Include your email address to get a message when this question is answered.
Submit
Advertisement
-
Since official support for Windows XP ceased in April of 2014, you won’t be able to speak to a customer service representative, and over the internet.
Thanks for submitting a tip for review!
Advertisement
-
The linked product keys may not work, in which case you should use the Winkey Finder to help activate Windows XP.
-
Resetting the registry manually may only restore your Windows XP version to a 30 day trial.
Advertisement
About This Article
Article SummaryX
1. Download Windows Keyfinder.
2. Unzip the file.
3. Double-click the WinKeyFinder program.
4. Find a key next to «Product Key.»
Did this summary help you?
Thanks to all authors for creating a page that has been read 3,279,744 times.
Is this article up to date?
A guide how to activate Windows 10 and 11 Pro for free!
NOTE
If you see the Windows keyboard button ; and you can’t find it, you likely have/had Windows 10 which has the button . If you can’t find that one, you likely have a PC that has been upgraded to Windows 10/11 from Windows 8.1/8/7/XP and other ones. If you have one of those, refer the Windows key button to as yours. A list of them is below:
Windows key buttons
— Windows 11
— Windows 10
— Windows 8.1 and 8
— Windows 7
— Windows XP
— Windows 95/98
This doesn’t say that your PC currently runs an older version of Windows. It is just the logo from the Windows version it came with. Your PC can always be upgraded to a newer version of Windows if it runs 64-bit and has a good CPU and GPU.
Table of Contents
- Why?
- CREATE A RESTORE POINT!!!
- Restore Point Tool
- Tool Usage
- Restore Procedure
- BACKUP YOUR CURRENT KEY!!!
- FAQ
- Note for users with unactivated Pro edition
- I get a notification:
Your Windows license will expire soonor something that way. What do i do? - Getting Started
- Method 1 For Activating Windows Pro
- Method 2 For Activating Windows Pro
- Method 3 For Activating Windows Pro Permanently
- Video Tutorial
- Last Words
- Support and Help
Why?
There are so many reasons why you want to upgrade! A few famous features which you provide of:
- BitLocker — Used to better secure your storage drive in case it is stolen or for any other reason.
- Remote Desktop — Used to access your PC from anywhere by enabling a connection to your device.
- Domain or Azure Active Directory — Used to make it possible to place the PC in a domain or use Azure Active Directory.
CREATE A RESTORE POINT!!!
Create a restore point to make sure you can roll back if something doesn’t work, or anything goes wrong. You can find a tool to easily do this below.
Restore Point Tool
The Restore Point Tool is a good tool using Batch to create a Windows restore point automatically so that you can rollback to your previous Windows edition. If needed, you can later on restore to this point to make everything working again.
Tool Usage
- Download the tool from here.
- Run the file as administrator.
- Wait some time. You will see some text that it is working on some things.
- When it is done, it will prompt ‘Create restore point done!’.
- It will exit, and your restore point is created!
Restore Procedure
- Open Settings (Not Control Panel).
- Go to ‘Info’ or ‘Information’.
- Go down until you see ‘Advanced System Settings’ at ‘Device Specifications’.
- Click on it.
- Go to ‘System Security’ section.
- Click on ‘System Restore’.
- Click on the box at ‘Select a different restore point’.
- Select the first restore point in the list.
- Click on ‘Next’.
- Click on ‘Complete’.
- Wait until the process is done.
It should now be restored to your previous edition of Windows!
BACKUP YOUR CURRENT KEY!!!
Backup the activation key you are currently using. This is to make sure that if the process doesn’t work, you can reinstall Windows/change the edition and enter your current key, so that you can access everything again.
This only applies when:
- You have buyed a key online.
- It isn’t connected to your Microsoft Account and is no digital license.
If you have a Microsoft account with a digital license, you don’t need to worry.
Use third method for PERMANENT activation!
Third is for users with PERMANENT activation. This requires you to have a Microsoft account to be connected with Windows. Find it by clicking here. The first and second methods are NOT PERMANENT.
FAQ
Q: Am I also able to switch from any other edition to Pro?
A: The answer is almost yes! You can switch from almost any edition to Pro completely for free!
Q: Will I lose my activation key?
A: No, you shouldn’t lose your key. It doesn’t care which type you have (Key, HWID, Digital license, etc.). Built-in keys should be reactivated when reinstalling Windows, although this isn’t always the case. A seperate key can just be copied and stored somewhere, which you could enter again later on (rollback first needed for this). Digital licenses are connected to your Microsoft account, so if you login it should restore automatically.
Q: Which upgradeable version are currently working?
A: If you’re on Home edition, it is likely that it can be upgraded to Pro. Most other editions are also supported as well. There are a few which might not work.
Note for users with unactivated Pro edition
People which already have Pro, but not activated, can skip to this step.
I get a notification: Your Windows license will expire soon or something that way. What do i do?
Don’t worry. You need to run the script again, but a recommendation: For users which used this guide to activate with the first or second method and now get this message everytime, use the third method to activate it forever. But it requires a Microsoft account.
Getting Started
-
What you first need to do is open CMD (Command Prompt) as Administrator by pressing + R.
-
And now type in
cmd.exein the box -
It should now look as something like this:

-
Now press the 3 keys Ctrl + Shift + Enter.
-
Now you should have something like this:
-
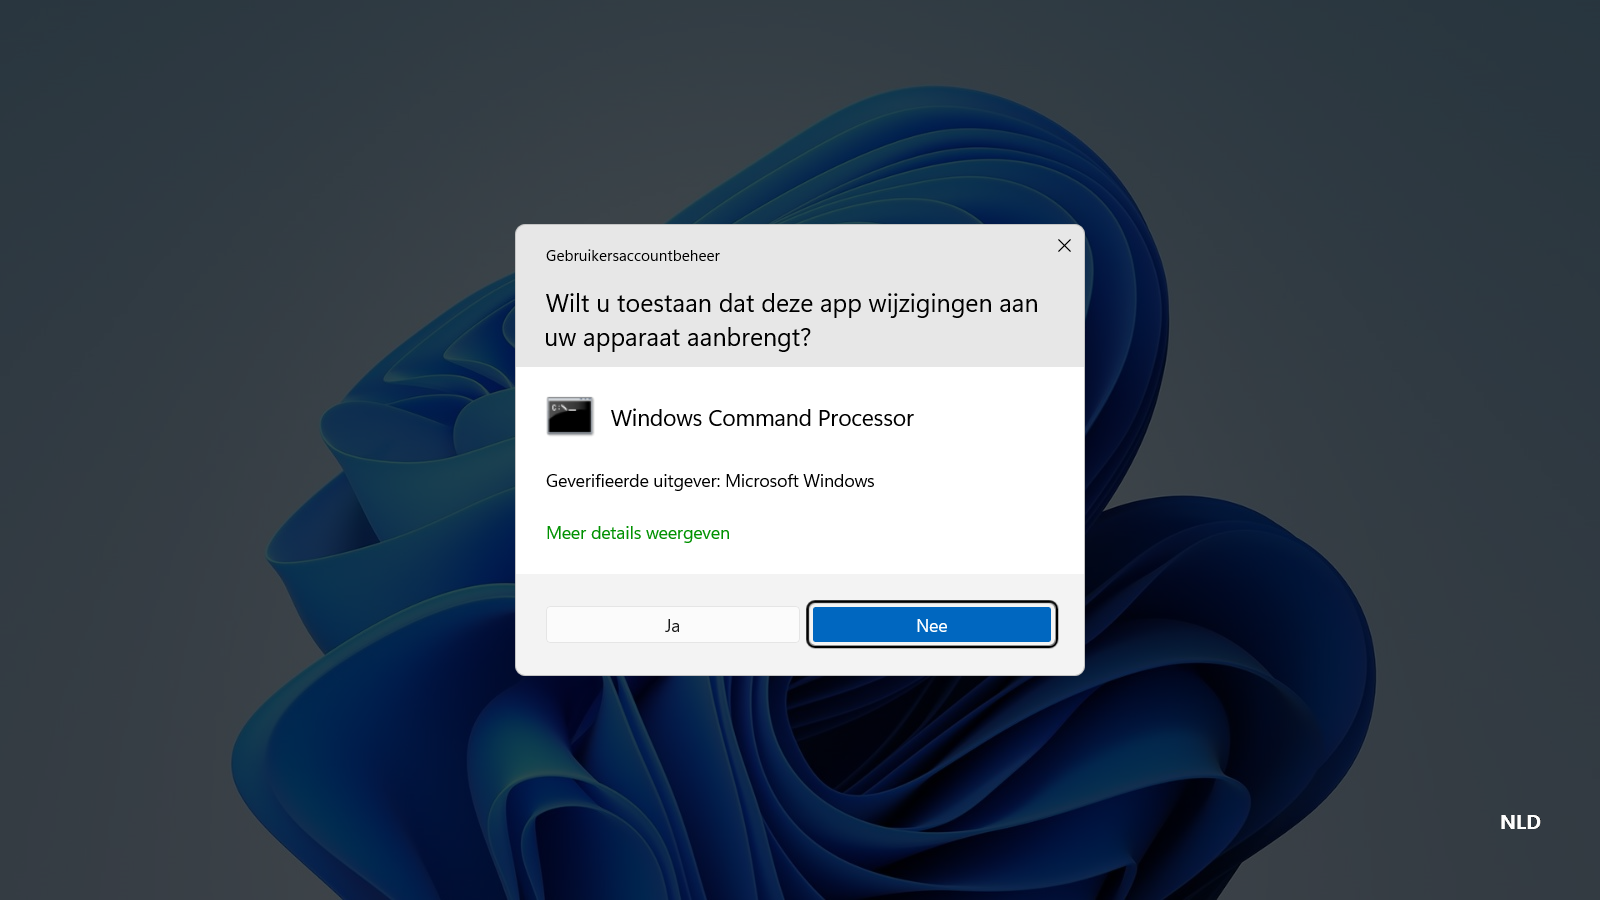
Now, click on
Yes -
Now you have something like this:

The commands
- Now, type the following command:
slmgr.vbs /upk
Note: this will remove your current activation key!
-
Now it will give an message, click on
OK -
And now this command:
slmgr.vbs /cpky -
It will give an message once again, and click on
OKagain -
And now type this command:
slmgr.vbs /ckms -
Once again click on
OKwhen you get an message
Edition upgradable check command
Now we are going to check of your edition is supported to upgrade to Pro.
- Run the following command to check this:
DISM /online /Get-TargetEditions - If you see
Professionalin the list, then you can upgrade your Windows edition to Pro for free!
Running Windows Pro installer
- Now, copy and paste this complete command:
sc config LicenseManager start= auto & net start LicenseManager
sc config wuauserv start= auto & net start wuauserv
changepk.exe /productkey VK7JG-NPHTM-C97JM-9MPGT-3V66T
exit
-
It will run an installer and you will see an message:
% complete -
Now wait until it’s 100% and then you get an error (This is normal, this needs to happen.)
-
When you get the error, just click Exit and then reboot your pc.
-
You will now see an message that he is running updates and is installing features, just wait until its done and check
infoin settings, You will see that Windows 10/11 Pro is installed! (May show Windows Enterprise, but will be Windows Pro!!)
But we are not done, You will see that it isn’t activated and that you can’t change some settings, now we are going to fix that!
Activating Windows Pro
Now we are going to activate Windows Pro for free. Choose one of the methods below. The third method is recommended, as this will activate it permanently. This requires you to have a Microsoft account associated with your device.
Method 1 For Activating Windows Pro
-
Now we are going to run some other commands to activate Windows 10/11 Pro.
-
Press + R.
-
It looks like this again:
-
Press Ctrl + Shift + Enter
-
You will get an message, just click on
Yes -
Now you will get an Command Prompt.
-
Type the following commands one for one to activate:
slmgr /ipk W269N-WFGWX-YVC9B-4J6C9-T83GX
slmgr /skms kms8.msguides.com
slmgr /ato
Note: This does not always work. When running slmgr /ato it does not always work, but keep trying. When it doesn’t, try one of the other methods below. If it was successful, you now have Windows 10/11 Pro and it activated! You can check settings to see it.
Method 2 For Activating Windows Pro
There’s another method with a batch file.
-
Download it by clicking here.
-
It will start to download. Click
Save (As)to save it. Now we need to open Windows Explorer. First, press the keyboard keys + R. -
Type
explorer.exein the box and clickEnteron your keyboard or clickOK. -
Now it will open Windows Explorer. You’re here now:

-
Click on
Downloads, or go to the directory where you saved the downloaded batch file. Now you are here (or on a different place):
-
Click on the batch file 1 time, then right click and click
Run As Administrator. It will ask for UAC permissions. ClickYesnow. Now a console windows will open. Wait until it says<product activation succesfull>. Now you activated Windows Pro for free! It also asks if you wanna see someone’s blog. PressYif you want to andNif you don’t want to see.


Method 3 For Activating Windows Pro Permanently
Note: This method requires you to have a Microsoft account connected!
This is the method most people may use as this one activates it PERMANENT.
- Download the batch file by clicking here.
- Now it will start downloading this file and click
Saveif asked. Now open Windows Explorer. Go to the directory where it got downloaded, and double click it. It will open a Command Prompt Console (Windows Terminal, Windows Console Host or any other). It will soon ask UAC permissions, and then clickYes. Now when you see a menu with options, click2on your keyboard. Now wait until it is done! And it is activated!
Video Tutorial
No one yet. You are allowed to make one for me and share it. Or i will add one soon.
Last Words
I hope you enjoy it!
Support and Help
If you have any further questions or need further help, you can email me by clicking this link or email me at Minionguyjpro@gmail.com. You can also comment on this guide or contact me on Discord using this link or add me using Minionguyjpro#2502. You will need to have me as friend, as I for security reasons don’t allow direct messages.
Водяной знак «Активировать Windows 10 — перейдите в настройки, чтобы активировать Windows» появляется при окончании срока лицензии, при вводе ключа не от нужной версии или при использовании пиратского ключа. Сообщение можно убрать в реестре, специального скрипта, командной строки и т.д.
Причины появления водяного знака активации
Основные причины
- срок действия лицензии на компьютере истек;
- введен ключ, полученный из онлайн-источников, который уже используется;
- использован ключ от несравнимой версии Windows, например ключ от Professional Edition введен в версии Home Edition.
Убрать водяной знак активации Windows через Regedit
После активации Windows 10 нажмите «Пуск», в открывшемся окне введите «Regedit» и нажмите Enter (вам будет предложено UAC*, нажмите «Да»)

Перейдите в «HKEY_CURRENT_USER — нажмите на Панель управления — Рабочий стол».
В папке «Desktop» прокрутите вниз, чтобы найти «PaintDesktopVersion», и дважды щелкните по нему, чтобы открыть.
Убедитесь, что выбрано шестнадцатеричное число, и измените значение параметра на «0». Затем нажмите «ОК», чтобы сохранить изменения как убрать надпись активации на компьютере.

Закрываете редактор реестра и перезагружаете компьютер. Благодаря таким действиям следующий вопрос как убрать надпись активация удален.
Убрать водяной знак активации Windows с помощью специальных возможностей
Используем опцию Windows 10 Ease of Access.
Нажимаем на меню, находим «Панель управления», запускаем приложение.
Переходим в «Центр возможностей» компьютера об активации Windows.

На следующем экране нужно нажать «Оптимизация изображений на экране».
Прокручиваем вниз до нижней части экрана, и устанавливаем флажок водяного знака с «Удалить фоновые изображения (по возможности)».

Нажимаем «ОК» и нажимаем перезагрузку компьютера.
Водяной знак активации должен исчезнуть и решиться как убрать надпись активации.
Убрать водяной знак активации Windows, можно отключив советы
Заходим в «Пуск» и нажимаем «Настройки (кнопка в виде шестеренки)».
Переходим в систему и нажимаем «Уведомления и действия».
Отключаем параметр «Показывать приветствие Windows после обновлений и получать советы, рекомендации и предложения при использовании Windows» и нажать применить.

Убрать водяной знак можно с помощью центра поддержки
Запускаем «Поиск» и вводим запрос «Центр безопасности».

Второй раздел бокового меню.

Снимаем галочку со строки «Активация Windows».

Уведомление исчезнет через некоторое время, но проблема как убрать надпись активации решена не будет — система останется нелицензионной и неполноценной строка слияния.
Отключение водяного знака активации Windows с помощью скрипта
Открываем блокнот, скопируем и вставляем приведенный ниже текст в него.
@echo offtitle Activate Windows 7 / 8 / 8.1 / 10 for FREE!&cls&echo =====================================&echo #Copyright: MSGuides.com&echo =====================================&echo.&echo autoactivationoff reg #Supported products:&echo – Windows 7 Professional&echo – Windows 7 Professional N&echo – Windows 7 Professional E&echo – Windows 7 Enterprise&echo – Windows 7 Enterprise N&echo – Windows 7 Enterprise E&echo – Windows 8 Core&echo – Windows 8 Core Single Language&echo – Windows 8 Professional&echo – Windows 8 Professional N&echo – Windows 8 Professional WMC&echo – Windows 8 Enterprise&echo – Windows 8 Enterprise N&echo – Windows 8.1 Core&echo – Windows 8.1 Core N&echo – Windows 8.1 Core Single Language&echo – Windows 8.1 Professional&echo – Windows 8.1 Professional N&echo – Windows 8.1 Professional WMC&echo – Windows 8.1 Enterprise&echo – Windows 8.1 Enterprise N&echo – Windows 10 Home&echo – Windows 10 Home N&echo – Windows 10 Home Single Language&echo – Windows 10 Home Country Specific&echo – Windows 10 Professional&echo – Windows 10 Professional N&echo – Windows 10 Education N&echo – Windows 10 Education N&echo – Windows 10 Enterprise&echo – Windows 10 Enterprise N&echo – Windows 10 Enterprise LTSB&echo – Windows 10 Enterprise LTSB N&echo.&echo.&echo ====================================&echo Activating your Windows… & cscript //nologo c:\windows\system32\slmgr.vbs /ipk FJ82H-XT6CR-J8D7P-XQJJ2-GPDD4 >nul&cscript //nologo c:\windows\system32\slmgr.vbs /ipk MRPKT-YTG23-K7D7T-X2JMM-QY7MG >nul&cscript //nologo c:\windows\system32\slmgr.vbs /ipk W82YF-2Q76Y-63HXB-FGJG9-GF7QX >nul&cscript //nologo c:\windows\system32\slmgr.vbs /ipk 33PXH-7Y6KF-2VJC9-XBBR8-HVTHH >nul&cscript //nologo c:\windows\system32\slmgr.vbs /ipk YDRBP-3D83W-TY26F-D46B2-XCKRJ >nul&cscript //nologo c:\windows\system32\slmgr.vbs /ipk C29WB-22CC8-VJ326-GHFJW-H9DH4 >nul&cscript //nologo c:\windows\system32\slmgr.vbs /ipk BN3D2-R7TKB-3YPBD-8DRP2-27GG4 >nul&cscript //nologo c:\windows\system32\slmgr.vbs /ipk 2WN2H-YGCQR-KFX6K-CD6TF-84YXQ >nul&cscript //nologo c:\windows\system32\slmgr.vbs /ipk NG4HW-VH26C-733KW-K6F98-J8CK4 >nul&cscript //nologo c:\windows\system32\slmgr.vbs /ipk XCVCF-2NXM9-723PB-MHCB7-2RYQQ >nul&cscript //nologo c:\windows\system32\slmgr.vbs /ipk GNBB8-YVD74-QJHX6-27H4K-8QHDG >nul&cscript //nologo c:\windows\system32\slmgr.vbs /ipk 32JNW-9KQ84-P47T8-D8GGY-CWCK7 >nul&cscript //nologo c:\windows\system32\slmgr.vbs /ipk JMNMF-RHW7P-DMY6X-RF3DR-X2BQT >nul&cscript //nologo c:\windows\system32\slmgr.vbs /ipk M9Q9P-WNJJT-6PXPY-DWX8H-6XWKK >nul&cscript //nologo c:\windows\system32\slmgr.vbs /ipk 7B9N3-D94CG-YTVHR-QBPX3-RJP64 >nul&cscript //nologo c:\windows\system32\slmgr.vbs /ipk BB6NG-PQ82V-VRDPW-8XVD2-V8P66 >nul&cscript //nologo c:\windows\system32\slmgr.vbs /ipk GCRJD-8NW9H-F2CDX-CCM8D-9D6T9 >nul&cscript //nologo c:\windows\system32\slmgr.vbs /ipk HMCNV-VVBFX-7HMBH-CTY9B-B4FXY >nul&cscript //nologo c:\windows\system32\slmgr.vbs /ipk 789NJ-TQK6T-6XTH8-J39CJ-J8D3P >nul&cscript //nologo c:\windows\system32\slmgr.vbs /ipk TX9XD-98N7V-6WMQ6-BX7FG-H8Q99 >nul&cscript //nologo c:\windows\system32\slmgr.vbs /ipk 3KHY7-WNT83-DGQKR-F7HPR-844BM >nul&cscript //nologo c:\windows\system32\slmgr.vbs /ipk 7HNRX-D7KGG-3K4RQ-4WPJ4-YTDFH >nul&cscript //nologo c:\windows\system32\slmgr.vbs /ipk PVMJN-6DFY6-9CCP6-7BKTT-D3WVR >nul&cscript //nologo c:\windows\system32\slmgr.vbs /ipk W269N-WFGWX-YVC9B-4J6C9-T83GX >nul&cscript //nologo c:\windows\system32\slmgr.vbs /ipk MH37W-N47XK-V7XM9-C7227-GCQG9 >nulecho ————————————&echo.&echo.&set i=1:serverif %i%==1 set KMS_Sev=kms7.MSGuides.comif %i%==2 set KMS_Sev=kms8.MSGuides.comif %i%==3 set KMS_Sev=kms9.MSGuides.comif %i%==4 goto notsupportedcscript //nologo c:\windows\system32\slmgr.vbs /skms %KMS_Sev% >nulcscript //nologo c:\windows\system32\slmgr.vbs /ato | find /i “successfully” && (echo.& echo ====================================== & echo. & choice /n /c YN /m “Would you like to visit my blog [Y,N]?” & if errorlevel 2 exit) || (echo The connection to the server failed! Trying to connect to another one… & echo Please wait… & echo. & echo. & set /a i+=1 & goto server)explorer “https://productkey.net”&goto halt:notsupportedecho ======================================&echo.&echo Sorry! Your version is not supported.:haltpause >nul
В блокноте раздел «Файл», нажимаем «Сохранить как» и называем файл «windows10.cmd». Сохраняем файл на рабочем столе.

Нажимаем правой кнопкой мыши наш файл и выбираем «Запуск от имени администратора».
Перезагружаем компьютер, чтобы активировать Windows.
Убрать водяной знак активации в Windows PowerShell
-
- Нажимаем сочетание клавиш «Win + X». Выбираем «Windows PowerShell (администратор)».
-
- Вставляем команду «slmgr /renew» и дальше нужно нажать Enter.

- Перезагружаем систему.
Для избавления от водяного знака активации Windows используем CMD
В поиске Виндовс указываем «командная строка». Нажимаем «командная строка» и «Запуск от имени администратора».

Вставьте команду
«bcdedit -set TESTSIGNING OFF»
и нажмите на запуск её выполнения.

После завершения операции ОС выведет соответствующее уведомление.
Убрать водяной знак активации Windows в сторонних приложениях
Можно воспользоваться отдельными программами для решения проблемы как убрать надпись активация.
Универсальное средство отключения водяных знаков (Winaero)
-
- Загрузите «Universal Watermark Disabler» и установите его.

-
- Приложение запустится, а затем автоматически выйдет из системы.
- Снова войдите в ПК.
- Теперь водяной знак должен быть удален.
Убрать готовность об активации через KMSAuto
-
- Загрузите KMSAuto и установите его.
- Откройте программу, нажмите «Активировать Windows».

- Как только это будет сделано, ваш компьютер перезагрузится.
- Когда снова войдете в систему, Windows будет активирована, и водяной знак активации исчезнет.
В данной статье рассмотрим случай, если Вы по каким-либо причинам хотите удалить ключ (удаление активации) на Вашем Windows, инструкция подходит для любых версий Windows.
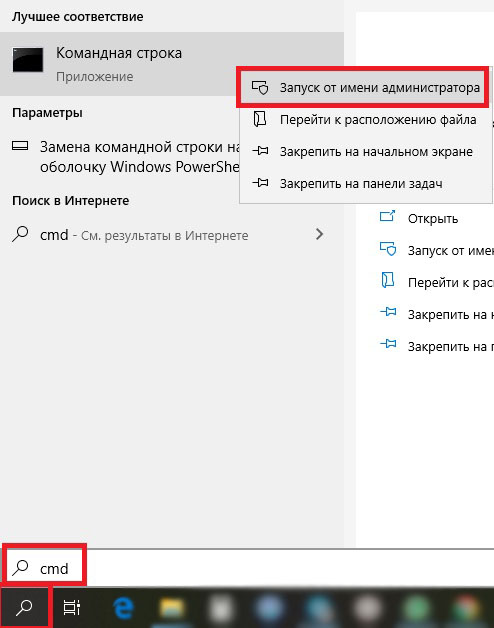
Деактивировать систему возможно только с правами администратора, т.е Вам нужно будет открыть командную строку от имени администратора. На примере Windows 10 это можно сделать путем поиска по слову CMD => Правой кнопкой мыши на пункт «Командная строка» => Запуск от имени администратора.
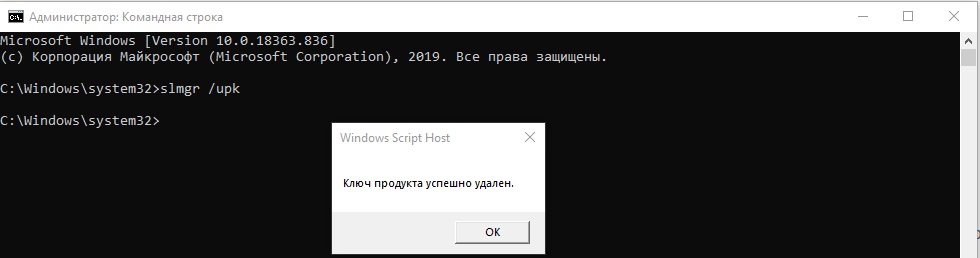
— Первой командной вводим: slmgr /upk
Этой командой ключ будет удален из системы и деактивирует ее.
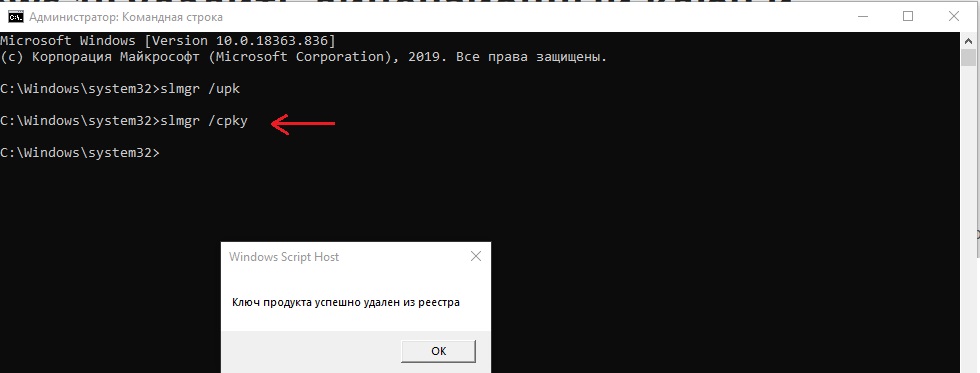
— Далее вводим вторую команду: slmgr /cpky
Эта команда удалит ключ активации из реестра.
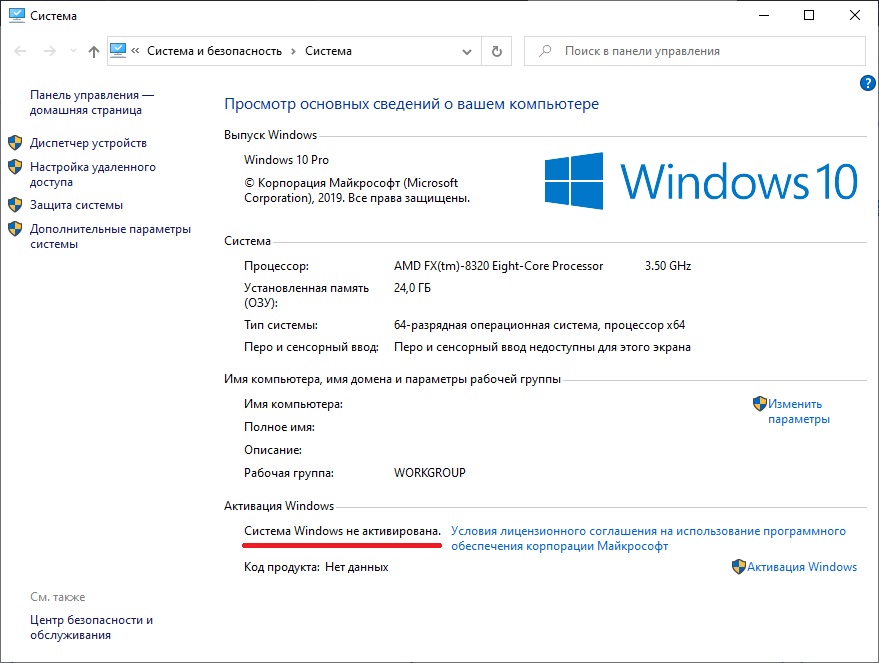
Теперь можем проверить в меню «Свойства» системы, что система не активирована.
Приобрести лицензионные ключи активации можете в нашем каталоге по самым низким ценам от 1490 ₽. Моментальная доставка лицензии на Вашу электронную почту в автоматическом режиме.
Время на прочтение2 мин
Количество просмотров50K

Энтузиасты изучили и модернизировали для удобства использования в настоящее время алгоритм активации Windows XP. Теперь для активации ОС не нужны серверы для проверки ключей от Microsoft, которые компания отключила несколько лет назад в рамках окончания поддержки старого ПО.
Windows XP вышла в октябре 2001 года. Microsoft прекратила расширенную поддержку операционной системы в апреле 2014 года.
Разработчики продолжают надеяться, что Microsoft всё же сочтёт целесообразным выпустить официальный инструмент активации XP для будущих поколений, так как даже техподдержка компании практикует удалённую активацию Windows на ПК клиента с помощью пиратских кряков и открытого проекта Microsoft Activation Scripts (MAS).
Исследователи смогли реализовать свою версию алгоритма для генерации валидных кодов активации для Windows XP без подключения к интернету через утилиту xp_activate32.exe. По их заверению, этот инструмент активации полностью автономен и безопасен, а также не является кряком. Он основан на методе активации по номеру телефона на основе имеющегося у пользователя лицензионного ключа. Алгоритм преобразует код, сгенерированный системой, в лицензионный ключ активации. При этом активация сохраняется при очистке или переустановке системы, поскольку она привязана к характеристикам определённого компьютера.

Файл утилиты (размер 18432 байт, SHA-256 хэш 5a4bcac5a50eb5113dd6a2f88c35ebdb709c4df8a792c71ad03ea347afaced52).
Существующие в сети другие активаторы Windows XP требуют подключения к интернету, взламывают или обманывают механизм проверки активации старой ОС.
Другой открытый проект WindowsXPKg на GitHub, может генерировать ключи для Windows XP, но требует связи с внешним сервером Microsoft для проверки, который больше не работает. Примечательно, что разработчик Neo-Desktop решил развивать далее форк WindowsXPKg, включить в этот инструмент исправление для компиляции и правильной работы под Linux, а также работает над дизассемблированием утилиты xp_activate32.exe.
В марте 2023 года пользователь научил ChatGPT генерировать ключи активации для ОС Windows 95. Прямой запрос к чат-боту по поводу генерации ключа Windows 95 привёл к отказу это сделать. ИИ предложил пользователю купить новую версию Windows 10/11. Пользователь уточнил свой запрос на основе открытых данных по поводу алгоритма для генерации кода ключа и смог получить несколько правильных ключей. Хотя ChatGPT ему отвечал ранее, что не обучен выполнять такие действия и разработчики крепко-накрепко запретили ему генерировать коды, ключи и другие элементы лицензий ПО для нелегального использования.