
Все способы:
- Создание резервной копии
- Синхронизация
- Управление резервной копией
- Создание загрузочного носителя
- Безвозвратное удаление данных с дисков
- Очистка системы
- Работа в пробном режиме
- Вопросы и ответы: 7
Обеспечение защиты сохранности и конфиденциальности информации, хранимой на компьютере, а также работоспособности всей системы в целом – очень важные задачи. С ними отлично помогает справиться комплексный набор утилит Acronis True Image. С помощью этой программы можно сохранить свои данные как от случайных сбоев в системе, так и от целенаправленных вредоносных действий. Давайте разберемся, как работать в приложении Acronis True Image.
Скачать последнюю версию Acronis True Image
Создание резервной копии
Одним из основных гарантов сохранения данных в целостности является создание их резервной копии. Программа Acronis True Image предлагает расширенные возможности при выполнении указанной процедуры, ведь это одна из основных задач приложения.
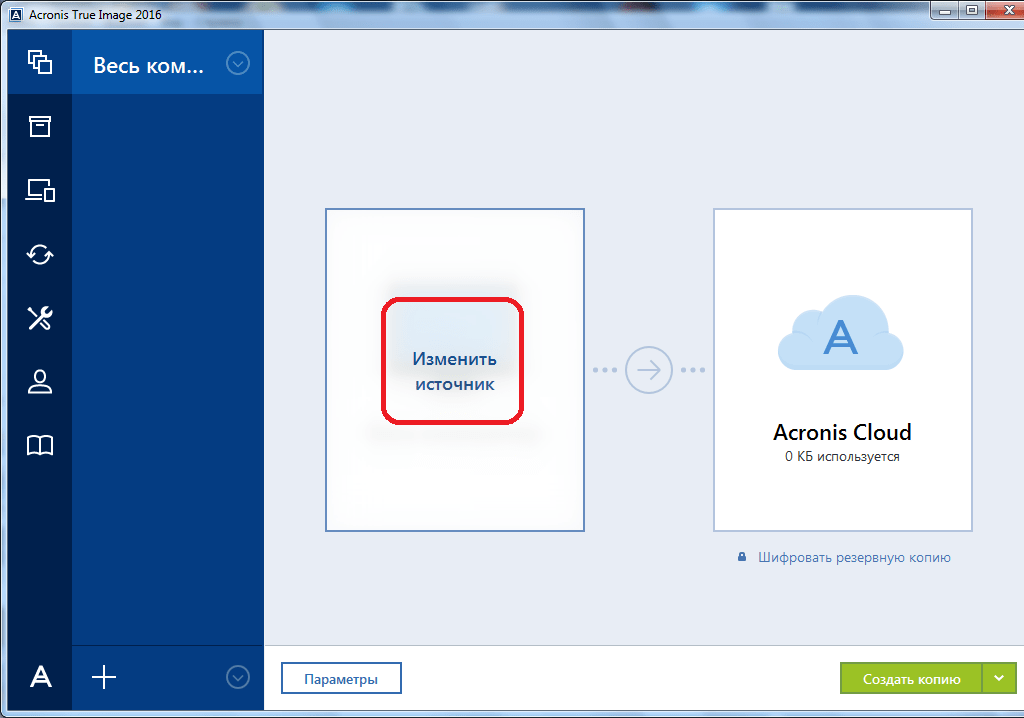
Сразу же после запуска программы Акронис Тру Имидж, открывается стартовое окно, которое предлагает возможность резервного копирования. Копию можно сделать полностью со всего компьютера, отдельных дисков и их разделов, а также с отмеченных папок и файлов.
- Для того, чтобы выбрать источник копирования, кликаем по левой части окна, где должна быть надпись: «Изменить источник».
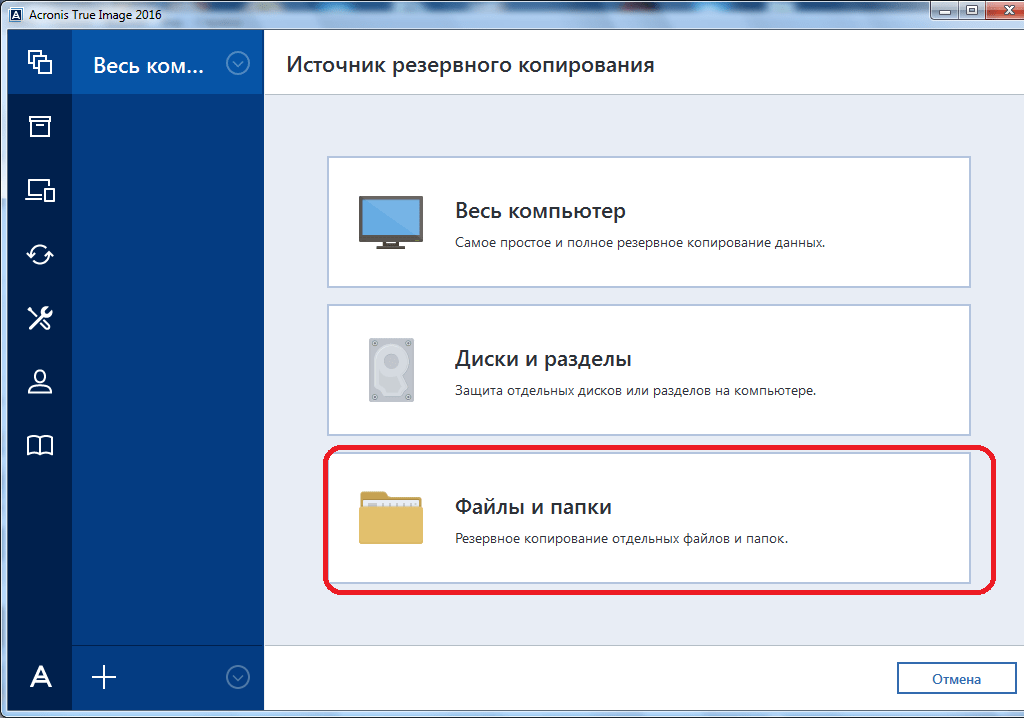
- Мы попадаем в раздел выбора источника. Как говорилось выше, нам предоставляется на выбор три варианта копирования:
- Весь компьютер;
- Отдельные диски и разделы;
- Отдельные файлы и папки.
Выбираем, один из данных параметров, к примеру, «Файлы и папки».
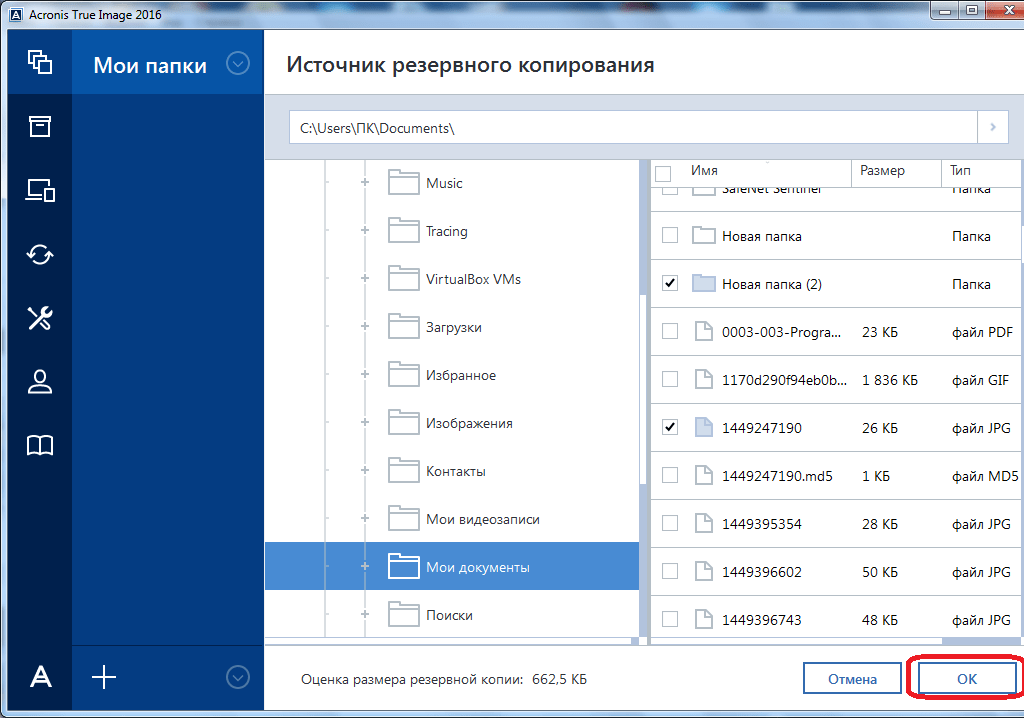
- Перед нами открывается окно в виде проводника, где отмечаем те папки и файлы, резервную копию которых хотим сделать. Отмечаем нужные элементы, и жмем на кнопку «OK».
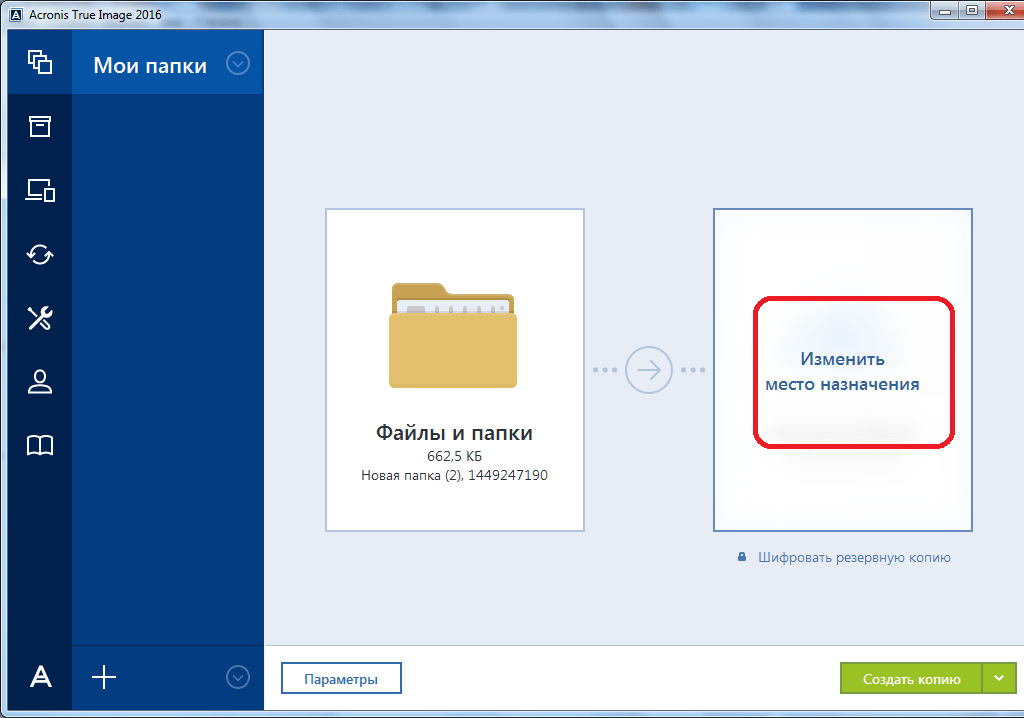
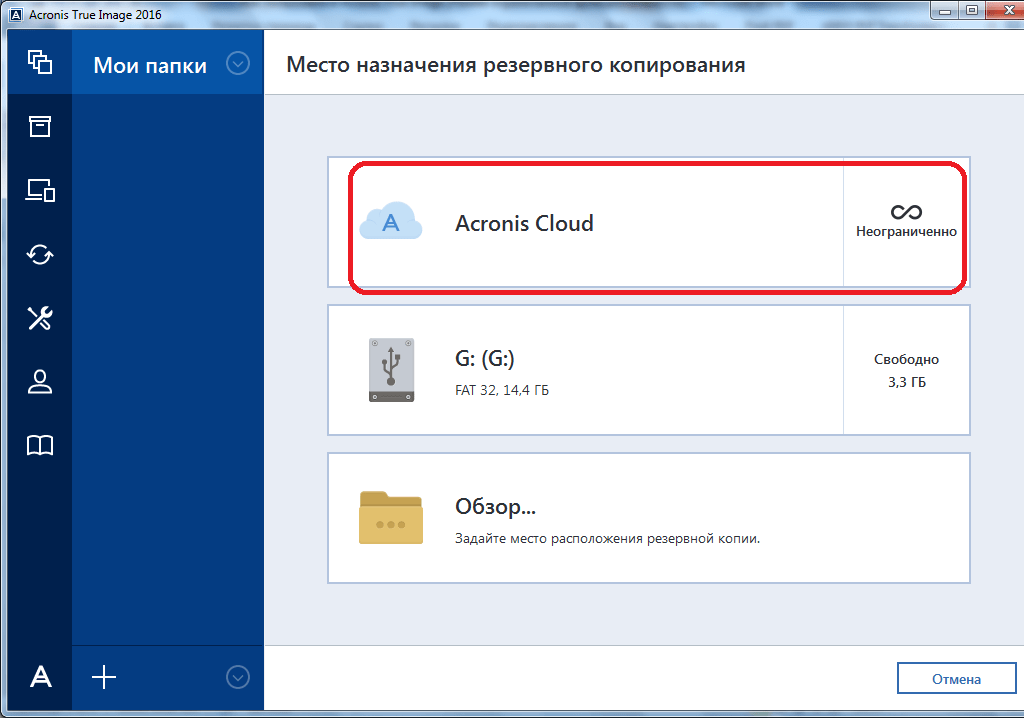
- Далее нам предстоит выбрать место назначение копии. Для этого кликаем по левой части окна с надписью «Изменить место назначения».
- Тут также существует три варианта:
- Облачное хранилище Acronis Cloud с неограниченным объемом места для хранения данных;
- Съемный носитель;
- Место на жестком диске компьютера.
Выберем, к примеру, облачное хранилище Acronis Cloud, в котором вы предварительно должны создать учетную запись.
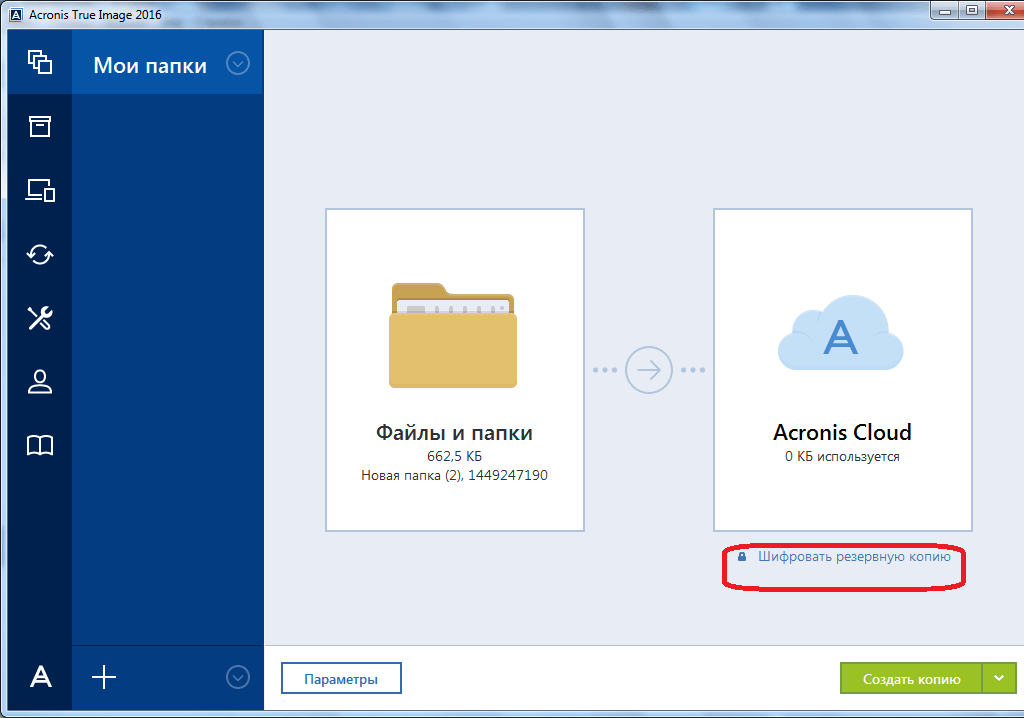
- Итак, для создания резервной копии практически все готово. Но, мы ещё можем решить, шифровать ли нам данные, или оставить их незащищенными. Если мы решили шифровать, то жмем на соответствующую надпись на окне.
- В открывшемся окне дважды вводим произвольный пароль, который следует запомнить, чтобы в будущем иметь возможность получить доступ к зашифрованной резервной копии. Жмем на кнопку «Сохранить».
- Теперь для того, чтобы создать резервную копию, осталось нажать на зеленую кнопку с надписью «Создать копию».


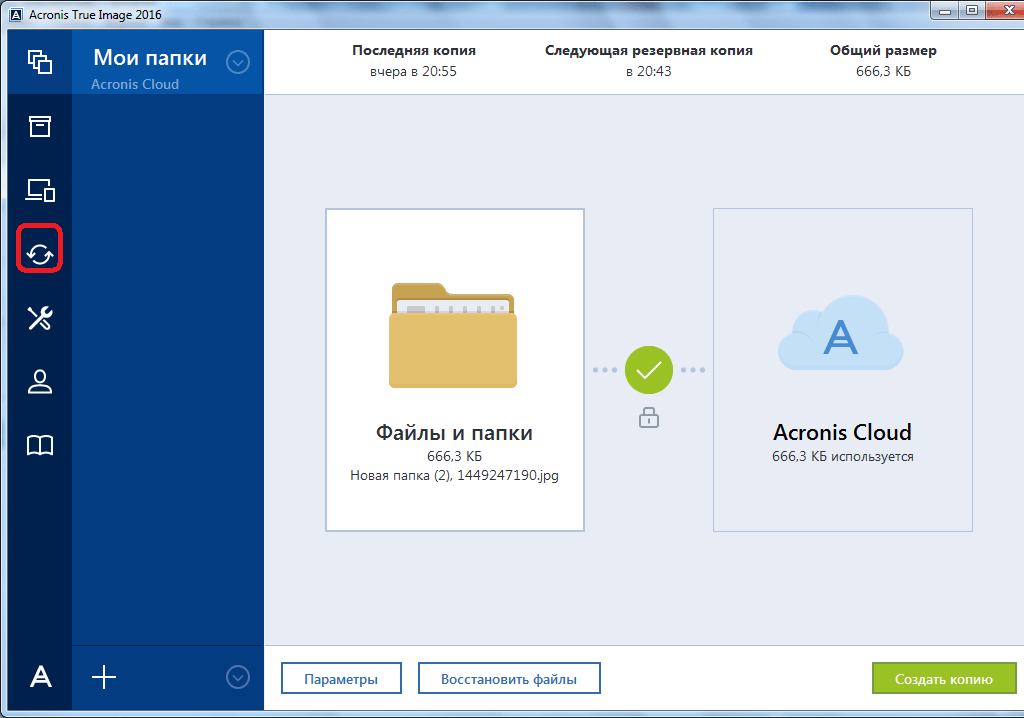
После этого, запускается процесс резервного копирования, который может быть продолжен в фоновом режиме, пока вы занимаетесь другими делами. После завершения процедуры резервного копирования, в окне программы между двумя точками соединения появляется характерный зеленый значок с галочкой внутри.

Синхронизация
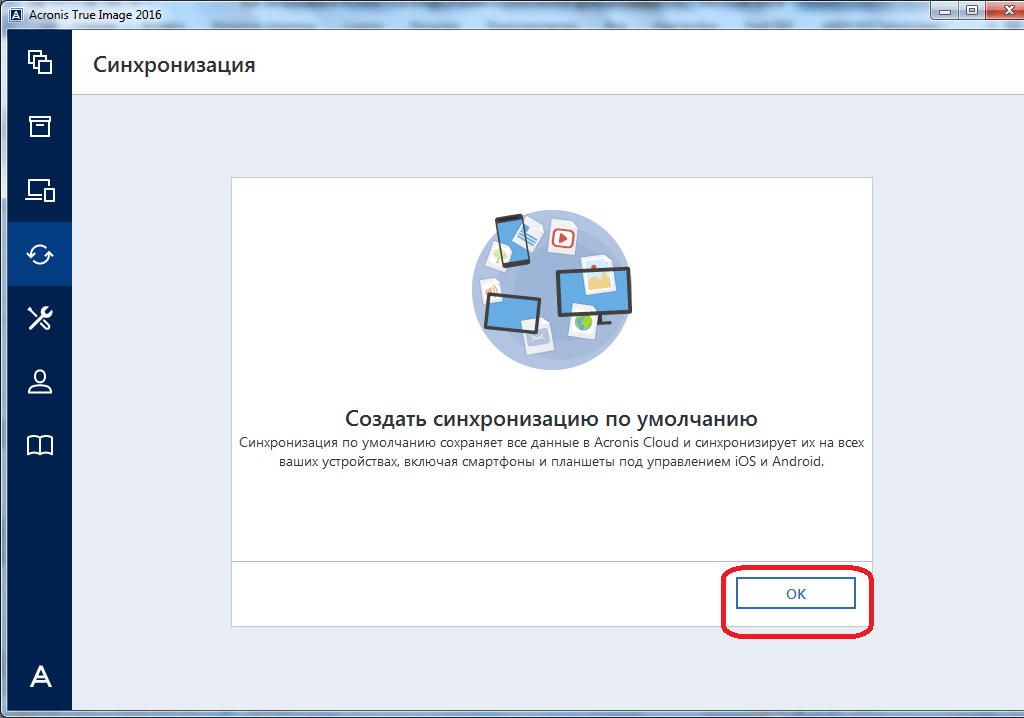
- Для того, чтобы синхронизировать свой компьютер с облачным хранилищем Acronis Cloud, и иметь доступ к данным с любого устройства, с главного окна программы Acronis True Image, переходим во вкладку «Синхронизация».
- В открывшемся окне, в котором в общих чертах описываются возможности синхронизации, жмем на кнопку «OK».
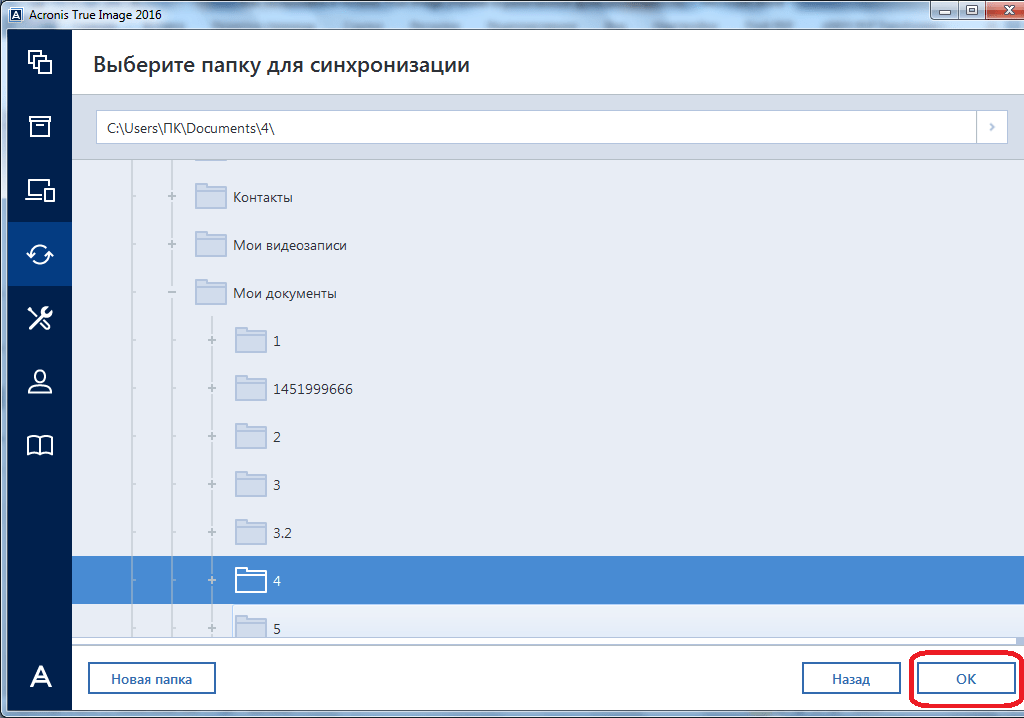
- Далее, открывается файловый менеджер, где нужно выбрать именно ту папку, которую мы хотим синхронизировать с облаком. Ищем нужную нам директорию, и жмем на кнопку «OK».
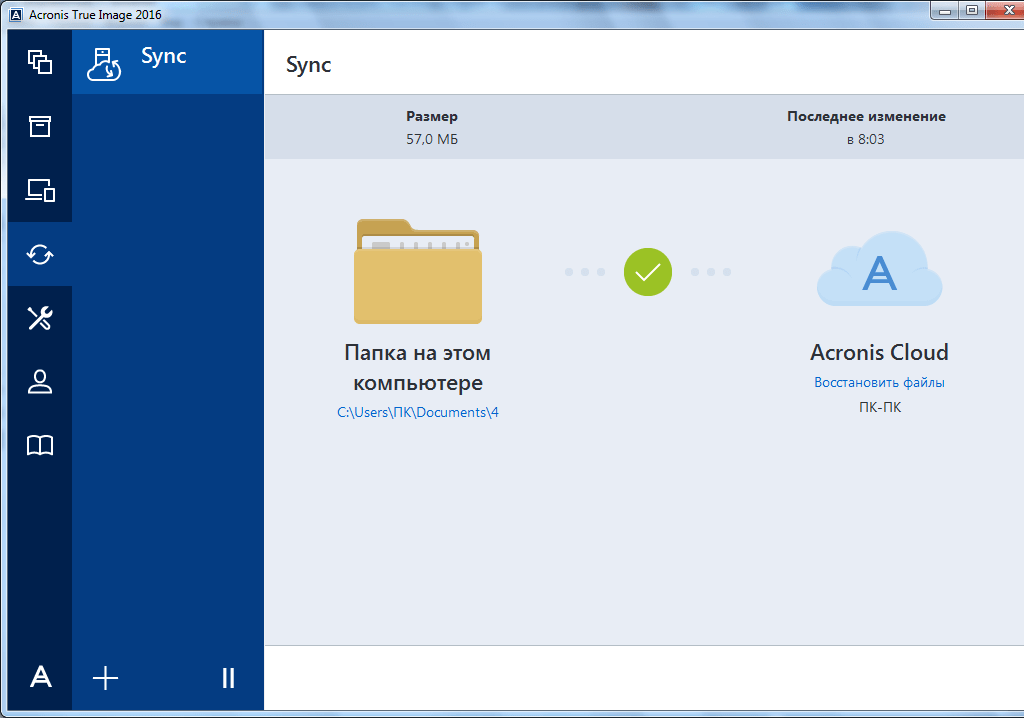
- После этого, создается синхронизация между папкой на компьютере и облачным сервисом. Процесс может занять некоторое время, но теперь любые изменения в указанной папке будут автоматически передаваться Acronis Cloud.
Управление резервной копией
После того, как резервная копия данных была загружена на сервер Acronis Cloud, ею можно управлять с помощью Панели мониторинга. Тут же имеется возможность управлять и синхронизациями.
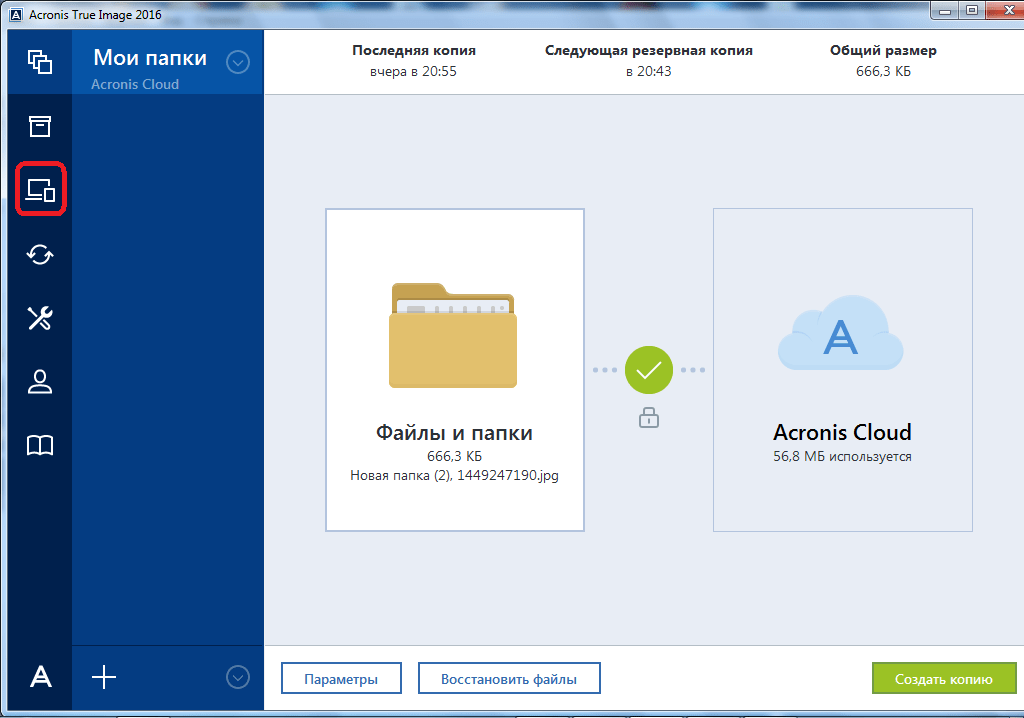
- Со стартовой страницы Acronis True Image переходим в раздел под названием «Панель мониторинга».
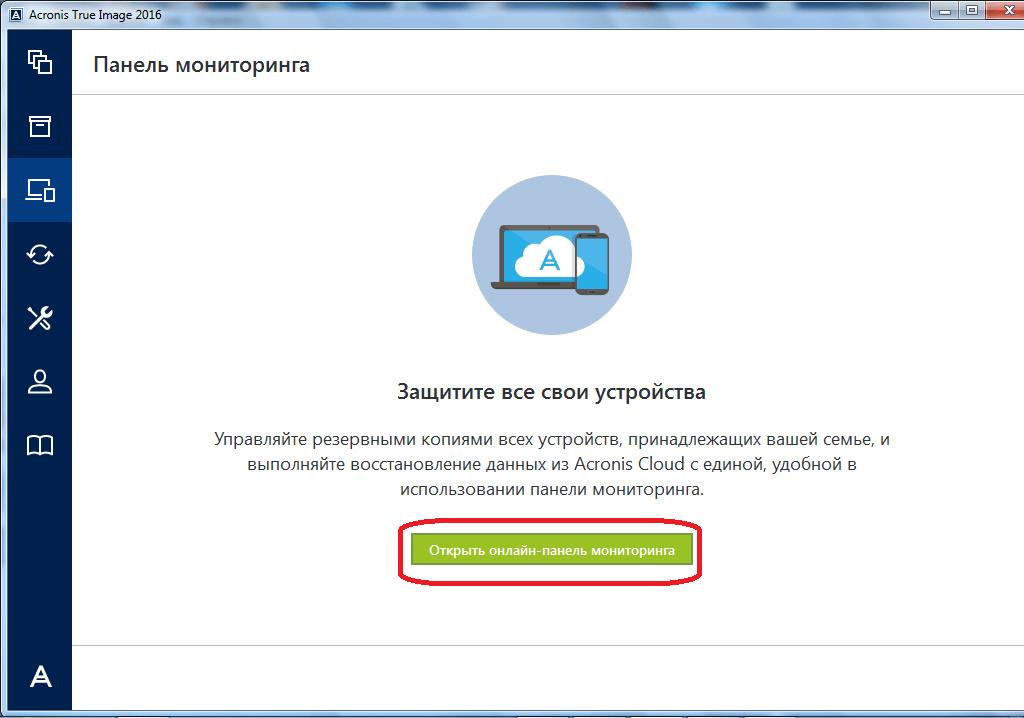
- В открывшемся окне кликаем по зеленой кнопке «Открыть он-лайн панель мониторинга».
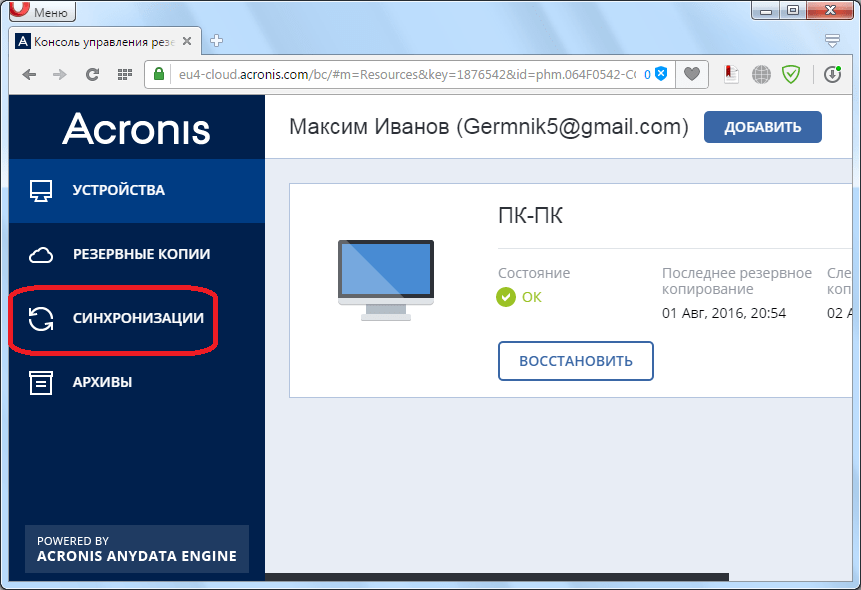
- После этого, запускается браузер, который установлен в Вашем компьютере по умолчанию. Браузер перенаправляет пользователя на страницу «Устройства» в его учетной записи в Acronis Cloud, на которой видны все резервные копирования. Для того, чтобы восстановить резервную копию, достаточно просто нажать на кнопку «Восстановить».
- Для того, чтобы просмотреть свои синхронизации в браузере требуется кликнуть по одноименной вкладке.

Создание загрузочного носителя
Загрузочный диск, или флешка, нужны после аварийного сбоя в системе для её восстановления.
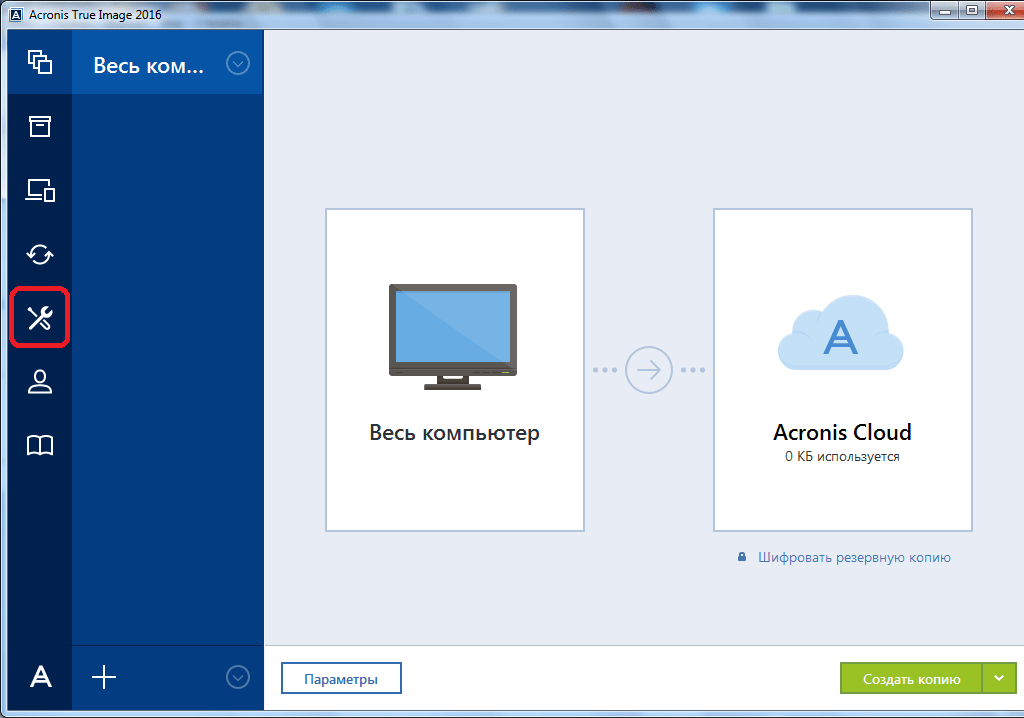
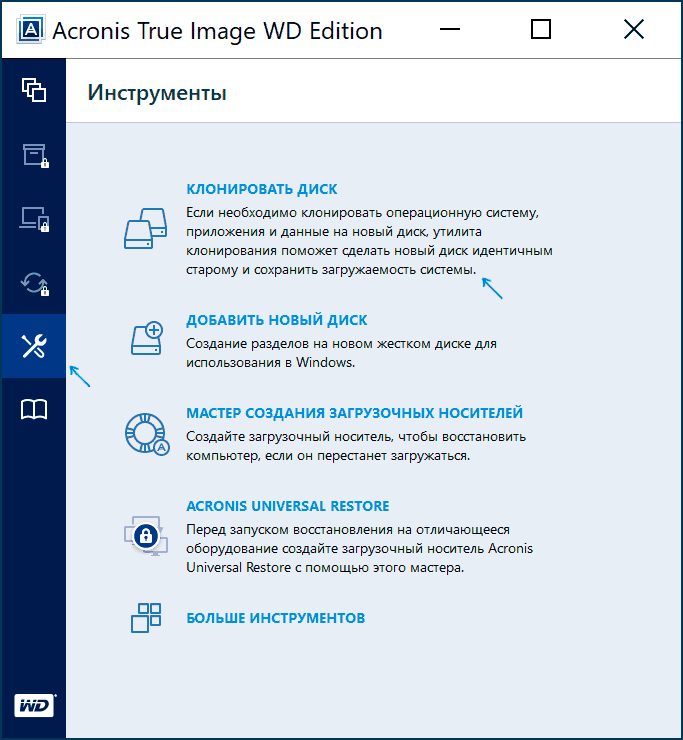
- Чтобы создать загрузочный носитель, переходим в раздел «Инструменты».
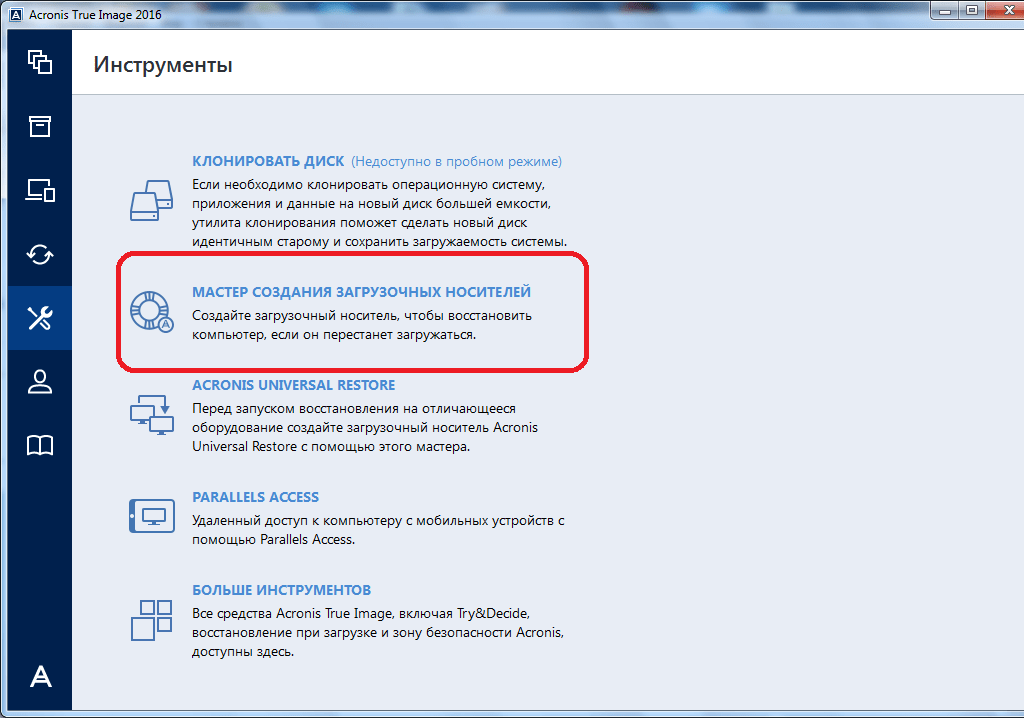
- Далее выбираем пункт «Мастер создания загрузочных носителей».
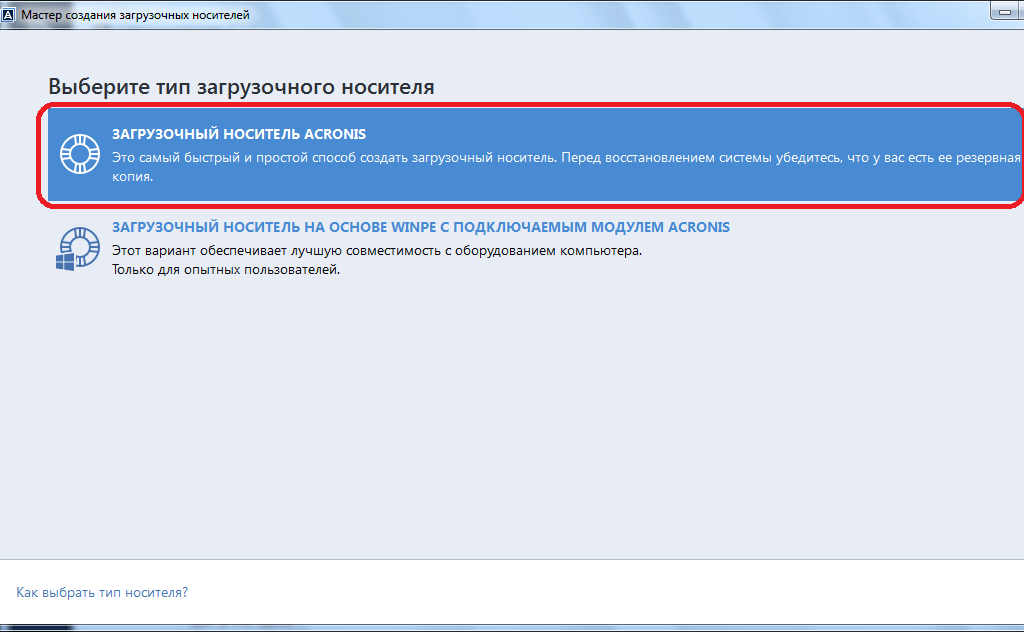
- Затем, открывается окно, в котором предлагается выбрать способ создания загрузочного носителя: используя собственную технологию Acronis, или же воспользовавшись технологией WinPE. Первый из способов более простой, но не работает с некоторыми аппаратными конфигурациями. Второй способ сложнее, но в то же время он подойдет для любого «железа». Правда, нужно отметить, что процент несовместимости загрузочной флешки, созданной по технологии Acronis, достаточно мал, так что, прежде всего, нужно использовать именно этот USB-накопитель, и только в случае неудачи переходить к созданию флешки по технологии WinPE.
- После того, как выбран способ создания флешки, открывается окно, в котором следует указать конкретный USB-накопитель или диск.
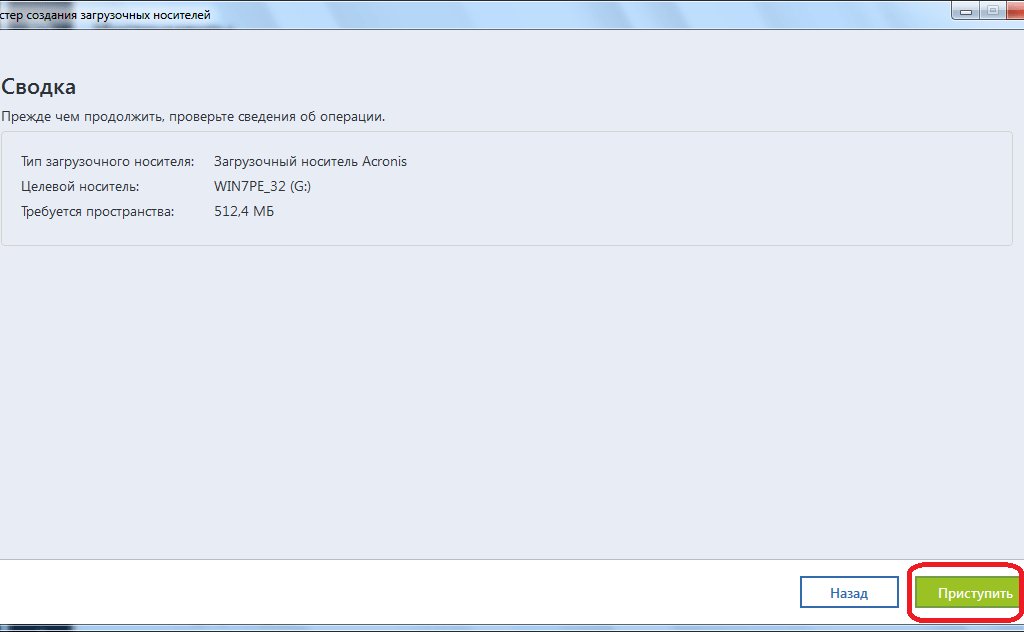
- На следующей странице сверяем все выбранные параметры, и жмем на кнопку «Приступить».
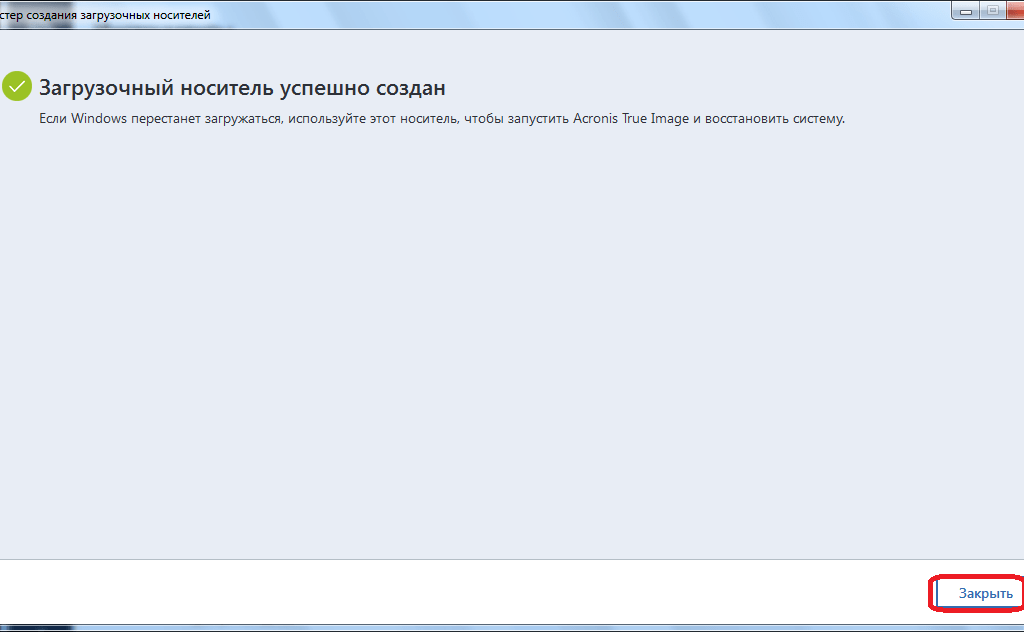
- После этого, происходит сам процесс создания загрузочного носителя.

Как создать загрузочную флешку в Acronis True Image
Безвозвратное удаление данных с дисков
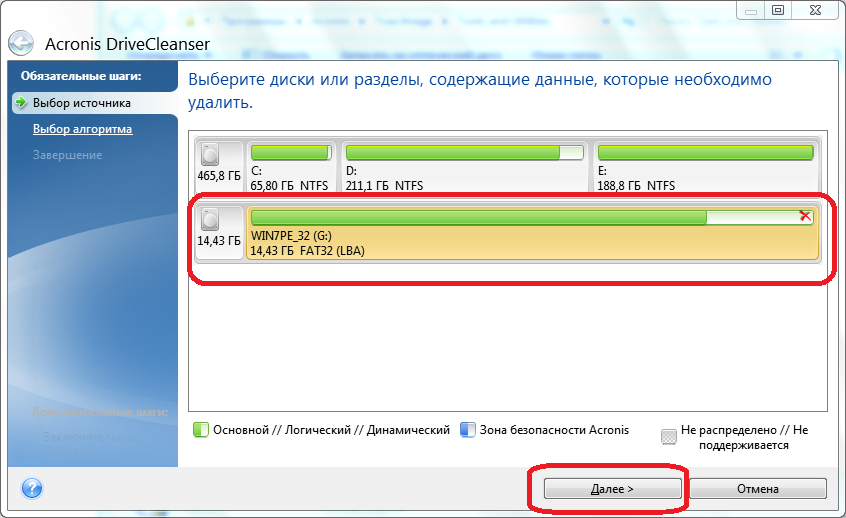
В программе Acronis True Image имеется инструмент Drive Cleanser, который помогает полностью стирать данные с дисков, и их отдельных разделов, без возможности последующего восстановления.
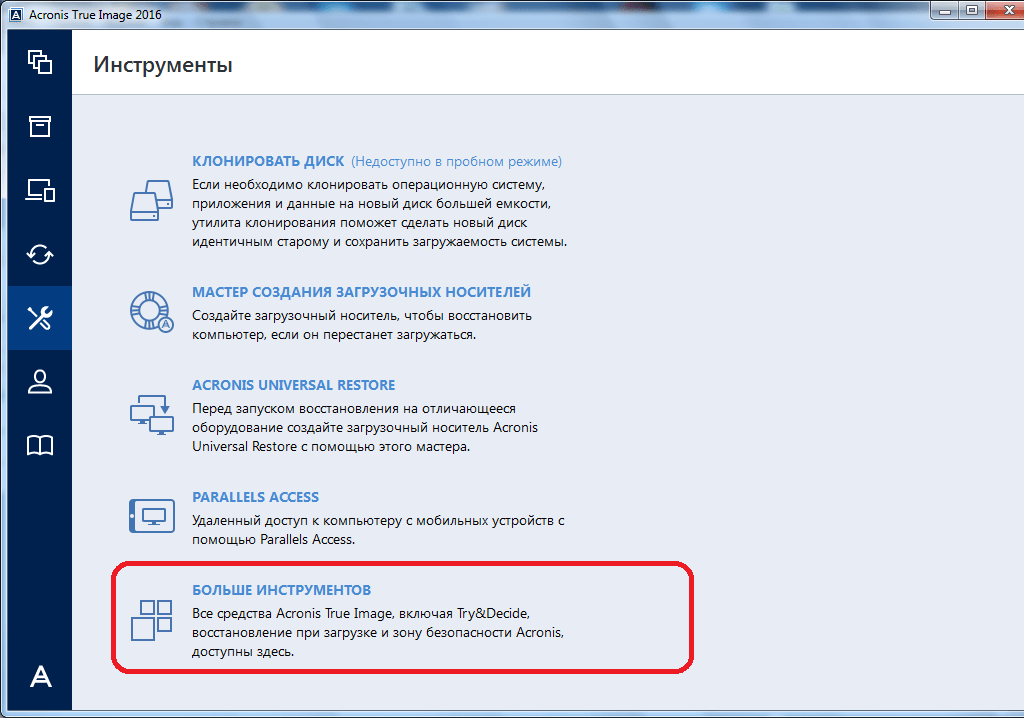
- Для того, чтобы воспользоваться данной функцией, из раздела «Инструменты» переходим в пункт «Больше инструментов».
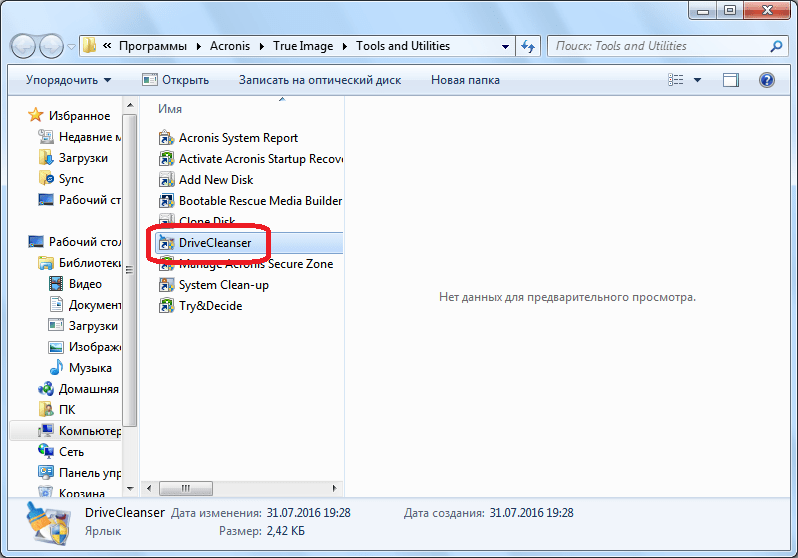
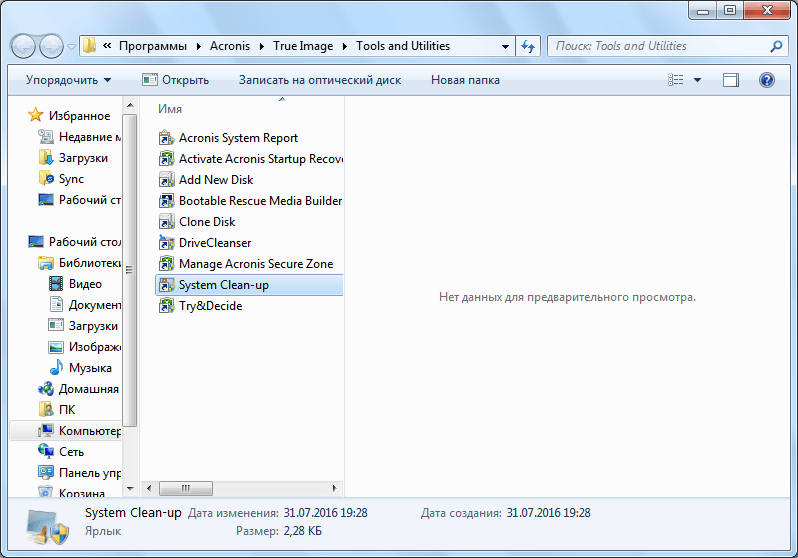
- После этого, открывается проводник Windows, который представляет дополнительный перечень утилит Acronis True Image, не включенных в основной интерфейс программы. Запускаем утилиту Drive Cleanser.
- Перед нами отрывается окно утилиты. Здесь нужно выбрать диск, раздел диска или USB-носитель, который нужно очистить. Для этого достаточно сделать один клик левой кнопкой мыши по соответствующему элементу. После выбора, жмем на кнопку «Далее».
- Затем, выбираем метод очистки диска, и опять жмем на кнопку «Далее».
- После этого, открывается окно, в котором предупреждается, что данные на выбранном разделе будут удалены, а сам он отформатирован. Ставим галочку около надписи «Удалить выбранные разделы без возможности восстановления», и жмем на кнопку «Приступить».


Затем, начинается процедура безвозвратного удаления данных с выбранного раздела.
Очистка системы
- Воспользовавшись утилитой System Clean-up, можно очистить ваш жесткий диск от временных файлов, и другой информации, которая может помочь злоумышленникам отследить действия пользователя на компьютере. Данная утилита расположена также в перечне дополнительных инструментов программы Acronis True Image. Запускаем её.
- В открывшемся окне утилиты, выбираем те системные элементы, которые желаем удалить, и жмем на кнопку «Очистить».
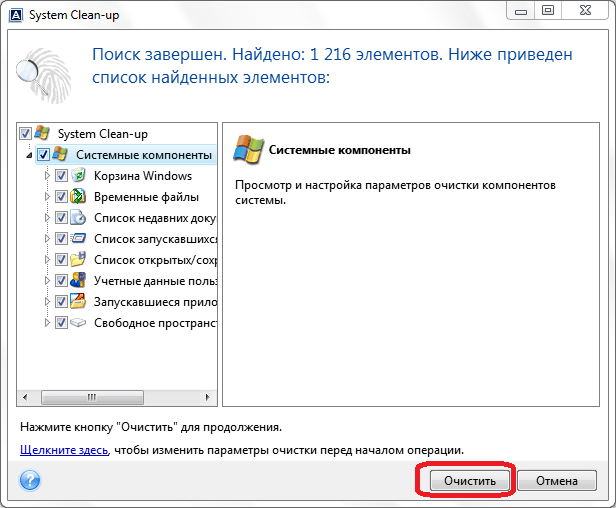
После этого, происходит очистка компьютера от ненужных системных данных.
Работа в пробном режиме
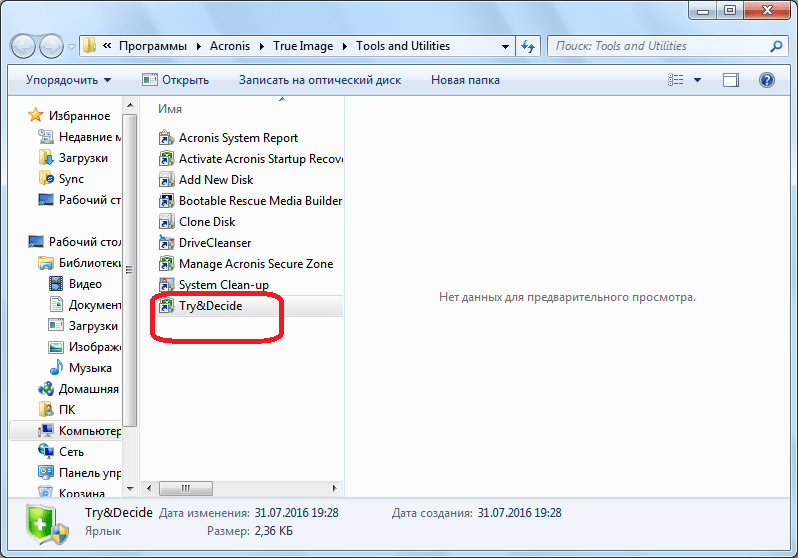
Инструмент Try&Decide, который также находится среди дополнительных утилит программы Acronis True Image, предоставляет возможность запустить пробный режим работы. В этом режиме пользователь может запускать потенциально опасные программы, переходить на сомнительные сайты, и выполнять другие действия без риска нанесения вреда системе.
- Открываем утилиту.
- Для того, чтобы включить пробный режим, кликаем на самую верхнюю надпись в открывшемся окне.
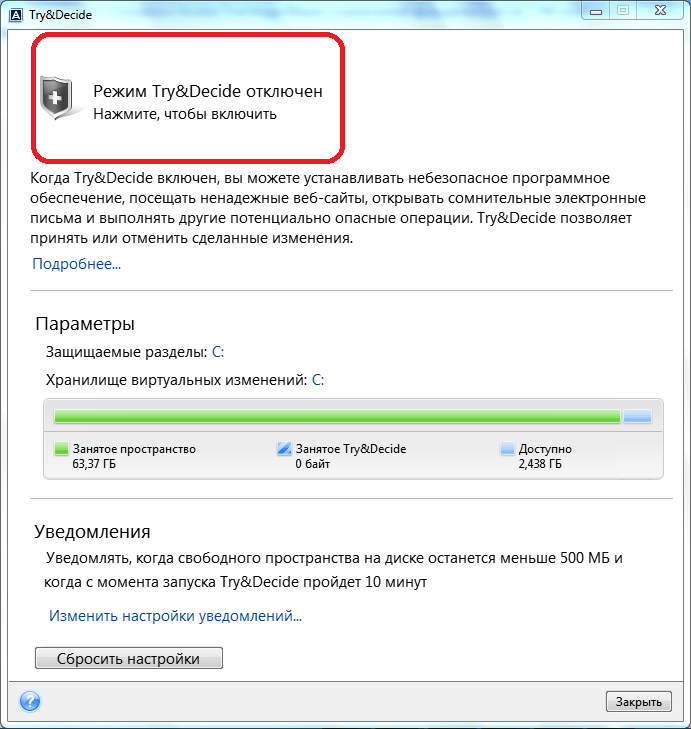
После этого, запускается режим работы, в котором отсутствует вероятность риска нанесения ущерба системе вредоносными программами, но, в то же время, этот режим накладывает некоторые ограничения на возможности пользователя.
Как видим, программа Acronis True Image представляет собой очень мощный комплекс утилит, который призван обеспечить максимальный уровень защиты данных от потери или воровства злоумышленниками. В то же время, функционал приложения так богат, что для того, чтобы разобраться во всех возможностях Acronis True Image, потребуется немало времени, но это того стоит.
Наша группа в TelegramПолезные советы и помощь
Многие производители накопителей SSD в качестве официальной утилиты для переноса системы на SSD предлагают использовать Acronis True Image: например, если вы купили SSD Western Digital (WD) или SanDisk, вам полагается бесплатная версия Acronis True Image WD Edition, аналогичная версия Acronis есть для покупателей SSD производства Kingston, Crucial и A-Data. А возможно у вас есть и полная версия программы. Во всех случаях перенос системы на SSD с её помощью — сравнительно не сложная задача.
В этой инструкции подробно о том, как перенести Windows 10 на SSD с помощью Acronis True Image (подойдет и для других версий ОС), возможных проблемах при переносе, а также видео демонстрация процесса.
- Перенос Windows 10 на SSD в Acronis True Image
- Видео инструкция
- Где бесплатно скачать Acronis True Image для SSD разных марок
- Возможные проблемы и методы решения
Перенос системы на SSD в Acronis True Image
Вне зависимости от того, какую именно версию Acronis True Image для переноса Windows с жесткого диска на SSD вы используете, шаги по переносу будут практически одинаковыми:
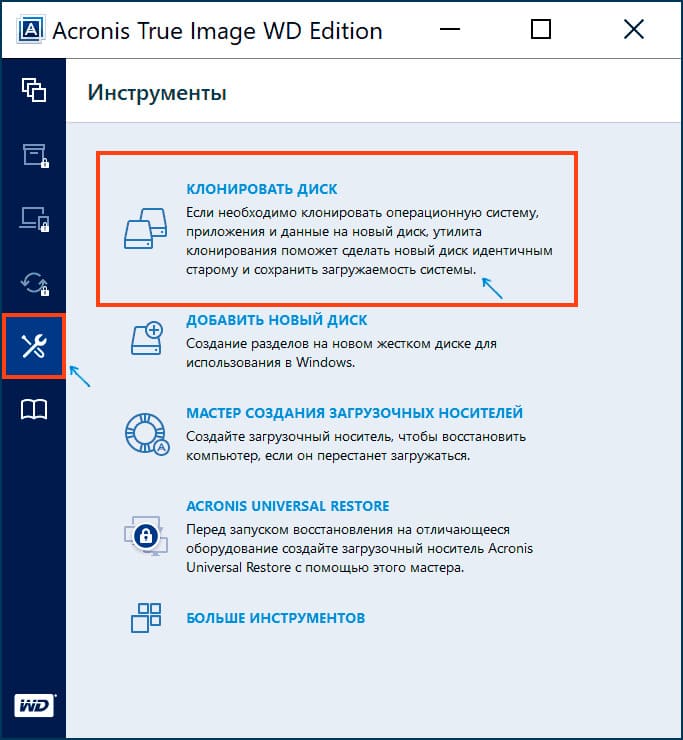
- В разделе программы «Инструменты» нажмите «Клонировать диск».

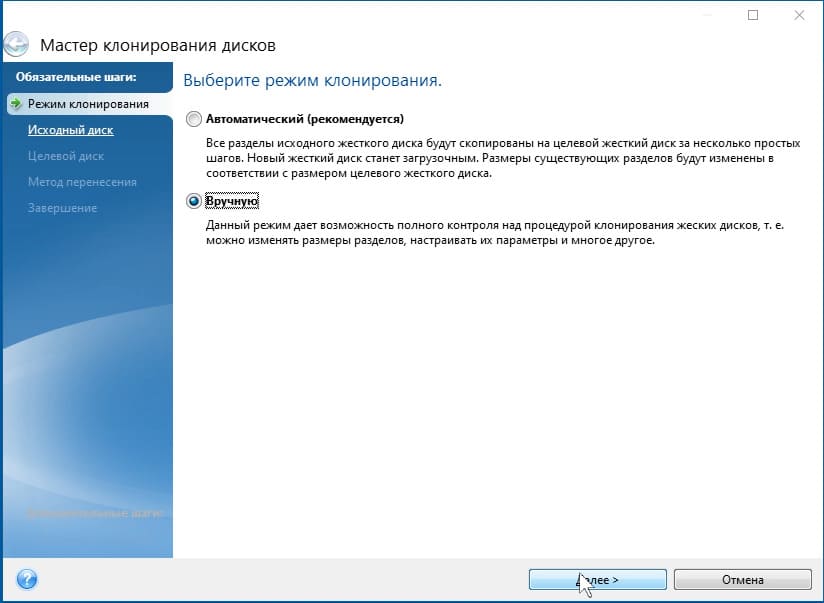
- Выберите вариант клонирования: «Автоматический» проще — достаточно будет выбрать исходный и целевой диск, а также при необходимости исключить отдельные файлы из клонирования. «Вручную» слегка сложнее, его и рассмотрим.

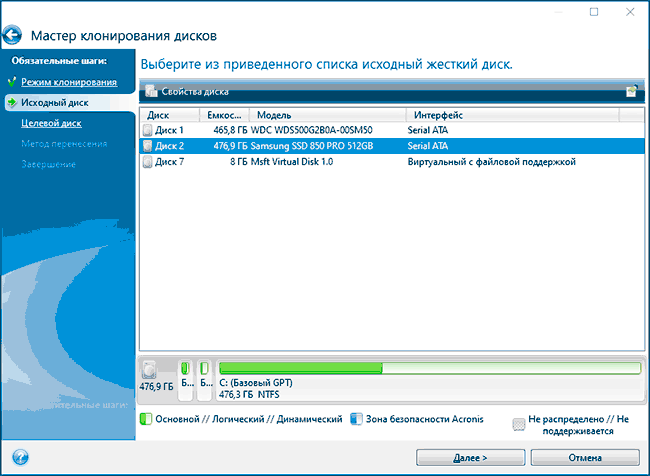
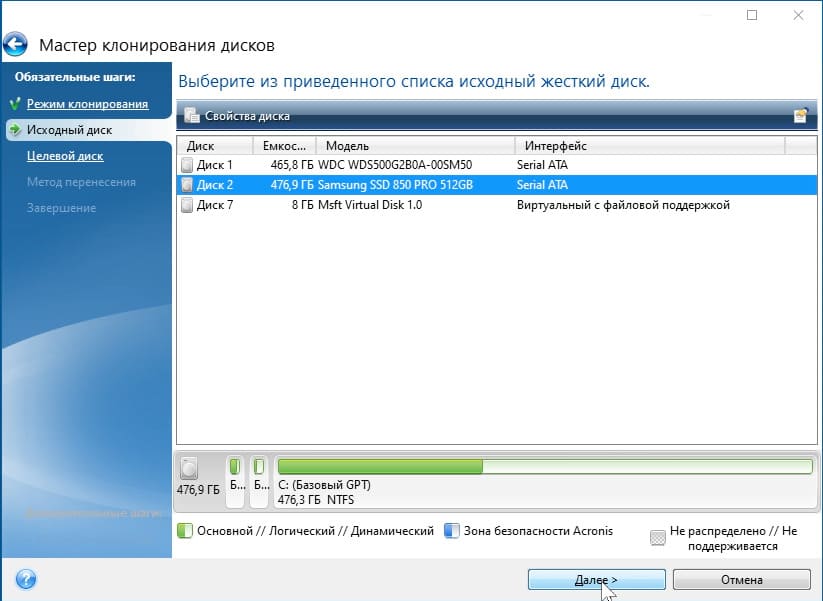
- Выберите исходный диск — тот, с которого выполняется клонирование системы.
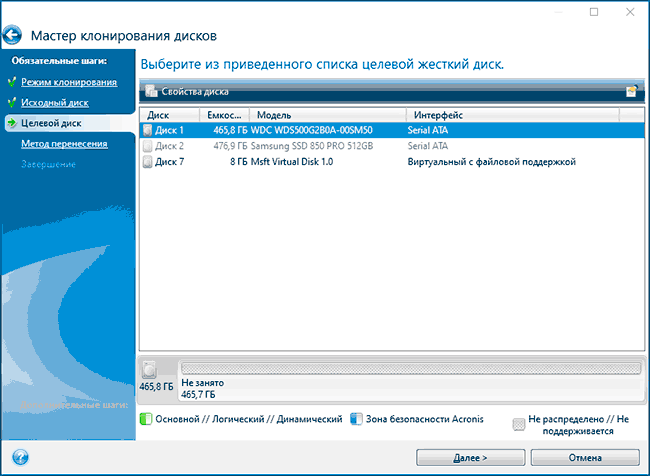
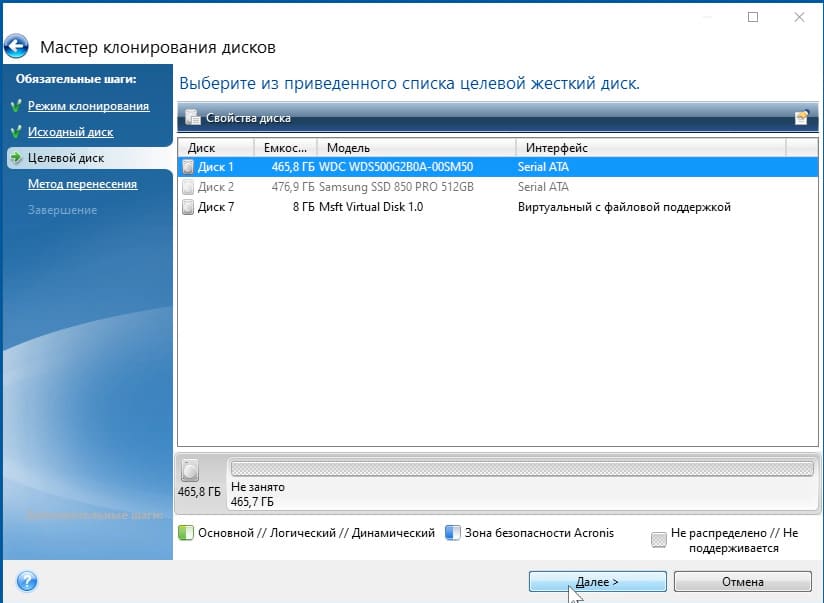
- Выберите целевой диск — ваш SSD, на который вы переносите операционную систему.
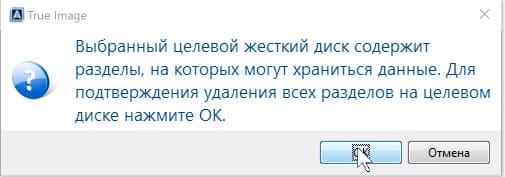
- Учитывайте, что все данные и разделы с целевого диска будут удалены, об этом вас предупредят.
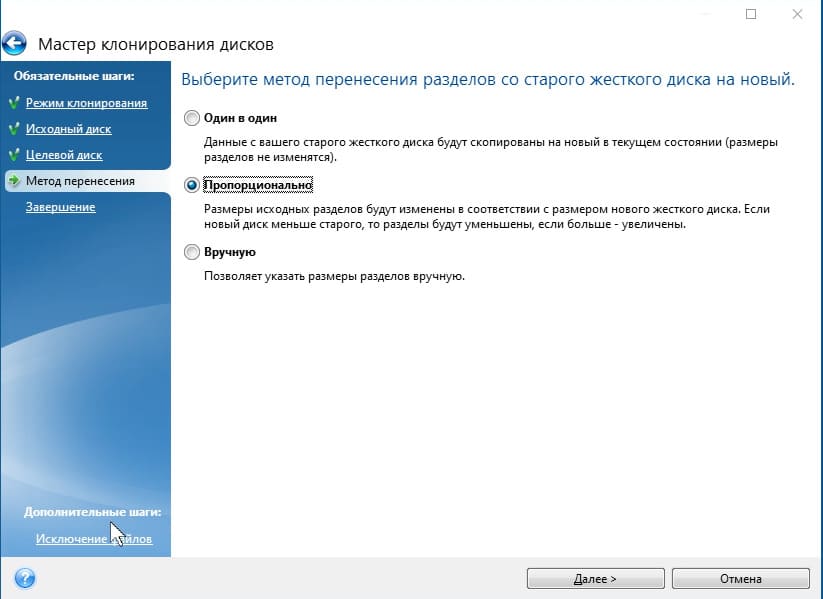
- Выберите метод переноса. Лучший вариант — «Пропорционально». Метод «Один в один» может не подойти при различии размеров исходного и целевого накопителей, а «Вручную» не совсем для начинающих. Все три метода пояснил более подробно в видео ниже.
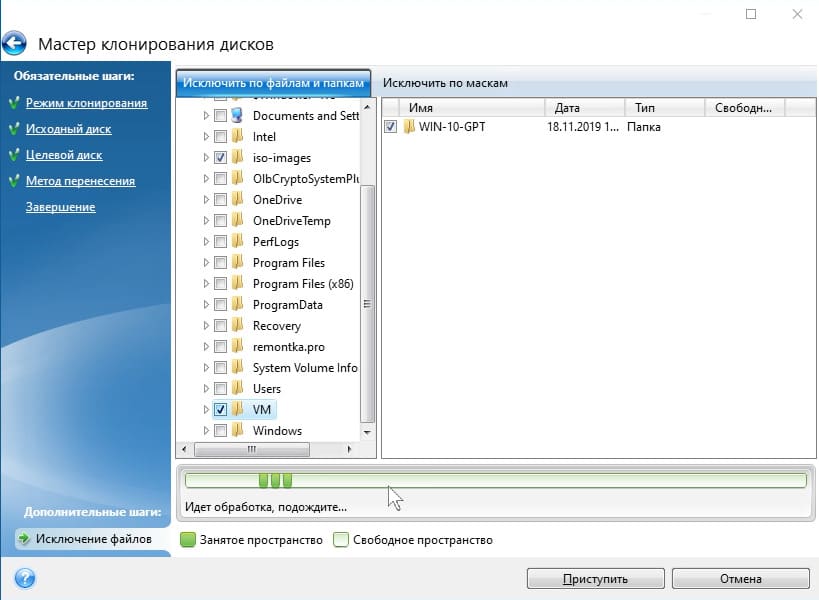
- Нажав пункт «Исключение файлов» слева внизу вы можете отметить те папки и файлы, которые не нужно переносить на SSD, чтобы высвободить место на нем. Разумным будет не переносить загрузки, корзину, а возможно и еще какие-то не слишком важные данные.
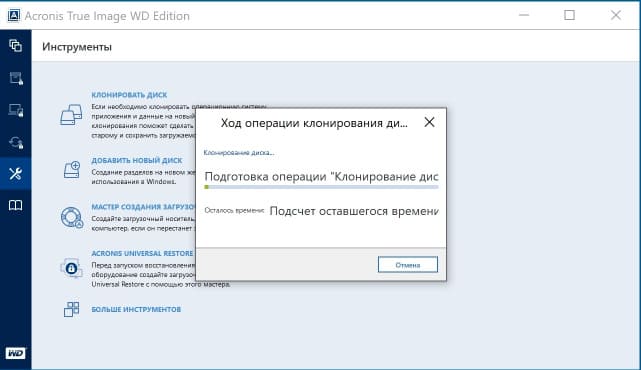
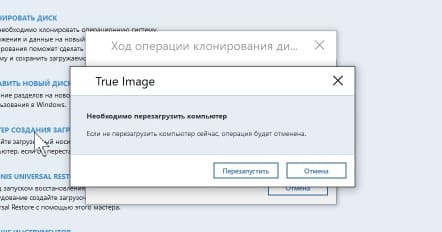
- Нажмите кнопку «Приступить», начнется процесс клонирования системы на другой диск. Если вам сообщат о необходимости перезагрузить компьютер, перезагрузите его. Учитывайте: если после перезагрузки вы видите лишь черный экран (что произошло в моем эксперименте), вполне возможно, перенос идет и лучше подождать пару часов (в зависимости от скорости исходного диска и его объема), а не выключать компьютер, в противном случае можно навредить SSD.
- После завершения процесса переноса система автоматически перезагрузится, и загрузка будет выполнена с того диска, который с «точки зрения» БИОС/UEFI является первым. Если это не тот диск, с которого нужно было загружаться, укажите нужный (предположительно, новый SSD) в параметрах загрузки БИОС. Если вдруг у вас это не получается, поищите, есть ли отдельная настройка порядка жестких дисков в БИОС. Если и такие пункты не найдены, может помочь простое переключение дисков местами в компьютере или ноутбуке (при условии, что они имеют одинаковый интерфейс подключения).


Обычно всё проходит гладко, однако, если что-то не получается или в процессе программа сообщает об ошибках, распространенные случае рассмотрены в соответствующем разделе далее в инструкции.
Как перенести Windows на другой диск в Acronis True Image — видео
Где скачать и как установить Acronis True Image для SSD определенной марки
Если у вас SSD одного из указанных производителей, загрузить бесплатную версию Acronis True Image вы можете:
- Для дисков WD и Sandisk — Acronis True Image WD Edition https://support.wdc.com/downloads.aspx?lang=ru (программа запускается в случае если к компьютеру подключен диск указанных марок).
- Для Kingston —https://www.kingston.com/ru/support/technical/acronis-download — ключ для Acronis True Image обычно в комплекте с покупаемым накопителем.
- Для SSD Crucial — https://www.acronis.com/en-us/promotion/CrucialHD-download/
- Для A-Data — https://www.adata.com/ru/ss/software-5/ (загружаем Acronis True Image OEM, для получения ключа продукта может потребоваться регистрация вашего SSD A-Data на той же странице).
Возможные проблемы при переносе системы
Среди частых проблем, которые могут возникнуть при клонировании Windows на SSD в Acronis True Image:
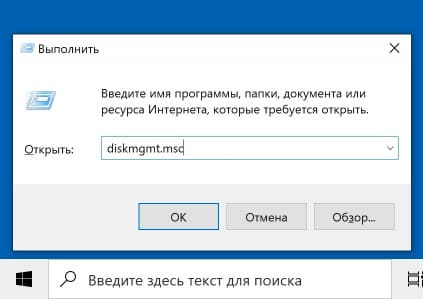
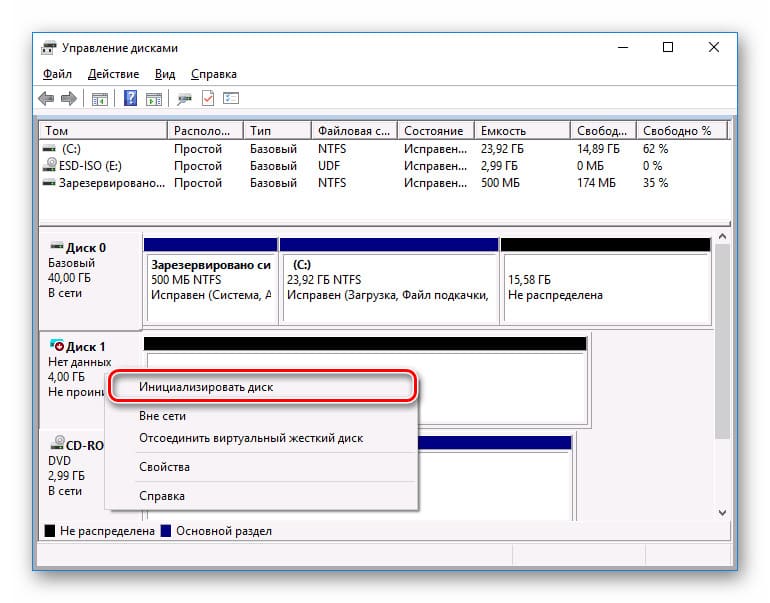
- Acronis True Image не запускается и сообщает, что нет SSD нужной марки. Такое бывает, если вы подключили новый диск и не инициализировали его. Инициализируйте в «Управлении дисками» — нажмите Win+R, введите diskmgmt.msc и следуйте указаниям (инициализацию предложат автоматически, либо нужно будет нажать правой кнопкой мыши по диску с изображением красной стрелки). Выбор таблицы разделов не важен, форматировать диск не требуется.
- При переносе Acronis True Image сообщает, что недостаточно места на целевом диске. Это возможно по разным причинам: файлы с исходного диска не удается поместить на целевой (тогда нужно исключить больше данных из переноса), вы выбрали режим переноса «Один в один», но разделы исходного диска не помещаются на целевой (независимо от занятого места на них). Эта же ошибка возникает и при включенном шифровании для исходного диска. Решение — либо расшифровать диск, либо создать загрузочный накопитель Acronis (на вкладке «Инструменты») и выполнить клонирование с него.
- После перезагрузки Acronis True Image черный экран. Лучшее решение — ничего не предпринимать и подождать, возможно, долго. Если по истечении очень длительного периода времени ничего не произошло, можно выключить компьютер долгим удержанием кнопки питания (но это не безопасно в данном случае) и попробовать в БИОС отключить Secure Boot.
В завершение еще один момент: если вы успешно перенесли систему и в ближайшее время не планируете пользоваться программой, я рекомендую её удалить — она создает собственные службы и пункты в автозагрузки, которые вам вероятнее всего не нужны.
В этой статье расскажем, как перенести Windows 10, 8 или 7 с одного диска на другой (например, с HDD на SSD) с помощью программы Acronis True Image. Эта программа часто поставляется бесплатно с дисками известных производителей, таких как Western Digital (WD) или Sandisk, и позволяет легко клонировать диски.
Приобрести оригинальные ключи активации Windows 10 можно у нас в каталоге от 1490 ₽
Почему Acronis True Image?
Acronis True Image поставляется бесплатно с некоторыми дисками известных производителей. Например, доступна версия Acronis True Image WD Edition для пользователей, у которых есть диски или SSD от WD или Sandisk. Если у вас SSD от Kingston, программа также предоставляется с ключом для активации.
Шаг 1: Подготовка и запуск Acronis True Image
После скачивания и установки Acronis True Image (например, WD Edition) программа автоматически определит наличие совместимого диска WD или Sandisk и позволит начать работу. Если диск не инициализирован, программа может не запуститься, тогда вам нужно инициализировать диск через утилиту Управление дисками.
Нажмите Win + R, введите diskmgmt.msc, откроется управление дисками.
Далее выберите диск который не инициализирован, нажмите правой кнопкой мыши > Инициализировать.
После этого перезапустите Acronis, и программа распознает ваш диск.
Шаг 2: Клонирование диска
1. Откройте программу и перейдите в раздел Инструменты.
2. Выберите опцию Клонировать диск.
3. Вам будет предложено два варианта клонирования:
— Автоматически — программа сама подгонит размеры исходного диска под целевой диск.
— Вручную — этот метод позволяет настроить параметры разделов и размеры целевого диска самостоятельно.
Выберите тот метод, который вам подходит. Для большинства пользователей подойдет автоматический вариант, который подгоняет размеры разделов автоматически. В нашем случае мы выберем «Вручную».
Шаг 3: Настройка клонирования
1. Выберите исходный диск (тот, с которого хотите клонировать систему).
2. Выберите целевой диск (тот, на который будет клонироваться система). Обратите внимание, что все данные на целевом диске будут удалены.
Нажмите «Ок»
3. Выберите метод клонирования:
— Один в один — полное копирование разделов.
— Пропорционально — программа подгонит размеры разделов исходного диска под целевой, что удобно, если исходный диск больше, чем целевой.
Рекомендуется выбрать вариант Пропорционально, так как он автоматически оптимизирует размер разделов.
Шаг 4: Исключение файлов
Если у вас недостаточно места на целевом диске, программа предложит исключить некоторые файлы.
Например, можно не переносить образы ISO или виртуальные машины, если они занимают много места.
Шаг 5: Перенос и завершение
После настройки клонирования нажмите Приступить. Программа начнет перенос данных. В процессе может потребоваться перезагрузка компьютера, и во время этого процесса может возникнуть черный экран. Не пугайтесь — это нормальная часть процесса клонирования, и через некоторое время система перезагрузится.
Шаг 6: Настройка BIOS
После завершения клонирования, возможно, потребуется изменить порядок загрузки в BIOS, чтобы система загружалась с нового диска. Если этого не сделать, компьютер может продолжить загружаться со старого диска. Если вы не можете изменить порядок загрузки в BIOS, попробуйте поменять диски местами внутри компьютера.
Итог
Программа Acronis True Image позволяет легко и быстро клонировать систему на новый SSD или HDD. Несмотря на возможные трудности, такие как черный экран в процессе переноса, клонирование проходит без проблем.
Лицензионный ключ активации Windows 10 от


Table of contents
1 Introduction ……………………………………………………………………………………………………..7
1.1 What is Acronis® True Image™? …………………………………………………………………………………… 7
1.2 New in this version …………………………………………………………………………………………………….. 7
1.3 Backups created in Acronis True Image 2020 or later ……………………………………………………… 8
1.4 System requirements and supported media ………………………………………………………………….. 9
1.4.1 Minimum system requirements …………………………………………………………………………………………………….. 9
1.4.2 Supported operating systems ………………………………………………………………………………………………………… 9
1.4.3 Supported file systems …………………………………………………………………………………………………………………. 10
1.4.4 Supported Internet connection types …………………………………………………………………………………………… 10
1.4.5 Supported storage media …………………………………………………………………………………………………………….. 10
1.5 Installing Acronis True Image 2020 ………………………………………………………………………………11
1.6 Activating Acronis True Image 2020 …………………………………………………………………………….12
1.7 Trial version information ……………………………………………………………………………………………13
1.8 Upgrading Acronis True Image 2020 ……………………………………………………………………………14
1.9 Technical Support ……………………………………………………………………………………………………..15
2 Getting started ……………………………………………………………………………………………….. 16
2.1 User interface language ……………………………………………………………………………………………..16
2.2 Protecting your system ………………………………………………………………………………………………16
2.2.1 Step 1. Backing up your computer ………………………………………………………………………………………………… 17
2.2.2 Step 2. Creating Acronis bootable media ………………………………………………………………………………………. 18
2.3 Backing up all data on your PC ……………………………………………………………………………………19
2.4 Creating an Acronis Survival Kit …………………………………………………………………………………..20
2.5 Backing up your files ………………………………………………………………………………………………….22
2.6 Cloning your hard drive ……………………………………………………………………………………………..23
2.7 Recovering your computer …………………………………………………………………………………………24
2.8 Recovering your files and folders ………………………………………………………………………………..26
2.9 Acronis account ………………………………………………………………………………………………………..26
2.10 Getting started with Acronis Cloud ……………………………………………………………………………..27
2.10.1 How we ensure security of your data ……………………………………………………………………………………………. 28
2.10.2 Subscription information ……………………………………………………………………………………………………………… 28
3 Basic concepts ………………………………………………………………………………………………… 29
3.1 Basic concepts …………………………………………………………………………………………………………..29
3.2 The difference between file backups and disk/partition images ……………………………………..30
3.3 Full, incremental and differential backups ……………………………………………………………………32
3.4 Deciding where to store your backups …………………………………………………………………………34
3.4.1 Preparing a new disk for backup …………………………………………………………………………………………………… 35
3.4.2 FTP connection ……………………………………………………………………………………………………………………………. 36
3.4.3 Authentication settings ………………………………………………………………………………………………………………… 36
3.5 Using Acronis Nonstop Backup ……………………………………………………………………………………37
3.5.1 Acronis Nonstop Backup data storage ………………………………………………………………………………………….. 38
3.5.2 Nonstop Backup — Frequently asked questions ………………………………………………………………………………. 39
2 Copyright © Acronis International GmbH, 2003-2019

3.6 Backup file naming …………………………………………………………………………………………………….39
3.7 Integration with Windows ………………………………………………………………………………………….40
3.8 Wizards ……………………………………………………………………………………………………………………41
3.9 FAQ about backup, recovery and cloning ……………………………………………………………………..42
4 Backing up data ………………………………………………………………………………………………. 44
4.1 Backing up disks and partitions …………………………………………………………………………………..44
4.2 Backing up files and folders ………………………………………………………………………………………..46
4.2.1 Notarized backup ………………………………………………………………………………………………………………………… 47
4.3 Backing up mobile devices ………………………………………………………………………………………….51
4.3.1 Acronis Mobile …………………………………………………………………………………………………………………………….. 52
4.3.2 Local destination of mobile backups …………………………………………………………………………………………….. 52
4.4 Backing up Office 365 data …………………………………………………………………………………………53
4.5 Backup options …………………………………………………………………………………………………………54
4.5.1 Scheduling …………………………………………………………………………………………………………………………………… 54
4.5.2 Backup schemes ………………………………………………………………………………………………………………………….. 57
4.5.3 Notifications for backup operation ……………………………………………………………………………………………….. 63
4.5.4 Excluding items from backup ……………………………………………………………………………………………………….. 64
4.5.5 Image creation mode …………………………………………………………………………………………………………………… 66
4.5.6 Backup protection ……………………………………………………………………………………………………………………….. 66
4.5.7 Pre/Post commands for backup ……………………………………………………………………………………………………. 67
4.5.8 Backup splitting …………………………………………………………………………………………………………………………… 68
4.5.9 Backup validation option ……………………………………………………………………………………………………………… 68
4.5.10 Backup reserve copy ……………………………………………………………………………………………………………………. 69
4.5.11 Removable media settings …………………………………………………………………………………………………………… 69
4.5.12 Error handling ……………………………………………………………………………………………………………………………… 70
4.5.13 File-level security settings for backup ……………………………………………………………………………………………. 71
4.5.14 Computer shutdown ……………………………………………………………………………………………………………………. 72
4.5.15 Acronis Cloud cleanup …………………………………………………………………………………………………………………. 72
4.5.16 Online backup protection …………………………………………………………………………………………………………….. 73
4.5.17 Performance of backup operation ………………………………………………………………………………………………… 73
4.5.18 Selecting a data center for backup ……………………………………………………………………………………………….. 75
4.5.19 Laptop power settings …………………………………………………………………………………………………………………. 75
4.5.20 Wi-Fi networks for backup to Acronis Cloud ………………………………………………………………………………….. 76
4.6 Operations with backups ……………………………………………………………………………………………77
4.6.1 Backup operations menu ……………………………………………………………………………………………………………… 77
4.6.2 Backup activity and statistics ………………………………………………………………………………………………………… 78
4.6.3 Sorting backups in the list …………………………………………………………………………………………………………….. 79
4.6.4 Replicating backups to Acronis Cloud ……………………………………………………………………………………………. 80
4.6.5 Validating backups ………………………………………………………………………………………………………………………. 80
4.6.6 Backup to various places ……………………………………………………………………………………………………………… 81
4.6.7 Adding an existing backup to the list …………………………………………………………………………………………….. 81
4.6.8 Cleaning up backups, backup versions, and replicas ………………………………………………………………………. 82
4.6.9 Removing data from Acronis Cloud ………………………………………………………………………………………………. 85
5 Recovering data ………………………………………………………………………………………………. 87
5.1 Recovering disks and partitions …………………………………………………………………………………..87
5.1.1 Recovering your system after a crash ……………………………………………………………………………………………. 87
5.1.2 Recovering partitions and disks ……………………………………………………………………………………………………. 95
5.1.3 About recovery of dynamic/GPT disks and volumes ………………………………………………………………………. 97
5.1.4 Arranging boot order in BIOS or UEFI BIOS ……………………………………………………………………………………. 99
5.2 Recovering files and folders ………………………………………………………………………………………100
3 Copyright © Acronis International GmbH, 2003-2019

5.3 Searching backup content ………………………………………………………………………………………..101
5.4 Recovery from Acronis Cloud ……………………………………………………………………………………102
5.4.1 Recovering data from online backups …………………………………………………………………………………………. 102
5.4.2 Recovering a file version …………………………………………………………………………………………………………….. 104
5.4.3 Disk recovery from Cloud …………………………………………………………………………………………………………… 104
5.5 Recovering Office 365 data ……………………………………………………………………………………….108
5.6 Recovery options …………………………………………………………………………………………………….109
5.6.1 Disk recovery mode …………………………………………………………………………………………………………………… 109
5.6.2 Pre/Post commands for recovery ……………………………………………………………………………………………….. 109
5.6.3 Validation option ……………………………………………………………………………………………………………………….. 110
5.6.4 Computer restart ……………………………………………………………………………………………………………………….. 110
5.6.5 File recovery options ………………………………………………………………………………………………………………….. 110
5.6.6 Overwrite file options ………………………………………………………………………………………………………………… 110
5.6.7 Performance of recovery operation ……………………………………………………………………………………………. 111
5.6.8 Notifications for recovery operation …………………………………………………………………………………………… 111
6 Archiving data……………………………………………………………………………………………….. 114
6.1 What is data archiving? ……………………………………………………………………………………………114
6.2 What is excluded from archives? ……………………………………………………………………………….115
6.3 Cloud archiving vs. Online backup ……………………………………………………………………………..115
6.4 Archiving your data ………………………………………………………………………………………………….116
6.4.1 Data archiving options ……………………………………………………………………………………………………………….. 116
6.5 Accessing your archived files …………………………………………………………………………………….117
7 Protecting family data …………………………………………………………………………………….. 118
7.1 What is family data protection? ………………………………………………………………………………..118
7.2 Adding a new device to Online Dashboard………………………………………………………………….118
7.3 Backing up data remotely …………………………………………………………………………………………119
7.4 Recovering data with Online Dashboard …………………………………………………………………….120
7.5 Email notifications …………………………………………………………………………………………………..120
8 Acronis Active Protection ………………………………………………………………………………… 122
8.1 Protecting your computer from malware ……………………………………………………………………123
8.2 Managing Acronis Active Protection ………………………………………………………………………….124
8.3 Ransomware quarantine ………………………………………………………………………………………….126
9 Synchronizing data …………………………………………………………………………………………. 127
9.1 About the Sync feature …………………………………………………………………………………………….127
9.2 What you can and cannot synchronize ……………………………………………………………………….127
9.3 Sync icons ……………………………………………………………………………………………………………….128
9.4 Creating a sync ………………………………………………………………………………………………………..129
9.5 Versions of synchronized files …………………………………………………………………………………..129
9.5.1 Reverting to a previous file version …………………………………………………………………………………………….. 130
9.6 How to clean up your space on Acronis Cloud …………………………………………………………….130
9.7 How to recover a deleted file ……………………………………………………………………………………131
9.8 Deleting a sync ………………………………………………………………………………………………………..132
4 Copyright © Acronis International GmbH, 2003-2019

10 Disk cloning and migration ………………………………………………………………………………. 133
10.1 Disk cloning utility ……………………………………………………………………………………………………133
10.1.1 Clone Disk wizard ………………………………………………………………………………………………………………………. 133
10.1.2 Manual partitioning …………………………………………………………………………………………………………………… 136
10.1.3 Excluding items from cloning ……………………………………………………………………………………………………… 137
10.2 Migrating your system from an HDD to an SSD ……………………………………………………………138
10.2.1 What to do if Acronis True Image 2020 does not recognize your SSD ……………………………………………. 138
10.2.2 Migrating to SSD using the backup and recovery method…………………………………………………………….. 139
11 Tools …………………………………………………………………………………………………………… 141
11.1 Creating bootable media ………………………………………………………………………………………….142
11.2 Acronis Media Builder………………………………………………………………………………………………142
11.2.1 Creating Acronis bootable media ………………………………………………………………………………………………… 143
11.2.2 Acronis bootable media startup parameters ……………………………………………………………………………….. 145
11.2.3 Adding drivers to an existing .wim image ……………………………………………………………………………………. 146
11.2.4 Creating an .iso file from a .wim file ……………………………………………………………………………………………. 147
11.3 Making sure that your bootable media can be used when needed ………………………………..148
11.3.1 Selecting video mode when booting from the bootable media …………………………………………………….. 151
11.4 Acronis Startup Recovery Manager ……………………………………………………………………………152
11.5 Try&Decide …………………………………………………………………………………………………………….153
11.5.1 Using Try&Decide ………………………………………………………………………………………………………………………. 155
11.5.2 Try&Decide options and notifications …………………………………………………………………………………………. 156
11.5.3 Try&Decide: typical use cases …………………………………………………………………………………………………….. 157
11.6 Acronis Secure Zone ………………………………………………………………………………………………..158
11.6.1 Creating and managing Acronis Secure Zone ………………………………………………………………………………. 159
11.6.2 Acronis Secure Zone location ……………………………………………………………………………………………………… 159
11.6.3 Size of Acronis Secure Zone ………………………………………………………………………………………………………… 160
11.6.4 Acronis Secure Zone protection ………………………………………………………………………………………………….. 161
11.6.5 Removing Acronis Secure Zone …………………………………………………………………………………………………… 162
11.7 Adding a new hard disk …………………………………………………………………………………………….162
11.7.1 Selecting a hard disk …………………………………………………………………………………………………………………… 163
11.7.2 Selecting initialization method ……………………………………………………………………………………………………. 164
11.7.3 Creating new partitions ……………………………………………………………………………………………………………… 164
11.8 Security and Privacy Tools ………………………………………………………………………………………..166
11.8.1 Acronis DriveCleanser ………………………………………………………………………………………………………………… 166
11.8.2 System Clean-up ………………………………………………………………………………………………………………………… 170
11.8.3 Hard Disk Wiping methods …………………………………………………………………………………………………………. 176
11.9 Mounting an image ………………………………………………………………………………………………….177
11.10 Unmounting an image ……………………………………………………………………………………………..178
11.11 Working with .vhd(x) files …………………………………………………………………………………………178
11.11.1 Converting Acronis backup …………………………………………………………………………………………………………. 178
11.12 Importing and exporting backup settings ……………………………………………………………………179
11.13 Acronis Universal Restore …………………………………………………………………………………………180
11.13.1 Creating Acronis Universal Boot media ……………………………………………………………………………………….. 181
11.13.2 Using Acronis Universal Restore …………………………………………………………………………………………………. 183
12 Troubleshooting ……………………………………………………………………………………………. 184
12.1 Resolving the most frequent issues ……………………………………………………………………………184
12.2 Acronis System Report ……………………………………………………………………………………………..185
5 Copyright © Acronis International GmbH, 2003-2019

12.3 Acronis Smart Error Reporting …………………………………………………………………………………..186
12.4 Sending feedback to Acronis …………………………………………………………………………………….187
12.5 How to collect crash dumps ……………………………………………………………………………………..188
12.6 Acronis Customer Experience Program ………………………………………………………………………189
13 Glossary of Terms ………………………………………………………………………………………….. 191
6 Copyright © Acronis International GmbH, 2003-2019

1 Introduction
1.1 What is Acronis® True Image™?
Acronis True Image 2020 is an integrated software suite that ensures the security of all of the
information on your PC. It can back up your documents, photos, email, and selected partitions, and
even the entire disk drive, including operating system, applications, settings, and all of your data.
Backups allow you to recover your computer system should a disaster occur, such as losing data,
accidentally deleting critical files or folders, or suffering a complete hard disk crash.
Online Backup allows you to store your files and disks on Acronis Cloud. Your data will be protected
even if your computer is lost, stolen, or destroyed, and your data can be entirely recovered onto a
new device, if needed.
Key features:
Disk backup to a local storage and to Acronis Cloud (p. 44)
File backup to a local storage and to Acronis Cloud (p. 46)
Acronis bootable media (p. 142)
Hard disk cloning (p. 133)
Data archiving (p. 114)
Family data protection (p. 118)
File synchronization (p. 127)
Security and privacy tools (p. 141)
You cannot create backups to Acronis Cloud with Acronis Startup Recovery Manager and Acronis bootable
media.
Getting started
Learn how to protect your computer with two simple steps: «Protecting your system (p. 16)».
1.2 New in this version
The Dual Protection feature provides automatic replication of a local disk backups in the Acronis
Cloud.
The Tray Notification Center provides alerts so users can monitor the status of backups and
quickly resolve issues.
The Battery Saver option offers more control over resource usage than the ‘Do not back up on
battery’ option, allowing users to select the required battery limitations.
The ‘Wi-Fi Networks for Backup’ option helps limit unwanted traffic and prevents backups on
metered connections and insecure public networks.
New technology offers improved backup performance for disk-level backups.
Acronis Active Protection was updated to explain why a process is being monitored and shows
real script and library names when an injection is detected.
7 Copyright © Acronis International GmbH, 2003-2019

1.3 Backups created in Acronis True Image 2020 or later
Acronis True Image 2020 introduced a new backup format — TIBX, which is even more reliable and
convenient. The TIBX format is used for disk backups created to internal drives, external drives,
network storage.
Backup file naming
With .tibx files, the file name has only the backup name and an incremental counter. It does not
contain any additional information such as backup method, backup chain number, backup version
number, or volume number, which were used with the TIB format.
A backup name may look like:
1. my_archive.tibx
2. my_archive_0001.tibx
3. my_archive_0002.tibx
4. my_archive_0003.tibx
Backup schemes
Backing up in the TIBX format supports all backup schemes. As opposed to the TIB format, which
saves every backup version as a separate file, the TIBX format saves full and differential backup
versions as separate files, while incremental backup versions are automatically merged into their
base backups (full or differential).
Cleaning up TIBX format backups
If you’d like to clean up backup versions you do not need anymore, use automatic and manual
cleanup methods.
In case automatic or manual cleanups are configured, some small auxiliary files may stay in the
storage after the cleanup. Windows may show the size of these files bigger than the real one. You
can see the physical size by checking Windows file properties.
Please do not delete any files manually!
Cleaning up local backups manually has the following scheme:
Full backups can be deleted with the dependent versions only.
Differential backup versions can be deleted independently of any other backup versions.
Incremental backups:
If it is the last backup chain, then any incremental backup can be deleted to free up the
space.
If it is not the last backup chain, any incremental backup version can be deleted only
together with all other incremental versions of the same chain.
Which backups retain TIB format
The following backups continue to use the TIB format:
File-level backups
Nonstop backups
Notarized backups
Backups which use CD/DVD/Blu-ray, FTP, or Acronis Secure Zone as their destination
8 Copyright © Acronis International GmbH, 2003-2019

To compare naming of a .tibx archive with a .tib archive in detail, please refer to Backup file naming
(p. 39).
Refer to Cleaning up backups, backup versions, and replicas (p. 82) for more details about automatic
cleanup.
For more details about manual cleanup, refer to Cleaning up backup versions manually (p. 83).
1.4 System requirements and supported media
1.4.1 Minimum system requirements
Acronis True Image 2020 requires the following hardware:
Processor Pentium 1 GHz
1 GB RAM
3.5 GB of free space on a hard disk
CD-RW/DVD-RW drive or USB drive for bootable media creation (about 600 MB of free space is
required)
Screen resolution is 1024 x 768
Mouse or other pointing device (recommended)
Warning! Successful backup and recovery are not guaranteed for the installations on virtual machines.
Other requirements:
An Internet connection is required for the product activation and all features that use Acronis
Cloud, including online backup, cloud archiving, and data synchronization. If your computer is not
connected to the Internet, you can activate the product by using another computer that has an
Internet connection. Refer to Activating Acronis True Image 2020 (p. 12) for details.
You need to have administrator privileges to run Acronis True Image 2020.
1.4.2 Supported operating systems
Acronis True Image 2020 has been tested on the following operating systems:
Windows 10 (all editions, including November 2019 Update, except for Windows IoT edition and
Windows 10 LTSB) *
Windows 8.1 (except for Windows Embedded editions)
Windows 8 (except for Windows Embedded editions)
Windows 7 SP1 (all editions)
Windows Home Server 2011
* Beta builds are not supported. For more information, refer to
https://kb.acronis.com/content/60589
Acronis True Image 2020 also lets you create a bootable CD-R/DVD-R or USB drive that can back up
and recover a disk/partition on a computer running any Intel- or AMD- based PC operating system,
including Linux®. Note that the Intel-based Apple Macintosh is not supported.
Warning! Successful recovery is only guaranteed for the supported operating systems. Other operating systems
can be backed up using a sector-by-sector approach, but they may become unbootable after recovery.
9 Copyright © Acronis International GmbH, 2003-2019

1.4.3 Supported file systems
Acronis Console in Windows
Any connection
established in
Windows
Disk-level and file-level backup
to Acronis Cloud
Disk-level recovery from
Acronis Cloud
File-level recovery from Acronis
Cloud
NTFS
Ext2/Ext3/Ext4
ReiserFS(3) *
Linux SWAP *
HFS+*/HFSX*
FAT16/32/exFAT * **
* File systems are supported only for disk or partition backup/recovery operations.
** File systems are supported only for disk or partition recovery operations (without resizing).
If a file system is not supported or is corrupted, Acronis True Image 2020 can copy data using a
sector-by-sector approach.
1.4.4 Supported Internet connection types
The table below shows which Internet connection types are supported by the product functions.
* — You can activate the product by using an activation code. Refer to the Activation from another
computer section in Activating Acronis True Image 2020 (p. 12) for details.
** — To update the product, download the newer product version from the Acronis website and
install it over your current one.
1.4.5 Supported storage media
Hard disk drives (HDD)*
Solid State Drives (SSD)
Networked storage devices
FTP servers**
CD-R/RW, DVD-R/RW, DVD+R (including double-layer DVD+R), DVD+RW, DVD-RAM, BD-R, BD-RE
10 Copyright © Acronis International GmbH, 2003-2019

USB 1.1 / 2.0 / 3.0, eSATA, FireWire (IEEE-1394), SCSI, and PC card storage devices
* Limitations on operations with dynamic disks:
Creation of Acronis Secure Zone on dynamic disks is not supported.
Recovery of a dynamic volume as a dynamic volume with manual resizing is not supported.
Try&Decide® cannot be used for protecting dynamic disks.
«Clone disk» operation is not supported for dynamic disks.
** An FTP server must allow passive mode file transfers. Acronis True Image 2020 splits a backup into
files with a size of 2GB when backing up directly to an FTP server.
The firewall settings of the source computer should have Ports 20 and 21 opened for the TCP and
UDP protocols to function. The Routing and Remote Access Windows service should be disabled.
1.5 Installing Acronis True Image 2020
Installing Acronis True Image 2020
To install Acronis True Image 2020:
1. Run the setup file. Before starting the setup process, Acronis True Image 2020 will check for a
newer build on the website. If there is one, the newer version will be offered for installation.
2. Click Install.
Acronis True Image 2020 will be installed on your system partition (usually C:).
3. When the installation is complete, click Start application.
4. Read and accept the terms of the license agreements for Acronis True Image 2020 and Bonjour.
Bonjour software will be installed on your computer for advanced support of NAS devices. You
can uninstall the software at any time.
You can also agree to participate in the Acronis Customer Experience Program. You can change
this setting at any time.
5. In the opened window, sign in to your Acronis account. The product will be automatically
activated.
You can skip this step. In this case, enter your serial number, and then click Activate.
Refer to Acronis account (p. 26) for details.
Recovering from an Acronis True Image 2020 error
If Acronis True Image 2020 ceased running or produced errors, its files might be corrupted. To repair
this problem, you first have to recover the program. To do this, run Acronis True Image 2020 installer
again. It will detect Acronis True Image 2020 on your computer and will ask you if you want to repair
or remove it.
Removing Acronis True Image 2020
Select Start -> Settings -> Control panel -> Add or remove programs -> Acronis True Image 2020 ->
Remove. Then follow the instructions on the screen. You may have to reboot your computer
afterwards to complete the task.
If you use Windows 10, click Start -> Settings -> System -> Apps & features -> Acronis True Image
2020 -> Uninstall.
If you use Windows 8, click the Settings icon, then select Control Panel -> Uninstall a program ->
Acronis True Image 2020 -> Uninstall.
11 Copyright © Acronis International GmbH, 2003-2019

If you use Windows 7, click Start -> Control Panel -> Uninstall a program -> Acronis True Image 2020
-> Uninstall.
If you used the Acronis Secure Zone or Acronis Nonstop Backup (p. 37), select in the window that appears what
to do with the zone and Nonstop Backup storages.
Upgrading from old versions of Acronis True Image
If your current version of Acronis True Image is Acronis True Image 2018 or Acronis True Image 2019,
the new version will simply update it; there is no need to remove the old version and reinstall the
software. If your current version is older, we recommend that you remove the current version, first.
Please keep in mind that the backups created by the later program version may be incompatible with
the previous program versions. Therefore, if you roll back Acronis True Image to an older version, you
likely will have to re-create the backups using the older version. We strongly recommend that you
create new bootable media after each product upgrade.
1.6 Activating Acronis True Image 2020
To use Acronis True Image 2020, you need to activate it via the Internet. Without activation the fully
functional product works for 30 days. If you do not activate it during that period, all the program
functions become unavailable except the recovery.
Activating Acronis True Image 2020
You can activate Acronis True Image 2020 either on your computer or from another computer, if
your computer is not connected to the Internet.
Activation on a computer connected to the Internet
If your computer is connected to the Internet, the product will be activated automatically.
If the computer where you install Acronis True Image 2020 does not have Internet connection or if
the program cannot connect to Acronis Activation Server, click Account on the sidebar, and then
select one of the following actions:
Try again — select this option to try to connect to the Acronis Activation Server again.
Activate offline — you can activate the program manually from another computer that is
connected to the Internet (see below).
Activation from another computer
If your computer is not connected to the Internet, you may activate Acronis True Image 2020 by
using another computer which has connection to the Internet.
To activate the product from another computer:
1. On your computer, install and start Acronis True Image 2020.
2. On the sidebar, click Account, and then click Activate offline.
3. In the Acronis True Image 2020 Activation window, perform 3 simple steps:
1. Save your installation code to a file by clicking the Save to file button, and specify a
removable media as the file location (for example, a USB flash drive). You may also simply
write down this code on a piece of paper.
2. On another computer which has the Internet connection, go to
https://www.acronis.com/activation/. The instructions on the screen will help you to get
12 Copyright © Acronis International GmbH, 2003-2019

your activation code by using the installation code. Save the obtained activation code to a file
on a removable media, or write it down on paper.
3. On your computer, click the Load from file button and specify a path to the file with the
activation code; or, simply type it into the box from the piece of paper.
4. Click Activate.
Additionally, watch the English-language video instructions at https://goo.gl/DHd1h5.
«Too many activations» issue
Possible reasons for the issue:
You exceed the maximum number of computers with installed Acronis True Image 2020.
For example, you have one license or a serial number for one computer and you install Acronis
True Image on a second computer.
Solutions:
Enter a new serial number. If you do not have one, you can buy it in the Acronis built-in store
or at the Acronis website.
Move the license to your new computer from another one on which the product is already
activated. To do this, select the computer from which you want to move the license. Note
that Acronis True Image will be deactivated on that computer.
You reinstall Windows or change hardware of your computer.
For example, you might upgrade motherboard or processor in your computer. Activation is lost,
because Acronis True Image sees your computer as a new one.
Solution:
To reactivate Acronis True Image on your computer, choose from the list the same computer by
its old name.
Managing your subscription licenses manually
If you use the subscription-based version of Acronis True Image 2020, you can manage the licenses
manually at the Acronis website. You can do the following:
Move licenses between your computers
Transfer licenses between your accounts
Remove a license from a computer
Resolve product activation conflicts, including the «Too many activations» issue
Buy new licenses
To manage licenses:
1. Go to https://account.acronis.com/, and then sign in with your Acronis account.
2. In the Products section, find Acronis True Image 2020, and then click Manage.
1.7 Trial version information
General limitations
The trial version of Acronis True Image 2020 works only during the trial period of 30 days. It has the
following limitations:
Disk cloning is disabled.
When booting from an Acronis bootable media, the only available operation is recovery.
13 Copyright © Acronis International GmbH, 2003-2019

Synchronization
Data synchronization is available without any limitations, but when the trial period expires:
Your computer is excluded from all syncs. After activating the full version of Acronis True Image
2020 you will be able to connect to the syncs again.
All the versions of synced files will be permanently deleted from Acronis Cloud.
Acronis Cloud
You have 1000 GB of storage space on the cloud during the trial period. You can use this space to
store your online backups, archives, and versions of synced files. After the trial period is over, Acronis
Cloud works in recovery-only mode for 30 days. After this period, you won’t be able to use the
Acronis Cloud service and all your data on the Cloud will be deleted.
Purchasing the full version
You can buy the full version at the Acronis website or using in-app purchase functionality. See details
in Upgrading Acronis True Image 2020 (p. 14).
1.8 Upgrading Acronis True Image 2020
If your current version of Acronis True Image is Acronis True Image 2018 or Acronis True Image 2019,
the new version will simply update it; there is no need to remove the old version and reinstall the
software. If your current version is older, we recommend that you remove the current version, first.
Your backups created with a previous version of Acronis True Image are completely compatible with
the newer product version. After you upgrade, all of your backups will automatically be added to
your backup list.
We strongly recommend that you create new bootable media after each product upgrade.
Purchasing the full version while using the trial version
To purchase the full version of the product:
1. Start Acronis True Image 2020.
2. On the sidebar, click Account, and then click Buy full version. The built-in store opens.
3. Select the license that you want to buy, and then click Buy now.
4. Provide your payment information.
Updating Acronis True Image 2020
To update Acronis True Image:
1. Start Acronis True Image 2020.
2. On the sidebar, click Account.
If there is a new version available, you will see the appropriate message next to the current build
number.
3. Click Download and install.
Before you start downloading, please make sure that your firewall won’t block the download process.
4. When the new version is downloaded, click Install now.
To check for updates automatically, go to the Settings tab, and then select the Automatically check
for updates at startup check box.
14 Copyright © Acronis International GmbH, 2003-2019

Built-in store
Acronis True Image 2020 provides an in-app store. Using this store, you can:
Buy the full version of Acronis True Image 2020.
Buy Acronis True Image subscription.
Buy more storage space on Acronis Cloud.
To access the in-app store, go to the Account tab, and then click Acronis Store. You will see the
in-app store and all available purchase options.
1.9 Technical Support
Maintenance and Support Program
If you need assistance with your Acronis product, please go to https://www.acronis.com/support/
15 Copyright © Acronis International GmbH, 2003-2019

2 Getting started
In this section
User interface language ………………………………………………………………………………………. 16
Protecting your system ……………………………………………………………………………………….. 16
Backing up all data on your PC ……………………………………………………………………………… 19
Creating an Acronis Survival Kit ……………………………………………………………………………. 20
Backing up your files …………………………………………………………………………………………… 22
Cloning your hard drive ……………………………………………………………………………………….. 23
Recovering your computer ………………………………………………………………………………….. 24
Recovering your files and folders ………………………………………………………………………….. 26
Acronis account ………………………………………………………………………………………………….. 26
Getting started with Acronis Cloud ……………………………………………………………………….. 27
2.1 User interface language
Before you start, select a preferred language for the Acronis True Image 2020 user interface. By
default, the language is set in accordance with your Windows display language.
To change the user interface language:
1. Start Acronis True Image 2020.
2. In the Settings section, select a preferred language from the list.
2.2 Protecting your system
To protect your system:
1. Back up your computer (p. 17).
2. Create Acronis bootable media (p. 18).
It is recommended to test the bootable media as described in Making sure that your bootable
media can be used when needed (p. 148).
16 Copyright © Acronis International GmbH, 2003-2019

2.2.1 Step 1. Backing up your computer
When should I back up my computer?
Create a new backup version after every significant event in your system.
Examples of these events include:
You bought a new computer.
You reinstalled Windows on your computer.
You configured all system settings (for example, time, date, language) and installed all necessary
programs on your new computer.
Important system update.
To ensure you save a healthy state of a disk, it is a good idea to scan it for viruses before backing it up. Please
use antivirus software for this purpose. Note this operation often takes a significant amount of time.
How do I create a backup of my computer?
You have two options to protect your system:
Entire PC backup (recommended)
Acronis True Image backs up all your internal hard drives in disk mode. The backup contains the
operating system, installed programs, system settings, and all your personal data including your
photos, music, and documents. Refer to Backing up all data on your PC (p. 19) for details.
System disk backup
You can choose to back up your system partition or the entire system drive. Refer to Backing up
disks and partitions (p. 44) for details.
We do not recommend using nonstop backup as a primary way to protect your system, because the
main purpose of this technology is protection of frequently changed files. For the safety of your
system, use any other schedule. See examples in Examples of custom schemes (p. 61). Refer to Using
Acronis Nonstop Backup (p. 37) for more details about the Nonstop Backup feature.
To back up your computer:
1. Start Acronis True Image 2020.
2. On the sidebar, click Backup.
If this is your first backup, you will see the backup configuration screen. If you already have some
backups in the backup list, then click Add backup.
3. Click the Backup source icon, and then select Entire PC.
If you want to back up your system disk only, then click Disks and partitions, and then select your
system partition (usually C:) and the System Reserved partition (if any).
4. Click the Backup destination icon, and then select a storage place for the backup (see
recommendation below).
5. Click Back up now.
Result: A new backup box appears in the backup list. To create a new version of the backup in future,
select the backup box from the list, and then click Back up now.
Where do I store my disk backups?
Good: Your ordinary internal hard disk.
Better: Acronis Secure Zone (p. 158). This is a special secure partition on your local hard drive for
storing backups.
17 Copyright © Acronis International GmbH, 2003-2019

The best: Acronis Cloud (p. 27) or an external hard disk.
Refer to Deciding where to store your backups (p. 34) for details.
How many backup versions do I need?
In most cases, you need 2-3 backup versions of your entire PC contents or your system disk, with a
maximum of 4-6 (see above for information about when to create backups). You can control the
number of backup versions by using automatic cleanup rules. Refer to Custom schemes (p. 59) for
details.
Remember, the first backup version (the full backup version) is the most important. It is the biggest
one, because it contains all data stored on the disk. Further backup versions (the incremental and
differential backup versions) may be organized in different schemes. These versions contain only
data changes. That’s why they are dependent on the full backup version and why the full backup
version is so important.
By default, a disk backup is created by using the incremental scheme. This scheme is optimal, in most
cases.
For advanced users: it is a good idea to create 2-3 full backup versions and store them on different storage
devices. This method is much more reliable.
2.2.2 Step 2. Creating Acronis bootable media
What is Acronis bootable media?
Acronis bootable media is a CD, DVD, USB flash drive, or other removable media from which you can
run Acronis True Image when Windows cannot start. You can make a media bootable by using
Acronis Media Builder.
How do I create Acronis bootable media?
1. Insert a CD/DVD or plug in a USB drive (USB flash drive, or an HDD/SSD external drive).
2. Start Acronis True Image 2020.
3. On the sidebar, click Tools, and then click Rescue Media Builder.
4. On the first step, select Simple.
5. Select the device to use to create the bootable media.
6. Click Proceed.
How do I use Acronis bootable media?
Use Acronis bootable media to recover your computer when Windows cannot start.
1. Connect the bootable media to your computer (insert the CD/DVD or plug in the USB drive).
2. Arrange the boot order in BIOS so that your Acronis bootable media is the first device to be
booted.
Refer to Arranging boot order in BIOS (p. 99) for details.
3. Boot your computer from the bootable media and select Acronis True Image 2020.
Result: Once Acronis True Image is loaded, you can use it to recover your computer.
Refer to Acronis Media Builder (p. 142) for details.
18 Copyright © Acronis International GmbH, 2003-2019

2.3 Backing up all data on your PC
What is an Entire PC backup?
An Entire PC backup is the easiest way to back up the full contents of your computer. We
recommend that you choose this option when you are not sure which data that you need to protect.
If you want to back up your system partition only, refer to Backing up disks and partitions (p. 44) for
details.
When you select Entire PC as a backup type, Acronis True Image backs up all your internal hard drives
in disk mode. The backup contains the operating system, installed programs, system settings, and all
your personal data including your photos, music, and documents.
The recovery from an Entire PC backup is also simplified. You only need to choose the date to which
you want to revert your data. Acronis True Image recovers all data from the backup to the original
location. Note that you cannot select specific disks or partitions to recover and you cannot change
the default destination. If you need to avoid these limitations, we recommend that you back up your
data with an ordinary disk-level backup method. Refer to Backing up disks and partitions (p. 44) for
details.
You can also recover specific files and folders from an Entire PC backup. Refer to Backing up files and
folders (p. 46) for details.
If an Entire PC backup contains dynamic disks, you recover your data in partition mode. This means
that you can select partitions to recover and change recovery destination. Refer to About recovery of
dynamic/GPT disks and volumes (p. 97) for details.
How do I create an Entire PC backup?
To back up the entire contents of your computer:
1. Start Acronis True Image 2020.
2. On the sidebar, click Backup.
3. Click the plus sign at the bottom of the backup list.
4. Click the Backup source icon, and then select Entire PC.
5. Click the Backup destination icon, and then select a destination for the backup.
19 Copyright © Acronis International GmbH, 2003-2019

We recommend that you back up your computer to Acronis Cloud or to local or network storage.
Refer to Deciding where to store your backups (p. 34) for details.
6. [optional step] Click Options to set the options for the backup, including Schedule (p. 54),
Scheme (p. 57), and Password protection (p. 66). For more information see Backup options (p.
54).
7. Click Back up now.
When you back up your data to Acronis Cloud, the first backup may take a considerable amount of time to
complete. Further backup processes will likely be much faster, because only changes to files will be transferred
over the Internet.
Additionally, watch the English-language video instructions at https://goo.gl/KjW5sM.
2.4 Creating an Acronis Survival Kit
What is an Acronis Survival Kit?
To recover your computer in case of a failure, you need to have two crucial components—a backup
of your system disk and an Acronis bootable media (p. 142). Most often these components are
separated, for example, the system backup is stored on an external drive or Acronis Cloud and the
bootable media is a small USB flash drive. An Acronis Survival Kit combines both components so that
you could have a single device that has everything that you need to recover your computer in case of
a failure. It is an external hard disk drive that contains both the Acronis bootable media files and a
backup of your system partition, entire computer, or any disk backup. Moreover, the backup of
your data can be used as a normal backup: it can contain any data that you need to secure, you can
set up Scheduling (p. 54) to update it as a normal backup. And even more, the external hard drive is
not exclusively booked by the Acronis Survival Kit, its bootable media takes only 2 Gb of the disk
space, and the remaining space can be shared by the system partition or entire computer backup
which is the part of the Acronis Survival Kit, and by any other data including other backups, your
20 Copyright © Acronis International GmbH, 2003-2019

personal data, photos, whatever. But please keep only one Acronis Survival Kit on one external hard
disk.
No matter how many backups are stored in this external hard disk, only one Acronis Survival Kit is
required to recover a computer. Its bootable media component works with any system partition or
entire computer backup if they both are created for the same computer or computers with the same
configuration.
As a device for an Acronis Survival Kit you can use:
an external hard disk drive
It should be larger than 32 GB and have an NTFS, FAT32, or exFAT file system. If the drive has
another file system, Acronis True Image 2020 suggests formatting the drive.
a USB flash drive
It should be an MBR flash drive with minimum size of 32 GB. If you use a GPT flash drive, Acronis
True Image 2020 suggests formatting the drive to MBR. Note, flash drives are supported only for
Windows 10 (build 1703 and later).
How do I create an Acronis Survival Kit?
When you configure a backup of your system partition, entire computer, or any disk backup and
select an external hard disk drive as a destination, Acronis True Image 2020 will suggest creating an
Acronis Survival Kit.
To create an Acronis Survival Kit:
1. Click Back up now or Create Acronis Survival Kit.
2. In the opened window, click Create.
Acronis True Image 2020 creates a small partition on the selected drive and writes the boot files
there. To create it, one of the existing volumes will be resized. If the disk is not a GPT one and has
a file system different from NTFS, FAT32, or exFAT, Acronis True Image 2020 suggests formatting
the disk. Pay attention, that disk formatting deletes all the data stored on the disk.
21 Copyright © Acronis International GmbH, 2003-2019

3. When the boot files are successfully written to the drive, it becomes an Acronis bootable media
(p. 142) that you can use to recover your computer. To complete creating an Acronis Survival Kit,
you need to save a backup of your system partition, entire computer, or any disk backup to this
drive. To do this, click Back up now. If you skip this step, do not forget to create a backup on this
drive later. Refer to Backing up disks and partitions (p. 44) for details.
When your Acronis Survival Kit is ready, you can use it to recover your computer. Refer to
Recovering your system to the same disk (p. 88) for details.
Every time you configure a backup to an external device with a Survival Kit on it, Acronis True Image
2020 will check its version. If an up-to-date version of the Survival Kit is available, Acronis True Image
2020 will suggest updating the Survival Kit on your external device.
2.5 Backing up your files
To protect files such as documents, photos, music files, and video files, there is no need to back up
the entire partition containing the files. You can back up specific files and folders and save them to
the following storage types:
Local or network storage
This option is fast and easy. Use it to protect rarely changed files.
Acronis Cloud
This option is reliable. Use it to protect critical files and files that you want to share between
devices or people.
To use Acronis Cloud, you must have an Acronis account and a subscription to the Acronis Cloud
service. Refer to Subscription information for details.
To back up files and folders:
1. Start Acronis True Image 2020.
2. On the sidebar, click Backup.
3. Click the Backup source icon, and then select Files and folders.
4. In the opened window, select the check boxes next to the files and folders that you want to back
up, and then click OK.
5. Click the Backup destination icon, and then select a destination for backup:
Acronis Cloud—Sign in to your Acronis account, and then click OK.
22 Copyright © Acronis International GmbH, 2003-2019

Your external drive—When an external drive is plugged into your computer, you can select it
from the list.
NAS—Select an NAS from the list of found NAS devices. If you have only one NAS, Acronis
True Image 2020 will suggest using it as a backup destination by default.
Browse—Select a destination from the folder tree.
6. Click Back up now.
Refer to Backing up files and folders (p. 46) for details.
Additionally, watch the English-language video instructions at https://goo.gl/i4J1AN.
2.6 Cloning your hard drive
Why do I need it?
When you see that the free space on your hard drive is not enough for your data, you might want to
buy a new, larger hard drive and transfer all your data to the new drive. The usual copy operation
does not make your new hard drive identical to the old one. For example, if you open File Explorer
and copy all files and folders to the new hard drive, Windows will not start from the new hard drive.
The Clone disk utility allows you to duplicate all your data and make Windows bootable on your new
hard drive.
Before you start
We recommend that you install the target (new) drive where you plan to use it and the source drive
in another location, for example, in an external USB enclosure. This is especially important for
laptops.
Note: It is recommended that your old and new hard drives work in the same controller mode (for example, IDE
or AHCI). Otherwise, your computer might not start from the new hard drive.
Using the Clone disk utility
To clone a disk:
1. On the sidebar, click Tools, and then click Clone disk.
2. On the Clone Mode step, we recommend that you choose the Automatic transfer mode. In this
case, the partitions will be proportionally resized to fit your new hard drive. The Manual mode
23 Copyright © Acronis International GmbH, 2003-2019

provides more flexibility. Refer to Clone Disk wizard (p. 133) for more details about the manual
mode.
If the program finds two disks, one partitioned and another unpartitioned, it will automatically recognize
the partitioned disk as the source disk and the unpartitioned disk as the destination disk. In this case, the
next steps will be bypassed and you will be taken to the cloning Summary screen.
3. On the Source Disk step, select the disk that you want to clone.
4. On the Destination Disk step, select the destination disk for the cloned data.
If any disk is unpartitioned, the program will automatically recognize it as the destination and bypass this
step.
5. On the Finish step, ensure that the configured settings suit your needs, and then click Proceed.
By default, Acronis True Image 2020 shuts down the computer after the clone process finishes. This
enables you to change the position of master/subordinate jumpers and remove one of the hard
drives.
Additionally, watch the English-language video instructions at https://goo.gl/bjWRLL
(https://goo.gl/bjWRLL).
2.7 Recovering your computer
Please be aware that recovery of a system disk is an important operation. Before you start, we
recommend that you read the detailed descriptions in the following Help topics:
Trying to determine the crash cause (p. 87)
Preparing for recovery (p. 87)
Recovering your system to the same disk (p. 88)
Let’s consider two different cases:
1. Windows works incorrectly, but you can start Acronis True Image 2020.
24 Copyright © Acronis International GmbH, 2003-2019

2. Windows cannot start (for example, you turn on your computer and see something unusual on
your screen).
Case 1. How to recover computer if Windows works incorrectly?
1. Start Acronis True Image 2020.
2. On the sidebar, click Backup.
3. From the backup list, select the backup that contains your system disk. The backup can be
located on local, network storage, or Acronis Cloud.
4. On the right panel, click Recovery.
5. Depending on the backup type, click Recover PC or Recover disks.
6. In the opened window, select the backup version (the data state from a specific date and time).
7. Select the system partition and the System Reserved partition (if any) to be recovered.
8. Click Recover now.
To complete the operation, Acronis True Image 2020 must restart your system.
Case 2. How to recover computer if Windows cannot start?
1. Connect Acronis bootable media to your computer, and then run the special standalone version
of Acronis True Image 2020.
25 Copyright © Acronis International GmbH, 2003-2019

Refer to Step 2 Creating Acronis bootable media (p. 18) and Arranging boot order in BIOS (p. 99)
for details.
2. On the Welcome screen, select My disks below Recover.
3. Select the system disk backup to be used for recovery. Right-click the backup and choose
Recover.
When the backup is not displayed, click Browse and manually specify the path to the backup. In
the same window, you can connect to Acronis Cloud and select an online backup. Refer to
Recovering your system from Acronis Cloud (p. 105) for details.
4. At the Recovery method step, select Recover whole disks and partitions.
5. Select the system partition (usually C) on the What to recover screen. Note that you may
distinguish the system partition by the Pri, Act flags. Select the System Reserved partition (if any),
as well.
6. You may leave all settings of the partitions without changes and click Finish.
7. Check the summary of operations, and then click Proceed.
8. When the operation finishes, exit the standalone version of Acronis True Image 2020, remove
the bootable media (if any), and boot from the recovered system partition. After making sure
that you have recovered Windows to the state you need, restore the original boot order.
2.8 Recovering your files and folders
You can recover files and folders both from file-level and disk-level backups.
To recover files and folders:
1. Start Acronis True Image 2020.
2. On the sidebar, click Backup.
3. From the backup list, select the backup which contains the files or folders that you want to
recover.
The backup can be located on local, network storage, or Acronis Cloud. When you recover data
from Acronis Cloud, you first need to sign in to your Acronis account.
4. On the right panel, click Recovery.
5. Select the backup version (the data state from a specific date and time).
6. Select the files and folders that you want to recover, and then click Next.
7. Select a destination on your computer for the recovered files/folders. You can recover data to its
original location or choose a new one, if necessary. To choose a new location, click the Browse
button.
8. To start the recovery process, click the Recover now button.
2.9 Acronis account
An Acronis account is required when you:
Register an Acronis product.
Back up to Acronis Cloud.
Synchronize your data.
Archive your data.
26 Copyright © Acronis International GmbH, 2003-2019

How to create an Acronis account
If you do not have an Acronis account yet, perform the following steps:
1. On the sidebar, click Account, and then click Sign in or create an account.
2. Click Create account.
3. In the opened registration form, provide your email address, a password for your new account
and confirm the password by retyping it once more in the appropriate field.
To keep your personal data secure, choose a strong password for your online backups, guard it from getting
into the wrong hands, and change it from time to time.
4. Click Create account.
5. An email message will be sent to the address you specified. Open this message and confirm your
wish to create an account.
How to sign in
To sign in to your Acronis account:
1. On the sidebar, click Account, and then click Sign in or create an account.
2. Enter your registration email address and password, and then click Sign in.
How to sign out
To sign out of your Acronis account:
1. On the sidebar, click Account.
2. Click your email address, and then choose Sign out.
2.10 Getting started with Acronis Cloud
Acronis Cloud might be unavailable in your region. For more information, click here:
https://kb.acronis.com/content/4541
Remote storage
On the one hand, Acronis Cloud is a secure remote storage which you can use to store:
Backups of your files and folders
Backups of your partitions and disks
Versions of your synchronized files and folders
Because files are stored on a remote storage, they are protected even if your computer is stolen or
your house burns down. In the case of a disaster or data corruption, you can recover your files and
even the entire contents of your computer.
With one account, you can save data from several computers and all your mobile devices running iOS
and Android operating systems. Refer to Acronis Mobile for details.
To start using Acronis Cloud, you need a subscription to the service. Refer to Subscription
information for details.
Web application
On the other hand, Acronis Cloud is a web application that allows you to recover and manage the
data you store on Acronis Cloud. To work with the application, you can use any computer connected
to the Internet.
27 Copyright © Acronis International GmbH, 2003-2019

To access the application, go to https://www.acronis.com/my/online-backup/webrestore/, and then
log in to your Acronis account.
2.10.1 How we ensure security of your data
When you use Acronis Cloud as storage for your backups, archives, or synced data, you want to be
sure that your personal files won’t get into the wrong hands. You may be especially concerned about
your mobile device, because all of your data will be transferred through the Internet.
Let us assure you that your data will be safe. First of all, we use encrypted protocols (SSL, TLS) to
transfer all data through both the Internet and LAN. To access the data, sign in to your account by
providing the email address and password for that account. Second, you can choose to use only
protected Wi-Fi networks for backing up of your data. In this case, your data will be completely safe
while it is transferred to Acronis Cloud. Select the secure Wi-Fi networks for backup (p. 76) in the
Settings.
2.10.2 Subscription information
The Acronis True Image 2020 features that use Acronis Cloud (such as online backup, cloud archiving,
and cloud synchronization) require a subscription to Acronis Cloud Storage. To subscribe, start
Acronis True Image 2020, go to the Account tab, and then choose if you want to start a trial
subscription or buy a full one.
Trial version
When you activate the trial version of the product, a 1000 GB storage and free subscription to
Acronis Cloud for the True Image trial period is assigned to your account automatically. See details in
Trial version information (p. 13).
Full version
You can purchase the full Acronis Cloud subscription in the Account section of your version of
Acronis True Image or at the Acronis website. See details in Upgrading Acronis True Image 2020 (p.
14).
28 Copyright © Acronis International GmbH, 2003-2019

3 Basic concepts
In this section
Basic concepts ……………………………………………………………………………………………………. 29
The difference between file backups and disk/partition images ………………………………. 30
Full, incremental and differential backups …………………………………………………………….. 32
Deciding where to store your backups ………………………………………………………………….. 34
Using Acronis Nonstop Backup …………………………………………………………………………….. 37
Backup file naming ……………………………………………………………………………………………… 39
Integration with Windows …………………………………………………………………………………… 40
Wizards……………………………………………………………………………………………………………… 41
FAQ about backup, recovery and cloning ………………………………………………………………. 42
3.1 Basic concepts
This section provides general information about basic concepts which could be useful for
understanding how the program works.
Backup and recovery
Backup refers to the making copies of data so that these additional copies may be used to recover
the original after a data loss event.
Backups are useful primarily for two purposes:
To recover an operating system when it is corrupted or cannot start (called disaster recovery).
Refer to Protecting your system (p. 16) for more details about protecting your computer from a
disaster.
To recover specific files and folders after they have been accidentally deleted or corrupted.
Acronis True Image 2020 does both by creating disk (or partition) images and file-level backups
respectively.
Recovery methods:
Full recovery can be performed to the original location or to a new one.
When the original location is selected, the data in the location is completely overwritten with the
data from the backup. In case of a new location, the data is just copied to the new location from
the backup.
Incremental recovery is performed only to the original location and only from a cloud backup.
Before the recovery starts, the files in the original location are compared with the files in the
backup by file attributes, such as file size and date of last modification. Those files that do not
match are marked for recovery, the remaining files will be skipped during recovery. In that way,
as opposed to the full recovery, Acronis True Image recovers only changed files. This method
significantly reduces the recovery time and saves Internet traffic while recovering from Acronis
Cloud.
Backup versions
Backup versions are the file or files created during each backup operation. The number of versions
created is equal to the number of times the backup is executed. So, a version represents a point in
time to which the system or data can be restored.
29 Copyright © Acronis International GmbH, 2003-2019

Backup versions represent full, incremental and differential backups — see Full, incremental and
differential backups (p. 32).
The backup versions are similar to file versions. The file versions concept is familiar to those who use
a Windows feature called «Previous versions of files». This feature allows you to restore a file as it
existed on a particular date and time. A backup version allows you to recover your data in a similar
way.
Disk cloning
This operation copies the entire contents of one disk drive to another disk drive. This may be
necessary, for example, when you want to clone your operating system, applications, and data to a
new larger capacity disk. You can do it two ways:
Use the Clone disk utility.
Back up your old disk drive, and then recover it to the new one.
Backup file format
Acronis True Image usually saves backup data in the proprietary tib format using compression. The
data from .tib file backups can be recovered only through Acronis True Image, in Windows or in the
recovery environment.
Acronis Nonstop Backup uses a special hidden storage for data and metadata. The backed up data is
compressed and split into files of about 1 GB. These files also have a proprietary format and the data
they contain can be recovered only with the help of Acronis True Image.
Backup validation
The backup validation feature allows you to confirm that your data can be recovered. The program
adds checksum values to the data blocks being backed up. During backup validation, Acronis True
Image opens the backup file, recalculates the checksum values and compares those values with the
stored ones. If all compared values match, the backup file is not corrupted.
Scheduling
For your backups to be really helpful, they must be as «up-to-date» as possible. Schedule your
backups to run automatically and on a regular basis.
Deleting backups
When you want to delete backups and backup versions you no longer need, please do it by using the
tools provided by Acronis True Image 2020. Refer to Deleting backups and backup versions (p. 82) for
details.
Acronis True Image 2020 stores information on the backups in a metadata information database.
Therefore, deleting unneeded backup files in File Explorer will not delete information about these
backups from the database. This will result in errors when the program tries to perform operations
on the backups that no longer exist.
3.2 The difference between file backups and
disk/partition images
When you back up files and folders, only the files and folder tree are compressed and stored.
30 Copyright © Acronis International GmbH, 2003-2019
Loading…
Zip File, камрады. Вот и наступил новый год, а значит самое время позаботиться о сохранении своих данных. Ведь, как известно, все админы делятся на 2 категории: тех, кто пока не делает бэкапы, и, собственно, тех кто уже делает, причём заблаговременно. Лично я всегда относился ко второй категории нашей братии. Вернее, почти всегда. Данную привычку я окончательно внедрил в свою практику после нескольких поистине катастрофических случаев.
В одном из них я потерял очень важные доки, которые достаточно долгое время собирал и разрабатывал для того, чтобы сдать на первую категорию. Это было ещё в самом начале преподской карьеры. Ну и по неопытности, ваш покорный слуга естественно хранил всю эту историю на флехе, которую с успехом про**ал на очередной посиделке. После того раза, я параноидально резервирую всё не только на внешний жёсткий, но и до кучи копирую на домашний NAS и заливаю на внешнее облако.
Второй случай связан с утратой копии контроллера домена. Вот это был поистине лютый пи***ц. Я тогда долгое время не отслеживал делаются ли вообще копии с серва, т.к. на протяжении более чем двух лет никаких сбоев в работе не наблюдалось. Обновы стабильно накатывались, политики отрабатывали, а студенты жаловались исключительно на медленный инет, но никак не на косяки со входом или подгрузкой сетевых дисков.
Однако, ничто не вечно под виндой. В один прекрасный день сервак поймал очередную обнову, которая встала не совсем корректно и пришлось в спешном порядке выискивать старую копию. И знаете, я таки отыскал её спустя сутки. Но, как это обычно бывает у особенно везучих людей, по иронии судьбы она не взлетела. Возможно, из-за того, что файл с образом повредился. Либо же это и вовсе был очень старый имэйдж. Не знаю.
Благо к тому времени на домене оставалось завязано всего 2 компьютерных класса, которые мы просто вывели в рабочую группу и решили отложить серверные дела до осени. Ну а осенью я уже уволился из «шараги» и стал активно вникать в проблемы администрирования в новой конторе. Не без гордости отмечу, что общие принципы резервного копирования и программное обеспечение для этих целей там использовались аналогичные.
Вообще у админов старой школы ПО от Acronis в принципе является эдаким стандартом де-факто в вопросах резервного копирования серверов и рабочих станций. Особенно эта проблема остро стоит на предприятиях, занимающихся хранением и обработкой больших объёмов конфиденциальной информации. Например, таких как персональные данные или финансовые отчёты. Однако и в домашних условиях данная задача тоже весьма актуальна.
Ведь если вы занимаетесь бизнесом на дому. К примеру, тем же видеоблогингом. То вам необходимо обезопасить свои данные от внезапного выхода из строя рабочего SSDнакопителя. Причём сделать это таким образом, чтобы при его замене на новый носитель, можно было восстановить всю систему до рабочего состояния в течении получаса. И в этом нам поможет уже упомянутый ранее программный продукт Acronis True Image.
Как скачать Acronis True Image 2020?
Шаг 1. Для загрузки актуальной версии переходим на официальный сайт acronis.com и в разделе с решениями для домашних пользователей кликаем по соответствующей ссылке.

Шаг 2. На открывшейся странице выбираем «Try now», чтобы скачать пробную полнофункциональную версию True Image.

Шаг 3. Я сижу с мака, поэтому по умолчанию сайт предлагает качнуть Acronis для Mac OS, но в данном уроке мы будем рассматривать версию исключительно для PC. Кликаем «Looking for PC version?» и загружаем установочный EXE’шник.

Как установить Acronis True Image 2020?
Шаг 4. Открываем его на рабочей станции. Я буду демонстрировать весь процесс на клиентском компьютере под управлением Windows 10. В первом окне нажимаем «Установить».

Шаг 5. И дождавшись завершения процесса распаковки библиотек, кликаем «Запустить приложение».

Шаг 6. Принимаем лицензионное соглашение. «Ок».

Шаг 7. Лицензионный ключ у нас пока отсутствует. Поэтому выбираем пункт «Запустить пробную версию».

Шаг 8. Проверяем на компьютере наличие Интернет-соединения. Без подключения к глобальной сети создать учётную запись на серверах Acronis’а попросту не получится. Если инет есть, то заполняем данные в полях и приняв условия использования кликаем по кнопке «Создать учётную запись».

Шаг 9. В появившемся окне отмечаем галочкой пункт «Больше не показывать» и пропускаем окно помощника.

Как сделать резервную копию Acronis?
Шаг 10. С установкой закончили. Переходим непосредственно к настройке резервного копирования. И первым делом изменим источник, т.е. то, что собственно планируем бэкапить.

Шаг 11. Я буду настраивать резервирование системного диска C. Он присутствует на каждом компьютере и в последнее время всё чаще наблюдается тенденция использование для Ц’шки SSDнакопителя. При этом старые жёсткие никто не выбрасывает, а просто продолжают использовать их в качестве хранилища для рабочих документов. Домашние же пользователи сливают туда фотки, музыку, видео и прочий безумно важный контент. Мы же задействуем этот диск в качестве хранилища резервных копий системного тома. Это удобно и весьма практично. Окей. Выбираем «Диски и разделы».

Шаг 12. Отмечаем «Локальный диск (С:)», жмём на «ОК».
")
Шаг 13. Переходим к выбору хранилища.

Шаг 14. «Обзор…».

Шаг 15. Как я и говорил ранее, резервировать мы будем на отдельный диск, диск D. Для этого создадим на нём отдельную папку «Backup». Всё. Окей.

Шаг 16. Осталось настроить параметры создания нашей копии. Кликаем по одноимённому пункту.

Шаг 17. И на вкладке «Расписание» указываем в какие дни будут сниматься резервные копии. Тут уже всё зависит от конкретной ситуации. Допустим, в конторе, где я нынче работаю обед у сотрудников ежедневно в час дня. Именно на это время логичнее всего запланировать создание резервной копии. Исходя из того, что объёмы винчестеров на тачках сравнительно небольшие, да и информация за неделю плюс минус особо не поменяется, выделим под это дело один день. Пятничку. Даже если образ не успеет создаться на обеде, в пятницу пользюки особо возмущаться не будут, ведь по большей части они уже считают минуты до ухода домой, а не вкалывают, как папа Карло.

Шаг 18. На второй вкладке выбираем «Пользовательскую схему» и в качестве метода указываем «Полный». Да, существует множество различных схем резервного копирования. Инкрементное, дифференциальное, с различным количеством цепочек и блоков, но если вы впервые юзаете данную прогу, то не забивайте себе голову этой информацией. Поверьте, лучше пожертвовать временем и объёмом винта, чем потом гемороиться на этапе восстановления выискиваю сначала полную копию, а затем нужную дифку или блок инкремента. Если захотите, можете дополнительно почитать о каждом из этих методов перейдя по соответствующим ссылкам на официальный ресурс. Но на начальном этапе рекомендую остановиться именно на методе фулл бэкапа. Окей. Этот момент прояснили. Отмечаем галочкой «Не удалять первую версию резервной копии» и указываем, сколько версий мы в принципе планируем хранить до того, как они будут перезаписаны.

Шаг 19. Переходим на вкладку «Уведомления» и ставим галочку, чтобы нас информировали о том, что на рабочей станции заканчивается свободное место. Также тут можно настроить оповещение на админский e-mail. Такую фиху обычно настраивают на серверах. Там это действительно имеет значение.

Шаг 20. Проверяем исключены ли темповские файлы системы из резервирования.

Шаг 21. И переходим к последней вкладочке «Дополнительно». Тут можно поиграться с настройками, например включить проверку после создания копии или задать автоматическое выключение ПК. Я же, как правило делаю акцент только на пункте «Производительность». Тут можно выставить максимальный уровень сжатия. Учитывая, что мы снимаем полную копию с системного диска, возможность хоть немного уменьшить размер образа весьма кстати. Жмём «ОК».

Шаг 22. С настройкой почти закончили. Однако, прежде чем приступить к процессу создания первой копии, давайте экспортируем наши настройки в отдельный файл, дабы в следующий раз не повторять те же шаги на другой машине. Ведь у хорошего админа компьютеров в офисе не один, и даже не два. А следовательно, и конфигурировать большое число машин гораздо проще имея в распоряжении готовый файлик с настройками. Выбираем в списке «Создать копию» — «Позже».

Шаг 23. И в меню «ПАРАМЕТРЫ» ищем пункт «Сохранить параметры в файл…». Даём понятное имя, пусть будет «Acronis settings» и сохраняем получившийся вариант на рабочий стол. В следующий раз настраивая другой компьютеры вы просто импортируете настройки из данного файла выбрав соответствующий пункт в этом же меню. Там даже менять почти ничего не придётся. Главное не забудьте создать на диске D папку «Backup», либо укажите в качестве места сохранения другой носитель. Флешку, внешний жёсткий или вообще сетевую папку. Тут, как я уже говорил ранее, всё зависит от ситуации.

Шаг 24. Ну а мы переходим к созданию нашей первой копии. Возвращаемся на вкладку «РЕЗЕРВНОЕ КОПИРОВАНИЕ» и жмём на большую зелёную кнопку.

Шаг 25. Процесс создания копии запущен.

Шаг 26. После его завершения, программа уведомит нас об успехе.

Как восстановить резервную копию Acronis?
Шаг 27. С созданием резервных копий разобрались. Осталось научиться восстанавливаться из получившегося образа. Давайте для чистоты эксперимента удалим несколько файлов с рабочего стола и создадим новую папку. После восстановления эти же файлы должны будут появиться, а папка соответственно исчезнуть.

Шаг 28. В окне True Image переходим на вкладку «Восстановление» и ищем нужную копию. У нас она одна, поэтому особо выбирать не приходится. В качестве места восстановления указываем «Локальный диск (C:)» и жмякаем по кнопке «Восстановить».

Шаг 29. Программа любезно предупреждает нас о том, что выбранный диск содержит информацию, которая в процессе восстановления будет удалена. Соглашаемся с сиим раскладом, выбрав вариант «Да».

Шаг 30. И перезапускаем компьютер для начала процедуры восстановления.

Шаг 31. После ребута Acronis возьмёт управление в свои руки. Нам остаётся лишь пойти заварить кофе и дождаться завершения восстановления.

Шаг 32. Заходим в систему и видим, что файлы успешно восстановились, а созданная папка отсутствует.

Аналогичным образом вы в два счёта сможете восстановить систему после вирусной атаки. Этот же метод поможет оправиться от последствий, связанных с выходом из строя системного диска. Однако в этом случае вам потребуется, как минимум запустить Acronis. Но как спрашивается это сделать, если накопитель со всеми установленными программами приказал долго жить? Друзья, даже в этой, на первый взгляд патовой ситуации есть одна лазейка, которая заключается в использовании загрузочной флешки.
О том, как записать такую флешку и воспользоваться ею на практики я расскажу в следующем выпуске. Так что если ещё не подписались на канал, то обязательно сделайте это прямо сейчас. А то ведь пропустите ценную инфу. Потом жалеть будете. Реветь по ночам в подушку оплакивая утраченные данные. Да, кстати, к слову, о данных. Помимо резервного копирования сторонними средствами, в Windowsсуществует встроенная функций создания бэкапов.
Она не такая балдёжная, как вариант с Acronis, но тоже имеет место быть. Помимо этого, в винде есть чудеснейшая штука под названием теневое копирование. Это когда все изменения, которые вы делаете в файлах сохраняются на диске, а вы потом в случае чего можете восстановить нужную версию отдельно взятого файла. Мега удобная хрень. Более подробно обо всём этом деле вы можете узнать в обучающем курсе по администрированию Windows Server. Ссылочка, как всегда, в описании к ролику.

Что ж, други, на этом сегодня всё. По традиции хочу пожелать вам удачи, успеха и самое главное, отличного настроения. Всех с наступившим, новым, 2020 годом. Пусть он будет в разы продуктивнее и интереснее, чем предыдущий. С вами был, Денчик. В следующий раз увидимся ровно через неделю. До встречи.
