

APPLIES TO THE FOLLOWING PRODUCTS
Advanced for Windows Server
Advanced for Linux Server
Advanced for PC
Advanced for VMware / Hyper-V / RHEV / Citrix XenServer / Oracle VM
Advanced for Exchange
Advanced for SQL
Advanced for SharePoint
Advanced for Active Directory
For Windows Server Essentials

Copyright Statement
Copyright © Acronis International GmbH, 2002-2014. All rights reserved.
“Acronis” and “Acronis Secure Zone” are registered trademarks of Acronis International GmbH.
«Acronis Compute with Confidence», “Acronis Startup Recovery Manager”, “Acronis Active Restore”,
“Acronis Instant Restore” and the Acronis logo are trademarks of Acronis International GmbH.
Linux is a registered trademark of Linus Torvalds.
VMware and VMware Ready are trademarks and/or registered trademarks of VMware, Inc. in the
United States and/or other jurisdictions.
Windows and MS-DOS are registered trademarks of Microsoft Corporation.
All other trademarks and copyrights referred to are the property of their respective owners.
Distribution of substantively modified versions of this document is prohibited without the explicit
permission of the copyright holder.
Distribution of this work or derivative work in any standard (paper) book form for commercial
purposes is prohibited unless prior permission is obtained from the copyright holder.
DOCUMENTATION IS PROVIDED «AS IS» AND ALL EXPRESS OR IMPLIED CONDITIONS,
REPRESENTATIONS AND WARRANTIES, INCLUDING ANY IMPLIED WARRANTY OF MERCHANTABILITY,
FITNESS FOR A PARTICULAR PURPOSE OR NON-INFRINGEMENT, ARE DISCLAIMED, EXCEPT TO THE
EXTENT THAT SUCH DISCLAIMERS ARE HELD TO BE LEGALLY INVALID.
Third party code may be provided with the Software and/or Service. The license terms for such
third-parties are detailed in the license.txt file located in the root installation directory. You can
always find the latest up-to-date list of the third party code and the associated license terms used
with the Software and/or Service at http://kb.acronis.com/content/7696
Acronis patented technologies
Technologies, used in this product, are covered and protected by one or more U.S. Patent Numbers:
7,047,380; 7,275,139; 7,281,104; 7,318,135; 7,353,355; 7,366,859; 7,475,282; 7,603,533; 7,636,824;
7,650,473; 7,721,138; 7,779,221; 7,831,789; 7,886,120; 7,895,403; 7,934,064; 7,937,612; 7,949,635;
7,953,948; 7,979,690; 8,005,797; 8,051,044; 8,069,320; 8,073,815; 8,074,035; 8,145,607; 8,180,984;
8,225,133; 8,261,035; 8,296,264; 8,312,259; 8,347,137; 8,484,427; 8,645,748; 8,732,121 and patent
pending applications.
2 Copyright © Acronis International GmbH, 2002-2014

Table of contents
1 Introducing Acronis Backup ……………………………………………………………………………….. 11
1.1 What’s new in Update 5 …………………………………………………………………………………………….11
1.2 What’s new in Update 4 …………………………………………………………………………………………….11
1.3 What’s new in Update 3 …………………………………………………………………………………………….11
1.4 What’s new in Update 2 …………………………………………………………………………………………….12
1.5 What’s new in Update 1 …………………………………………………………………………………………….12
1.6 What’s new in Acronis Backup & Recovery 11.5 ……………………………………………………………13
1.7 Acronis Backup components ………………………………………………………………………………………15
1.7.1 Agent for Windows ……………………………………………………………………………………………………………………… 16
1.7.2 Agent for Linux ……………………………………………………………………………………………………………………………. 16
1.7.3 Agent for VMware ……………………………………………………………………………………………………………………….. 17
1.7.4 Agent for Hyper-V ……………………………………………………………………………………………………………………….. 17
1.7.5 Agent for SQL ………………………………………………………………………………………………………………………………. 17
1.7.6 Agent for Active Directory ……………………………………………………………………………………………………………. 18
1.7.7 Components for centralized management ……………………………………………………………………………………. 18
1.7.8 Management Console ………………………………………………………………………………………………………………….. 19
1.7.9 Bootable Media Builder ……………………………………………………………………………………………………………….. 20
1.7.10 Acronis Wake-on-LAN Proxy ………………………………………………………………………………………………………… 20
1.8 About using the product in the trial mode ……………………………………………………………………20
1.9 Supported file systems ………………………………………………………………………………………………20
1.10 Technical Support ……………………………………………………………………………………………………..21
2 Getting started ……………………………………………………………………………………………….. 22
2.1 Using the management console ………………………………………………………………………………….25
2.1.1 «Navigation» pane ……………………………………………………………………………………………………………………….. 26
2.1.2 Main area, views and action pages ……………………………………………………………………………………………….. 28
2.1.3 Console options …………………………………………………………………………………………………………………………… 30
3 Understanding Acronis Backup …………………………………………………………………………… 33
3.1 Owners …………………………………………………………………………………………………………………….33
3.2 Credentials used in backup plans and tasks ………………………………………………………………….33
3.3 User privileges on a managed machine ………………………………………………………………………..35
3.4 List of Acronis services ……………………………………………………………………………………………….35
3.5 Full, incremental and differential backups ……………………………………………………………………38
3.6 What does a disk or volume backup store? …………………………………………………………………..39
3.7 About dynamic and logical volumes …………………………………………………………………………….40
3.7.1 Backup and recovery of dynamic volumes (Windows) …………………………………………………………………… 40
3.7.2 Backup and recovery of logical volumes and MD devices (Linux) ……………………………………………………. 42
3.8 Support for Advanced Format (4K-sector) hard disks …………………………………………………….48
3.9 Support for UEFI-based machines ……………………………………………………………………………….49
3.10 Support for Windows 8 and Windows Server 2012 ……………………………………………………….49
3.11 Compatibility with encryption software ……………………………………………………………………….51
3.12 Support for SNMP ……………………………………………………………………………………………………..52
3 Copyright © Acronis International GmbH, 2002-2014

4 Backup ………………………………………………………………………………………………………….. 54
4.1 Back up now ……………………………………………………………………………………………………………..54
4.2 Creating a backup plan ………………………………………………………………………………………………54
4.2.1 Selecting data to back up ……………………………………………………………………………………………………………… 56
4.2.2 Access credentials for source ……………………………………………………………………………………………………….. 58
4.2.3 Source files exclusion …………………………………………………………………………………………………………………… 59
4.2.4 Backup location selection …………………………………………………………………………………………………………….. 60
4.2.5 Access credentials for archive location ………………………………………………………………………………………….. 63
4.2.6 Backup schemes ………………………………………………………………………………………………………………………….. 64
4.2.7 Archive validation ………………………………………………………………………………………………………………………… 73
4.2.8 Backup plan’s credentials …………………………………………………………………………………………………………….. 74
4.2.9 Label (Preserving machine properties in a backup) ………………………………………………………………………… 74
4.2.10 Sequence of operations in a backup plan ……………………………………………………………………………………… 76
4.2.11 Why is the program asking for the password? ………………………………………………………………………………. 76
4.3 Simplified naming of backup files ………………………………………………………………………………..76
4.3.1 The [DATE] variable ……………………………………………………………………………………………………………………… 77
4.3.2 Backup splitting and simplified file naming ……………………………………………………………………………………. 78
4.3.3 Usage examples …………………………………………………………………………………………………………………………… 78
4.4 Scheduling ………………………………………………………………………………………………………………..81
4.4.1 Daily schedule ……………………………………………………………………………………………………………………………… 83
4.4.2 Weekly schedule …………………………………………………………………………………………………………………………. 84
4.4.3 Monthly schedule ………………………………………………………………………………………………………………………… 87
4.4.4 On Windows Event Log event ………………………………………………………………………………………………………. 89
4.4.5 Advanced scheduling settings ………………………………………………………………………………………………………. 90
4.4.6 Conditions …………………………………………………………………………………………………………………………………… 92
4.5 Replication and retention of backups …………………………………………………………………………..95
4.5.1 Supported locations …………………………………………………………………………………………………………………….. 97
4.5.2 Setting up replication of backups ………………………………………………………………………………………………….. 98
4.5.3 Setting up retention of backups ……………………………………………………………………………………………………. 98
4.5.4 Retention rules for the Custom scheme ………………………………………………………………………………………… 99
4.5.5 Usage examples …………………………………………………………………………………………………………………………. 101
4.6 How to disable backup cataloging ……………………………………………………………………………..103
4.7 Default backup options …………………………………………………………………………………………….104
4.7.1 Additional settings……………………………………………………………………………………………………………………… 106
4.7.2 Archive protection ……………………………………………………………………………………………………………………… 107
4.7.3 Backup cataloging ……………………………………………………………………………………………………………………… 108
4.7.4 Backup performance ………………………………………………………………………………………………………………….. 109
4.7.5 Backup splitting …………………………………………………………………………………………………………………………. 110
4.7.6 Compression level ……………………………………………………………………………………………………………………… 111
4.7.7 Disaster recovery plan (DRP) ………………………………………………………………………………………………………. 112
4.7.8 E-mail notifications …………………………………………………………………………………………………………………….. 113
4.7.9 Error handling ……………………………………………………………………………………………………………………………. 114
4.7.10 Event tracing ……………………………………………………………………………………………………………………………… 115
4.7.11 Fast incremental/differential backup ………………………………………………………………………………………….. 116
4.7.12 File-level backup snapshot …………………………………………………………………………………………………………. 116
4.7.13 File-level security ……………………………………………………………………………………………………………………….. 117
4.7.14 LVM snapshotting ……………………………………………………………………………………………………………………… 117
4.7.15 Media components ……………………………………………………………………………………………………………………. 119
4.7.16 Mount points …………………………………………………………………………………………………………………………….. 119
4.7.17 Multi-volume snapshot ………………………………………………………………………………………………………………. 120
4.7.18 Pre/Post commands …………………………………………………………………………………………………………………… 120
4.7.19 Pre/Post data capture commands ………………………………………………………………………………………………. 122
4.7.20 Replication/cleanup inactivity time …………………………………………………………………………………………….. 124
4 Copyright © Acronis International GmbH, 2002-2014

4.7.21 Sector-by-sector backup …………………………………………………………………………………………………………….. 124
4.7.22 Tape management …………………………………………………………………………………………………………………….. 124
4.7.23 Task failure handling ………………………………………………………………………………………………………………….. 126
4.7.24 Task start conditions ………………………………………………………………………………………………………………….. 127
4.7.25 Volume Shadow Copy Service …………………………………………………………………………………………………….. 128
5 Recovery ……………………………………………………………………………………………………… 131
5.1 Creating a recovery task …………………………………………………………………………………………..131
5.1.1 What to recover ………………………………………………………………………………………………………………………… 133
5.1.2 Access credentials for location ……………………………………………………………………………………………………. 137
5.1.3 Access credentials for destination ………………………………………………………………………………………………. 138
5.1.4 Where to recover ………………………………………………………………………………………………………………………. 138
5.1.5 When to recover ……………………………………………………………………………………………………………………….. 146
5.1.6 Task credentials …………………………………………………………………………………………………………………………. 146
5.2 Recovering BIOS-based systems to UEFI-based and vice versa ………………………………………147
5.2.1 Recovering volumes …………………………………………………………………………………………………………………… 148
5.2.2 Recovering disks ………………………………………………………………………………………………………………………… 149
5.3 Acronis Active Restore ……………………………………………………………………………………………..151
5.4 Bootability troubleshooting ………………………………………………………………………………………152
5.4.1 How to reactivate GRUB and change its configuration …………………………………………………………………. 154
5.4.2 About Windows loaders …………………………………………………………………………………………………………….. 155
5.5 Reverting a Windows system to its factory settings ……………………………………………………..155
5.6 Default recovery options ………………………………………………………………………………………….156
5.6.1 Additional settings……………………………………………………………………………………………………………………… 157
5.6.2 E-mail notifications …………………………………………………………………………………………………………………….. 158
5.6.3 Error handling ……………………………………………………………………………………………………………………………. 160
5.6.4 Event tracing ……………………………………………………………………………………………………………………………… 160
5.6.5 File-level security ……………………………………………………………………………………………………………………….. 161
5.6.6 Mount points …………………………………………………………………………………………………………………………….. 162
5.6.7 Pre/Post commands …………………………………………………………………………………………………………………… 162
5.6.8 Recovery priority ……………………………………………………………………………………………………………………….. 163
5.6.9 Tape management …………………………………………………………………………………………………………………….. 164
6 Conversion to a virtual machine ……………………………………………………………………….. 165
6.1 Conversion methods ………………………………………………………………………………………………..165
6.2 Conversion to an automatically created virtual machine ………………………………………………165
6.2.1 Considerations before conversion ………………………………………………………………………………………………. 166
6.2.2 Setting up regular conversion to a virtual machine ………………………………………………………………………. 167
6.2.3 Recovery to the »New virtual machine» destination …………………………………………………………………….. 170
6.3 Recovery to a manually created virtual machine …………………………………………………………173
6.3.1 Considerations before conversion ………………………………………………………………………………………………. 173
6.3.2 Steps to perform ……………………………………………………………………………………………………………………….. 174
7 Storing the backed up data………………………………………………………………………………. 175
7.1 Vaults …………………………………………………………………………………………………………………….175
7.1.1 Working with vaults …………………………………………………………………………………………………………………… 176
7.1.2 Centralized vaults ………………………………………………………………………………………………………………………. 177
7.1.3 Personal vaults ………………………………………………………………………………………………………………………….. 186
7.1.4 Changing the default cache folder for catalog files ………………………………………………………………………. 188
7.2 Acronis Secure Zone ………………………………………………………………………………………………..189
7.2.1 Creating Acronis Secure Zone …………………………………………………………………………………………………….. 190
7.2.2 Managing Acronis Secure Zone …………………………………………………………………………………………………… 192
5 Copyright © Acronis International GmbH, 2002-2014

7.3 Removable devices ………………………………………………………………………………………………….193
7.4 Tape devices …………………………………………………………………………………………………………..194
7.4.1 What is a tape device? ……………………………………………………………………………………………………………….. 194
7.4.2 Overview of tape support …………………………………………………………………………………………………………… 194
7.4.3 Getting started with a tape device ………………………………………………………………………………………………. 198
7.4.4 Tape management …………………………………………………………………………………………………………………….. 202
7.4.5 Vaults on tapes ………………………………………………………………………………………………………………………….. 210
7.4.6 Usage examples …………………………………………………………………………………………………………………………. 211
7.5 Storage nodes …………………………………………………………………………………………………………214
7.5.1 What is a storage node? …………………………………………………………………………………………………………….. 214
7.5.2 Supported types of storage ………………………………………………………………………………………………………… 215
7.5.3 Operations performed by storage nodes …………………………………………………………………………………….. 215
7.5.4 Getting started with a storage node ……………………………………………………………………………………………. 216
7.5.5 User privileges on a storage node ……………………………………………………………………………………………….. 217
7.5.6 Operations with storage nodes …………………………………………………………………………………………………… 218
7.5.7 Deduplication ……………………………………………………………………………………………………………………………. 226
8 Operations with archives and backups……………………………………………………………….. 233
8.1 Validating archives and backups ………………………………………………………………………………..233
8.1.1 Archive selection ……………………………………………………………………………………………………………………….. 234
8.1.2 Backup selection ………………………………………………………………………………………………………………………… 234
8.1.3 Vault selection …………………………………………………………………………………………………………………………… 234
8.1.4 Access credentials for source ……………………………………………………………………………………………………… 235
8.1.5 When to validate ……………………………………………………………………………………………………………………….. 236
8.1.6 Task credentials …………………………………………………………………………………………………………………………. 236
8.2 Exporting archives and backups ………………………………………………………………………………..237
8.2.1 Archive selection ……………………………………………………………………………………………………………………….. 239
8.2.2 Backup selection ………………………………………………………………………………………………………………………… 239
8.2.3 Access credentials for source ……………………………………………………………………………………………………… 240
8.2.4 Destination selection …………………………………………………………………………………………………………………. 240
8.2.5 Access credentials for destination ………………………………………………………………………………………………. 241
8.3 Mounting an image ………………………………………………………………………………………………….242
8.3.1 Archive selection ……………………………………………………………………………………………………………………….. 243
8.3.2 Backup selection ………………………………………………………………………………………………………………………… 243
8.3.3 Access credentials ……………………………………………………………………………………………………………………… 243
8.3.4 Volume selection ……………………………………………………………………………………………………………………….. 244
8.3.5 Managing mounted images………………………………………………………………………………………………………… 244
8.4 Operations available in vaults ……………………………………………………………………………………245
8.4.1 Operations with archives ……………………………………………………………………………………………………………. 245
8.4.2 Operations with backups ……………………………………………………………………………………………………………. 246
8.4.3 Converting a backup to full …………………………………………………………………………………………………………. 247
8.4.4 Deleting archives and backups ……………………………………………………………………………………………………. 247
9 Bootable media …………………………………………………………………………………………….. 249
9.1 How to create bootable media ………………………………………………………………………………….250
9.1.1 Linux-based bootable media ………………………………………………………………………………………………………. 250
9.1.2 WinPE-based bootable media …………………………………………………………………………………………………….. 254
9.2 Connecting to a machine booted from media ……………………………………………………………..256
9.3 Working under bootable media…………………………………………………………………………………257
9.3.1 Setting up a display mode ………………………………………………………………………………………………………….. 258
9.3.2 Configuring iSCSI and NDAS devices ……………………………………………………………………………………………. 258
9.4 List of commands and utilities available in Linux-based bootable media ………………………..259
6 Copyright © Acronis International GmbH, 2002-2014

9.5 Acronis Startup Recovery Manager ……………………………………………………………………………260
9.6 Acronis PXE Server …………………………………………………………………………………………………..261
9.6.1 Acronis PXE Server Installation ……………………………………………………………………………………………………. 261
9.6.2 Setting up a machine to boot from PXE ………………………………………………………………………………………. 261
9.6.3 Work across subnets ………………………………………………………………………………………………………………….. 262
10 Disk management …………………………………………………………………………………….. 263
10.1 Supported file systems …………………………………………………………………………………………….263
10.2 Basic precautions …………………………………………………………………………………………………….263
10.3 Running Acronis Disk Director Lite …………………………………………………………………………….264
10.4 Choosing the operating system for disk management ………………………………………………….264
10.5 «Disk management» view …………………………………………………………………………………………265
10.6 Disk operations ……………………………………………………………………………………………………….265
10.6.1 Disk initialization ………………………………………………………………………………………………………………………… 266
10.6.2 Basic disk cloning ……………………………………………………………………………………………………………………….. 266
10.6.3 Disk conversion: MBR to GPT ……………………………………………………………………………………………………… 268
10.6.4 Disk conversion: GPT to MBR ……………………………………………………………………………………………………… 269
10.6.5 Disk conversion: basic to dynamic ………………………………………………………………………………………………. 269
10.6.6 Disk conversion: dynamic to basic ………………………………………………………………………………………………. 270
10.6.7 Changing disk status …………………………………………………………………………………………………………………… 271
10.7 Volume operations ………………………………………………………………………………………………….271
10.7.1 Creating a volume ……………………………………………………………………………………………………………………… 271
10.7.2 Delete volume …………………………………………………………………………………………………………………………… 275
10.7.3 Set active volume ………………………………………………………………………………………………………………………. 276
10.7.4 Change volume letter ………………………………………………………………………………………………………………… 276
10.7.5 Change volume label ………………………………………………………………………………………………………………….. 276
10.7.6 Format volume ………………………………………………………………………………………………………………………….. 277
10.8 Pending operations ………………………………………………………………………………………………….278
11 Protecting applications with disk-level backup ……………………………………………….. 279
11.1 Backing up an application server ……………………………………………………………………………….279
11.1.1 Locating database files ……………………………………………………………………………………………………………….. 281
11.1.2 Truncating transaction logs ………………………………………………………………………………………………………… 284
11.1.3 Best practices when backing up application servers …………………………………………………………………….. 288
11.2 Recovering SQL Server data ………………………………………………………………………………………289
11.2.1 Recovering SQL Server databases from a disk backup ………………………………………………………………….. 290
11.2.2 Accessing SQL Server databases from a disk backup ……………………………………………………………………. 290
11.2.3 Attaching SQL Server databases …………………………………………………………………………………………………. 291
11.3 Recovering Exchange Server data ………………………………………………………………………………291
11.3.1 Recovering Exchange Server database files from a disk backup ……………………………………………………. 292
11.3.2 Mounting Exchange Server databases ………………………………………………………………………………………… 292
11.3.3 Granular recovery of mailboxes ………………………………………………………………………………………………….. 293
11.4 Recovering Active Directory data ………………………………………………………………………………293
11.4.1 Recovering a domain controller (other DCs are available) ……………………………………………………………. 293
11.4.2 Recovering a domain controller (no other DCs are available) ……………………………………………………….. 294
11.4.3 Restoring the Active Directory database ……………………………………………………………………………………… 295
11.4.4 Restoring accidentally deleted information …………………………………………………………………………………. 296
11.4.5 Avoiding a USN rollback ……………………………………………………………………………………………………………… 296
11.5 Recovering SharePoint data ……………………………………………………………………………………..298
11.5.1 Recovering a content database …………………………………………………………………………………………………… 298
11.5.2 Recovering configuration and service databases …………………………………………………………………………. 300
7 Copyright © Acronis International GmbH, 2002-2014

11.5.3 Recovering individual items………………………………………………………………………………………………………… 301
12 Protecting Microsoft SQL Server with single-pass backup …………………………………. 303
12.1 General information ………………………………………………………………………………………………..303
12.1.1 Agent for SQL …………………………………………………………………………………………………………………………….. 303
12.1.2 Supported operating systems …………………………………………………………………………………………………….. 304
12.1.3 Supported Microsoft SQL Server versions ……………………………………………………………………………………. 304
12.1.4 Permissions for SQL Server backup and recovery ………………………………………………………………………… 304
12.1.5 What else you need to know about single-pass backup ……………………………………………………………….. 305
12.2 Installation of Agent for SQL ……………………………………………………………………………………..306
12.3 Backing up Microsoft SQL server ……………………………………………………………………………….306
12.3.1 Single-pass backup settings ………………………………………………………………………………………………………… 307
12.4 Recovering Microsoft SQL Server data ……………………………………………………………………….308
12.4.1 Recovering SQL databases to instances ………………………………………………………………………………………. 308
12.4.2 Extracting the database files to folders ……………………………………………………………………………………….. 310
12.5 Mounting SQL Server databases from a single-pass backup ………………………………………….311
12.5.1 Unmounting mounted SQL Server databases ………………………………………………………………………………. 311
12.6 Protecting clustered SQL Server instances and AAG …………………………………………………….312
13 Protecting Microsoft Active Directory with single-pass backup ………………………….. 314
13.1 Agent for Active Directory ………………………………………………………………………………………..314
13.2 Supported operating systems ……………………………………………………………………………………314
13.3 Installation of Agent for Active Directory ……………………………………………………………………314
13.4 Backing up Microsoft Active Directory ……………………………………………………………………….315
13.5 Recovering Microsoft Active Directory ……………………………………………………………………….315
13.5.1 Re-promoting the domain controller ………………………………………………………………………………………….. 316
13.5.2 Recovering the Active Directory data from a single-pass backup ………………………………………………….. 316
14 Administering a managed machine ………………………………………………………………. 318
14.1 Backup plans and tasks …………………………………………………………………………………………….318
14.1.1 Actions on backup plans and tasks ……………………………………………………………………………………………… 318
14.1.2 States and statuses of backup plans and tasks …………………………………………………………………………….. 320
14.1.3 Export and import of backup plans ……………………………………………………………………………………………… 322
14.1.4 Deploying backup plans as files …………………………………………………………………………………………………… 326
14.1.5 Backup plan details ……………………………………………………………………………………………………………………. 327
14.1.6 Task/activity details ……………………………………………………………………………………………………………………. 328
14.2 Log …………………………………………………………………………………………………………………………328
14.2.1 Actions on log entries…………………………………………………………………………………………………………………. 329
14.2.2 Log entry details ………………………………………………………………………………………………………………………… 329
14.3 Alerts ……………………………………………………………………………………………………………………..330
14.4 Changing a license …………………………………………………………………………………………………..331
14.5 Collecting system information …………………………………………………………………………………..332
14.6 Adjusting machine options ……………………………………………………………………………………….332
14.6.1 Additional settings……………………………………………………………………………………………………………………… 332
14.6.2 Acronis Customer Experience Program ……………………………………………………………………………………….. 333
14.6.3 Alerts ………………………………………………………………………………………………………………………………………… 333
14.6.4 E-mail settings …………………………………………………………………………………………………………………………… 334
14.6.5 Event tracing ……………………………………………………………………………………………………………………………… 335
14.6.6 Log cleanup rules ……………………………………………………………………………………………………………………….. 337
14.6.7 Machine management……………………………………………………………………………………………………………….. 338
8 Copyright © Acronis International GmbH, 2002-2014

14.6.8 Cloud backup proxy ……………………………………………………………………………………………………………………. 338
15 Centralized management …………………………………………………………………………… 340
15.1 Understanding centralized management ……………………………………………………………………340
15.1.1 Basic concepts …………………………………………………………………………………………………………………………… 340
15.1.2 Privileges for centralized management ……………………………………………………………………………………….. 341
15.1.3 Communication between Acronis Backup components ……………………………………………………………….. 345
15.2 Back up now ……………………………………………………………………………………………………………349
15.3 Creating a centralized backup plan …………………………………………………………………………….350
15.3.1 Selecting data to back up ……………………………………………………………………………………………………………. 350
15.3.2 Selection rules for files and folders ……………………………………………………………………………………………… 352
15.3.3 Selection rules for volumes ………………………………………………………………………………………………………… 353
15.3.4 Backup location selection …………………………………………………………………………………………………………… 356
15.3.5 Centralized backup plan’s credentials …………………………………………………………………………………………. 357
15.3.6 What if a machine does not have data meeting the selection rules ………………………………………………. 358
15.4 Administering Acronis Backup Management Server …………………………………………………….359
15.4.1 Dashboard …………………………………………………………………………………………………………………………………. 359
15.4.2 Machines with agents ………………………………………………………………………………………………………………… 360
15.4.3 Virtual machines ………………………………………………………………………………………………………………………… 373
15.4.4 Backup plans and tasks ………………………………………………………………………………………………………………. 374
15.4.5 Storage nodes ……………………………………………………………………………………………………………………………. 376
15.4.6 Licenses …………………………………………………………………………………………………………………………………….. 376
15.4.7 Alerts ………………………………………………………………………………………………………………………………………… 378
15.4.8 Reporting ………………………………………………………………………………………………………………………………….. 380
15.4.9 Log ……………………………………………………………………………………………………………………………………………. 385
15.4.10 Management server options ………………………………………………………………………………………………………. 386
15.5 Configuring Acronis Backup components ……………………………………………………………………392
15.5.1 Parameters set through administrative template ………………………………………………………………………… 392
15.5.2 Parameters set through Windows registry ………………………………………………………………………………….. 406
16 Cloud backup …………………………………………………………………………………………… 408
16.1 Introduction to Acronis Cloud Backup ………………………………………………………………………..408
16.1.1 What is Acronis Cloud Backup? …………………………………………………………………………………………………… 408
16.1.2 What data can I back up and recover? ………………………………………………………………………………………… 408
16.1.3 How long will my backups be kept in the cloud storage? ……………………………………………………………… 408
16.1.4 How do I secure my data? ………………………………………………………………………………………………………….. 409
16.1.5 How do I back up virtual machines to the cloud storage? …………………………………………………………….. 409
16.1.6 Supported operating systems and virtualization products ……………………………………………………………. 410
16.1.7 Backup and recovery FAQ ………………………………………………………………………………………………………….. 411
16.1.8 Initial Seeding FAQ …………………………………………………………………………………………………………………….. 412
16.1.9 Large Scale Recovery FAQ ………………………………………………………………………………………………………….. 418
16.1.10 Subscription lifecycle FAQ ………………………………………………………………………………………………………….. 419
16.2 Where do I start? …………………………………………………………………………………………………….422
16.3 Choosing a subscription ……………………………………………………………………………………………422
16.4 Activating cloud backup subscriptions ……………………………………………………………………….423
16.4.1 Activating subscriptions in Acronis Backup Advanced ………………………………………………………………….. 423
16.4.2 Reassigning an activated subscription …………………………………………………………………………………………. 423
16.5 Configuring proxy settings ………………………………………………………………………………………..425
16.6 Retrieving files from the cloud storage by using a web browser ……………………………………425
16.7 Limitations of the cloud storage ………………………………………………………………………………..426
16.8 Terminology reference …………………………………………………………………………………………….427
9 Copyright © Acronis International GmbH, 2002-2014

17 Glossary ………………………………………………………………………………………………….. 430
10 Copyright © Acronis International GmbH, 2002-2014

1 Introducing Acronis Backup
1.1 What’s new in Update 5
Acronis Backup Advanced for VMware now uses improved backup technology for vSphere virtual
machines.
The most recent operating systems remain bootable when recovered to dissimilar hardware. To
simplify the recovery procedure, the Acronis Universal Restore setting is removed from the
recovery wizard. A separate Acronis Universal Restore tool is introduced for the cases when
installing a custom driver is required. The tool can be downloaded from your account on the
Acronis website.
The cataloging performance is improved.
Acronis Active Restore now works faster, by using a Read-Only Memory cache, and supports
Windows 8/8.1 and Windows Server 2012/2012R2.
It is now possible to contact Acronis technical support directly from the error dialog box.
1.2 What’s new in Update 4
Recovery of Exchange 2013 mailboxes and their contents from database backups to a Microsoft
Exchange Server.
Support for Red Hat Enterprise Virtualization (RHEV) 3.3.
Improved backup to Acronis Cloud Storage.
Improved backup to tapes.
An option to accelerate recovery of large files from tapes (p. 164).
Support for Linux kernel version 3.13.
Support for Debian 7.2, 7.4, and 7.5.
1.3 What’s new in Update 3
Rebranding
Acronis Backup & Recovery 11.5 is renamed to Acronis Backup. The advanced product editions
are now called the Acronis Backup Advanced suite.
Licensing
The Universal Restore feature is included in all Acronis Backup and Acronis Backup Advanced
licenses. The Deduplication feature is included in all Acronis Backup Advanced licenses. The
Universal Restore and Deduplication add-on licenses are deprecated.
Agent for Exchange, Agent for SQL, and Agent for Active Directory can be installed by using any
Acronis Backup Advanced license for virtual environments. No additional licenses are required.
Cloud backup
The Acronis Backup & Recovery Online service is renamed to Acronis Cloud Backup.
Cloud backup is now available for machines running Linux.
Cloud backup subscriptions for Servers and for Virtual Machines are deprecated. Users can
renew these subscriptions to volume subscriptions (p. 422).
11 Copyright © Acronis International GmbH, 2002-2014

OS support
Support for Windows MultiPoint Server 2012 and Windows Storage Server 2012 R2.
Support for Linux kernel up to version 3.12.
Support for Fedora 19, Fedora 20, and Debian 7.
1.4 What’s new in Update 2
Single-pass backup of Microsoft Active Directory data (p. 314)
Back up a domain controller to any backup destination including Acronis Online Backup
Storage.
Recover the entire domain controller without a risk of a USN rollback.
Extract Microsoft Active Directory data from a backup and replace the corrupted data in a
few simple steps.
Recovery of Exchange 2013 mailboxes and their contents from database backups to .pst files.
Support for volume subscriptions to Acronis Backup & Recovery Online (p. 422).
Support for WinPE 5.0.
Support for Ubuntu 13.10.
1.5 What’s new in Update 1
Improvements added in build 37975
Basic support for Windows 8.1 and Windows Server 2012 R2.
Installation of Acronis Backup & Recovery 11.5 in the trial mode without a license key.
Upgrade from a stand-alone product to the advanced platform without reinstalling the software.
Backup and recovery with Agent for ESX(i): VMware vSphere 5.5.
Backup and recovery from inside a guest system: Red Hat Enterprise Virtualization 3.2, Oracle
VM VirtualBox 4.x.
Support for Linux kernel up to version 3.9.
Support for Ubuntu 12.10, 13.04, and Fedora 18.
Added support for Microsoft Exchange Server 2013 (starting with build 37687)
Back up and recover Microsoft Exchange Server 2013 databases by using Agent for Exchange.
Backup and recovery of Exchange 2013 mailboxes (including mailbox recovery from database
backups) are not yet supported, but will be added in future updates.
Microsoft Exchange Server 2013 Cumulative Update 1 (CU1) and later are supported.
Single-pass backup of Microsoft SQL Server data (p. 303)
Use a single solution and a single backup plan for both disaster recovery and data protection
purposes.
Back up a machine and recover disks, volumes, files, or Microsoft SQL databases.
Recover Microsoft SQL databases directly to a running SQL Server instance, or extract them as
files onto a file system.
Truncate SQL Server logs after a backup.
Use any backup destination including Acronis Online Backup Storage.
Microsoft SQL Server 2012 is supported, as well as the previous Microsoft SQL Server versions.
12 Copyright © Acronis International GmbH, 2002-2014

Basic support for Windows 8 and Windows Server 2012 (p. 49)
Install Agent for Windows, Agent for SQL (single-pass), and management components in
Windows 8 and Windows Server 2012.
Boot a machine from bootable media that is based on WinPE 4.
Use bootable media on a machine where UEFI Secure Boot is enabled.
Back up and recover (without resize) volumes that have the ReFS file system or any data on these
volumes.
Back up storage spaces and recover them to the original location, to different storage spaces or
as ordinary disks.
Back up and recover (at a disk level) volumes where the Data Deduplication feature is enabled.
Virtualization
Support for new virtualization platforms:
Back up and recover with Agent for ESX(i): VMware vSphere 5.1.
Back up and recover with Agent for Hyper-V: Hyper-V 3.0.
Agent for Hyper-V cannot be installed in Windows 8, even though this operating system includes
the Hyper-V feature.
Back up and recover from inside a guest system: Oracle VM Server 3.0, Red Hat Enterprise
Virtualization 3.1.
Linux
Support for Oracle Linux 5.x, 6.x – both Unbreakable Enterprise Kernel and Red Hat Compatible
Kernel
Other
Completely disable backup cataloging (p. 103) on a managed machine, storage node, or the
management server.
Save a Disaster Recovery Plan (p. 112) to a local or network folder, in addition to sending it via
e-mail.
Enable VSS Full backup (p. 128) to truncate logs of VSS-aware applications after a disk-level
backup.
Boot a UEFI machine from bootable media that is based on 64-bit WinPE (p. 254).
Add the %description% variable (the description shown in system properties of a Windows
machine) to the e-mail notification subject (p. 113).
1.6 What’s new in Acronis Backup & Recovery 11.5
Expanding the backup and recovery capabilities in physical, virtual, and cloud environments, Acronis
has now added backup and recovery of the Microsoft Exchange Server data.
The following is a summary of the product’s new features and enhancements.
Backup and recovery of Microsoft Exchange Server data
Key features
Support for Microsoft Exchange Server 2010
Acronis Backup supports Microsoft Exchange Server 2010 as well as Microsoft Exchange Server
2003/2007.
13 Copyright © Acronis International GmbH, 2002-2014

Express full backup method
This method is based on monitoring changes of the Exchange database files. Once the initial full
backup is taken, all subsequent backups will only back up changes to this database without
needing to read the entire database file. Combining this method with the data deduplication
functionality makes it possible to back up large databases of 1TB or more during business hours
and even over WANs.
Exchange clustering support
Acronis Backup & Recovery 11.5 supports SCC, CCR and DAG cluster configurations. You can
choose to back up database replicas rather than active databases for minimal production impact.
If the Mailbox role is moved to another server due to a switchover or a failover, the software will
track all relocations of the data and safely back it up.
Continuous Data Protection
By using Continuous Data Protection, you can revert Exchange data to almost any point in time. If
the most recent transaction log file survived, you can revert Exchange data to the point of failure.
Backup destinations
The backups can be saved to any type of storage supported by Acronis Backup & Recovery 11.5,
except for Acronis Online Backup Storage, Acronis Secure Zone, and removable media.
Enhanced granular recovery
Browse Exchange Server database or mailbox backups and recover single or multiple mailboxes
or just specific e-mails. You can also recover calendar items, notes, tasks and journal entries.
New recovery destinations
Besides being able to recover data to a live Exchange server, you can recover
Exchange databases to regular disk folders.
E-mails and mailboxes to .pst files.
Virtualization
Support for UEFI-based virtual machines (p. 49) (applies to VMware ESXi 5 only)
Back up and recover virtual machines that use Unified Extensible Firmware Interface (UEFI).
Convert a UEFI-based physical machine (p. 165) to a virtual machine that uses the same boot
firmware.
File-level recovery
Recover individual files and folders to the agent’s local file system (in Windows only), a network
share, FTP or SFTP server.
Support for Changed Block Tracking (CBT) (applies to VMware ESX(i) 4.0 and later)
Perform faster incremental and differential backups of ESX(i) virtual machines by using the
Changed Block Tracking (CBT) feature of ESX(i).
Support for VM templates
Back up and recover virtual machine templates the same way as normal ESX(i) virtual machines.
Bare-metal recovery of Microsoft Hyper-V hosts
Back up an entire Hyper-V host along with its virtual machines without interrupting its normal
operation. You can then recover the host to the same or a different hardware.
Enhanced support for Red Hat Enterprise Virtualization environments
Back up and recover virtual machines running in a RHEV environment. Migrate physical machines
to the RHEV environment (P2V); and migrate a virtual machine from a different virtualization
platform to the RHEV platform (V2V).
14 Copyright © Acronis International GmbH, 2002-2014

Installation
Remote installation of Acronis Backup & Recovery 11.5 Agent for Linux.
Support for various types of storage
Acronis Online Backup Storage (only for machines running Windows and virtual machines)
Replicating or moving backups to Acronis Online Backup Storage (p. 101).
The Grandfather-Father-Son and Tower of Hanoi backup schemes are now available when
backing up to Acronis Online Backup Storage.
Tapes (only for advanced editions, now called Acronis Backup Advanced)
File-level recovery is possible from disk backups stored on tapes.
This feature can be enabled or disabled by setting the corresponding tape management option (p.
124).
Centralized management
Vault selection in Data catalog (p. 135)
You can select the vault to recover the data from, if the backed-up data has multiple replicas
stored in more than one managed vault.
Linux
Support for Linux kernel up to 3.6
Support for the following Linux distributions:
Ubuntu 11.04, 11.10, 12.04
Fedora 15, 16, 17
Debian 6
CentOS 6.x
Support for Unified Extensible Firmware Interface (UEFI) (p. 49)
Back up a UEFI-based machine running Linux and recover it to the same or a different UEFI-based
machine.
Bootable media
New Linux kernel version (3.4.5) in Linux-based bootable media. The new kernel makes for better
hardware support.
Usability
Support for 800×600 screen resolution
1.7 Acronis Backup components
Acronis Backup includes the following main types of components.
Components for a managed machine (agents)
These are applications that perform data backup, recovery and other operations on the machines
managed with Acronis Backup. Agents require a license to perform operations on each managed
machine.
15 Copyright © Acronis International GmbH, 2002-2014

Components for centralized management
These components, included in Acronis Backup Advanced, provide centralized management
capability. Usage of these components is not licensed.
Console
The console provides Graphical User Interface to other Acronis Backup components. Usage of the
console is not licensed.
Bootable media builder
With bootable media builder, you can create bootable media in order to use the agents and other
rescue utilities in a rescue environment.
Bootable Media Builder does not require a license if installed together with an agent. To use a media
builder on a machine without an agent, you need to enter the license key or have at least one license
on the license server. The license may be either available or assigned.
1.7.1 Agent for Windows
This agent enables disk-level and file-level data protection under Windows.
Disk backup
Disk-level data protection is based on backing up either a disk or a volume file system as a whole,
along with all the information necessary for the operating system to boot; or all the disk sectors using
the sector-by-sector approach (raw mode). A backup that contains a copy of a disk or a volume in a
packaged form is called a disk (volume) backup or a disk (volume) image. It is possible to recover
disks or volumes as a whole from such backup, as well as individual folders or files.
File backup
File-level data protection is based on backing up files and folders residing on the machine where the
agent is installed or on a network share. Files can be recovered to their original location or to another
place. It is possible to recover all files and folders that were backed up or select which of them to
recover.
Conversion to a virtual machine
Agent for Windows performs the conversion by recovering a disk backup to a new virtual machine of
any of the following types: VMware Workstation, Microsoft Virtual PC, Citrix XenServer Open Virtual
Appliance (OVA) or Red Hat Kernel-based Virtual Machine (KVM). Files of the fully configured and
operational machine will be placed in the folder you select. You can start the machine using the
respective virtualization software or prepare the machine files for further usage.
Disk management
Agent for Windows includes Acronis Disk Director Lite — a handy disk management utility. Disk
management operations, such as cloning disks; converting disks; creating, formatting and deleting
volumes; changing a disk partitioning style between MBR and GPT or changing a disk label, can be
performed either in the operating system or using bootable media.
1.7.2 Agent for Linux
This agent enables disk-level and file-level data protection under Linux.
16 Copyright © Acronis International GmbH, 2002-2014

Disk backup
Disk-level data protection is based on backing up either a disk or a volume file system as a whole,
along with all information necessary for the operating system to boot; or all the disk sectors using the
sector-by-sector approach (raw mode.) A backup that contains a copy of a disk or a volume in a
packaged form is called a disk (volume) backup or a disk (volume) image. It is possible to recover
disks or volumes as a whole from such backup, as well as individual folders or files.
File backup
File-level data protection is based on backing up files and directories residing on the machine where
the agent is installed or on a network share accessed using the smb or nfs protocol. Files can be
recovered to their original location or to another place. It is possible to recover all files and
directories that were backed up or select which of them to recover.
Conversion to a virtual machine
Agent for Linux performs the conversion by recovering a disk backup to a new virtual machine of any
of the following types: VMware Workstation, Microsoft Virtual PC, Citrix XenServer Open Virtual
Appliance (OVA) or Red Hat Kernel-based Virtual Machine (KVM). Files of the fully configured and
operational machine will be placed in the directory you select. You can start the machine using the
respective virtualization software or prepare the machine files for further usage.
1.7.3 Agent for VMware
Acronis Backup Agent for VMware enables backup and recovery of ESX(i) virtual machines without
installing agents into the guest systems. This backup method is known as agent-less backup or
backup at a hypervisor level. The agent can be imported or deployed to a VMware ESX(i) host as a
virtual appliance.
1.7.4 Agent for Hyper-V
Acronis Backup Agent for Hyper-V protects virtual machines residing on a Hyper-V virtualization
server. The agent allows for backing up virtual machines from the host without having to install
agents on each virtual machine.
Agent for Hyper-V can be installed in the following operating systems:
Windows Server 2008 (x64) with Hyper-V
Windows Server 2008 R2 with Hyper-V
Microsoft Hyper-V Server 2008/2008 R2
Windows Server 2012/2012 R2 with Hyper-V
Microsoft Hyper-V Server 2012/2012 R2
Agent for Hyper-V cannot be installed in Windows 8/8.1, even though this operating system includes
the Hyper-V feature.
1.7.5 Agent for SQL
Acronis Backup Agent for SQL enables you to create single-pass disk and application backups and to
recover Microsoft SQL databases from them. The databases can be recovered directly to a running
SQL Server instance or extracted to a folder on a file system.
17 Copyright © Acronis International GmbH, 2002-2014

The agent uses Microsoft VSS to ensure the consistency of the backed-up databases. After a
successful backup, the agent can truncate the SQL Server transaction log.
The agent is included in the setup program of Acronis Backup Advanced.
The agent is installed with Agent for Windows (p. 16) or on a machine where Agent for Windows is
already installed.
1.7.6 Agent for Active Directory
Acronis Backup Agent for Active Directory enables you to create single-pass disk and application
backups and to extract Microsoft Active Directory data from them to a folder on a file system.
The agent uses Microsoft VSS to ensure the consistency of the backed-up data.
The agent is included in the setup program of Acronis Backup Advanced.
The agent is installed with Agent for Windows (p. 16) or on a machine where Agent for Windows is
already installed.
1.7.7 Components for centralized management
This section lists the components that are included in Acronis Backup Advanced and provide the
centralized management capability. Besides these components, Acronis Backup Agents have to be
installed on all machines that need data protection.
1.7.7.1 Management Server
Acronis Backup Management Server is the central server that drives data protection within the
enterprise network. The management server provides the administrator with:
a single entry point to the Acronis Backup infrastructure
an easy way to protect data on numerous machines (p. 439) using centralized backup plans and
grouping
integration with VMware vCenter to discover virtual machines for protection
enterprise-wide monitoring and reporting functionality
built-in license management
the ability to create centralized vaults (p. 433) for storing enterprise backup archives (p. 431)
the ability to manage storage nodes (p. 441)
the centralized catalog (p. 434) of all data stored on the storage nodes.
If there are multiple management servers on the network, they operate independently, manage
different machines and use different centralized vaults for storing archives.
1.7.7.2 Storage Node
Acronis Backup Storage Node is a server designed to optimize the usage of various resources (such as
the corporate storage capacity, the network bandwidth, or the managed machines’ CPU load) which
are required to protect the enterprise data. This goal is achieved by organizing and managing the
locations that serve as dedicated storages of the enterprise backup archives (managed vaults).
18 Copyright © Acronis International GmbH, 2002-2014

The most important function of a storage node is deduplication (p. 226) of backups stored in its
vaults. This means that identical data will be backed up to this vault only once. This minimizes the
network usage during backup and storage space taken by the archives.
The storage nodes enable creating highly scalable and flexible, in terms of the hardware support,
storage infrastructure. Up to 50 storage nodes can be set up, each being able to manage up to 20
vaults.
The administrator controls the storage nodes centrally from the Acronis Backup Management Server
(p. 18). Direct console connection to a storage node is not possible.
1.7.7.3 Components for Remote Installation
These are Acronis component installation packages used by the management console (p. 19) for
installation on remote machines.
Components for Remote Installation need to be installed on the machine with the console or with
the management server (p. 18). During installation, the setup program saves the components in the
default location and saves this location path in the registry. As a result, the components are readily
available in the Remote Installation Wizard as «registered components».
1.7.7.4 PXE Server
Acronis PXE Server allows for booting machines into Acronis bootable components through the
network.
The network booting:
Eliminates the need to have a technician onsite to install the bootable media (p. 432) into the
system that has to be booted
During group operations, reduces the time required for booting multiple machines as compared
to using physical bootable media.
1.7.7.5 License Server
The server enables you to manage licenses of Acronis products and install the components that
require licenses.
You can install a license server as a separate component or use the one integrated into the
management server. The functionality of the license server (p. 376) is similar for both types of
installation.
1.7.8 Management Console
Acronis Backup Management Console is an administrative tool for access to Acronis Backup agents
and, in Acronis Backup Advanced, to Acronis Backup Management Server.
The console has two distributions: for installation on Windows and installation on Linux. While both
distributions enable connection to any Acronis Backup agent and Acronis Backup Management
Server, we recommend that you use the console for Windows if you have a choice between the two.
The console that installs on Linux has limited functionality:
Remote installation of Acronis Backup components is not available.
The Active Directory-related features, such as browsing the AD, are not available.
19 Copyright © Acronis International GmbH, 2002-2014

1.7.9 Bootable Media Builder
Acronis Bootable Media Builder is a dedicated tool for creating bootable media (p. 432). There are
two media builder distributions: for installation in Windows and installation in Linux.
The media builder that installs on Windows can create bootable media based on either Windows
Preinstallation Environment, or Linux kernel. The media builder that installs on Linux creates
bootable media based on Linux kernel.
1.7.10 Acronis Wake-on-LAN Proxy
Acronis Wake-on-LAN Proxy enables Acronis Backup Management Server to wake up for backup
machines located in another subnet. Acronis Wake-on-LAN Proxy installs on any server in the subnet
where the machines to be backed up are located.
1.8 About using the product in the trial mode
Before buying an Acronis Backup license, you may want to try the software. This can be done without
a license key.
To install the product in the trial mode, run the setup program locally or use the remote installation
functionality. Unattended installation and other ways of installation are not supported.
Limitations of the trial mode
When working under bootable media:
The disk management functionality is not available. You can try the user interface, but there is no
option to commit the changes.
The recovery functionality is available, but the backup functionality is not. To try the backup
functionality, install the software in the operating system.
Upgrading to the full mode
After the trial period expires, the product GUI displays a notification requesting you to specify or
obtain a license key.
To specify a license key, click Help > Change License (p. 331). Specifying the key by running the setup
program is not possible.
If you have activated a trial or purchased a subscription for the cloud backup service (p. 408), cloud
backup will be available until the subscription period expires, regardless of whether you specify a
license key.
1.9 Supported file systems
Acronis Backup can back up and recover the following file systems with the following limitations:
FAT16/32
NTFS
ReFS — volume recovery without the volume resize capability. Supported in Windows Server
2012/2012 R2 (p. 49) only.
Ext2/Ext3/Ext4
20 Copyright © Acronis International GmbH, 2002-2014

ReiserFS3 — particular files cannot be recovered from disk backups located on Acronis Backup
Storage Node
ReiserFS4 — volume recovery without the volume resize capability; particular files cannot be
recovered from disk backups located on Acronis Backup Storage Node
XFS — volume recovery without the volume resize capability; particular files cannot be recovered
from disk backups located on Acronis Backup Storage Node
JFS — particular files cannot be recovered from disk backups located on Acronis Backup Storage
Node
Linux SWAP
Acronis Backup can back up and recover corrupted or non-supported file systems using the
sector-by-sector approach.
1.10 Technical Support
Maintenance and Support Program
If you need assistance with your Acronis product, please go to http://www.acronis.com/support/
Product Updates
You can download the latest updates for all your registered Acronis software products from our
website at any time after logging into your Account (http://www.acronis.com/my) and registering
the product. See Registering Acronis Products at the Website (http://kb.acronis.com/content/4834)
and Acronis Website User Guide (http://kb.acronis.com/content/8128).
21 Copyright © Acronis International GmbH, 2002-2014

2 Getting started
Step 1. Installation
These brief installation instructions enable you to start using the product quickly. For the
complete description of installation methods and procedures, please refer to the Installation
documentation.
Before installation, make sure that:
Your hardware meets the system requirements.
You have license keys for the product of your choice.
You have the setup program. You can download it from the Acronis website.
Procedure
When following the instructions below, you can select more than one machine role.
1. Install the management server to be able to manage multiple machines.
a. Run the setup program and click Install Acronis Backup.
b. After accepting the terms of the license agreement, select the Centrally monitor and
configure the backing up of physical and virtual machines check box.
c. Type your license keys or import them from a text file.
d. Follow the on-screen instructions.
Details. The console will also be installed so that you can control the management server locally.
2. Install an agent on each machine you want to back up.
a. Run the setup program and click Install Acronis Backup.
b. After accepting the terms of the license agreement, select the Back up this machine’s data
check box.
c. Select I purchased a license or a subscription.
d. Click Add licenses, select the Use the following license server check box, and then enter the
name or IP address of the previously installed management server.
e. When prompted, register the machine on the management server.
f. Follow the on-screen instructions.
Details. The console will also be installed on each machine.
3. [Optional] Install the storage node on the machine that will serve as a storage for backups of
other machines.
a. Run the setup program and click Install Acronis Backup.
b. After accepting the terms of the license agreement, select the Store the backups of other
machines on this machine check box.
c. When prompted, register the storage node on the management server.
d. Follow the on-screen instructions.
4. [Optional] Install the console on a machine from which you prefer to operate, if this machine is
not the management server and does not have an agent.
a. Run the setup program and click Install Acronis Backup.
b. After accepting the terms of the license agreement, select the Connect to remote machines
check box.
22 Copyright © Acronis International GmbH, 2002-2014

c. Follow the on-screen instructions.
Start the console by selecting Acronis Backup from the Start menu.
Log in as root or log in as an ordinary user and then switch user as
required. Start the console with the command
/usr/sbin/acronis_console
1. Select Tools > Create bootable media in the menu.
2. Click Next in the welcome screen. Keep clicking Next until the list of components appears.
3. Proceed as described in «Linux-based bootable media» (p. 250).
Manage this machine
If the agent is installed on the same machine as the console.
Manage a remote machine
If the agent is installed on a remote machine.
Connect to a management server
To manage multiple physical and virtual machines.
Step 2. Running
Run Acronis Backup Management Console.
For understanding of the GUI elements see «Using the management console» (p. 25).
Step 3. Bootable media
To be able to recover an operating system that fails to start, or deploy it on bare metal, create
bootable media.
Step 4. Connection
Connect the console to the managed machine, or to the management server.
On the first page of the console, click one of the following:
Step 5. Backup
Back up now (p. 54)
Click Back up now to do a one-time backup in a few simple steps. The backup process will
start immediately after you perform the required steps.
To save your machine to a file:
Under Where to back up, click Location, and select the location where the backup will be
saved. Click OK to confirm your selection. Click OK at the bottom of the window to start the
backup.
23 Copyright © Acronis International GmbH, 2002-2014

Tip. Using the bootable media, you can do off-line («cold») backups in the same way as in the
operating system.
Create backup plan (p. 54)
Create a backup plan if you need a long-term backup strategy including backup schemes,
schedules and conditions, timely deleting of backups, or moving them to different locations.
Notes for users of Acronis Backup Advanced: When creating a backup plan on the
management server, you can:
— Select entire machines or groups of machines.
— Select different data items on each machine.
— Use selection rules to select the same data items on different machines.
This way, you will create a centralized backup plan to be deployed to the selected machines.
For more information, please refer to «Creating a centralized backup plan» (p. 350).
Step 6. Recovery
Recover (p. 131)
To recover data, you need to select the backed-up data and the destination the data will be
recovered to. As a result, a recovery task will be created.
Recovery of a disk or volume over a volume locked by the operating system requires a reboot.
After the recovery is completed, the recovered operating system goes online automatically.
If the machine fails to boot or if you need to recover a system to bare metal, boot the
machine using the bootable media and configure the recovery operation in the same way as
the recovery task.
Notes for users of Acronis Backup Advanced: You cannot control operations under bootable
media by using the management server. But you can disconnect the console from the server
and connect it to the machine booted from the media.
Step 7. Management
The Navigation pane (at the left part of the console) enables you to navigate across the product
views that are used for different administering purposes.
Use the Backup plans and tasks view to manage backup plans and tasks: run, edit, stop and
delete plans and tasks, view their states and progress.
Use the Alerts view to rapidly identify and solve the problems.
Use the Log view to browse the operations log.
The location where you store backup archives is called a vault (p. 442). Navigate to the
Vaults (p. 175) view to obtain information about your vaults. Navigate further to the specific
vault to view backups and their contents. You can also select the data to recover and perform
manual operations with backups (mounting, validating, deleting).
Administering the management server
Use the Machines with agents view to manage machines registered on the management
server. To effectively work with a large number of machines, organize them into groups (p. 360).
Use the Virtual machines (p. 373) view to manage supported virtualization environments.
24 Copyright © Acronis International GmbH, 2002-2014

If you opt for storing all backup archives in a single or a few networked locations, create
Contains the Navigation tree and the Shortcuts bar. Lets you navigate to the
different views. For details, see Navigation pane (p. 26).
Here you configure and monitor backup, recovery and other operations. The
main area displays views and action pages (p. 28) depending on the items
selected in the menu or Navigation tree.
centralized vaults in these locations. After a vault is created, you can view and administer its
content by selecting Vaults > Centralized > ‘Vault name’ in the Navigation pane.
The shortcut to the vault will be deployed to all the registered machines. The vault can be
specified as a backup destination in any backup plan created by you or by the registered
machines’ users.
Create centralized managed vaults on the storage node (p. 216) to be able to:
Search the Data catalog (p. 135) for the required version of backed up data in all of the
managed vaults.
Back up multiple machines to tape devices (p. 194) attached to the storage node.
Use deduplication (p. 226) to minimize storage space taken by the data and reduce network
load during backup.
2.1 Using the management console
As soon as the console connects to a managed machine (p. 439) or to a management server (p. 439),
the respective items appear across the console’s workspace (in the menu, in the main area with the
Welcome screen, or in the Navigation pane) enabling you to perform agent-specific or server-specific
operations.
Acronis Backup Management Console — Welcome screen
Key elements of the console workspace
25 Copyright © Acronis International GmbH, 2002-2014

Appears across the top of the program window. Lets you perform most of
operations available in Acronis Backup. The menu items change dynamically
depending on the item selected in the Navigation tree and the main area.
2.1.1 «Navigation» pane
The navigation pane includes the Navigation tree and the Shortcuts bar.
Navigation tree
The Navigation tree enables you to navigate across the program views. Views depend on whether
the console is connected to a managed machine or to the management server. In both cases, you can
choose between the Full list or the Short list of views. The Short list contains the most frequently
used views from the Full list.
Views for a managed machine
When the console is connected to a managed machine, the following views are available in the
navigation tree.
The Short list displays
[Machine name]. This is the root of the tree also called a Welcome screen. It displays the
name of the machine the console is currently connected to. Use this view for quick access to the
main operations, available on the managed machine.
Backup plans and tasks. Use this view to manage backup plans and tasks on the
managed machine: run, edit, stop and delete plans and tasks, view their progress.
Vaults. Use this view to manage personal vaults and archives stored in there, add new
vaults, rename and delete the existing ones, validate vaults, explore backup content, perform
operations on archives and backups, etc. If the machine is registered on the management
server, you can browse the centralized vaults and perform operations on the archives for
which you have the appropriate permissions.
Alerts. Use this view to examine warning messages for the managed machine.
The Full list additionally displays
Tape management. Use this view to perform operations with tapes.
Disk management. Use this view to perform operations on the machine’s hard disk
drives.
Log. Use this view to examine information on operations performed by the program on
the managed machine.
Mounted images. This node is displayed if at least one volume is mounted. Use this view
to manage mounted images.
Views for a management server
When the console is connected to a management server, the following views are available in the
navigation tree.
The Short list displays
[Management server name]. This is the root of the tree also called a Welcome screen.
Displays the name of the management server the console is currently connected to. Use this view
for quick access to the main operations, available on the management server.
26 Copyright © Acronis International GmbH, 2002-2014

Dashboard. Use this view to estimate at a glance whether the data is successfully
protected on the machines registered on the management server.
Machines with agents. Use this view to manage machines registered on the
management server.
Backup plans and tasks. Use this view to manage centralized backup plans and tasks on
the management server.
Vaults. Use this view to manage centralized vaults and archives stored in there: create
new centralized vaults, rename and delete the existing ones, assign vault users and
administrators, perform operations on archives and backups.
Alerts. Use this view to examine warning messages for the management server and all
the registered machines.
The Full list additionally displays
Data catalog. Use this view for quick search of the required version of backed up data in
the centralized managed vaults.
Virtual machines. Use this view to manage supported virtualization environments.
Storage nodes. Use this view to manage storage nodes. Add a storage node to be able to
create centralized vaults that will be managed by the node.
Tape management. Use this view to perform operations with tapes.
Licenses. Use this view manage licenses.
Reports. Use this view to generate reports.
Log. Use this view to examine the history of centralized management operations, as well
as the history of operations logged in the local logs of the registered machines and the
storage nodes.
Shortcuts bar
The Shortcuts bar appears under the navigation tree. It offers you an easy and convenient way of
connection to the machines in demand by adding them as shortcuts.
To add a shortcut to a machine
1. Connect the console to a managed machine.
2. In the navigation tree, right-click the machine’s name (a root element of the navigation tree), and
then select Create shortcut.
If the console and agent are installed on the same machine, the shortcut to this machine will be
added to the shortcuts bar automatically as Local machine [Machine name].
Operations with pane
How to expand/minimize panes
By default, the Navigation pane appears expanded. You might need to minimize the pane in order to
free some additional workspace. To do this, click the chevron ( ). The pane will be minimized and
the chevron changes its direction ( ). Click the chevron once again to expand the pane.
How to change the panes’ borders
1. Point to the pane’s border.
2. When the pointer becomes a double-headed arrow, drag the pointer to move the border.
27 Copyright © Acronis International GmbH, 2002-2014

2.1.2 Main area, views and action pages
The main area is a basic place where you work with the console. Here you create, edit and manage
backup plans, recovery tasks and perform other operations. The main area displays different views
and action pages according the items you select in the menu, or Navigation tree.
2.1.2.1 Views
A view appears on the main area when clicking any item in the Navigation tree in the Navigation
pane (p. 26).
«Log» view
Common way of working with views
Generally, every view contains a table of items, a table toolbar with buttons, and the Information
panel.
Use filtering and sorting (p. 28) capabilities to search the table for the item in question.
In the table, select the desired item.
In the information panel (collapsed by default), view the item’s details. To expand the panel, click
the arrow mark ( ).
Perform actions on the selected item. There are several ways of performing the same action on
selected items:
By clicking the buttons on the table toolbar.
By selecting the items in the Actions menu.
By right-clicking the item and selecting the operation in the context menu.
Sorting, filtering and configuring table items
The following is a guideline to sort, filter and configure table items in any view.
28 Copyright © Acronis International GmbH, 2002-2014

Click a column’s header to sort items in ascending order.
Click it once again to sort items in descending order.
Filter items by predefined
column value
In a field below the corresponding column’s header, select the required value
from the drop-down list.
Filter items by entered value
In a field below the corresponding column’s header, type a value.
As a result you will see the list of values, fully or just partly coincide with the
entered value.
Filter items by predefined
parameters
Click the appropriate buttons above the table.
For example, in the Log view, you can filter the log entries by event type
(Error, Warning, Information) or by the period when the event occurred (For
last 24 hours, For last week, For last three months, or For custom period).
Show or hide table columns
By default, any table has a fixed number of columns that are shown, others
are hidden. If required, you can hide the shown columns and show the hidden
ones.
To show or hide columns
1. Right-click any column header to open the context menu.
2. Click the items you want to be displayed/hidden.
2.1.2.2 Action pages
An action page appears in the main area when clicking any action item in the Actions menu. It
contains steps you need to perform in order to create and launch any task or a backup plan.
Action page — Create backup plan
29 Copyright © Acronis International GmbH, 2002-2014

Using controls and specifying settings
Use active controls to specify a backup plan or recovery task settings and parameters. By default,
such fields as credentials, options, comments, and some others are hidden. Most settings are
configured by clicking the respective Show… links. Others are selected from the drop-down list, or
typed manually in the page’s fields.
Action page — Controls
Acronis Backup remembers the changes you made on the action pages. For example, if you started to
create a backup plan, and then for any reason switched to another view without accomplishing the
plan creation, you can click the Back navigation button on the menu. Or, if you have passed several
steps forward, click the Down arrow and select the page where you started the plan creation from
the list. Thus, you can perform the remaining steps and accomplish the backup plan creation.
Navigation buttons
2.1.3 Console options
The console options define the way information is represented in the Graphical User Interface of
Acronis Backup.
To access the console options, select Options > Console options from the top menu.
2.1.3.1 Alert display options
The option specifies which alerts to show and which to hide in the Alerts view.
The preset is: All alerts.
To show (hide) alerts, select (clear) the check boxes next to the respective alert types.
2.1.3.2 Credentials cache
The option specifies whether to store the credentials entered while using the management console.
The preset is: Enabled.
30 Copyright © Acronis International GmbH, 2002-2014
Loading…
Здравствуйте, уважаемые читатели сайта www.remontcompa.ru! Меня зовут Роман Нахват и я представляю вашему вниманию несколько статей на тему резервного копирования данных в программе Acronis Backup 12.5. Данный программный продукт является отличным решением, позволяющим разворачивать систему резервного копирования как в среде предприятия, так и в облачном окружении. Acronis Backup 12.5 позволяет создавать резервные копии как отдельных файлов, так и образов дисков и в случае необходимости восстанавливать рабочие станции, физические и виртуальные серверы. Продукт может работать с облачным хранилищем Acronis Cloud, а также включает средства шифрования данных с использованием алгоритмов AES 128, 192, 256 и ГОСТ Р 34.12-2015. Acronis Backup 12.5 обеспечивает резервное копирование физических серверов Windows и Linux, виртуальных машин VMware и Microsoft Hyper-V, приложений Microsoft Exchange, Microsoft Office 365, SQL Server, Oracle Database, SharePoint, локальных и удалённых рабочих станций, мобильных устройств Windows, iPhone, iPad, Android. Управление всей инфраструктурой резервного копирования осуществляется централизованно через веб-консоль в браузере.
Acronis Backup 12.5 или надёжное решение для резервного копирования данных. Часть 1. Скачивание, установка продукта. Добавление удалённой машины на сервер управления через веб-интерфейс
Как уже было сказано выше, Acronis Backup 12.5 поддерживает два способа развертывания: в локальной среде и в облаке. Основное различие между ними заключается в месте размещения сервера управления Acronis Backup. Сервер управления Acronis Backup — это центр управления всеми резервными копиями. При локальном развертывании он устанавливается в локальной сети, а при облачном — в одном из центров обработки данных Acronis. Веб-интерфейс этого сервера называется консолью резервного копирования. При обоих типах развертывания необходимо установить агент резервного копирования на каждой машине, резервное копирование которой требуется выполнять. В данной части статьи мы выполним локальное развертывание Acronis Backup 12.5 на машину с предустановленной Windows Server 2008 R2 Enterprise и добавим на сервер управления удалённую машину с операционной системой Windows 8.1
Начнём нашу работу со скачивания установочного файла Acronis Backup 12.5. Для этого переходим по адресу
и вводим адрес эл.почты и пароль и входим в учётную запись Acronis
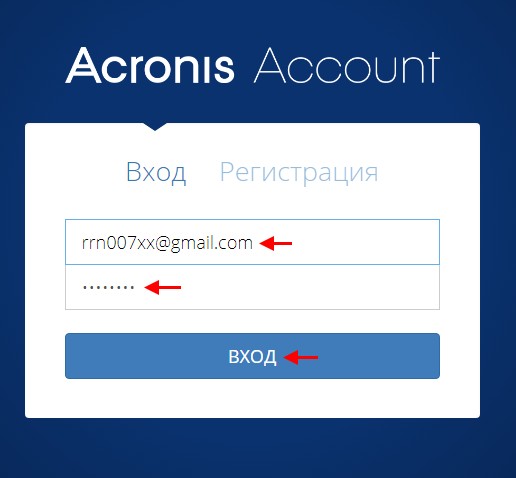
Переходим на вкладку Продукты и выполняем скачивание Acronis Backup 12.5, нажав Загрузить Acronis Backup
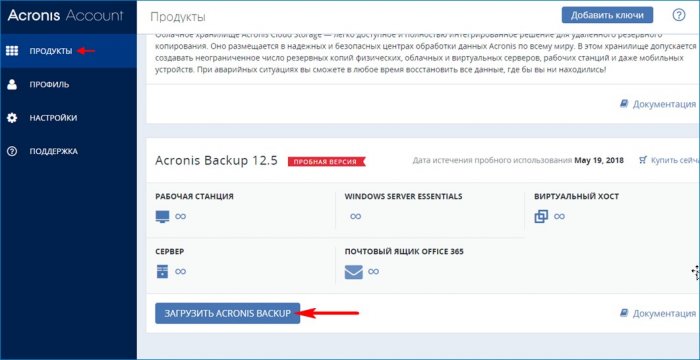
Имеется возможность скачать как веб-установщик Acronis Backup 12.5, так и установочный файл для автономной установки. Выбираем Другие варианты загрузки
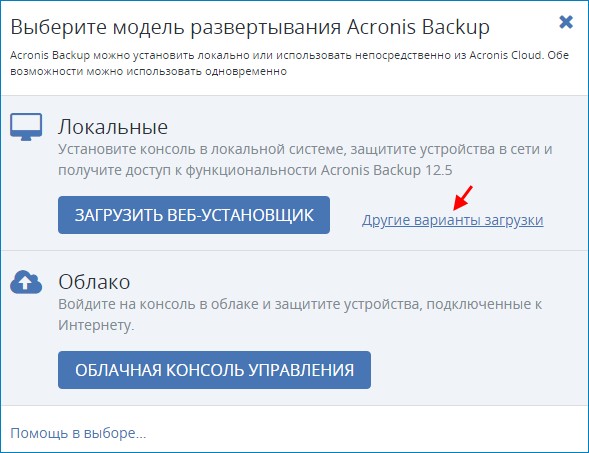
Скачиваем файлы для автономной Acronis Backup 12.5 для 32 и 64 битных ОС
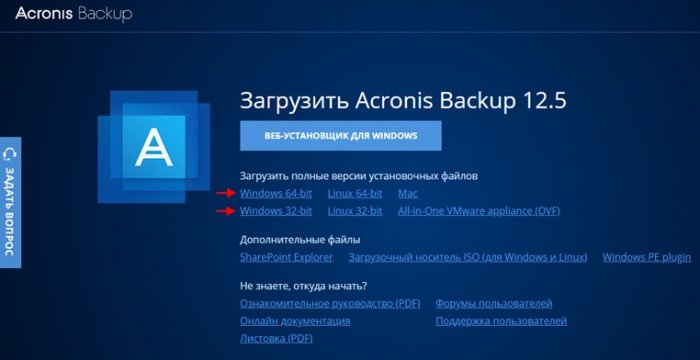
Скачанные установочные файлы Acronis Backup 12.5
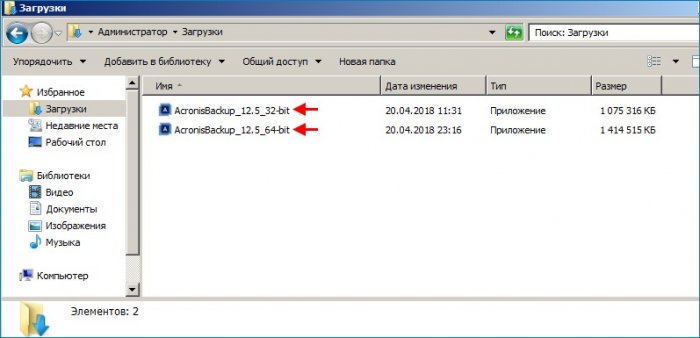
Так как в Acronis Backup 12.5 управление инфраструктурой резервного копирования осуществляется через веб-консоль, необходимо убедиться в наличии соответствующей версии браузера
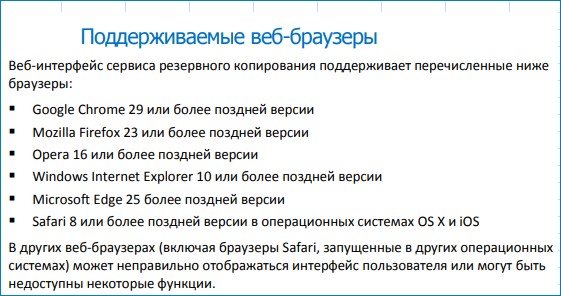
Сервер управления может быть установлен на машины со следующими ОС:

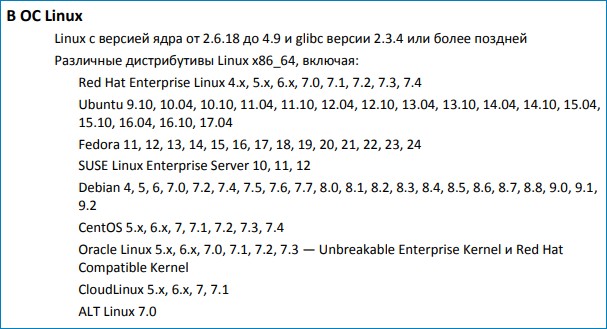
Агенты представляют собой приложения, которые выполняют резервное копирование данных, их восстановление и другие операции на машинах под управлением Acronis Backup.
Агенты Acronis Backup 12.5 поддерживают операционные системы, представленные ниже.
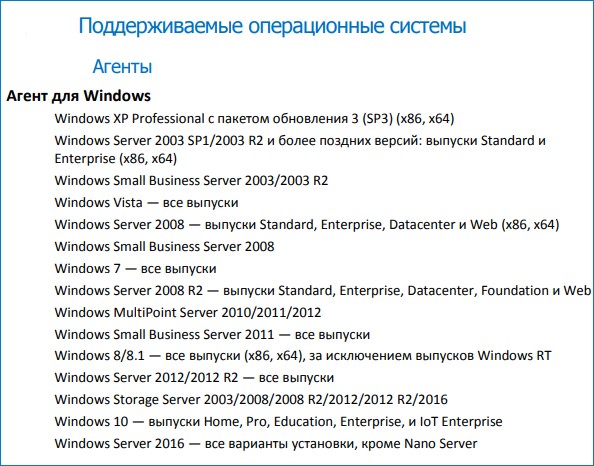
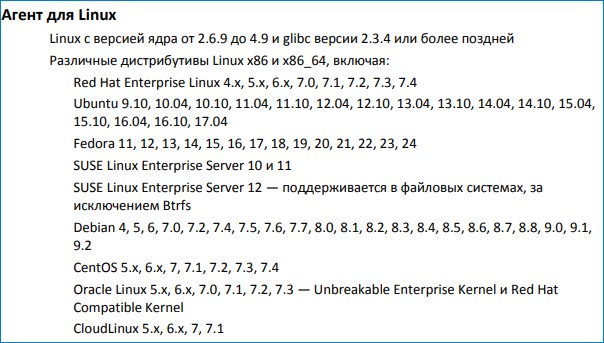
Выполним установку Acronis Backup 12.5 на машину с Windows Server 2008 R2 Enterprise
Принимаем лицензионное соглашение. Далее
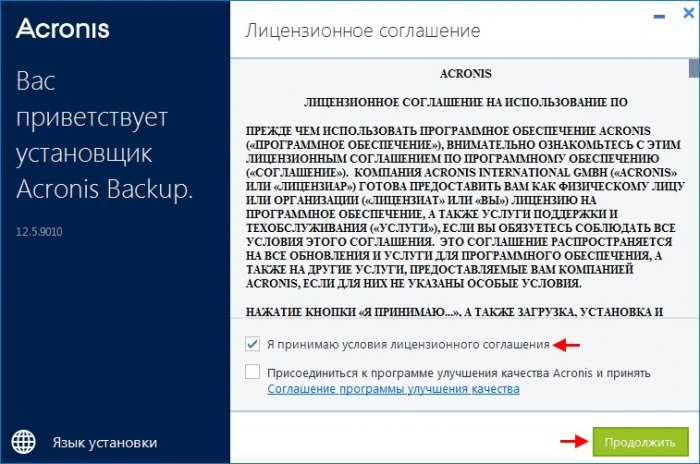
Выбираем Установить агент резервного копирования и сервер управления
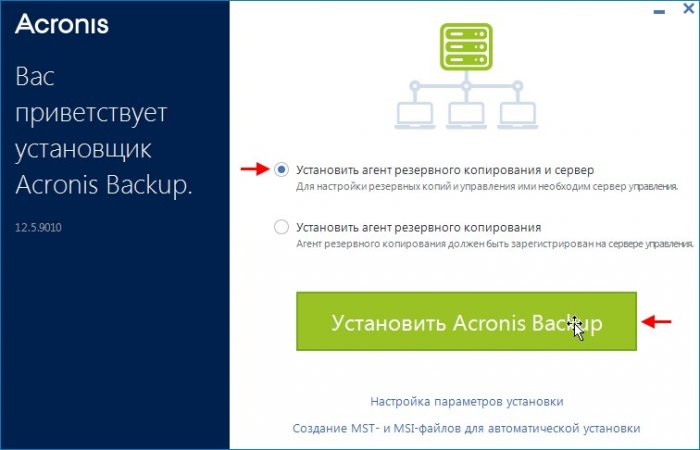
Процесс установки Acronis Backup 12.5
Установка Acronis Backup 12.5 завершена
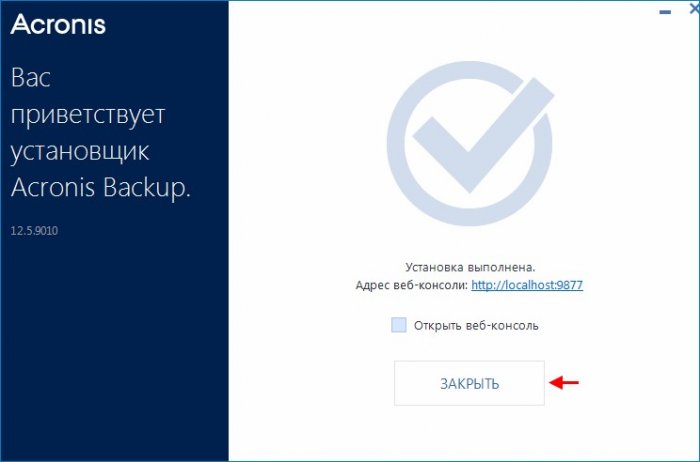
Запустим веб-консоль управления резервными копиями, щёлкнув по ярлыку Acronis Backup 12.5
Вводим имя пользователя и пароль и входим в консоль управления резервными копиями
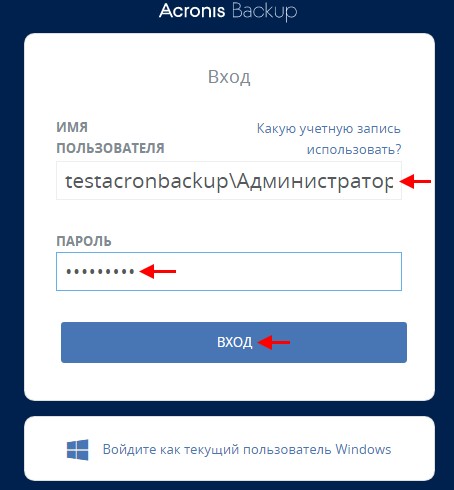
После ввода имени пользователя и пароля перед нами откроется консоль резервного копирования Acronis Backup 12.5
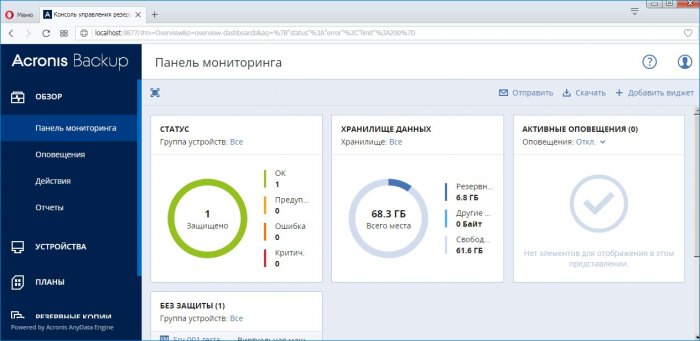
Перейдём на вкладку Все машины и видим, что в консоли управления резервными копиями присутствует только одна машина с именем Srv-001.testacronbackup.com
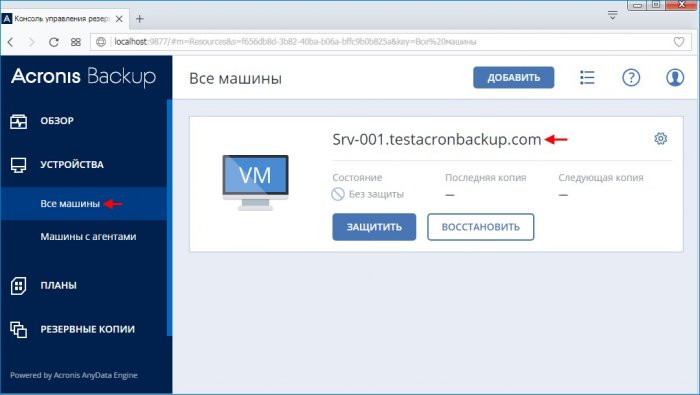
У нас также есть удалённая машина с предустановленной ОС Windows 8.1 c именем PC-001.testacronbackup.com
Добавим машину c именем PC-001.testacronbackup.com на сервер управления, располагающийся на машине с именем Srv-001.testacronbackup.com
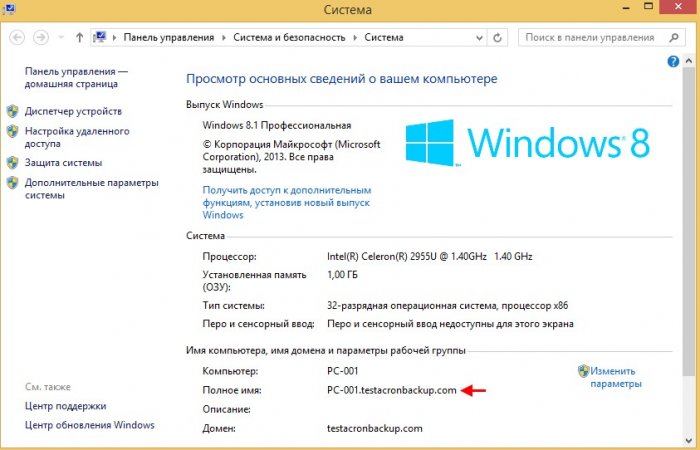
На вкладке Все машины жмём Добавить
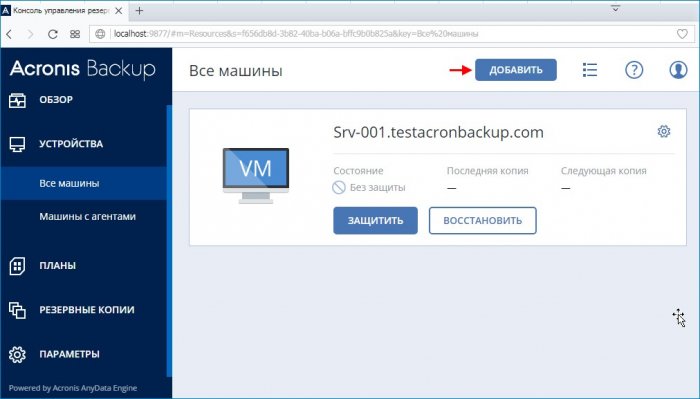
Выбираем Рабочая станция Windows
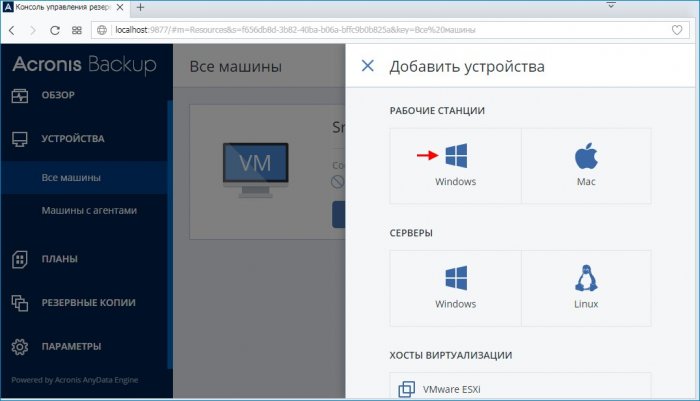
Жмём Обзор
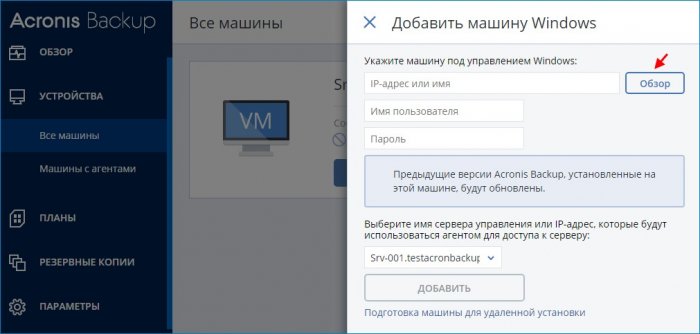
Выделяем машину с именем PC-001 и жмём Готово
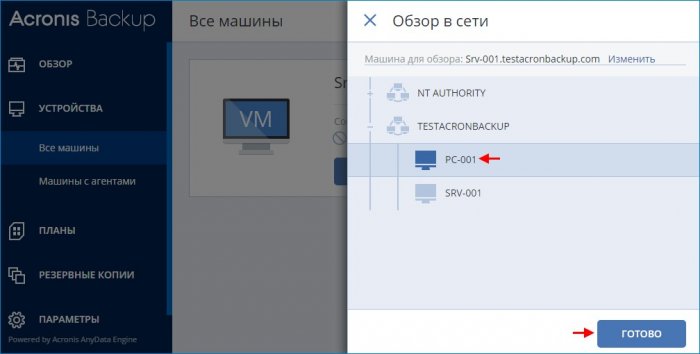
Указываем пользователя с правами администратора и его пароль на машине PC-001.testacronbackup.com и жмём Добавить
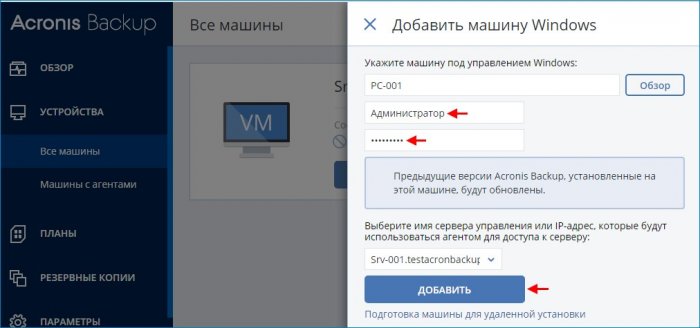
ПРИМЕНИМО К СЛЕДУЮЩИМ ПРОДУКТАМ
Acronis Backup
Version 11.5 Update 4
Для Windows Server
РУКОВОДСТВО ПОЛЬЗОВАТЕЛЯ
8
Copyright © Acronis International GmbH, 2002-2014
1 Знакомство с Acronis Backup
1.1 Что нового в обновлении 4
Улучшенное резервное копирование в хранилище Acronis Cloud Storage.
1.2 Что нового в обновлении 3
Ребрендинг
Продукт Acronis Backup & Recovery 11.5 переименован в Acronis Backup.
Лицензирование
Компонент Universal Restore включен во все лицензии Acronis Backup. Дополнительная
лицензия на Universal Restore более не используется.
Облачное резервное копирование
Служба резервного копирования и восстановления Acronis Backup & Recovery Online
переименована в Acronis Cloud Backup.
Подписки на резервное копирование в облачное хранилище для серверов и виртуальных
машин больше не используются. Пользователи могут продлевать их на условиях
корпоративных подписок (стр. 277).
Техническая поддержка операционных систем
Поддержка Windows MultiPoint Server 2012 и Windows Storage Server 2012 R2.
1.3 Что нового в обновлении 2
Поддержка корпоративных подписок на Acronis Backup & Recovery Online (стр. 277).
Поддержка WinPE 5.0.
1.4 Что нового в обновлении 1
Улучшения в сборке 37975
Базовая поддержка Windows 8.1 и Windows Server 2012 R2.
Установка продукта Acronis Backup & Recovery 11.5 в пробном режиме без лицензионного
ключа.
Переход с автономного выпуска продукта на расширенный без переустановки
программного обеспечения.
Базовая поддержка Windows 8 и Windows Server 2012 (стр. 34)
Установка Acronis Backup & Recovery 11.5 в Windows 8 и Windows Server 2012.
Загрузка машины с загрузочного носителя на основе WinPE 4.
Используйте загрузочный носитель на машине с включенной безопасной загрузкой UEFI.
Резервное копирование и восстановление (без изменения размера) томов с файловой
системой ReFS или любых данных с этих томов.
Резервное копирование дисковых пространств и их восстановление в исходном
расположении, в других дисковых пространствах или в качестве обычных дисков.
9
Copyright © Acronis International GmbH, 2002-2014
Резервное копирование и восстановление (на уровне дисков) томов с включенной
функцией дедупликации данных.
Другое
Полное отключение каталогизации резервных копий (стр. 87).
Сохранение плана аварийного восстановления (стр. 95) в локальной или сетевой папке,
помимо отправки по электронной почте.
Включение полного резервного копирования VSS (стр. 110) для усечения журналов
приложений с поддержкой VSS после резервного копирования на уровне дисков.
Загрузка машины с интерфейсом UEFI с 64-разрядного загрузочного носителя на основе
WinPE (стр. 194).
Добавление переменной %description% (описание, отображаемое в системных свойствах
машины с ОС Windows) к теме уведомления по электронной почте (стр. 96).
1.5 Что нового в Acronis Backup & Recovery 11.5
Ниже представлена сводка новых возможностей и усовершенствований продукта.
Поддержка разных типов хранилищ
в онлайн-хранилище резервных копий Acronis
Репликация или перемещение резервных копий в хранилище Acronis Online Backup (стр.
86).
Схемы резервного копирования «дед-отец-сын» и «Ханойская башня» теперь доступны для
резервного копирования в хранилище Acronis Online Backup.
Загрузочный носитель
Новая версия ядра Linux (3.4.5) в загрузочном носителе на основе Linux. Новое ядро
обеспечивает лучшую поддержку оборудования.
Удобство в использовании
Поддержка экранов с разрешением 800×600.
1.6 Компоненты Acronis Backup
В этом разделе содержится список компонентов Acronis Backup и краткое описание их функций.
Компоненты для управляемой машины (агенты)
Это приложения, которые выполняют резервное копирование данных, их восстановление и
другие операции на машинах под управлением Acronis Backup. Агентам необходима лицензия
для выполнения операций на каждой управляемой машине.
Консоль
Консоль обеспечивает графический интерфейс пользователя для работы с агентами.
Использование консоли не лицензируется. Консоль устанавливается вместе с агентом, и
отсоединить ее от него невозможно.
10
Copyright © Acronis International GmbH, 2002-2014
Мастер создания загрузочных носителей
Мастер создания загрузочных носителей создает загрузочные носители, которые позволяют
использовать агенты и другие утилиты в среде аварийного восстановления. Мастер создания
загрузочных носителей устанавливается вместе с агентом.
1.6.1 Агент для Windows
Этот агент обеспечивает защиту данных на уровне дисков и уровне файлов в ОС Windows.
Резервная копия диска
Защита данных на уровне дисков основана на резервном копировании или диска, или
файловой системы тома в целом вместе со всей информацией, требуемой для загрузки ОС, или
всех секторов диска с помощью посекторного метода (режима). Резервная копия, содержащая
копию диска или тома в упакованной форме, называется резервной копией диска (тома) или
образом диска (тома). Из такой резервной копии можно восстанавливать диски или тома
целиком, а также отдельные папки и файлы.
Резервная копия файлов
Защита данных на уровне файлов основана на резервном копировании файлов и папок с
машины, на которой установлен агент, или из общего сетевого ресурса. Файлы можно
восстановить в их прежнее расположение или другое место. Возможно восстановление всех
сохраненных файлов и папок, а также выборочное восстановление.
Другие операции
Преобразование в виртуальную машину
Агент для Windows выполняет преобразование, восстанавливая резервную копию диска на
новую виртуальную машину любого из следующих типов: VMware Workstation, Microsoft Virtual
PC, Citrix XenServer Open Virtual Appliance (OVA) или виртуальная машина на основе ядра (KVM)
Red Hat. Файлы полностью настроенной и готовой к работе машины будут помещены в
выбранную папку. Можно запустить машину с помощью соответствующего ПО виртуализации
или подготовить файлы машины к дальнейшему использованию.
Восстановление на отличающемся оборудовании
Функцию восстановления можно использовать для восстановления данных на отличающемся
оборудовании на машинах с установленным агентом и создания загрузочных носителей для
этого оборудования. Acronis Universal Restore учитывает различия в устройствах, критических
для запуска операционной системы (контроллерах памяти, системных платах или наборе
микросхем).
Управление дисками
Агент для Windows включает Acronis Disk Director Lite — удобную утилиту управления дисками.
Операции по управлению дисками (клонирование и преобразование дисков, создание,
форматирование и удаление томов, изменение стиля разделов диска с MBR на GPT и обратно
или изменение метки диска) могут быть выполнены или в ОС, или с помощью загрузочных
носителей.
Нажмите на кнопку для помощи
< 1 min read
Table of Contents
- Step 4
- Step 5
- Step 6
- Step 7
This guide will help you with the installation of Acronis Cyber Backup inside your Windows Server machine.
Step 1
Please login inside your Acronis Portal
Step 2
Go to Devices on the menu located on the left side and choose Window Server device:

Step 3
Download the Acronis Cyber Backup agent and run it on your Window Server

Step 4 #
Register your agent by clicking Show registration info
Step 5 #
Copy the REG code and paste it to Acronis Cyber Backup

Step 6 #
Select now your server inside the Acronis Cyber Backup portal in the Device section:

Step 7 #
Create now your desired backup plan and apply it to your server.
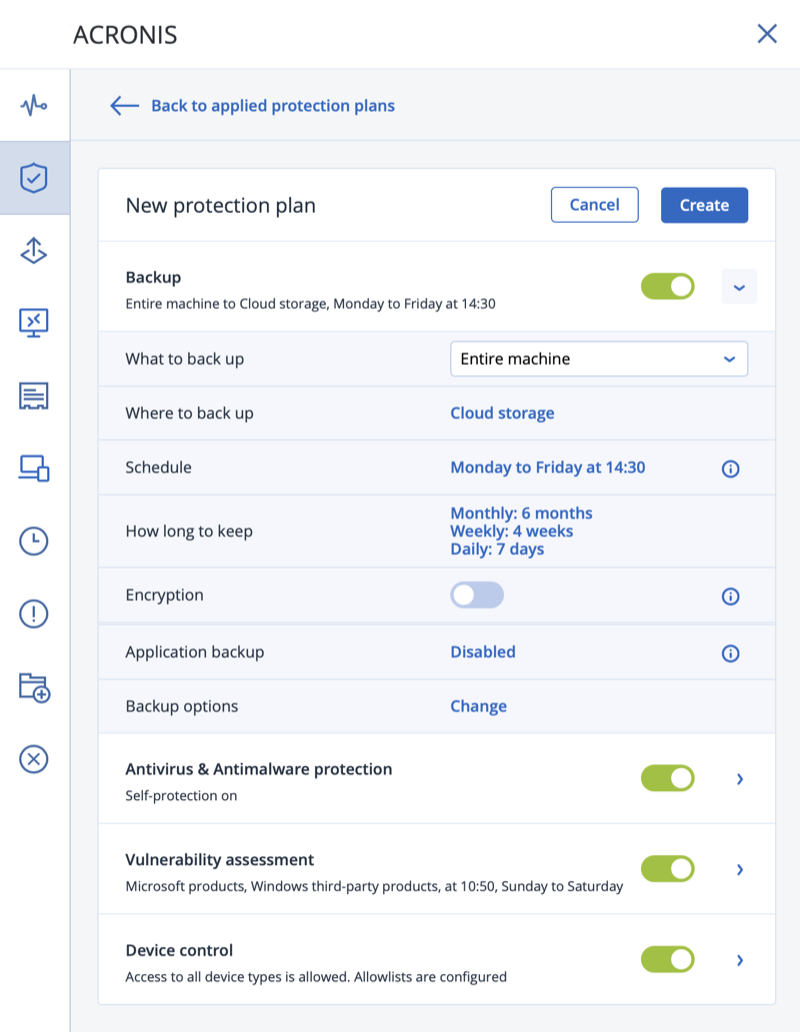
В этой статье я пошагово опишу работу сервиса резервного копирования Acronis Backup Cloud (ранее известный как «Acronis Backup as a Service»), разработанный инженерами компании Acronis. Расскажу, что представляет собой «бекапы как сервис» изнутри, и как все это работает. Перехожу непосредственно к описанию работы самого сервиса.

Как устроен сервис
Сервис состоит из серверной и клиентской части. Используются «агентная» и «безагентная» технологии, в зависимости от инфраструктуры. На клиентском компьютере или хост-сервере виртуализации устанавливается агент, задачей которого является соединение клиентского компьютера/хоста с сервером Acronis Backup Cloud и осуществление задач резервного копирования и восстановления.
Про клиентскую часть
Вот какие Агенты (Клиенты) разработаны:
- Клиенты резервного копирования для Windows, Linux и Mac – отвечают за резервное копирование данных на машинах под управлением ОС Windows/Linux/Mac.
- Клиент резервного копирования для VMware – выполняет резервное копирование виртуальных машин на платформе VMware vSphere (ESX/ESXi) без установки соответствующих клиентов в гостевых системах. Этот клиент устанавливается на «виндовых» машинах с доступом к vCenter Server и хранилищу, в котором сохраняются резервные копии виртуальных машин.
- Клиент резервного копирования для Hyper-V – выполняет резервное копирование виртуальных машин на платформе MS Hyper-V без установки соответствующих клиентов в гостевых системах. Этот клиент устанавливается на хосте Hyper-V.
- Клиент резервного копирования для MS Exchange Server – поддерживаются версии Microsoft Exchange Server 2003, 2007/10, 20013.
- Клиент резервного копирования для MS SQL Server – поддерживаются версии Microsoft SQL Server 2005, 2008, 2008 R2, 2012, 2014.
Про серверную часть
Давайте рассмотрим, как устроена серверная часть. Серверная часть сервиса состоит из двух компонентов – управление системой и хранение резервных копий.
Управляющий компонент доступен через интернет и позволяет с помощью веб-браузера управлять резервным копированием удаленных машин и уже созданными резервными копиями; создавать, редактировать и удалять политики резервного копирования и политики хранения; настраивать шифрование создаваемых резервных копий, используя AES или ГОСТ стандарт, и в случае необходимости сохранять отдельные резервные копии локально; следить за состоянием удаленных машин; восстанавливать отдельные файлы/папки, диски/разделы или же целиком машины из облака прямо на «голое железо». Одной из наиболее отличительных и полезных возможностей является создание иерархии подчиненных администраторских и пользовательских учетных записей, в рамках которых распределяются доступ к данным и удаленным машинам. Администраторы могут следить за состоянием подчиненных учетных записей и в случае необходимости оказывать помощь.
Компонент хранения позволяет развернуть масштабируемое, дешевое и при этом надежное хранилище данных. Хранилище для резервных копий состоит из группы серверов, на которые записываются клиентские данные. Для обеспечения достаточного уровня надежности всех хранимых пользовательских данных каждый входящий файл разбивается на «K» блоков и затем добавляются «N-K» (где N – некоторое число большее K) блоков избыточности с использованием алгоритма коррекции ошибок Рида-Соломона. Все блоки хранятся независимо друг от друга, и сохранность любых «K» блоков из записанных «N» гарантирует восстановление хранящихся пользовательских данных.

Серверные роли
Система хранения данных Acronis строится на физических серверах. Но при этом серверные роли назначаются непосредственно дискам.
Существуют три серверные роли: Сервер Метаданных (Metadata Server (MDS)), Сервер Хранилища (Storage Server (STS)) и Front-end Server (FES).
Сервер Метаданных отвечает за хранение информации о фрагментах, на которые разбит файл, и расположение этих фрагментов на серверах. Это наиболее критический компонент системы.
Для обеспечения высокого уровня доступности и отказоустойчивости хранилища рекомендуется иметь несколько серверов с ролью MDS. Один из серверов становится основным, и метаданные периодически реплицируются с остальными серверами с ролью MDS.
Кроме того, на каждый сервер, имеющий роль MDS, также устанавливается и компонент управления системой (MGMT). В случае если основной сервер MDS перестает работать, компонент управления системой автоматически включается на другом сервере с ролью MDS, таким образом, web-консоль управления хранилищем постоянно доступна.
Сервер Хранилища (STS) предназначен для хранения фрагментов данных.
Front-End сервер позволяет клиентам сервиса Acronis Backup Cloud получать доступ к хранилищу и осуществлять передачу данных между пользовательской стороной и хранилищем данных Acronis.
Работа с сервисом
А теперь рассмотрим, как это работает на практике. Администраторам компании IT-Lite (поставщика услуги) и компаний конечных пользователей предоставляется доступ к управлению сервисом через web-консоль. На приведенной ниже диаграмме показана стандартная архитектура сервиса резервного копирования. Синие стрелки обозначают взаимодействие между компонентами программного обеспечения. Черные стрелки показывают, как администраторы и конечные пользователи получают доступ к сервису резервного копирования.

Права огласите, пожалуйста!
Администраторы IT-Lite имеют доступ к управлению группами и учетными записями пользователей.

Администраторы компаний конечных пользователей имеют права, позволяющие управлять пользователями, находящимися только в их группе! А конечные пользователи в свою очередь получают доступ к консоли, в которой можно добавлять компьютеры и создавать расписание автоматического резервного копирования. Сервис интегрирован с сайтом поставщика услуги, что позволяет пользователям сразу же по заполнению формы на этой странице проходить автоматическую регистрацию.

Acronis Backup Cloud глазами пользователя
Для конечного пользователя работа с системой проста и наглядна. После создания учетной записи пользователя и входа в Личный кабинет необходимо указать компьютер, для которого будет сконфигурировано задание на резервное копирование. Для этого нужно нажать на «+» и выбрать ОС, на которую будет установлен агент. Следующим шагом нужно сконфигурировать задание для резервного копирования.

В консоли управления пользователя отображаются все Задачи, которые выполнялись ранее для конкретного компьютера, помимо этого есть функция «Создать новую Задачу» и «Восстановить данные из облака». Кроме того, доступен просмотр текущего статуса бэкапа для заданного компьютера.

Сравнение с локальными бекапами
Данные пользователей сервиса BaaS хранятся на серверах, которые расположены в сертифицированном дата-центре класса TIER-3.
Благодаря используемой архитектуре обеспечивается защита от сбоя на уровне отдельных серверов и отдельных дисков, что, заметим, невозможно при использовании RAID-массивов, которые используются для создания отказоустойчивых хранилищ. В системе также используется полная проверка целостности данных. Уровень избыточности конфигурируется в консоли управления хранилища. Используемый при разработке хранилища самовосстанавливающийся дизайн позволяет избежать типичных для RAID-массивов потерь в производительности системы.
В случае выхода из строя одного из дисков или даже целого сервера система произведёт автоматическую перебалансировку, что позволяет избежать немедленной замены вышедших из строя компонентов.

Бэкапить локально – да, быстрее, но менее надежно
Забыл упомянуть про особенность использования бекапов как сервиса – в случае возникновения аварийной ситуации необходимо восстанавливать компьютер (виртуальную машину) целиком. Да, действительно, если сравнивать скорость восстановления сервера, то локальный бекап, конечно, сделать быстрее. Но в данном случае надо сделать выбор – либо в пользу скорости, но без гарантии от косяков, либо в пользу надежности решения, но придется немного пожертвовать скоростью.
Подытожу так – я пришла к выводу, что вопрос о надежности/простоте локальных бекапов и использования BaaS, – это, скорее, вопрос ценностный. Тот, кому информация действительно ценна, скорее выберет сервис, а остальные – первый вариант. Но это уже мое личное мнение, непосредственно к делу не относится.
Резюме
Резюмируя все изложенное выше, хотела бы добавить, что, как говорится, лучше один раз увидеть, чем сто раз услышать. Поэтому лучше поработать с сервисом самостоятельно и сделать свои выводы, благо есть бесплатный тест.