A problem has been detected and windows has been shut down что делать при запуске

Table of contents

  • How to Fix “A Problem Has Been Detected and Windows Has Been Shut Down…”
    • Method 1: Checking your HDD
    • Method 2: Inspect recently installed hardware
    • Method 3: Updating your drivers
    • Method 4: Resetting Windows 10
  • A Problem Has Been Detected and Windows Has Been Shut Down: Solved

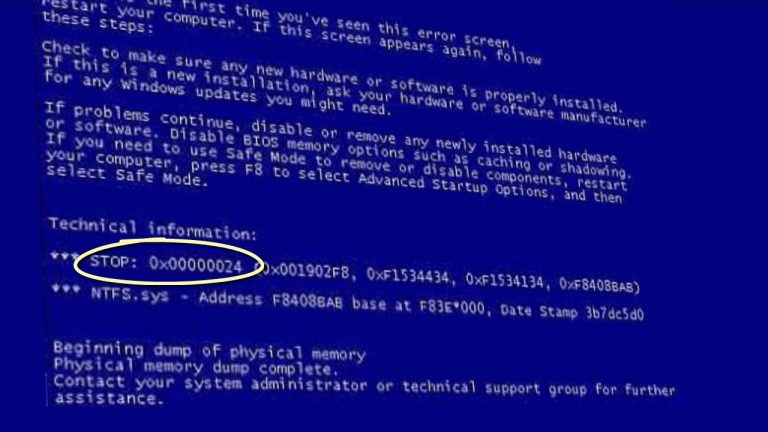
When a BSOD error shows up, it is likely that there is a serious issue behind it. That said, there is no reason to panic. In this post, we are going to teach you how to fix the “A problem has been detected and Windows has been shut down” error message. It is likely that the culprit is a faulty HDD, but there are various possible reasons why this problem occurs. Make sure you run through our solutions until you discover the one that works best for you.

How to Fix “A Problem Has Been Detected and Windows Has Been Shut Down…”

Method 1: Checking your HDD

When the Blue Screen of Death appears, it is usually accompanied by a Ntfs.sys error. This is an indicator that there is something wrong with your HDD. It is likely that Windows is unable to access a certain portion of the system partition. In most cases, this is caused by bad sectors in the HDD or corrupted system files.

So, the first solution you should try is to check the condition of your HDD. If you find that the issue cannot be fixed, then you’ll need a replacement. Before we share the instructions, you need to create a Windows installation media. Once you have one, you can proceed to the steps below:

  • Plug the Windows installation media into your PC.
  • Restart your computer.
  • Access the boot menu. Keep in mind that the key for accessing this varies depending on your motherboard. It is best that you check the owner’s manual to get the details.
  • Select the Windows installation media.
  • Hit Enter to exit the boot menu.
  • Boot the Windows installation media by pressing any key.
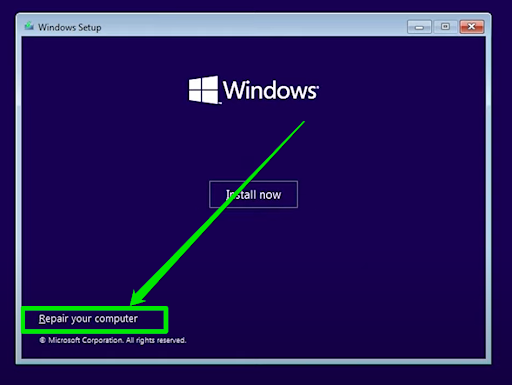
  • Go to the bottom-left corner, then select Repair your computer.

Windows repair your computer

  • From the menu, select Troubleshoot, then click Advanced options.

From the menu, select <em>Troubleshoot</em>, then click <em>Advanced options</em>» src=»https://www.auslogics.com/en/articles/wp-content/uploads/2023/09/Troubleshoot-PC-Advanced-Options.webp»></p>
<div class= Картинка с сайта: www.auslogics.com

  • Now, you need to open Command Prompt.
  • Once Command Prompt is up, run the following command:
chkdsk /f C:

Type in chkdsk/f C:

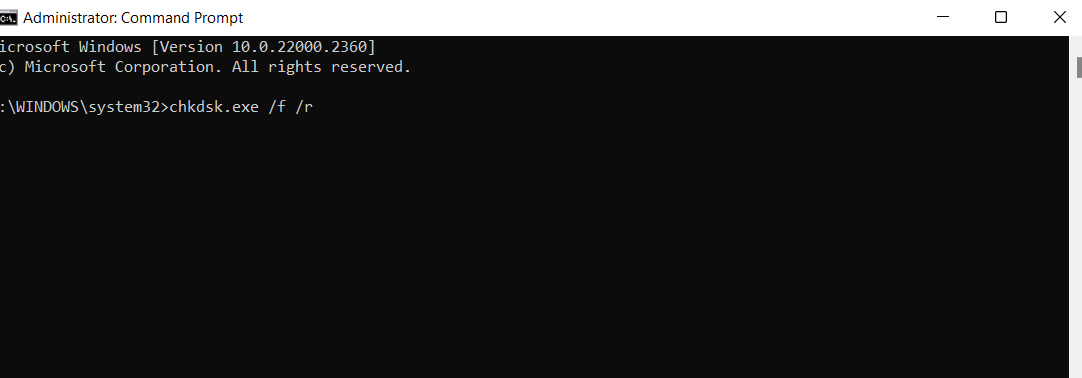
  • Wait until the process is complete, then restart your computer.

If the BSOD error still appears, then you’ve confirmed that the HDD isn’t the issue. In this case, you should move on to the next solution.


Also read: How to Run Hard Drive Diagnostics on Windows PC?


Method 2: Inspect recently installed hardware

It is worth noting that almost every replaceable component in your computer can force your operating system to shut down to prevent further damage. You should know that when this happens, it does not necessarily mean that a piece of hardware is faulty.

After all, you will not be able to boot your PC in the first place if one of the critical components is malfunctioning. So, it is likely that there are compatibility issues rather than defects in your hardware components behind your problem.

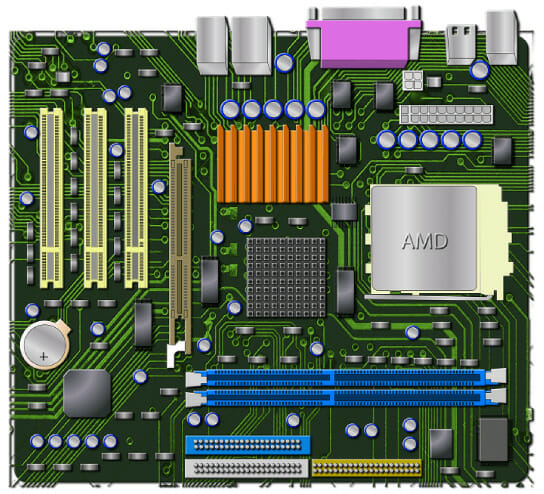
If your motherboard does not support the GPU or CPU you installed, your OS will crash. This event will prompt the BSOD error to appear. In this case, what you have to do is check if the CPU or GPU you added is compatible with your motherboard. If it is, then try updating your motherboard and see if this fixes the problem.


Also read: How to Find Your PC’s Windows System Information?


You should also ensure that all the other hardware components are in their proper places. Shut down your computer, then check if the RAM is connected properly. Aside from that, you must check if your power supply unit (PSU) is not malfunctioning and that your PC is not overheating.

Method 3: Updating your drivers

When there are corrupted or outdated drivers on your computer, you will encounter a host of issues, including BSOD errors. In most cases, the issue has something to do with major devices and their corresponding drivers. However, even peripheral devices like printers can cause an operating system to crash.

If you want to learn how to fix the “A problem has been detected and Windows has been shut down” error message, you must learn the ideal method to update your drivers. In this solution, you will need to boot into Safe Mode to access the Device Manager. As an extra step, you need to prevent Windows 10 from installing and updating the drivers automatically. Most of the time, it only finds generic drivers that are not suitable for your devices. Once you’re ready, you can proceed to the steps below:

  • Go to Microsoft’s support site, then download the Show or hide updates troubleshooter.
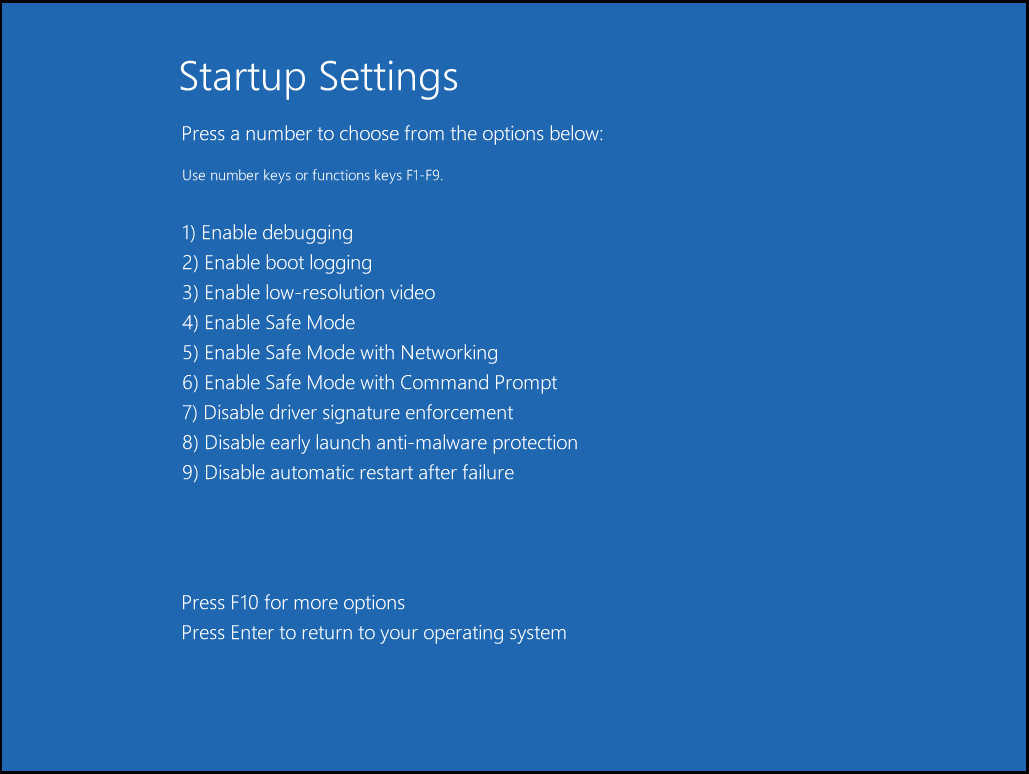
  • Restart your computer, then repeatedly press F8 to access the Startup Settings menu.
  • Boot your computer in Safe Mode with Networking mode.

Boot in a Safe Mode with Networking

  • Open the Device Manager, then update the drivers.
  • Now, you need to run the Show or hide updates troubleshooter to keep your operating system from updating your drivers automatically.
  • Restart your computer, then check if the error is gone.

PRO TIP

You have to know that updating your drivers via the Device Manager can be time-consuming.

Thankfully, there is an easier way to perform this task. With Auslogics Driver Updater, you can ensure that all your drivers will be updated to their latest versions. Moreover, you do not have to worry about compatibility issues because the tool will find the versions that are suitable for your operating system and processor.

Auslogics Driver Updater

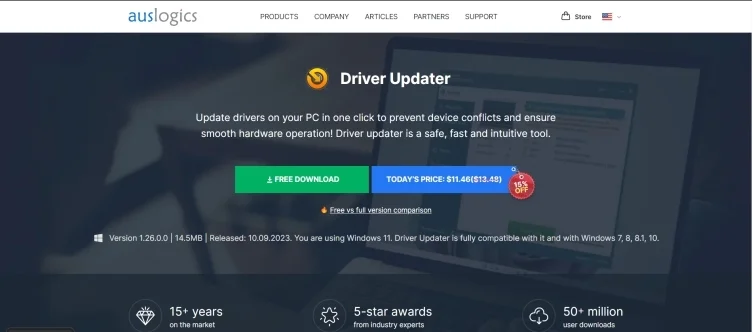
Update drivers in one click with Auslogics Driver Updater

Method 4: Resetting Windows 10

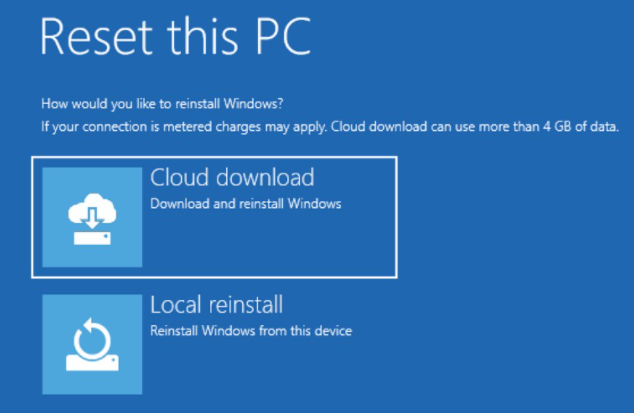
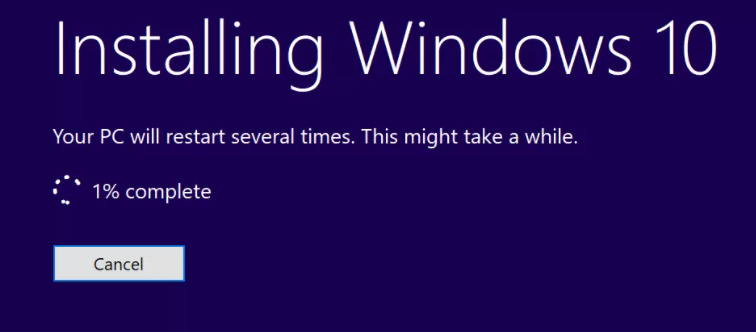
If the BSOD error persists even after trying the solutions above, then there must be something wrong with your Windows 10 installation. If it is corrupted, it will cause your PC to crash. To resolve this problem, we suggest that you perform a Windows 10 reset. However, before you opt for this solution, you must know that it will delete all the files from your system. So, it is best that you create a backup first before resorting to this method of resolving the “problem has been detected” issue.


Further reading: Easily Reset Your PC: How to Factory Reset a Windows 10 & 11 Computer


A Problem Has Been Detected and Windows Has Been Shut Down: Solved

In conclusion, a BSOD error can be alarming, but with patience and the right steps, it can be resolved relatively quickly. Check your HDD, inspect hardware, update drivers, or reset Windows 10 to troubleshoot the issue. Remember, systematic troubleshooting is key. If you have more questions, feel free to ask in the comments. Happy computing!

Are there other BSOD errors you’d like us to resolve?

Please do not hesitate to ask your questions in the comments below!

After installing Windows XP Service Pack 3 and rebooting the computer some people get this error:

A problem has been detected and Windows has been shut down to prevent damage to your computer.

Some of the technical codes accompanying the error are: OX0000007E (0XC00007D, 0XF7C6B8EA, 0XF7C6B7F4 – 0XF7CBBYF0). By booting into Safe Mode, I noticed that the boot process stopped when the MUP.SYS driver was loading.

The first thing to try is to boot from the Windows XP installation CD and get to the recovery console (by pressing R), then do a chkdsk /r check. If it finds any errors, it will try to repair them. After the scan, reboot the computer and hope for the best.

If the above does not work, then you need to try to to copy over the MUP.SYS file from a good working system and then paste it to the C:\windows\system32\drivers folder.

If the above solution does not work, restart the computer and boot up onto the Windows XP installation CD like shown above.

Repair Install Windows XP

When you see your manufacturer logo, you have to press F12 or F2 or F8 to get to the boot options menu. Then you select the CD drive, instead of the regular hard drive. This should bring you to the Windows XP setup like shown above.

When all the files are done loading, you have to follow the steps to install windows. This means you press Enter instead of R.

Go through the steps until you come to the point when you have to agree the terms and conditions and see a screen asking you where to install Windows. It’s like a table that has all your hard drives listed (most people have C, and that’s the only one). Highlight it, and press the appropriate key to install Windows.  When the installation starts, Windows will detect that you already have a copy of Windows installed on your [c] drive/partition.

It will ask you if the installation is damaged, it can attempt to repair the Windows XP installation.  Go ahead and press the R key to repair it. It will take some time to perform the repair install and you will need to answer some questions during the installation.

All your data should be intact after the repair install. Hopefully, upon reboot, Windows should boot without any blue screen errors. If you have any questions, feel free to comment. Enjoy!

Related Posts

  • How to Boot into Safe Mode in All Versions of Windows
  • How to Set Up a Windows XP Virtual Machine for Free
  • How to Reset Your Computer Password If You Lock Yourself Out
  • Transfer Files from Windows XP, Vista, 7 or 8 to Windows 10 using Windows Easy Transfer
  • How to Change the Clock To Military Time in Windows

Sometimes it happens that when you switched on your Laptop and start working on it, almost after half an hour or so the system shuts down instantly and kept restarting & flashing blue screen of death. You think to regain access to the system via standard or safe mode but unfortunately, you cannot. Reason being, the computer keeps on restarting prior to Windows load. The only message you are getting on the blue screen of death is:

Windows “Stop 0x00000024” Error

This technical information and error message detail states that it is an operating system error. This error also indicates that Windows is failing to show the correct screen image.

Don’t worry. Go for simple, easy and quick approaches to fix the issue quickly and effortlessly. However, before stepping ahead to the solutions let’s have a look at the probable causes for this error.

Possible Causes of Windows “Stop 0x00000024” Error

  • Virus or malware attack.
  • Corrupted Device Drivers.
  • Old or incorrectly configured drivers.
  • Damaged hard disk or system files.
  • Driver conflict due to new hardware installation.
  • Removed system files after drivers or software installation.
  • Due to NTFS_FILE_SYSTEM STOP error caused by RAM corruption.
  • Windows registry corruption due to software installation or uninstallation.

Symptoms of Windows “Stop 0x00000024” Error

The system behaves differently in different scenarios. Few most common signs are:

  • STOP Error 0x24: NTFS_FILE_SYSTEM
  • Active program crashes and NTFS_FILE_SYSTEM blue screen appears
  • Windows starts running slowly and react sluggishly to keyboard or mouse input
  • System freezes periodically at times
  • Error message: “The NTFS_FILE_SYSTEM bug check has a value of 0x00000024.” This indicates a problem occurred in ntfs.sys, the driver file that allows the system to read and write to NTFS drives.
  • Error message: A problem has been detected and Windows has been shut down to prevent damage to your computer.

When does the Windows “Stop 0x00000024” Error Pops Up?

As such, there is no definite situation. It can encounter at any time. Few common cases are:

  • During Program Installation
  • During Windows Drive loading
  • Windows startup/shutdown
  • At time of Hardware or Software Installation

Note: Keep a tab of when and where it arrived for proper troubleshooting.

Fixing Windows “Stop 0x00000024” Error

1. Quick Solution

  • Run an Anti-virus program for malware scan.
  • Execute System Restore.
  • Run Windows Clean Installation.
  • Check and run Windows Updates.
  • Update System Device Drivers.
  • Boot System in Safe Mode.

2. Troubleshoot Approaches to Resolve the Error

a. Run sfc /scannow (Windows System File Checker)

This handy tool ensures scanning and restoration of corrupt Windows system files including NTFS_FILE_SYSTEM. This process can easily run on Windows 10, 8, 7, XP.

Steps are:

  • Click Start
  • In the search box, key-in command
  • Hold Ctrl-Shift and press Enter
  • Click Yes on a permission dialogue box
  • Under a black box with a blinking cursor, key-in sfc /scannow
  • Hit Enter
  • Wait for System File Checker to scan the error
  • Lastly, follow on-screen commands to fix

b. Run chkdsk

Mostly, the reason for this error is storage controllers or hard disk drivers issues, but there are scenarios where BSODs is the source. In such scenarios, Check Disk is useful. Reason being, with hands on this utility, you can scan as well as repair the corrupt hard drive.

Steps are:

  • Click Start and key in command
  • Hold and press CTRL-Shift and hit Enter
  • Under permission dialogue box, hit Yes
  • Key-in chkdsk /f under blinking cursor and press Enter
  • Wait for scanning completion. On completion, follow on-screen instructions to fix the error.

After troubleshooting the aforesaid error, you can always restore the lost data from the saved back-up. However, in the absence of a backup, opt for Stellar Data Recovery Professional for Windows to recover your data. This Editor’s Choice software can deal with the issue easily and efficiently. It is reliable, 100% safe to use, and provides a straightforward recovery process.

Watch this video to recover deleted data from Windows PC with Stellar Data Recovery Professional

In Summation

Unfortunate that Windows is prone to several errors. But, with the simple fixes you can easily troubleshoot the issue and to overcome data loss in such scenarios, always trust on the award-winning Stellar Data Recovery Professional for Windows. This software enables to fix all types of errors including Windows “Stop 0x00000024” Error. This comprehensive all-in-one software ensures uninterrupted work.

Be it corruption, formatting, or any other issue, count on this Windows Data Recovery tool.

Was this article helpful?

YES0

NO

Are you having problems with A problem has been detected and Windows has been shut down to prevent damage to your computer message? This can be a serious problem, and in today’s article, we’ll try to help you fix it.

There are Windows errors and there it is, on a whole different level, the Blue Screen of Death as an ultimate horror for every Windows user.

One of the most common errors that result in BSoD is followed by A problem has been detected and Windows has been shut down.

As you’re probably aware, the dreaded Blue Screen of Death is here since Windows 95. Now, even though a lot of things have changed in the period of 20 years, it’s still present and it still bothers a lot of users from time to time.

There are various reasons why something as bad as the BSoD will occur and in this case, our main suspect is the HDD.

On the other hand, due to a myriad of possible instigators, make sure to check all the provided steps in order to resolve the problem.

Read the next section and choose one of our recommendations to fix the a problem has been detected blue screen error.

How do I fix a problem was detected and Windows was shutdown to prevent damage?

1. Use dedicated software

A problem has been detected and Windows has been shut down is a critical error. We recommend you dedicated software to make your computer perform like new.


2. Check HDD health

  1. Plug in USB or DVD with the Windows installation, and then restart your PC.
  2. Press F11 (function key might vary depending on your motherboard) and enter the Boot menu.
    A problem has been detected and Windows has been shut down BSOD error

  3. Select Windows installation media and press Enter.
  4. Press any key to boot Windows installation media, and wait for the loading of the system files to end.
  5. Click Next, choose Repair your computer and open Troubleshoot.
  6. Pick Advanced Options, and then open Command Prompt.
    Fix error a problem has been detected and Windows has been shut down

  7. In the elevated command line, type the following command and press Enter: chkdsk /f C:
  8. Wait for the procedure to finish (it can take some time).
  9. Restart your PC.

The BSoD error is mostly followed by the ”NTFS.sys” error. This, obviously, points towards the HDD.

Namely, it seems that Windows is trying to access the part of the system partition, but for some reason, it’s unable to do so.

Most of the time this happens due to the corruption of system files or corruption (bad sectors) of the HDD itself and results in, none other than the BSoD.

Therefore, what you’ll be addressing firstly is the HDD. If the issue is physical in nature and your HDD is unrepairable, we’re sad to inform you that you’ll need to replace it.

Luckily, that’s not always the case and maybe you can address it with the procedure above. Make sure to try it out and hope for the best.

However, you’ll be needing the installation media for this procedure with the Windows 10 setup.

If the problem is still persistent and you can confirm with certainty that the HDD isn’t the problem, make sure to move to additional steps.


3. Inspect hardware changes

Besides the HDD, almost every other replaceable PC component can be forcing Windows to shut down in order to prevent further damage. Now, this doesn’t always mean that something is malfunctioning.

In case your one of the essential components is ‘dead’, you won’t be able to boot in the first place. Meaning that compatibility is the problem here, rather than a defect. The focus here is, of course, on the CPU.

So, what’s the problem then? Well, if you installed the CPU or GPU which isn’t supported by your motherboard, the system will crash.

The disturbance of homogeneous system configuration will most certainly result in BSoD. So, what you’ll need to do is check whether your motherboard supports certain component.

Maybe your motherboard is indeed supporting the troubling component but it’s not up-to-date. This will require you to update your BIOS/UEFI.

Furthermore, make sure that everything is in its place. Shutdown the PC, and inspect the RAM placement. Sometimes you can change the socket and look for changes.

Moreover, make sure that your PSU (Power Supply) isn’t faulty and that PC isn’t constantly overheating.

Once you’re positive that everything is as it supposed to be, and system crashes keep reoccurring, move with the steps below.


4. Reset Windows 10

If you keep getting this error message, perhaps the problem is related to your Windows 10 installation. Your installation can get corrupted, and that can lead to this and many other problems.

To fix the issue, users are suggesting to perform a Windows 10 reset.

Bear in mind that this process can delete all your files from the system drive, so be sure to back them up beforehand.


5. Update drivers

  1. Download Show or Hide Updates Troubleshooter for Windows 10.
  2. Restart your PC and press F8 rapidly to enter the Advanced Startup options menu.
  3. Start the PC in Safe Mode with Networking mode.
    A problem has been detected and Windows has been shut down error

  4. Navigate to Device Manager and install proper drivers or perform the roll-back action.
    device manager a problem has been detected

  5. Run Show or Hide Updates Troubleshooter and prevent Windows 10 from updating drivers.
  6. Restart your PC and look for changes.

Once we’re past the grave instigators of the problem at hand, let’s focus on lesser evil, or in this case, drivers.

The incompatible drivers or the drivers that aren’t properly installed can cause a variety of issues. Including the BSoD.

Now, most of the time the focus is on major devices and their drivers, but occasionally, even the peripheral device, like a printer, can cause the system crash.

So, we advise you to boot into Safe mode, navigate to Device Manager, and install proper drivers.

Moreover, if you’re using Windows 10, this procedure should be accompanied by blocking of drivers-related Windows Updates.

Windows 10 tends to install drivers on its own, and the generic drivers are not always the best-suited ones.

Updating your drivers can become a fast, simple and pleasant task if you use the right tool. After installation, this software will scan your computer and show you all missing, damaged or old drivers.

You will have access to a detailed report of your drivers, and you can also choose to download and install the newest ones. This is possible thanks to this tool’s huge daily updated database.

Get Outbyte Driver Updater

Read more about this topic

  • Fix: PRIMARY_TRANSPORT_CONNECT_FAILED Error
  • ERROR_IO_PRIVILEGE_FAILED: How to Fix
  • How to Fix MFReadWrite.dll is Missing on Windows N
  • DWMAPI.DLL Missing/Loading Errors – Fix-it Guide

6. Perform a clean reinstallation

Finally, if none of the previous steps proved fruitful, the only software-related solution that crosses our mind is a clean reinstallation.

Issues as large as this need a thorough approach and what’s more thorough than starting from a scratch.

If you’re not sure how to reinstall your system, we provided a detailed explanation so make sure to follow it closely.

We certainly hope that this was a helpful read and that, you’ll solve the A problem has been detected and Windows has been shut down error. Even more, we encourage troubleshooting shutdown errors caused by apps in Windows, so take a closer look at our dedicated guide.

Furthermore, make sure to tell us about your experience with this error and share alternative solutions we haven’t provided. You can do so in the comments below.

Понравилась статья? Поделить с друзьями:
0 0 голоса
Рейтинг статьи
Подписаться
Уведомить о
guest

0 комментариев
Старые
Новые Популярные
Межтекстовые Отзывы
Посмотреть все комментарии
  • Postgres default password windows
  • Нет подключения к службе обновления windows
  • Ярлык включения bluetooth windows 10
  • Как поменять стандартный браузер в windows 10
  • Windows 11 панель задач маленькие значки