
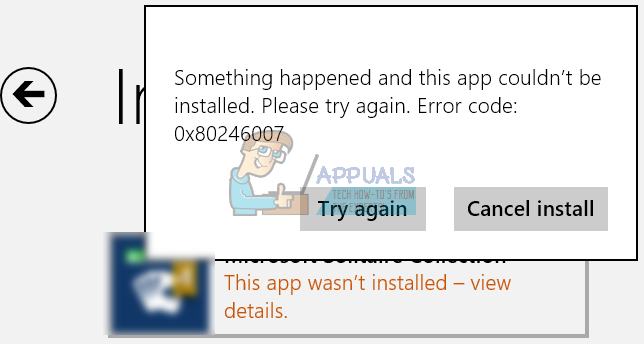
Ошибка 0x80246007 проявляет себя, как правило, при проверке наличия доступных обновлений с помощью Центра обновления Windows. В обычном случае, данная ошибка блокирует возможность для обновления уже установленных приложений и компонентов операционной системы, но с недавнего времени пользователи обнаружили, что она также появляется при попытках установки билдов Windows 10.
Существует несколько причин для появления ошибки 0x80246007, но в большинстве случаев главной причиной этой проблемы оказывается поврежденная база данных Центра обновления Windows. Также порой случается так, что какой-то запущенный процесс Windows может войти в конфликт со службами Центра обновления Windows, из-за чего и невозможно установить или скачать обновление.
Ознакомившись с причинами появления ошибки 0x80246007, давайте попробуем избавиться от нее.
Исправляем ошибку 0x80246007 при обновлении Windows
Метод №1 Сброс службы BITS(Фоновая интеллектуальная служба передачи)
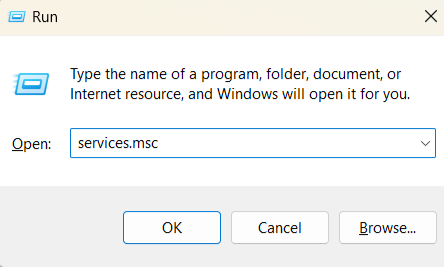
- Нажмите комбинацию клавиш Win+R и впишите в появившиеся окно services.msc.
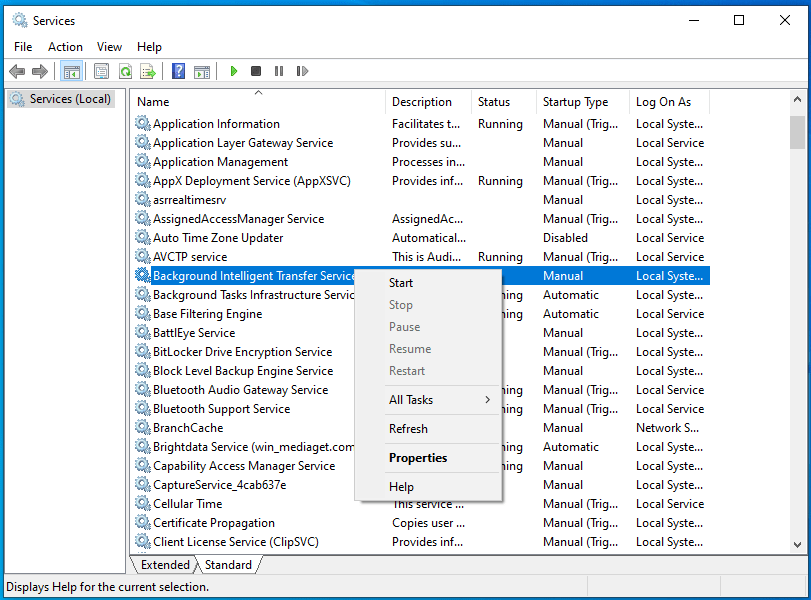
- Перед вами появится окошко со всеми службами, которые работают на вашем компьютере. Найдите службу под названием «Фоновая интеллектуальная служба передачи(BITS)».
- Нажмите на эту службу правой кнопкой мыши и выберите из контекстного меню пункт «Свойства».
- Перейдите во вкладку «Общие».
- Выставьте опцию «Тип запуска — Автоматически».
- Нажмите «Ок», а затем на «Применить» для сохранения изменений.
Проверьте, смогли ли вы исправить проблему с ошибкой 0x80246007.
Метод №2 Проведение чистого запуска
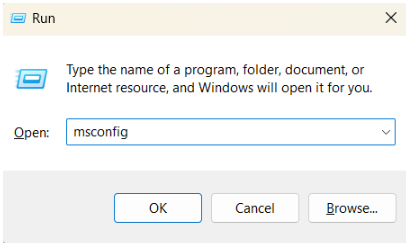
- Нажмите комбинацию клавиш Win+R и впишите в поисковую строку msconfig для открытия окна Конфигурации системы.
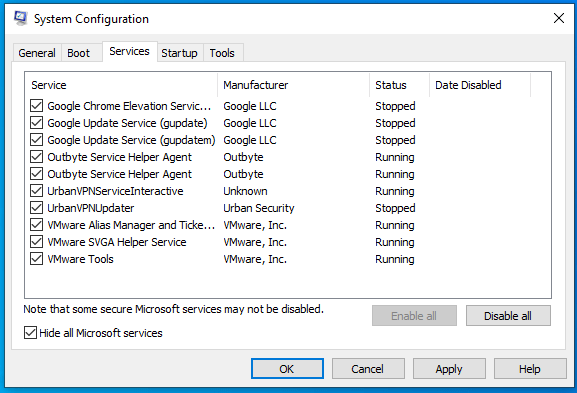
- Перейдите во вкладку «Службы».
- Поставьте галочку напротив параметра «Не отображать службы Майкрософт», а затем нажмите кнопку «Отключить все».
- Потом откройте Диспетчер задач с помощью комбинации клавиш Ctrl+Alt+Delete.
- Перейдите во вкладку «Автозагрузка» и отключите все утилиты, которые выставлены на автоматическую загрузку при запуске Windows.
- После выполненных шагов, перезагрузите свой компьютер.
Затем попытайтесь снова обновить свой Windows. При повторном появлении ошибки 0x80246007 переходите к следующему пункту в этой статье. Если же ошибка пропала, что это означает, что какой-то ранее запущенный процесс, до чистой загрузки, мешал обновляться операционной системе.
Вам нужно поочередно запускать каждый отключенный элемент, чтобы найти какой именно из них мешает обновлению, что может занять, к сожалению, довольно приличное количество времени.
Метод №3 Исправление проблем с почтой и датой
Довольно часто именно из-за проблем с почтой и датой в системе и не получается выполнить нормальное обновление. Для решения этой проблемы выполните следующие шаги:
- Откройте Диспетчер задач. Сделать это можно с помощью команды Ctrl+Alt+Delete или же с помощью такой команды Ctrl+Shift+ESC, про которую мало кто знает или забывают.
- Выберите «Файл — Запустить новую задачу».
- Пропишите в появившемся окошке Get-appxprovisionedpackage –online | where-object {$_.packagename –like “*windowscommunicationsapps*”} | remove-appxprovisionedpackage –online
После этого проверьте наличие ошибки 0x80246007 в системе. Попытайтесь скачать какое-то обновление для приложения или запустить Центр обновления Windows.
Метод №4 Использовать Восстановление системы
Данный метод является одним из самых полезных и решает множества проблем, в которые входит и ошибка 0x80246007. Однако, это не будет работать без заранее созданной точки восстановления. Но, обычно, должно быть включено автоматическое создание точки восстановления. Выполните следующие шаги:
- Перезагрузите свой компьютер.
- Перед загрузкой операционной системы, нажмите на F8 для входа в Безопасный режим.
- Введите свои данные для входа в систему.
- Как только вы войдете в систему, отключите ваш антивирус.
- Нажмите на клавишу Win и пропишите в поисковой строке «Восстановление системы».
- Выберите удобную вам точку Восстановления и проведите ее.
Таким образом, вы обратите внесенные недавно изменения на своем компьютере, которые смогли повлиять на появление ошибки 0x80246007. В этот раз проблема с обновлениями должны будут исчезнуть.
Updated May 2025: Stop error messages and fix your computer problem with this tool. Get it now at this link
- Download and install the software.
- It will scan your computer for problems.
- The tool will then fix the issues that were found.
This article will show you how to fix Windows Update Error Code 80246007 in four simple steps.
Step #1 – Open Registry Editor
Click OK.
Step #2 – Navigate to HKEY_LOCAL_MACHINE\SOFTWARE\Microsoft\Windows\CurrentVersion\WindowsUpdate
Name it EnableAutoUpdates. Double-click it and set its data to 0.
Step #3 – Restart your computer.
You are done.
If you still encounter this error, please contact us via our support form.
What can I do if I get the error code 80246007 when I try to update Windows?
Windows Update Error Code 80246007 occurs due to several reasons like missing registry entries, corrupted files, etc. In most cases, it happens because of some software conflicts. If you are facing the same issue, follow the steps mentioned below to resolve it.
#1 – Reset Windows Update Settings
If you are unable to install updates manually, try resetting Windows Update settings. Click on Change Settings button. Then select Turn off automatic updating and check Reinstall recommended updates now. This step might take a while depending upon how many updates are pending installation. Once done, restart your system and see whether the error persists or not.
#2 – Repair Windows Registry Entries
Sometimes, Windows Update gets stuck during installation process. You can use RegCure Pro to repair the damaged registry keys. Download the tool and run it. After completing the scan, open the log file located in %temp% folder. Find out what caused the error and correct the issues accordingly.
#3 – Remove Malware/Spyware
Malwarebytes Anti-malware is one of the best anti-spyware tools that can detect malware and clean up infected files. Use the free version to scan your PC for spyware infections.
1. Disable your antivirus/firewall tools
If you are experiencing issues with your internet connection while browsing the web, there could be something wrong with your anti-virus program. If it happens again, disable your firewall or antivirus programs. You can do this easily by unchecking the box next to the option “Allow programs to control my computer.” Once you’ve done that, try restarting your device and see what happens.
2. Change the registry
There are many ways to change a registry key, but most people don’t know how to properly do one. If you want to make changes to the registry, you must understand how to use the Registry Editor. This article explains how to change a registry key.
The Registry Editor is located at HKEY_LOCAL_MACHINE\SOFTWARE\Microsoft\Windows NT\CurrentVersion\Accessories\. You can open the Registry Editor by clicking Start | Run and typing regedit into the box.
Click OK once the Registry Editor opens up.
In the left pane, expand the following folders:
HKEY_LOCAL_ MACHINE\Software\Classes\. Click on.exe in the right pane. Right-click on the.exe file and select Rename. Type in a name like “MyApp” and press Enter.
Name the new key something
Updated: May 2025
We highly recommend that you use this tool for your error. Furthermore, this tool detects and removes common computer errors, protects you from loss of files, malware, and hardware failures, and optimizes your device for maximum performance. This software will help you fix your PC problems and prevent others from happening again:
- Step 1 : Install PC Repair & Optimizer Tool (Windows 11, 10, 8, 7, XP, Vista).
- Step 2 : Click Start Scan to find out what issues are causing PC problems.
- Step 3 : Click on Repair All to correct all issues.
Windows Deployment shows how Windows Update works.
Windows deployment is one of those things you don’t really think about unless something goes wrong. You just plug it into your computer and go home. But what happens behind the scenes? How does it work? What are the different parts? And how do they interact?
In this video I’ll show you everything you need to know about Windows deployment. We’ll start out by looking at the three main components of Windows deployment: the operating system itself, the setup program, and the installation media. Then we’ll move onto the actual process of deploying Windows, including the bootloader, the boot configuration data, the drivers, and the OS loader. Finally, we’ll look at some common problems people encounter during deployment and how to solve them.
This course covers the following topics:
1. Introduction
2. Components of Windows Deployment
3. Installation Media
4. Boot Configuration Data
What Is Windows 7 Update Error 80246007?
Windows 7 is one of the most popular operating systems around today. However, it is important to keep it updated because it could help you avoid some serious problems. One such problem is Windows 7 update error 80246007. There are many reasons why people encounter this error. Let us take a look at what causes this error and how to fix it.
RECOMMENATION: Click here for help with Windows errors.
Frequently Asked Questions
What is Update 80246007 for Windows 7?
This error occurs whenever you try to install a software update for Microsoft Windows 7. You might receive this error while installing a security update, a feature update, or even a hotfix. If you see this error message, it usually indicates that something went wrong during the installation process.
What Can Cause Windows 7 Update Error 80247007?
The following are some possible causes of Windows 7 update error 80246017.
1. Your computer does not meet the system requirements.
2. A virus or malware infection prevents the installation of the update.
Error code 0x80246007 is yet another issue that PC users may encounter when trying to update Windows. There are multiple reasons for why this happens.
Depending on which one causes the issue, you should use an appropriate method to fix it. Luckily, most of the solution steps are quite easy to follow. Read further to discover how you can fix Windows Update error 0x80246007.
Why Do You Receive the Error Code 0x80246007 Message?
Windows Update is an essential part of the Microsoft Windows operating system. When you can’t install updates, gradually your computer stops working properly. Many PC users discuss seeing error code 0x80246007 and not understanding how to solve it. It appears that there are two main reasons for this issue to occur:
- There are problems with the Windows Update database
- Some components are disrupted by certain Windows processes
Sometimes, you will get a notification that some updates didn’t finish downloading. Another variation of this error is the Windows Update error 0x80070002. When any of these errors occur, the Windows Update process fails to proceed with the installation and you’re stuck with an outdated operating system.
Fixing Error Code 0x80246007
Below is a step-by-step guide – follow it precisely to fix error code 0x80246007.
Method 1: Run Windows Troubleshooter
This is probably the easiest way to fix error code 0x80246007. Just let the built-in Windows troubleshooter tool do the work. Here’s how to run it:
- Press Win + S to open Search, type
troubleshootand select Troubleshoot from the options. - In the menu list, select Windows Update and click on the “Run the troubleshooter” button.
Wait for the process to finish. If it was successful, you should see the list of detected problems and the Fixed status for each of them. If that’s not the case, proceed to the following method.
Read also: How to fix error 0x80004003
Method 2: Perform a Clean Boot
That’s a suitable option in case the reason for error code 0x80246007 are third-party programs preventing Windows updates from installing. Here’s how you do it:
- Press Win + R to open the Run dialog.
- Type
msconfig, press Enter to open Services Configuration, and move to the Services tab. - Locate and select Hide All Microsoft Services. Now click Disable All.
- Press Ctrl + Shift + Esc on your keyboard to open Task Manager and move to the Startup tab.
- Right-click each application on the list and select Disable from the drop-down menu.
- Return to Services Configuration, apply changes, and restart your computer.
When your PC loads again, there will be no third-party application running. If they were the reason why you kept receiving the error code 0x80246007 message, then you should be able to install Windows updates without issues.
P.S. There are also times when error 0x80246007 occurs together with error 0x80070422. If this happens, you can also try the troubleshooting steps for error 0x80070422 if the solutions don’t work
Method 3: Automatically Run BITS Service
- Press Win + R to open the Run dialog.
- Type
services.mscand hit Enter to open Services. - Locate and right-click on Background Intelligent Transfer Service (BITS) on the list to open its properties.
- Under the General tab, open the Startup Type menu and choose Automatic (Delayed Start).
- In the same tab, move to the Service status section, press the Start button, and click Apply.
Method 4: Create and Run a Repair.bat File
- Open Notepad or right-click on your desktop and choose to create a text document.
- Paste either of the following:
net stop wuauserv
cd %systemroot%\SoftwareDistribution
ren Download Download.old
net start wuauserv
net stop bits
net start bits
ORnet stop wuauserv
cd %systemroot%\SoftwareDistribution
ren Download Download.old
net start wuauserv
net stop bits
net start bits
net stop cryptsvc
cd %systemroot%\system32
ren catroot2 catroot2old
net start cryptsvc - On the top menu, go to File > Save As
- Call your file Repair.bat and choose All Files (.) as its type.
- Now locate your file, right-click on it and select the Run as Administrator option from the drop-down menu.
Now you should try installing the updates. If the process was successful and there was no error code 0x80246007, delete the .bat file you’ve created.
Method 5: Check Windows Defender Firewall
Windows Update needs a firewall to be enabled, so it’s worth checking whether it’s running. If not, you should start it. Check these instructions:
- Press Win + S to open Search and type
services. - On the list of services, locate Windows Defender Firewall. Check the column on the side of it to see if it’s running.
- If not, right-click on the process and choose Start.
Now you can try installing updates once again and see if error code 0x80246007 remains.
Method 6: Change User Account Control Settings
Finally, you can deal with Windows Update error 0x80246007 by disabling the User Account Control feature. This may work when you have several user accounts on your PC.
- Press Win + S to open Search and type
user account control. Press Enter. - You will see a window for setting the notification options. On the left-hand side, drop the slider to the lowest point to set the “Never notify” option. Click OK.
Now you can try installing Windows updates again.
Error Code 80246007 simply means that the update has not been downloaded. This issue occurs when Windows has an update that needs to be installed – but it could not download it from Windows repositories.
This can be really frustrating for users trying to figure out why the update failed to download as it could be due to numerous reasons such as the server from where the update is pushed is down, or your antivirus raised a false flag on the download or it could also be the internet connection failing to establish a link with Windows.
Error Code 0x80246007 – How to Solve
This particular error code can occur either while trying to download Windows updates or while updating or downloading apps from Windows Store. The explanation provided by Microsoft on their post regarding all error messages is simply that “The update has not been downloaded”.
This can be quite annoying, especially if an app you want to update is quite important. Information regarding this error message in particular is quite rare and obscure but there are a lot of great fixes which are guaranteed to fix any error code you might receive.
1. Disable Your Antivirus and Firewall
Antivirus software is something every user should have installed on their PCs because threats you can infect your computer with are numerous and you can easily catch a virus online or by an infected DVD or USB flash drive.
However, these tools sometimes prevent services such as Windows Update from accessing the Internet normally and that is often why you receive these annoying error messages.
- Disable your antivirus.
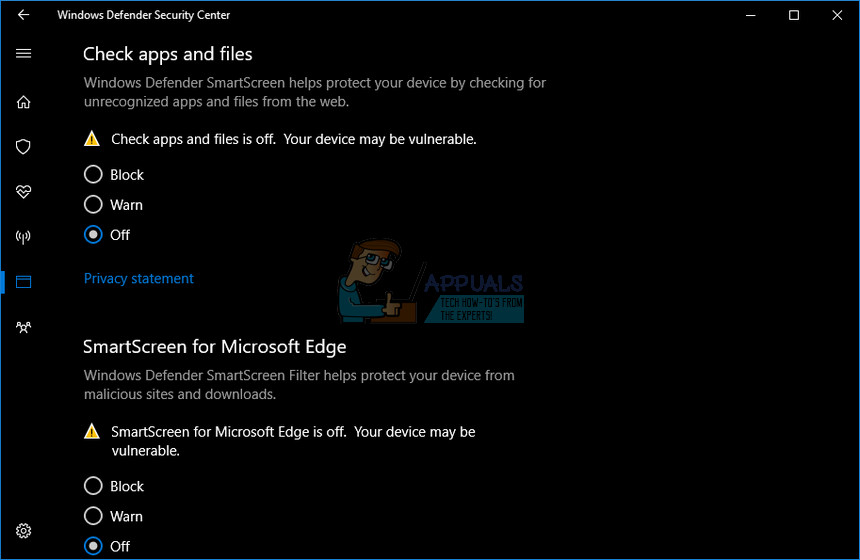
- The process for each antivirus is different. However, if you are a Windows 10 user, you also need to disable Windows Defender.
- Right-click on the shield icon on your taskbar and click on Open.
- When Windows Defender Security Center opens, click on the shield icon below the home button, open Virus & threat protection settings, and turn off Real-time protection and Cloud-based protection.
- Navigate to the browser icon (second from the end) and turn off the Check apps and files option.
- Also, turn off the SmartScreen for Windows Store apps option below.
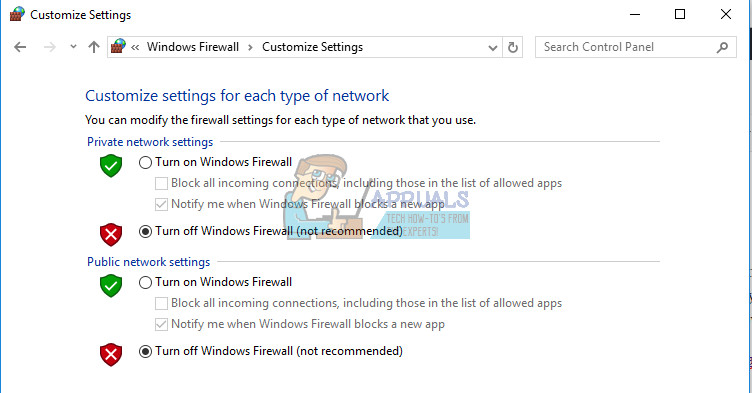
Windows Firewall may also cause some connectivity issues because it automatically blocks unrecognized connections towards you computer and it’s quite possible it’s currently blocking some of the connections related to Windows or application updates.
- Open Control Panel by searching for it after pressing the Start button located at the bottom left part of your desktop.
- Change the View by option to Small icons and locate the Windows Firewall option.
- Click on it and select the Turn Windows Firewall on or off option located at the menu on the left side of the window.
- Click the radio button next to the “Turn off Windows Firewall (not recommended)” option next to both the Private and Public network settings.
- Click on the OK button and try updating your computer now.
Note: Even though you struggled with updating one of your apps or your operating system because of your antivirus or firewall, you shouldn’t leave your computer unprotected so please make sure you turn on your antivirus, Windows Defender, and your Windows Firewall as soon as you successfully update Windows or the app you wanted to update.
2. Troubleshoot Windows Update and Your Internet Connection
Windows 10 comes preinstalled with several troubleshooters which can automatically recognize the problem you are having and fix it for you in no time. These troubleshooters have helped a lot of people who are not so experienced in dealing with these issues themselves and the process takes almost no time at all.
- Press and hold the Windows key then press the I key to open the Settings app.
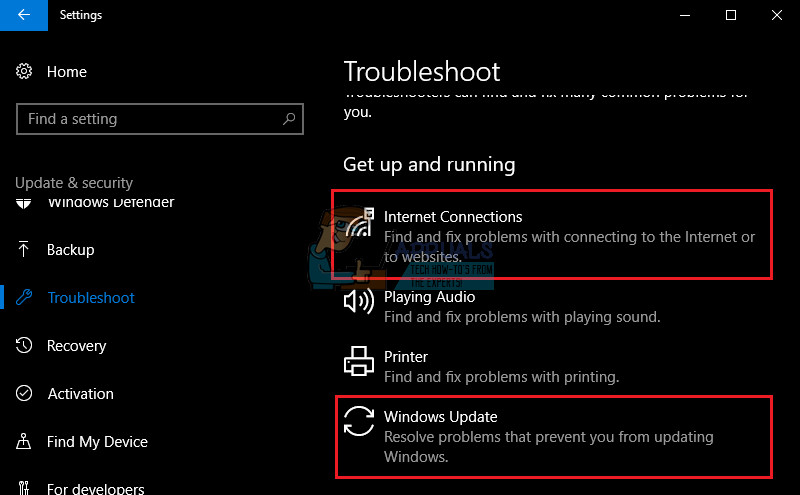
- Head over to the Update & Security section and navigate to the Troubleshoot menu.
- First of all, click on the Windows Update option and follow the instructions on the screen to see whether there is something wrong with Windows Update services and processes.
- After the troubleshooter finishes, navigate to the Troubleshoot section again and open the Internet Connections troubleshooter.
- Check to see if the problem is solved.
3. Check Your Image and Your System Files
Windows updates failing usually have to do something with your Windows image or your system files. Luckily, Windows comes with several tools built-in which can fix these issues easily and automatically.
DISM (Deployment Image Servicing and Management) is a command which can be used to check your Windows image for errors and fix these errors.
SFC (System File Checker) is another command which can be used to locate faulty and missing Windows system files and the tool also fixes or replaced them.
- You can use these tools with Command Prompt. Type Command Prompt in the search bar, right-click on it, and select Run as administrator.
- Type in the following command in order for DISM to scan your Windows image and perform a repair automatically. Please be patient for this tool to finish as the process can take up to 20 minutes.
DISM /Online /Cleanup-Image /RestoreHealth
- After the previous process finishes, use the following command to have SFC scan your system files for malfunctions:
sfc /scannow
- Try updating or downloading your app now if that was the problem or try running Windows update to see if the problem is fixed.
4. Resetting Windows Update Components Manually
This is probably the most complex solution but it efficiently eliminates all types of Windows update problems and error codes because of the fact that you have to reset everything on your computer regarding Windows update.
- Type Command Prompt in the search bar and run it with administrator privileges.
- Kill the following services: MSI Installer, Windows Update Services, BITS, and Cryptographic by copying and pasting the commands below. Make sure you click Enter after each one.
net stop msiserver net stop wuauserv net stop bits net stop cryptSvc
- Rename the Catroot2 and Software Distribution folders. You can do this more easily by copying the following commands in the Command Prompt:
ren C:\Windows\SoftwareDistribution SoftwareDistribution.old ren C:\Windows\System32\catroot2 Catroot2.old
- Start the MSI Installer, Windows Update Services, BITS, and Cryptographic services again by copying and pasting the commands below one after another.
net start wuauserv net start cryptSvc net start bits net start msiserver
- Restart your computer after this and check to see if your problem is solved.
Note: You won’t be able to rename the folders listed in Step 3 unless you end the services we listed before. Follow these steps exactly as they are listed, make sure you are logged in with an administrator account, and run Command Prompt as administrator.
Kevin Arrows
Kevin Arrows is a highly experienced and knowledgeable technology specialist with over a decade of industry experience. He holds a Microsoft Certified Technology Specialist (MCTS) certification and has a deep passion for staying up-to-date on the latest tech developments. Kevin has written extensively on a wide range of tech-related topics, showcasing his expertise and knowledge in areas such as software development, cybersecurity, and cloud computing. His contributions to the tech field have been widely recognized and respected by his peers, and he is highly regarded for his ability to explain complex technical concepts in a clear and concise manner.
Table of contents
- Why Does the Error 0x80246007 Occur?
- Steps to Fix the 0x80246007 Error
- Method one: Restart your computer
- Method two: Check your internet connection
- Method three: Run the Windows Update troubleshooter
- Method four: Check for malware
- Method five: Adjust User Account Control settings
- Method six: Perform a System File Checker scan
- Method seven: Let the BITS service to run automatically
- Method eight: Create a Repair.bat file
- Method nine: Manually download the update
- Method ten: Perform a clean boot
- How to Fix Windows Update Error 0x80246007?
But running into an issue when updating can be annoying, especially the 0x80246007 error that prevents your system from downloading and installing updates.With any luck, this tutorial will provide you with clear, easy-to-follow methods for fixing this problem and keeping your system operating at its best. Bumping into the 0x80246007 error? It’s like Windows Update hit a snag because it’s either getting a bit mixed up with its own components or it can’t find the files it needs. Think of it as your computer having a “where did I put my keys?” moment. Tackling this error quickly is super important to keep your computer running smoothly and safely. Let’s get it sorted so your system can get back to its top-notch self!
Why Does the Error 0x80246007 Occur?
The 0x80246007 error makes an appearance when your Windows update runs into a number of obstacles. It’s similar to trying to make a fancy dinner and discovering midway through that you’re missing some components or that your oven has given up. Selecting the appropriate remedy might be greatly aided by knowing what is causing the update to fail. Let’s take a look inside the pantry to determine what can be the source of the delay:
- Corrupted Windows Update components: Essential services and folders (like SoftwareDistribution and catroot2) that facilitate the update process can become corrupted, hindering the ability to download or install updates.
Also read:How to Delete Software Distribution Folder on Windows?
- Issues with BITS service: The Background Intelligent Transfer Service (BITS) is critical for handling background downloads of updates. If BITS is not running properly, or its configuration is incorrect, updates cannot be processed successfully.
- Insufficient user permissions: Sometimes, the error arises because the account attempting the update lacks the necessary permissions to execute changes, particularly in corporate environments where restrictions are tighter.
- Corrupted system files: Damaged or missing system files can prevent Windows Update from functioning correctly. These files are crucial for the operating system’s overall health and performance.
Quick fix:How to Find and Fix Corrupted Files in Windows 10?
- Registry errors: The Windows Registry, a database of system settings and configurations, can contain errors or corrupt entries that affect Windows Update.
Also read: Ultimate Guide: How to Fix Broken Registry Items in Windows 10/11
- Firewall or antivirus interference: Security software can sometimes mistakenly block Windows Update processes, mistaking them for malicious activity .
- Network connection issues: A stable internet connection is essential for downloading updates. Fluctuations or interruptions in your network can cause the update process to fail.
- Disk space limitations: Insufficient free space on the system drive can halt the update process, as Windows requires a certain amount of space to download and install updates.
Steps to Fix the 0x80246007 Error
Method one: Restart your computer
Sometimes, a simple restart can resolve the issue by refreshing the system and eliminating temporary glitches that might be causing the error.
Method two: Check your internet connection
A stable internet connection is essential for Windows Update. Verify your connection and try running the update again.
Method three: Run the Windows Update troubleshooter
Windows includes a built-in troubleshooter designed to find and fix problems with Windows Update automatically.
- Open the Settings app and go to Update & Security > Troubleshoot > Additional troubleshooters.
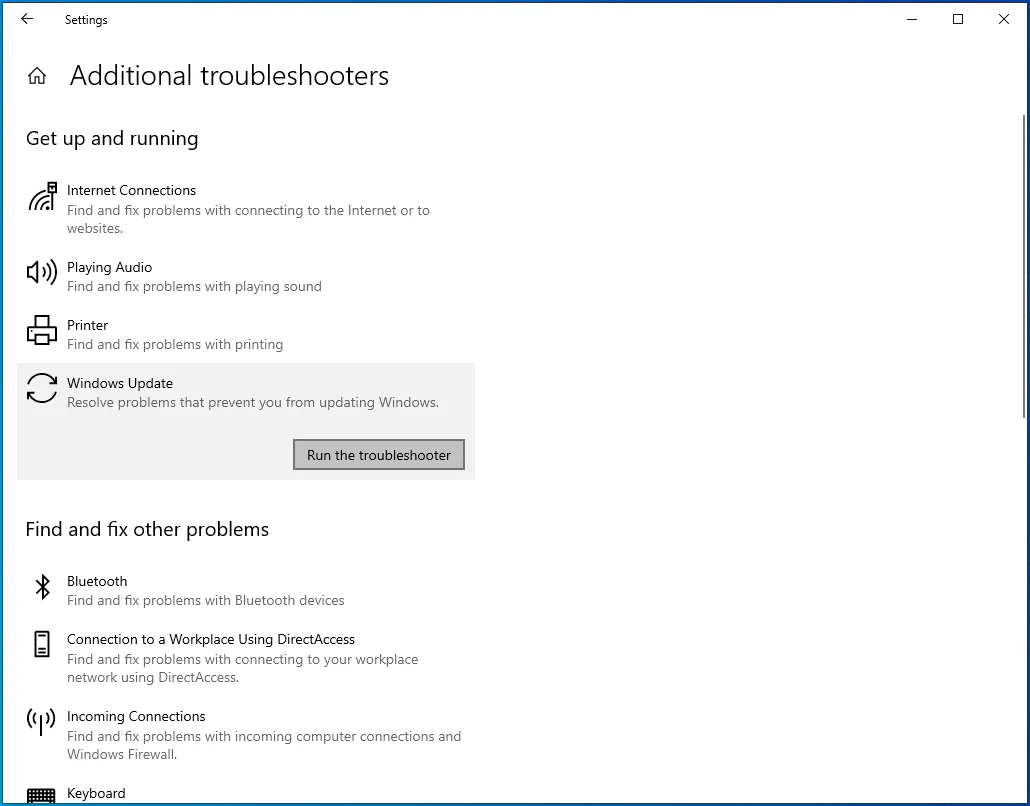
- Select Windows Update and click Run the troubleshooter. Follow the on-screen instructions to complete the process.
Method four: Check for malware
Malware can sometimes cause update errors. Running a full system scan with Windows Defender or another reliable antivirus program can help identify and remove any malicious software interfering with updates.
PRO TIP
Consider running a deep scan with Auslogics Anti-Malware to detect even the rarest malicious items on your PC.
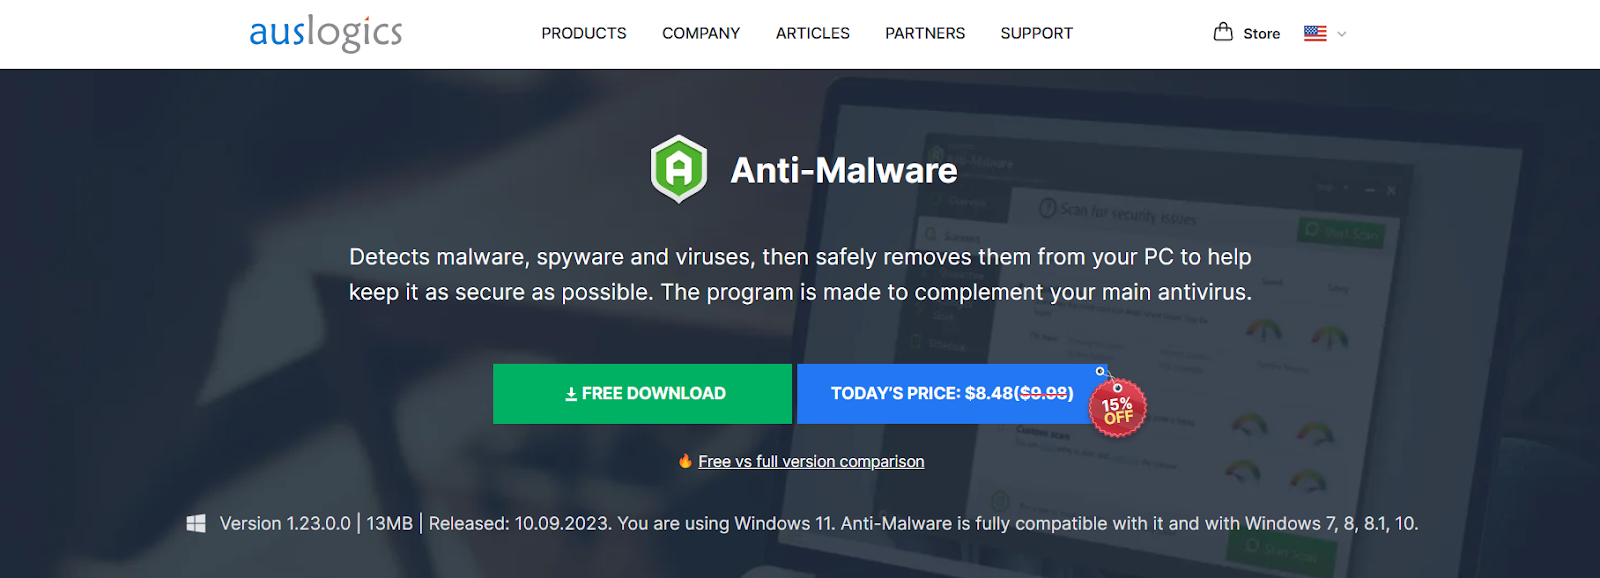
Scan your PC for malware with Auslogics Anti-Malware
Method five: Adjust User Account Control settings
According to some Insider Program members, they were able to fix the problem by changing their user control settings. Through User Account Control, a person can take advantage of administrative privileges and block other users and applications from running certain tasks. While many Windows users find this feature handy, some Insider members have reported that it can also cause the error 0x80246007. So, one of the workarounds for the problem is disabling User Account Control. You can do that by following these steps:
- On your keyboard, press
Windows Key + S. - Type
user account control, then hitEnter. - Once the window is open, you will see a slider. Move it all the way down to Never notify.
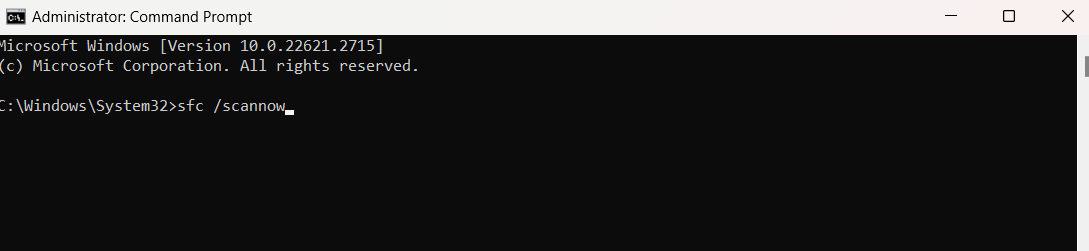
Method six: Perform a System File Checker scan
Corrupted or missing system files can lead to update errors. The System File Checker (SFC) tool can repair these files.
- Open Command Prompt as an administrator.
- Type
sfc /scannowand pressEnter. Wait for the process to complete and then restart your computer.
Method seven: Let the BITS service to run automatically
BITS is critical for the smooth operation of Windows Update, as it facilitates the background transfer of files between your computer and Microsoft servers, especially when downloading updates. If BITS isn’t set to run automatically, it might hinder the update process, leading to errors. Here’s how to set up BITS to run automatically:
- Open Run with the
Win + Rkey combo. - Type
services.mscand pressEnter.
- Look for Background Intelligent Transfer Service, then right-click it.
- Select Properties.
- Go to the General tab and choose Automatic (Delayed Start) from the drop-down list beside Startup type.
- Click the Start button, then click Apply to save the changes.
Method eight: Create a Repair.bat file
Creating a Repair.bat file can often help fix the Windows Update error 0x80246007 by automating the reset of update components. Here are the steps to take:
- Open Notepad and paste any of the command groups below:
net stop wuauserv cd %systemroot%\SoftwareDistribution ren Download Download.old net start wuauserv net stop bits net start bits
or
net stop wuauserv
cd %systemroot%\SoftwareDistribution
ren Download Download.old
net start wuauserv
net stop bits
net start bits
net stop cryptsvc
cd %systemroot%\system32
ren catroot2 catroot2old
net start cryptsvc
- Go to File, then click Save as.
- Type
Repair.batas the file name. Don’t forget to click the Save as type drop-down list and choose All files. Save the file on your desktop. - Go to your desktop and right-click the Repair.bat file you’ve just made.
- Choose Run as administrator.
Try installing the Windows 10 build again. Once you’ve successfully installed it, remember to delete the Repair.bat file.
Method nine: Manually download the update
If none of the above steps work, you can try downloading and installing the update manually. Visit the Microsoft Update Catalog website and search for the specific update using its KB number.
- Download the update that matches your system’s architecture (e.g., x64, x86) and follow the instructions to install it.
To minimize the chances of encountering errors in future updates, consider taking the following preventive measures:
- Regularly check for and install updates to keep your system up to date.
- Maintain a stable internet connection during updates.
- Keep your antivirus software updated and perform regular scans to protect your system from malware.
- Use the Disk Cleanup tool to free up space on your hard drive, as insufficient space can cause update issues.
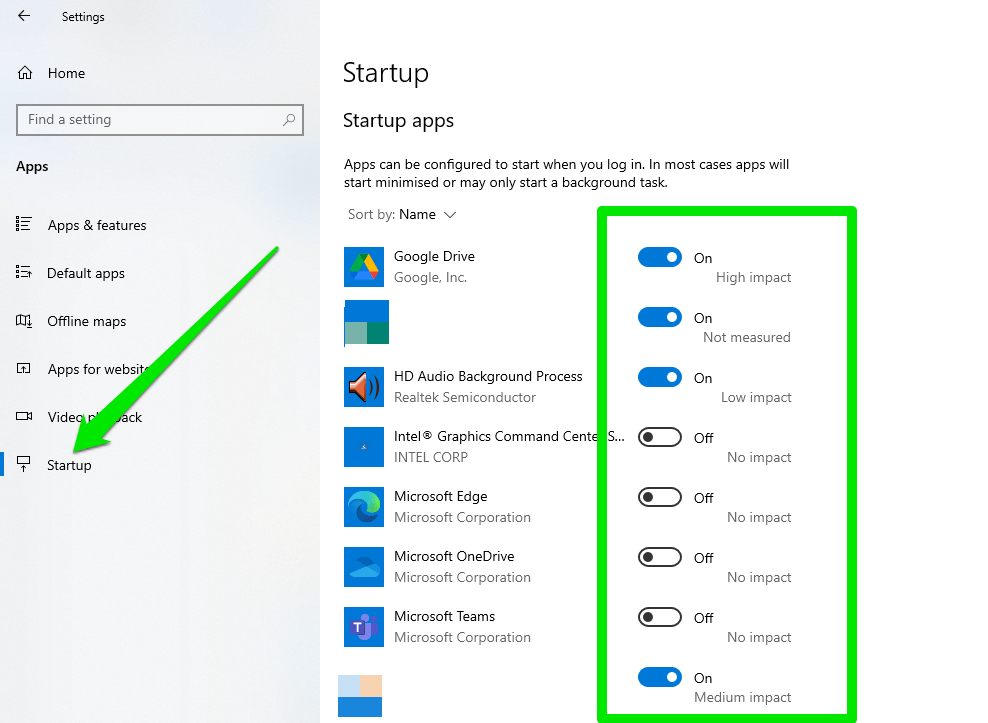
Method ten: Perform a clean boot
It is also possible for third-party applications to interfere with your system, causing various issues to appear, including the error 0x80246007. In this case, you have to identify and remove the particular program associated with the issue. You can choose from a range of methods, but the ideal one is to perform a clean boot . This is relatively easy to do. You just have to follow the steps below:
- Open the Run dialog by clicking
Windows key + Ron your keyboard. - Type
msconfig, then hitEnter.
- Go to the Services tab.
- At the bottom of the window, you will see Hide all Microsoft services. Make sure it is selected.
- Click the Disable all button.
- Navigate to the Startup tab, then click Open Task Manager.
- You will now see a list of startup applications. Go to the first entry on the list and right-click it.
- Select Disable from the menu. Repeat this process for all applications.
- Exit Task Manager and go back to the System Configuration window.
- Save the changes by clicking Apply and OK.
- Restart your computer.
Check if the error 0x80246007 is gone. If it is, then it means that one of the startup applications was what caused the issue. You can now enable the services and applications by using the same steps above. On the other hand, if the error reappears, you might have to identify the particular application that is causing the problem. Make sure you disable and remove the application to permanently resolve the issue.
Download Auslogics Anti-Malware
Detects malware, spyware and viruses, then safely removes them from your PC to help keep it as secure as possible. The program is made to complement your main antivirus.
How to Fix Windows Update Error 0x80246007?
The Windows Update error 0x80246007 can be a roadblock in keeping your system updated, but it’s often resolvable with a bit of troubleshooting. By following the steps outlined above, you can address the issue and help ensure your computer runs smoothly. Remember, keeping your system updated is key to enjoying a secure and efficient computing experience. If you continue to experience problems with Windows Update, consider seeking assistance from Microsoft Support or a professional technician to ensure your system remains in optimal condition.