

-
Microsoft Support & Malware Removal
-
Windows Update
You should upgrade or use an alternative browser.
Windows 7 SP1 x64 — KB4534310 — Error 8024200D
-
Thread starter
Thread starterscaistar
-
Start date
Start date
- Joined
- Mar 31, 2020
- Posts
- 5
-
-
#1
Followed any possible tips from here (and other forum) but can’t solve problem
Before creating this post as per your guidelines I have tried:
1) Manually running the windows6.1-kb4534310-x64
2) sfc /scannow — did not find any integrity violations
3) Ran Niemiro’s SFCFix — did not find any corruption
4) used some reset.bat for clean SoftwareDistribution and other folders…
5) Tried to expand .cab and force install with
DISM.exe /Online /Add-Package /PackagePath:C:\temp\Windows6.1-KB4534310-x64.cab
DISM.exe /Online /Add-Package /PackagePath:C:\temp\Windows6.1-KB4103718-x64.cab (like similar post)
6) tried Windows Repair ALL1ONE for Repair Windows Update component.
I’m going really crazy.
No other chance.
I attach my CBS.Log (the 2th version is 500 Mb… )
CBS
CBS2
PLEASE. Note that yesterday formatted my PC so System i now Clean. I have only windows and some few tool
This is the only KB that give me problem. All other KB updated with no problem
plodr
Sysnative Staff, Contributor
- Joined
- Mar 31, 2020
- Posts
- 5
-
-
#3
1-windows6.1-kb4490628-x64_d3de52d6987f7c8bdc2c015dca69eac96047c76e.msu
2-windows6.1-kb4474419-v3-x64_b5614c6cea5cb4e198717789633dca16308ef79c.msu
3-windows6.1-kb4536952-x64_87f81056110003107fa0e0ec35a3b600ef300a14.msu
now if try to install reiceve message «Update already installed»
- Joined
- Oct 9, 2014
- Posts
- 741
-
-
#4
FRST Registry Search
1. Click your Start button and type in cmd.
2.After you find the Command Prompt, right click on it and select Run as Administrator.
3. Copy and paste the following into the Command Prompt:
reg load HKLM\COMPONENTS C:\WINDOWS\SYSTEM32\CONFIG\COMPONENTS
4. Please download Farbar Recovery Scan Tool and save it to your Desktop.
Note: You need to run the 64-bit Version so please ensure you download that one.
5. Run FRST64 by Right-Clicking on the file and choosing Run as administrator.
6. Copy and paste 7.2.7601.24513 into the Search box and click the Search Registry button.
7. When the scan is complete a notepad window will open with the results. Please attach this to your next reply. It is saved on your desktop named SearchReg.txt.
- Joined
- Oct 9, 2014
- Posts
- 741
-
-
#6
- Joined
- Mar 31, 2020
- Posts
- 5
- Joined
- Oct 9, 2014
- Posts
- 741
-
-
#8
- Joined
- Mar 31, 2020
- Posts
- 5
-
-
#9
however… thanks for GREAT help..
i offer you a beer.
bye
- Joined
- Oct 9, 2014
- Posts
- 741
-
-
#10
You are welcome!
Has Sysnative Forums helped you? Please consider donating to help us support the site!
-
Microsoft Support & Malware Removal
-
Windows Update
Весь интернет уже обгуглен. Есть аналогичная тема со счастливым концом.
Ошибка установки наборов исправлений качества системы безопасности 8024200D
Но написать в личку Turok123 я не могу (видимо потому что только зарегистрировался). Может кто- то если не поможет, то напишет ему ссылку на эту ветку. СПАСИБО!
Добавлено через 2 часа 12 минут
Turok123
Могу использовать тег NICK, но пока 2 дня не пройдет (и 3 сообщения) написать ему не могу . Не могу даже зайти в свою ЛК.
Добавлено через 4 часа 26 минут
Решил пока пойти дальше, а именно UpdatePack7R2 для Windows 7 SP1.
1) Поставилось еще не менее 7 обновлений.
2) Интересные вещи можно почерпнуть из описания на том сайте.
Перед описанием прочитал что KB4534310 часто ломал рабочий стол, если картинку рабочего стола надо было растягивать и именно поэтому видимо:
а) KB4537820-x86-x64 с отключением телеметрии и проверки процессоров (заменяет KB4534310-x86-x64)
б) KB4540688-x86-x64 с отключением телеметрии и проверки процессоров (заменяет KB4537820-x86-x64)
в) KB4550964-x86-x64 с отключением телеметрии и проверки процессоров (заменяет KB4540688-x86-x64)
г) KB4556836-x86-x64 с отключением телеметрии и проверки процессоров (заменяет KB4550964-x86-x64)
Вот не уверен что это последнее обновление, т.к. оно очень свежее. (май) )))).
И хоть центр обновления все еще хочет KB4534310 и все еще дает ту же самую ошибку 8024200D, теперь думаю насколько оно действительно надо.
Пока ставился Набор обновлений UpdatePack7R2 также видел интересное сообщение про KB4556836 (последнее заменяющее то, что дает ошибку). Так вот KB4556836 тоже не поставилось с ошибкой 0x800f081f (та же ошибка, о которой говорил windows update troubleshoting, и которой вроде не должно быть в windows 7, а только в windows 10).
В общем пока рою дальше.
Добавлено через 1 час 56 минут
Ручная установка KB4556836 дает ошибку 80070002.
Ошибка 8024200D — системная ошибка, которая возникает при сбое в работе Центра обновления Windows.
Причиной ошибки 8024200D могут быть:
- Конфликт DNS;
- Конфликт системного уровня.
Иногда при индивидуальных настройках антивирусов или программ, выявляющих вредоносные ПО и блокирующих рекламу, можно заодно заблокировать установку обновлений Windows. В таком случае нужно временно отключить антивирус, вернуться к стандартным настройкам, либо переустановить программы.
Следующим шагом нужно сделать проверку системных файлов Windows для восстановления поврежденных или отсутствующих.
- Нажмите клавишу Windows на клавиатуре + R;
- Введите команду cmd;
- Нажмите «ОК».
Перед вами откроется консоль командной строки Windows. В ней введите команду:
Sfc / scannow
Просто скопируйте ее отсюда и вставьте, нажав после «ОК».
Если это не помогло воспользуйтесь следующими рекомендациями.
The Windows Update Error 8024200D (WU_E_UH_NEEDANOTHERDOWNLOAD) means that the Windows Update handled can’t install the update because the update downloaded is invalid and corrupted. This error is most commonly encountered on Windows 7.

If you are affected by this error code, you are likely to experience this behavior every time Windows Update attempt to install an update that has failed on the first try. This problem has been patched with newer Windows builds but remains prevalent with older builds.
The main reason why you’ll see this error is a WU inconsistency that can be fixed either by resetting the entire Windows component or by bypassing it entirely by downloading and installing the update manually using the Windows Update Catalog.
Update: This problem can also occur due to a corrupted Windows Update database.
Here’s a list of confirmed methods that you can use to troubleshoot this error:
1. Install the failing update manually
If you’re looking for a quick fix that will bypass a local issue that triggers the 8024200d error, use the Windows Update Catalog to install the failing update manually.
This method is only recommended if you only have one update that is throwing the 8024200d WU error when you attempt to install it.
Important: Keep in mind that going this route will not effectively address the root source of the issue. Even if this allows you to bypass the error and install the problematic update, it will not address the root cause of the issue. If you want to fix root the issue, continue troubleshooting with the remaining methods below even if this method allows you to install the failing update.
Here’s how to use the Windows Update Catalog to bypass the 8024200d error:
- Launch the homepage for the Microsoft Update Catalog in your web browser.
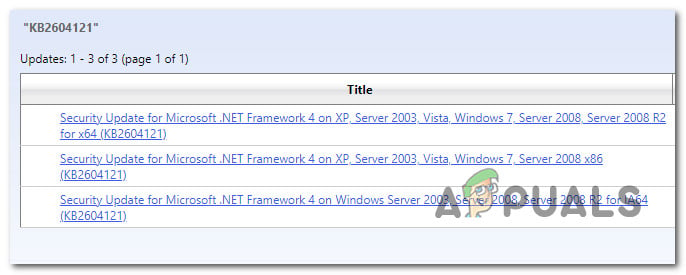
- Use the search box in the upper-right corner of the Microsoft Update Catalog page to discover the update that failed to install.

Searching for the failing update inside Windows Update Note: You can grab the update code from the WU error message inside the Windows Update page.
- From the list of results, identify the update applicable to your Windows version.

Identify the correct update Note: Consider the CPU architecture and Windows version while looking for an appropriate update, after analyzing the findings.
- After identifying the required update, click the Download option and wait until the download is complete.
- Once the download is complete, double-click the executable file you just downloaded from the Downloads folder.
- Follow the on-screen instructions to complete the sideloading of the next Windows update.
- Now that the update is installed, reboot your PC and see if the 8024200d has disappeared from the Windows update screen.

2. Run the Windows Update Troubleshooter
Running the Windows Update troubleshooter is a great way to try and fix this issue using the built-in tools provided by Microsoft.
If you are experiencing the 8024200D error due to a common WU inconsistency, running the Windows Update Troubleshooter and applying the recommended fix should help you resolve this issue.
Note: The Windows Update Troubleshooter provides a collection of automated repair strategies that may be used to treat the most common causes of a failing Windows update.
If Windows Update Troubleshooter manages to identify the cause of the error, follow the instructions to apply the recommended solution.
Here’s how to run the Windows Update Troubleshooter and apply the recommended fix:
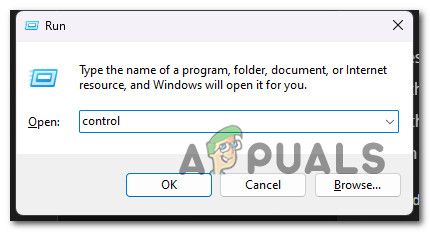
- Press the Windows key + R to open the Run dialog box.
- Type “control” and hit the Enter key to enter the Control Panel interface.

Open up the classic Control Panel interface - Click “Yes” when prompted by User Account Control to grant administrator permissions.
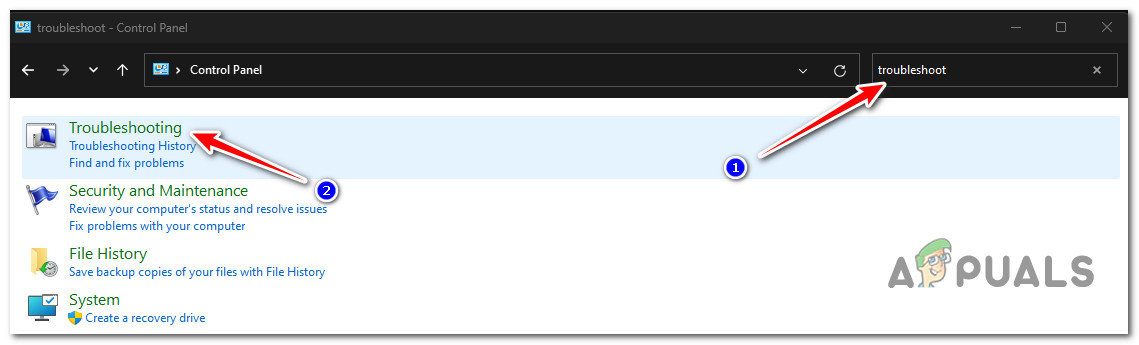
- Utilize the Control Panel’s search function to look for “troubleshoot” (top-right corner of the screen).
- From the list of search results, click on Troubleshooting.

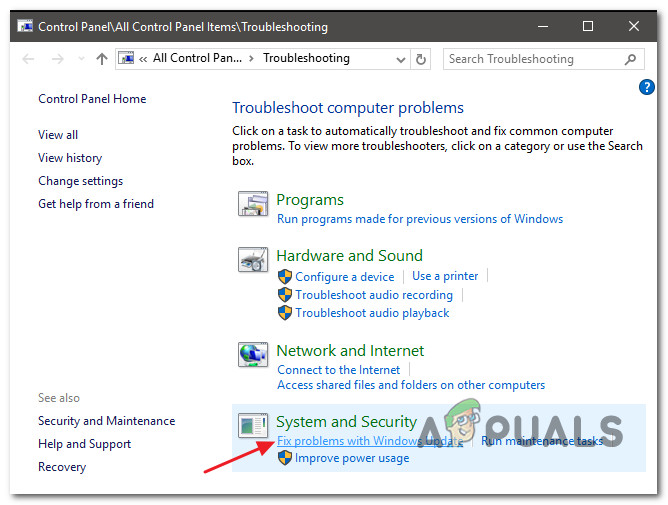
Open up the Troubleshooting tab - Under System and Security, click on Fix problems with Windows Update.

Find and Fix Problems with Windows Update Note: If you are running Windows 11, you may see different displays moving forward.
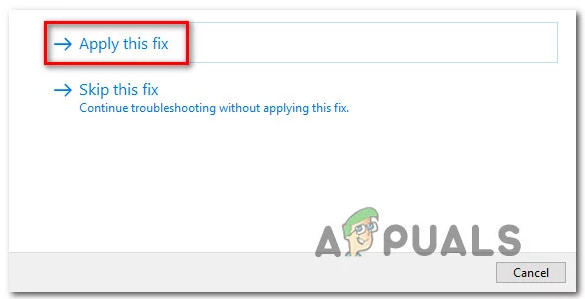
When asked by the Windows Update Troubleshooter, click Next and wait for the initial scan to complete. - Click Apply this Fix if you find a possible solution to implement it in the current situation.

Apply this fix - Once the solution is effective, restart your computer and attempt to reapply the unsuccessful update.
3. Reset the BITS & Cryptographic Services
Another scenario where you might see the 8024200d error when installing a pending Windows update is if two very important service dependencies (Background Intelligent Transfer Service and Cryptographic Service) do not receive content link headers.
Note: This is an old issue that is patched on Windows 11 and Windows 11 but still occring on Windows 7.
To fix this issue, you’ll need to reset both services & rename the two folders where Windows Update stores temporary Windows Files (Catroot 2 & Software Distribution). However, in order to complete this methods, you’ll also need to disable a series of additional WU dependencies to make sure there’s no interference.
Here’s a quick guide on how to do this:
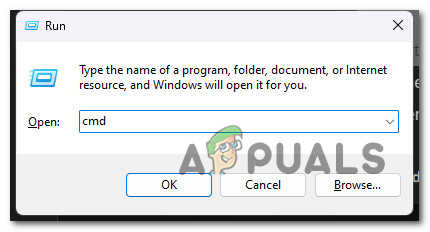
- To open the Run dialog box, press the Windows key + R.
- Then, to start a Command Prompt with elevated privileges, type “cmd” into the text box and press Ctrl + Shift + Enter.
Open up an elevated CMD prompt Note: Grant administrator access by choosing Yes when asked by the UAC (User Account Control) window.
- To stop all WU-related services, type the following commands in the following order at the elevated Command Prompt and press Enter after each command:
net stop wuauserv
net stop cryptSvc
net stop bits
net stop msiserver
Note: By following these steps, the Windows Update Service, MSI Installer, Cryptographic Service, and BITS Service will all be killed manually.
- Use the following commands to remove and rename the SoftwareDistribution and Catroot2 folders once all relevant services have been stopped:
ren C:\Windows\SoftwareDistribution SoftwareDistribution.old
ren C:\Windows\System32\catroot2 Catroot2.old
Important: These folders are responsible for storing updated files required by the WU component. If you rename these folders, your operating system will be compelled to build new, healthy copies.
- After the folders have been cleaned up, execute the following commands to enable the previously deactivated services:
net start wuauserv
net start cryptSvc
net start bits
net start msiserver
- Restart your computer when it has restarted to verify if the issue has been resolved.
4. Run SFC & DISM Scans
File corruption that interferes with the auto-updating capability of Windows installation is one of the most common reasons of the 8024200d error while attempting to install a pending system update.
In this case, it’s recommended to perform a few system file scans utilizing built-in tools System File Checker (SFC) and Deployment Image Servicing and Management (DISM).
Note: Although SFC and DISM are fairly similar, we recommend running both checks in short succession to enhance the likelihood of recovering corrupt system files.
Our recommendation is to start with a simple SFC scan. You can deploy this tool without an active connection to the internet.
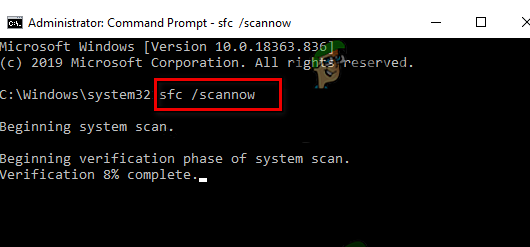
Important: It is imperative to maintain the CMD window active after initiating this process, even if the application seems frozen. This is a common occurrence, especially on Windows 7. Stopping the operation before it’s finished, this might result in logical problems on your HDD or SSD.
Once the SFC scan is finished, follow it up with a DISM scan with admin access without restarting your PC. DISM uses a component of Windows Update to obtain healthy replacements to replace corrupt system files. Because of this, you’ll need to ensure that you have a stable internet connection before beginning this operation.
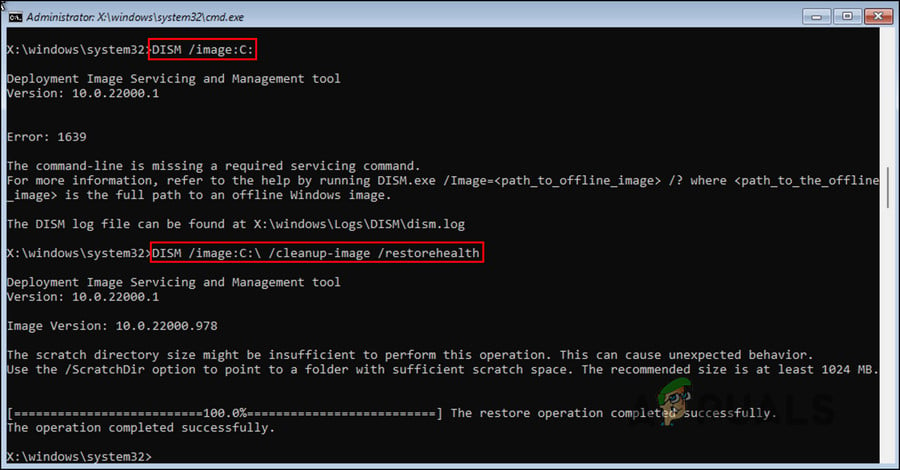
Before commencing this operation, you must thus ensure that you have access to a reliable Internet connection.
After the DISM scan is complete, restart your computer to verify if the 8024200d error has been addressed.
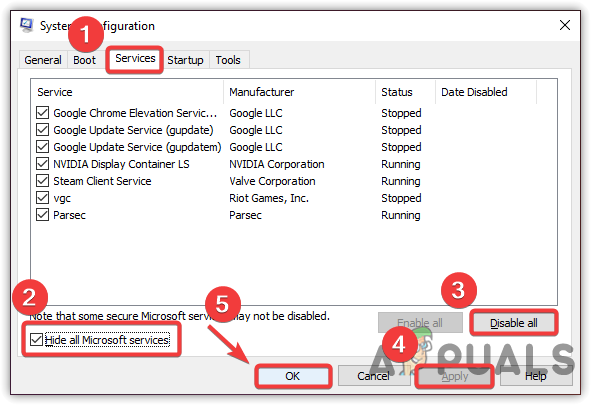
5. Install Update in Clean Boot Mode
It’s also possible that you’re dealing with this issue due to a scenario where a 3rd party application, startup item or service that is interfering with the Windows Update procedure.
If this scenario is applicable, one way to get around the 8024200d error is to is to achieve a clean boot state before attempting to install the update again.
Note: A clean boot forces your system to load just the required Windows apps and services. Once the clean boot state has been reached, no third-party services, processes, or starting items will be permitted to run.
Here’s a quick guide on achieving a clean boot state before reinstalling the problematic update that’s triggering the 8024200d error:
- Follow the steps outlined in this article to achieve a clean boot state.

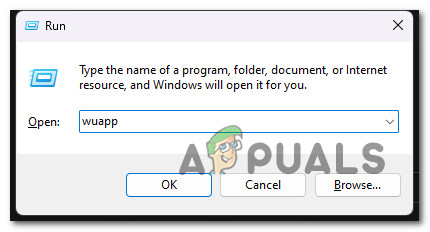
Achieve a clean boot state - Once you restart your PC in clean boot mode, press Windows key + R to open up a Run dialog box.
- Next, type ‘wuapp’ inside the text box of Run, then press Ctrl + Shift + Enter to open up an elevated Windows Update instance.
Open up the Windows update menu via Run box Note: This command will only work for Windows 7. If you’re on Windows 10 or Windows 11, use ‘ms-settings:windowsupdate’ instead.
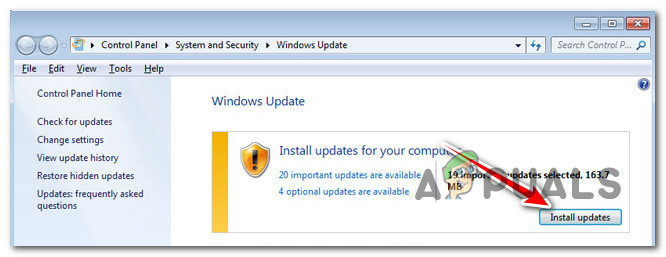
- Inside the Windows Update screen, click on Check for Updates.
- If the problematic update is available to install again, click on Install updates and see if it installs without the same 8024200d error.

Install pending updates
6. Delete Update logs & reinstall the update
Inconsistent WU log files can also cause this error. This is even more likely you have multiple updates that are all failing with the 8024200d and you started to experience this issue after an unexpected system shutdown while the update was installing.
In this case, you’re probably dealing with an issue affecting the integrity of servicing packages, manifests or WU underlying components.
To address this issue, you’ll need to access a series of hidden directories and delete the update logs before retrying the update.
Here’s how to do this:
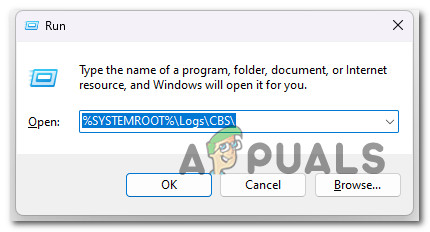
- Press Windows key + R to open up a Run dialog box.
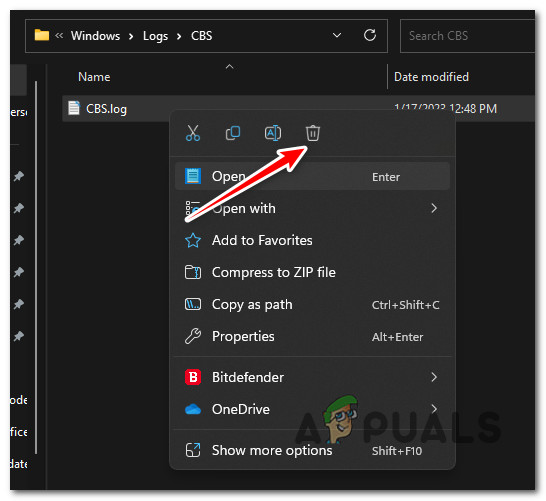
- Next, type ‘%SYSTEMROOT%\Logs\CBS\’ and press Ctrl + Shift + Enter to the first hidden folder with admin access.
Open up the CBS folder - At the User Account Control (UAC), click Yes to grant admin access.
- Inside the location, delete the cbs.log by right-clicking on it and clicking Delete from the context menu.

Deleting the CBS log Note: If the CBS folder contains a secondary log file named CheckSUR.log delete that as well.
- Once both files have been deleted, restart your PC and see if the problem is now fixed.
7. Perform a repair install
If you’ve come this far and you still can get past the 8024200d and install the pending update, you are likely dealing with file corruption that you will not be able to fix without replacing the entire suite of Windows files.
In this case, doing an in-place repair (repair install) or a clean installation are your only options on getting back to a state where Windows is able to install pending updates automatically.
A clean installation is a simpler option, but the main disadvantage is that you cannot preserve your data – including applications, games, and personal files (unless you back them out first).
If you’re looking for a method to save you from losing data, go for a repair install procedure. The main advantage is that you get to keep your data, including applications, games, files present on the OS drive and even certain user preferences.
In order to maintain a secure and stable Windows system, it’s essential to download and install the latest updates through the Windows Update Center – either automatically or manually. Going without these updates will mean known errors and identified security vulnerabilities will continue to exist on your system, unnecessarily exposing you to system issues and security risks. Although not self-inflicted, errors like 0x8024200d are just as critical because they prevent the update process and the problem can even persist after restarting the computer.
We show you what this update error is all about and which possible solutions are the most promising.
What is the 0x8024200d Error All About?
The Windows error code “0x8024200d” relates to an installation problem with a system update. In this instance, it’s possible that the update process is completely blocked or that only part of the available update is affected by the issue. Besides the code “0x8024200d”, Windows often also displays the message “WU_E_UH_NEEDANOTHERDOWNLOAD”, which suggests that the error won’t be fixed by simply repeating the update process. The update handler can’t work with the existing installation files. This can be due to a wide range of reasons. This includes erroneous data, update components that are defective or haven’t yet started, or a lack of storage space. Moreover, malware and third-party applications like antivirus programs or tuning tools can be responsible for a blocked update.
Error 0x8024200d occurs both on the current version Windows 10 as well as on older editions like Windows 7 or Windows Vista.
The Best Solutions for the Windows Error “0x8024200d”
Since the Windows update error can be due to a range of causes, there are also various solutions available. However, the general problem is that you don’t receive any information whatsoever from Windows about where you should look for the error. So, you have no choice other than to work through the list of possible causes, one after another to fix the 0x8024200d error.
Before you get started, you should at least try to resolve the issue by restarting the computer: The probability is very low, but there’s still a chance that the problematic update will run afterwards – for instance, because the download server simply couldn’t be reached before or because Windows itself wasn’t working properly.
If the Windows update continues to display the error code “0x8024200d” after you reboot the computer, you’ll need to look for the cause of the problem yourself. The solutions presented below have proven to be helpful.
Solution 1: Deactivate Third-Party Security Software (Temporarily)
If the 0x8024200d error is preventing the installation of a new Windows update, you should first take a look at your security software before you implement any changes to system files, services or settings. For example, if you’ve installed additional security programs against malware on your system besides Windows Defender and Windows Firewall, there’s a chance that they’re blocking the operating system’s update process. You can easily check whether this is the case by temporarily deactivating the corresponding applications and then trying the update again.
If you were able to identify an antivirus software, a malware scanner or a similar program as the cause of the problem, you have three different options:
- Contact the manufacturer of the software and report this issue.
- Uninstall the problematic application and replace it with a similar alternative.
- Deactivate the security software whenever you receive error messages like “0x8024200d” when updating Windows (not recommended if Windows Defender and Firewall are also disabled).
Solution 2: Use the Windows Update Troubleshooter
Windows errors that start with the code “0x8024” can often be resolved using the Windows Update Troubleshooter. This is integrated as standard in Windows 10, as well as older versions like Windows 8, however, it can also be downloaded from the Microsoft Support Forum. It’s particularly advisable to download the troubleshooter if you haven’t been able to update Windows for a long time – and are therefore less likely to have the up-to-date version of the troubleshooter. Once it has been downloaded, launch the downloaded .diagcab file simply by double clicking, select “Windows Update” and click on “Next” to start the automatic troubleshooter.

For the integrated troubleshooter in Windows 10, the following steps are necessary:
- Open the Start menu (Windows symbol) and open the Settings (cog symbol).
- Click on “Update and Security”.
- Switch to the “Troubleshooter” tab.
- Click on the “Windows Update” entry and then on “Run troubleshooter”.
Solution 3: Temporarily Delete Windows Installation Files
Another option for fixing the 0x8024200d error is to delete the automatically cached system files for the Windows update. It’s possible that they include defective files or incomplete patches that prevent the update to the operating system.
You need administrator rights to delete system files!
Windows provides the “Disk Cleanup” tool for this purpose; it can be started using the “Run” dialog. You can open it either via the button with the same name in the Start menu or using the key combination [Windows key] + [R]. As soon as you’ve opened the window, enter the following:
Confirm your entry with “OK” and Windows will open the Disk Cleanup tool. Now select the drive Windows is saved on – usually C: – and click on “OK” again. Next, you can press the button “Clear system files”. After a quick check, Windows will display a list of files that may be deleted, where you can select the following entries (provided they are listed):
- Windows Update Cleanup
- Downloaded Program Files
- Temporary Internet Files
- Temporary Files
- System Error Small Memory Dump Files
- Temporary Windows Installation Files
- Temporary Windows Setup Files

Click on “OK” one last time and then on “Delete files” to start the cleanup. After the tool has finished the process, you should then restart the system before trying to run the update again.
Solution 4: Restart the Update and Download Service
In order for the Windows Update Center to establish contact with Microsoft servers and download and install provided updates, it uses the Windows Update (WU) service as well as the Background Intelligent Transfer Service (BITS), among others. The former supports the entire update process, while the latter serves as a download manager and provides optimal utilization of bandwidth and the resumption of interrupted downloads. If these two services aren’t working properly or can’t even be started, the “0x8024200d” update problem can arise at any time.
The maximum bandwidth provided for new updates can be limited in the advanced settings of the Windows update (under “Transfer Optimization”). Use this option if the automatic Windows update regularly takes up too much of your capacity.
In this case, the solution involves ending these services, deleting the content of the directory Windows\SoftwareDistribution\Download and subsequently restarting both services. Begin by performing the following steps to stop the services:
- Open the “Run” dialog via the Start menu or using the key combination [Windows key] + [R].
- Enter “services.msc”.
- Press “OK” to open the Services Manager.
- Search for the entries “Windows Update” and “Background Intelligent Transfer Service” and press the “End the service” button for each of them.
Keep the Services Manager window open while deleting the content of the Update Download Directory. You can also open this via the “Run” dialog by entering the complete pathway there:
C:\Windows\SoftwareDistribution\DownloadDelete all files and folders contained in this directory without deleting the download folder itself, and then restart the system.
If you’ve chosen another installation location for your Windows system, you’ll need to change the drive letter accordingly.
Now restart the two update services by clicking on “Start the service” for both entries:

Solution 5: Check System Files for Errors
If installing new updates produces the error code “0x8024200d”, this can also be due to damaged or missing system files. To check whether this is the case, you can use the System File Checker (SFC) integrated as standard. The tool can be launched via command line, provided you have administrator rights. It examines all protected system files, and also attempts to resolve any discovered issues. If the fix is unsuccessful, you’ll at least receive a detailed report in the CBS.log file found in the directory Windows\Logs\CBS.
To start the SFC, you need to run the command prompt as an administrator – otherwise the command won’t work even with the corresponding rights. You can start the command prompt as administrator by following these steps:
- Open the Windows search function.
- Enter the term “cmd”.
- Right-click on the displayed entry “Command Prompt”.
- Select the menu item “Run as administrator”.
Now enter the following command into the command line:
Press the [Enter] key to confirm the command and then wait until the system check has been fully completed. It can take a few minutes. Leave the command prompt window open during this time.
Solution 6: Clear and Expand the System Partition if Necessary
One possible cause for the 0x8024200d error is that the hard drive or partition that Windows is installed in does not have sufficient free space. You should first try to clear up any unnecessary files from the Windows drive if you haven’t already done so as part of Solution 3 (see above).
If there still isn’t enough storage space after cleaning up the disk, the alternative solution is to expand the size of the system partition. Windows offers an integrated tool called “Disk Management” for this purpose. It can be opened as follows and used to expand the partition:
- Open the Windows Start menu and click on the entry “Computer Management” under “Windows Management Programs”.
- Under the “Disk” section, look for “Disk Management” and select it to obtain a list of existing partitions.
- Right-click on the system partition and then select the item “Expand volume”.

If the option “Expand volume” is grayed out, the storage space after the partition to be expanded is not available as it is used by the following partition. In this case, you’ll need to move the storage piece by piece by reducing the volume of the following partitions consecutively. Here it is advisable to use a third-party program such as Paragon Hard Disk Manager.
Solution 7: Manually Download and Install the Windows Update
If the 0x8024200d error can’t be resolved with the above solutions, you can try to download and install the problematic update yourself – without the Windows Update Center. All you need to do this is the update ID (starting with the letters “KB”) as well as the online database operated by Microsoft, the Microsoft Update Catalog.
The update ID can be found in the Update Center: Display the update history and note the updates’ KB number which caused the 0x8024200d error, shown in brackets.
You can open the online catalog at any time using the browser of your choice. Simply click on the above link or type the URL “catalog.update.microsoft.com” into the address bar. Next, enter the ID into the catalog’s search bar and click “Search”:

Following a successful search, the web catalog lists the available versions of the searched update. Select the suitable version for your system – Windows (desktop) or Windows Server – and the underlying architecture – ARM64, x64 or x84. Afterwards, click on “Download” in the respective line and then on the link provided in order to start the download. If you’re unsure about what system architecture you have, you can find out using the command prompt. Simply enter the command “systeminfo” and look for the value in the “System Type” line:

After you’ve downloaded the respective update file (.msu), start the installation by double-clicking. Then follow the instructions given by the assistant to update your system properly, thereby also fixing the 0x8024200d issue.
Click here for important legal disclaimers.
Was this article helpful?