
Applies ToWindows 7 Enterprise Windows 7 Professional Windows Server 2008 R2 Datacenter Windows Server 2008 R2 Enterprise Windows Server 2008 R2 Standard
Симптомы
Рассмотрим следующий сценарий:
-
Клиенты Windows 7 имеются в домене Windows Server 2008 R2.
-
Применение групповой политики предпочтения настройка, фильтруется по уровню элемента и, предназначенного для группы безопасности.
В этом случае может произойти сбой обработки групповой политики на клиентах Windows 7, и переменная среды задан неверно. Кроме того в журнале приложений регистрируется сообщение об ошибке следующего вида:
Журнал имя: приложенияИсточник: Групповой политики средыДата: ДатаивремяКод события: 8194Категория задачи: (2)Уровень: ошибкаКлючевые слова: классическийПользователь: системыКомпьютер: Client.Contoso.comописаниеКлиентское расширение не удалось применить параметры политики пользователя для «имя_политики» сбой с кодом ошибки «0x80070003»Система не может найти указанный путь
Причина
Эта проблема возникает из-за состязания, которая может возникнуть при применении политики компьютера и пользователя в то же время.
Решение
Сведения об исправлении
Доступно исправление от службы поддержки Майкрософт. Однако данное исправление предназначено для устранения только проблемы, описанной в этой статье. Применяйте это исправление только в тех случаях, когда наблюдается проблема, описанная в данной статье. Это исправление может проходить дополнительное тестирование. Таким образом если вы не подвержены серьезно этой проблеме, рекомендуется дождаться следующего пакета обновления, содержащего это исправление.
Если исправление доступно для скачивания, имеется раздел «Пакет исправлений доступен для скачивания» в верхней части этой статьи базы знаний. Если этот раздел не отображается, обратитесь в службу поддержки для получения исправления.
Примечание. Если наблюдаются другие проблемы или необходимо устранить неполадки, вам может понадобиться создать отдельный запрос на обслуживание. Стандартная оплата за поддержку будет взиматься только за дополнительные вопросы и проблемы, которые не соответствуют требованиям конкретного исправления. Чтобы просмотреть полный список телефонов поддержки и обслуживания клиентов корпорации Майкрософт или создать отдельный запрос на обслуживание, посетите следующий веб-сайт корпорации Майкрософт:
http://support.microsoft.com/contactus/?ws=supportПримечание. В форме «Пакет исправлений доступен для скачивания» отображаются языки, для которых доступно исправление. Если нужный язык не отображается, значит исправление для данного языка отсутствует.
Предварительные условия
Для установки этого исправления необходимо иметь Пакет обновления 1 для Windows 7 или Windows Server 2008 R2 установлен.
Необходимость перезагрузки
Может потребоваться перезагрузить компьютер после установки данного исправления. По умолчанию Групповая политика обновляется в фоновом режиме каждые 90 минут. Если необходимо обновить групповую политику раньше, после установки данного исправления выполните следующую команду:
gpupdate /force
Сведения о замене исправлений
Это исправление не заменяет все ранее выпущенные исправления.
Английский (США) версия данного исправления устанавливает файлы с атрибутами, указанными в приведенных ниже таблицах. Дата и время для файлов указаны в формате UTC. Дата и время для файлов на локальном компьютере отображаются в местном времени с вашим текущим смещением летнего времени (DST). Кроме того, при выполнении определенных операций с файлами, даты и время могут изменяться.
Информация о файлах для Windows 7 и Windows Server 2008 R2 и примечанияВажно. Исправления для Windows Server 2008 R2 и Windows 7 включены в одни и те же пакеты. Однако исправления на странице запроса исправлений перечислены под обеими операционными системами. Чтобы запросить пакет исправления, который применяется к одной или обеим ОС, установите исправление, описанное в разделе «Windows 7/Windows Server 2008 R2» страницы. Всегда смотрите раздел «Информация в данной статье относится к следующим продуктам» статьи для определения фактических операционных систем, к которым применяется каждое исправление.
-
Файлы, относящиеся к определенному продукту, этапу разработки (RTM, SPn) и направлению поддержки (LDR, GDR) можно определить путем проверки номера версий файлов, как показано в следующей таблице.
Версия
Продукт
SR_Level
Направление поддержки
6.1.760 1. 22 xxx
Windows 7 и Windows Server 2008 R2
SP1
LDR
-
Выпуски обновлений GDR содержат только те исправления, которые выпускаются повсеместно и предназначены для устранения распространенных крайне важных проблем. В обновления LDR входят также специализированные исправления.
-
Файлы MANIFEST (.manifest) и MUM (.mum), устанавливаемые для каждой среды, указаны отдельно в разделе «Сведения о дополнительных файлах для Windows 7 и Windows Server 2008 R2». Файлы MUM и MANIFEST, а также связанные файлы каталога безопасности (CAT) чрезвычайно важны для поддержания состояния обновленных компонентов. Файлы каталога безопасности, для которых не перечислены атрибуты, подписаны цифровой подписью корпорации Майкрософт.
Для всех поддерживаемых 86-разрядных версий Windows 7
|
Имя файла |
Версия файла |
Размер файла |
Дата |
Время |
Платформа |
|---|---|---|---|---|---|
|
Gpprefcl.dll |
6.1.7601.22498 |
590,336 |
01-Nov-2013 |
01:59 |
x86 |
Для всех поддерживаемых 64-разрядных версий Windows 7 и Windows Server 2008 R2
|
Имя файла |
Версия файла |
Размер файла |
Дата |
Время |
Платформа |
|---|---|---|---|---|---|
|
Gpprefcl.dll |
6.1.7601.22498 |
790,528 |
01-Nov-2013 |
02:49 |
x64 |
|
Gpprefcl.dll |
6.1.7601.22498 |
590,336 |
01-Nov-2013 |
01:59 |
x86 |
|
Gpprefcl.dll |
6.1.7601.22498 |
590,336 |
01-Nov-2013 |
01:59 |
x86 |
Для всех поддерживаемых версий Windows Server 2008 R2 для систем на базе процессоров IA-64
|
Имя файла |
Версия файла |
Размер файла |
Дата |
Время |
Платформа |
|---|---|---|---|---|---|
|
Gpprefcl.dll |
6.1.7601.22498 |
1,522,176 |
01-Nov-2013 |
01:56 |
IA-64 |
|
Gpprefcl.dll |
6.1.7601.22498 |
590,336 |
01-Nov-2013 |
01:59 |
x86 |
Статус
Корпорация Майкрософт подтверждает, что это проблема продуктов Майкрософт, перечисленных в разделе «Относится к».
Сведения о дополнительных файлах для Windows 7 и Windows Server 2008 R2
Дополнительные файлы для всех поддерживаемых 86-разрядных версий Windows 7
|
Имя файла |
Package_1_for_kb2904034~31bf3856ad364e35~x86~~6.1.1.0.mum |
|
Версия файла |
Неприменимо |
|
Размер файла |
1,835 |
|
Дата (UTC) |
01-Nov-2013 |
|
Время (UTC) |
07:42 |
|
Платформа |
Неприменимо |
|
Имя файла |
Package_2_for_kb2904034~31bf3856ad364e35~x86~~6.1.1.0.mum |
|
Версия файла |
Неприменимо |
|
Размер файла |
1,816 |
|
Дата (UTC) |
01-Nov-2013 |
|
Время (UTC) |
07:42 |
|
Платформа |
Неприменимо |
|
Имя файла |
Package_for_kb2904034_sp1~31bf3856ad364e35~x86~~6.1.1.0.mum |
|
Версия файла |
Неприменимо |
|
Размер файла |
1,933 |
|
Дата (UTC) |
01-Nov-2013 |
|
Время (UTC) |
07:42 |
|
Платформа |
Неприменимо |
|
Имя файла |
X86_7f95a9966436155972750a3b648e1d13_31bf3856ad364e35_6.1.7601.22498_none_3cd5909061c43049.manifest |
|
Версия файла |
Неприменимо |
|
Размер файла |
711 |
|
Дата (UTC) |
01-Nov-2013 |
|
Время (UTC) |
07:42 |
|
Платформа |
Неприменимо |
|
Имя файла |
X86_microsoft-windows-g..ppolicy-policymaker_31bf3856ad364e35_6.1.7601.22498_none_3987a2ddc09910ee.manifest |
|
Версия файла |
Неприменимо |
|
Размер файла |
53,968 |
|
Дата (UTC) |
01-Nov-2013 |
|
Время (UTC) |
02:30 |
|
Платформа |
Неприменимо |
Дополнительные файлы для всех поддерживаемых 64-разрядных версий Windows 7 и Windows Server 2008 R2
|
Имя файла |
Amd64_18fc96383997d280c9779cdf0a7b3b9e_31bf3856ad364e35_6.1.7601.22498_none_7c03b0e2a73c85ca.manifest |
|
Версия файла |
Неприменимо |
|
Размер файла |
715 |
|
Дата (UTC) |
01-Nov-2013 |
|
Время (UTC) |
07:42 |
|
Платформа |
Неприменимо |
|
Имя файла |
Amd64_40a072e9153564b7116a7bd79290d120_31bf3856ad364e35_6.1.7601.22498_none_606cd2c193aba444.manifest |
|
Версия файла |
Неприменимо |
|
Размер файла |
715 |
|
Дата (UTC) |
01-Nov-2013 |
|
Время (UTC) |
07:42 |
|
Платформа |
Неприменимо |
|
Имя файла |
Amd64_7f95a9966436155972750a3b648e1d13_31bf3856ad364e35_6.1.7601.22498_none_98f42c141a21a17f.manifest |
|
Версия файла |
Неприменимо |
|
Размер файла |
713 |
|
Дата (UTC) |
01-Nov-2013 |
|
Время (UTC) |
07:42 |
|
Платформа |
Неприменимо |
|
Имя файла |
Amd64_afb2997e1f08899bbbd700755cf00e66_31bf3856ad364e35_6.1.7601.22498_none_9c805e27611af343.manifest |
|
Версия файла |
Неприменимо |
|
Размер файла |
1,070 |
|
Дата (UTC) |
01-Nov-2013 |
|
Время (UTC) |
07:42 |
|
Платформа |
Неприменимо |
|
Имя файла |
Amd64_microsoft-windows-g..ppolicy-policymaker_31bf3856ad364e35_6.1.7601.22498_none_95a63e6178f68224.manifest |
|
Версия файла |
Неприменимо |
|
Размер файла |
53,972 |
|
Дата (UTC) |
01-Nov-2013 |
|
Время (UTC) |
03:22 |
|
Платформа |
Неприменимо |
|
Имя файла |
Package_1_for_kb2904034~31bf3856ad364e35~amd64~~6.1.1.0.mum |
|
Версия файла |
Неприменимо |
|
Размер файла |
2,049 |
|
Дата (UTC) |
01-Nov-2013 |
|
Время (UTC) |
07:42 |
|
Платформа |
Неприменимо |
|
Имя файла |
Package_2_for_kb2904034~31bf3856ad364e35~amd64~~6.1.1.0.mum |
|
Версия файла |
Неприменимо |
|
Размер файла |
1,843 |
|
Дата (UTC) |
01-Nov-2013 |
|
Время (UTC) |
07:42 |
|
Платформа |
Неприменимо |
|
Имя файла |
Package_3_for_kb2904034~31bf3856ad364e35~amd64~~6.1.1.0.mum |
|
Версия файла |
Неприменимо |
|
Размер файла |
2,045 |
|
Дата (UTC) |
01-Nov-2013 |
|
Время (UTC) |
07:42 |
|
Платформа |
Неприменимо |
|
Имя файла |
Package_4_for_kb2904034~31bf3856ad364e35~amd64~~6.1.1.0.mum |
|
Версия файла |
Неприменимо |
|
Размер файла |
2,055 |
|
Дата (UTC) |
01-Nov-2013 |
|
Время (UTC) |
07:42 |
|
Платформа |
Неприменимо |
|
Имя файла |
Package_for_kb2904034_sp1~31bf3856ad364e35~amd64~~6.1.1.0.mum |
|
Версия файла |
Неприменимо |
|
Размер файла |
3,123 |
|
Дата (UTC) |
01-Nov-2013 |
|
Время (UTC) |
07:42 |
|
Платформа |
Неприменимо |
|
Имя файла |
Wow64_microsoft-windows-g..ppolicy-policymaker_31bf3856ad364e35_6.1.7601.22498_none_9ffae8b3ad57441f.manifest |
|
Версия файла |
Неприменимо |
|
Размер файла |
34,836 |
|
Дата (UTC) |
01-Nov-2013 |
|
Время (UTC) |
02:15 |
|
Платформа |
Неприменимо |
|
Имя файла |
X86_microsoft-windows-g..ppolicy-policymaker_31bf3856ad364e35_6.1.7601.22498_none_3987a2ddc09910ee.manifest |
|
Версия файла |
Неприменимо |
|
Размер файла |
53,968 |
|
Дата (UTC) |
01-Nov-2013 |
|
Время (UTC) |
02:30 |
|
Платформа |
Неприменимо |
Дополнительные файлы для всех поддерживаемых версий Windows Server 2008 R2 с архитектурой IA-64
|
Имя файла |
Ia64_4f52cb834d7007bfa1648838f7d21ce4_31bf3856ad364e35_6.1.7601.22498_none_b4324014ddc95cd1.manifest |
|
Версия файла |
Неприменимо |
|
Размер файла |
1,068 |
|
Дата (UTC) |
01-Nov-2013 |
|
Время (UTC) |
07:42 |
|
Платформа |
Неприменимо |
|
Имя файла |
Ia64_microsoft-windows-g..ppolicy-policymaker_31bf3856ad364e35_6.1.7601.22498_none_398946d3c09719ea.manifest |
|
Версия файла |
Неприменимо |
|
Размер файла |
53,970 |
|
Дата (UTC) |
01-Nov-2013 |
|
Время (UTC) |
02:25 |
|
Платформа |
Неприменимо |
|
Имя файла |
Package_1_for_kb2904034~31bf3856ad364e35~ia64~~6.1.1.0.mum |
|
Версия файла |
Неприменимо |
|
Размер файла |
2,069 |
|
Дата (UTC) |
01-Nov-2013 |
|
Время (UTC) |
07:42 |
|
Платформа |
Неприменимо |
|
Имя файла |
Package_for_kb2904034_sp1~31bf3856ad364e35~ia64~~6.1.1.0.mum |
|
Версия файла |
Неприменимо |
|
Размер файла |
1,464 |
|
Дата (UTC) |
01-Nov-2013 |
|
Время (UTC) |
07:42 |
|
Платформа |
Неприменимо |
|
Имя файла |
X86_microsoft-windows-g..ppolicy-policymaker_31bf3856ad364e35_6.1.7601.22498_none_3987a2ddc09910ee.manifest |
|
Версия файла |
Неприменимо |
|
Размер файла |
53,968 |
|
Дата (UTC) |
01-Nov-2013 |
|
Время (UTC) |
02:30 |
|
Платформа |
Неприменимо |
Ссылки
Корпорация Майкрософт использует термины для описания обновлений программного обеспечения для получения дополнительных сведений см.
Нужна дополнительная помощь?
Нужны дополнительные параметры?
Изучите преимущества подписки, просмотрите учебные курсы, узнайте, как защитить свое устройство и т. д.
,
This tutorial is a short solution if you receive the error 0x80070003 or 0x80070002, when you try to install Windows updates inside Windows 8, 7 or vista. The above error(s) happens when your computer has wrong date/time settings or when Windows update temporary folder is corrupted. To resolve these errors, follow the solution given below.
Error code description:
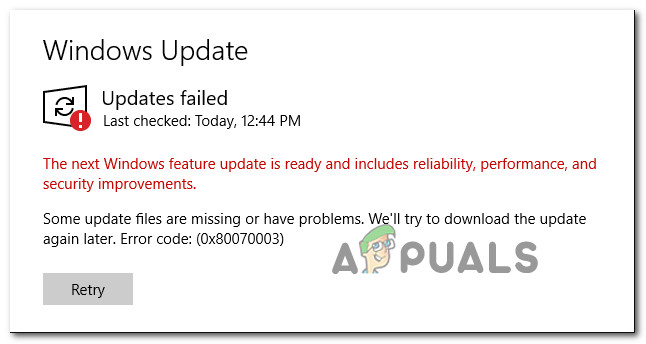
{ Update failed
Error(s) found:
Code 80070003 Windows Update ran into a problem }

How to fix Windows (8, 7 or vista) update error code 80070003 or 80070002
Method 1: Check you date and time settings.
Ensure sure that your computer’s date and time are correct.
To do this :
a. Click on the “Date and Time” in the lower right corner

b. In the window that opens, click on “Change date and time settings”.
c. Press “Change date and time” to ensure that you have setup the correct date/time/year in your computer.

d. When finished with date/time, press “Change time zone” to ensure that you have the proper time zone.

e. Restart your computer and try to update your computer. If the problem persists, proceed to the next method.
Method 2: Remove (delete) Windows update installation files:
Step 1: Stop Windows Update service.
To do this:
a. Simultaneously press Windows key + R to open run command box.
b. Inside run command box type: services.msc and press Enter

c. Search for Windows Update service, then right click on it and select Stop.

Step 2: Rename Windows update folder.
To do this:
a. Open “My Computer” and navigate to “C:\Windows” folder.
b. Find and right click on “SoftwareDistribution” folder and choose rename.

c: Rename the “SoftwareDistribution” folder to “SoftwareDistributionOLD” and press Enter.

d. Ask “YES” to UAC warning and continue to next step.

Step 3: Start Windows Update service, and try to update your computer.

Method 3: Use the Microsoft Fix it 50202 Tool
Download and run Microsoft Fix it 50202 and then try to update your computer.
Source: Microsoft article 910336
If this article was useful for you, please consider supporting us by making a donation. Even $1 can a make a huge difference for us in our effort to continue to help others while keeping this site free:
- Author
- Recent Posts
Konstantinos is the founder and administrator of Wintips.org. Since 1995 he works and provides IT support as a computer and network expert to individuals and large companies. He is specialized in solving problems related to Windows or other Microsoft products (Windows Server, Office, Microsoft 365, etc.).
Have you ever tried updating your system only to get interrupted? If yes then you might have encountered the most common Error 0X80070003. This is a Windows 10 update-related issue that prevents you from getting your hands on the latest update available. Moreover, you might also encounter that some update files are missing or have problems Window 10. This article will discuss how to fix Error 0X80070003 in beginner-friendly ways that are easy peasy lemon squeezy.
Table of Contents
Windows is one of the most popular operating systems in the world. Reports state that more than 1 billion active devices are operating on Windows 10 and 11. Accordingly, it is likely that you, along with many others, might be facing occasional issues such as the error 0X80070003. This error simply means that some update files are missing or have become corrupted.
What Causes This Error 0x80070003?
Although this is a pretty common error, only a few are aware of its causes. Here is what you need to know:
- Corrupted files: Damaged and inoperable files are the most common causes of error 0X80070003. In this case, all you need to do is get rid of malware and replace damaged files with healthy ones.
- Misconfiguration: Error 0X80070003 often highlights misconfigured files in your system. It can also occur if the Windows update settings are incorrectly configured and need immediate attention.
- Wobbling internet connection: If your internet connection speed is slow and unsteady then your system might fail to download all the files. Therefore, you will get a system update error unless the speed restores shortly. This may also cause windows update some files are missing issue for many users.
- Incorrect windows registry: If the system contains inorganized Windows registry entries then your OS will be unable to locate the necessary files. Consequently, your system will fail to boot correctly and display error 0X80070003.
Do you feel like the error 0X80070003 is driving you up the wall? If yes, this article will help you ease the sores effortlessly. Here are the top 10 ways to fix error 0X80070003 without frittering away your money.
Method 1: Run Windows Update Troubleshooter
If you’re having issues with Windows Update and a large number of pending WU updates are failing to install with the same 0X80070003 error, we recommend running the Windows Update troubleshooter.
If you haven’t used Windows Update Troubleshooter before, it is designed to automatically identify and fix common problems. If you haven’t tried this method before, follow the steps in our guide to run Windows Update troubleshooter and have the suggested fix applied automatically.

When the repair is finished, restart your computer and run the Windows update to see if the problem has been resolved.
Method 2: Modify Registry Keys
You need to follow the below-mentioned steps to modify the registry and fix error 0X80070003 accordingly:
Note: Make a backup of registry keys to restore to previous settings in case of manual errors during modification.
1. Press the Windows + R keys simultaneously to open the Run dialog box.
2. Type regedit and click on OK to launch the Registry Editor.

3. Next, go to the following key folder path in Registry Editor.
HKEY_LOCAL_MACHINE\SYSTEM\CurrentControlSet\Services\WIMMount

4. Click on ImagePath under the Name category and ensure that its Value data states:
system32\drivers\wimmount.sys
5. Now, open File Explorer manually or using the keyboard shortcut Windows + E keys together. paste the following in the address bar and click on OK.
C:\Windows\System32\drivers\
6. Verify the wimmount.sys file and restart your laptop.
Also Read: Fix Windows 10 Update Error 0xc1900204
Method 3: Conduct In-place Upgrade
Do you think manually upgrading the system is labor-intensive work and requires intensive technical know-how? If yes, you will be surprised to know how easy it is in reality:
1. Go to the Windows 10 download page on your browser.
2. Click on the Download too now option to download the Media Creation Tool on your system.

3. Once the download is complete, right-click on it and select the Run as administrator option.
4. Next, click Yes in the prompt and wait while the tool gets everything ready for the main action.
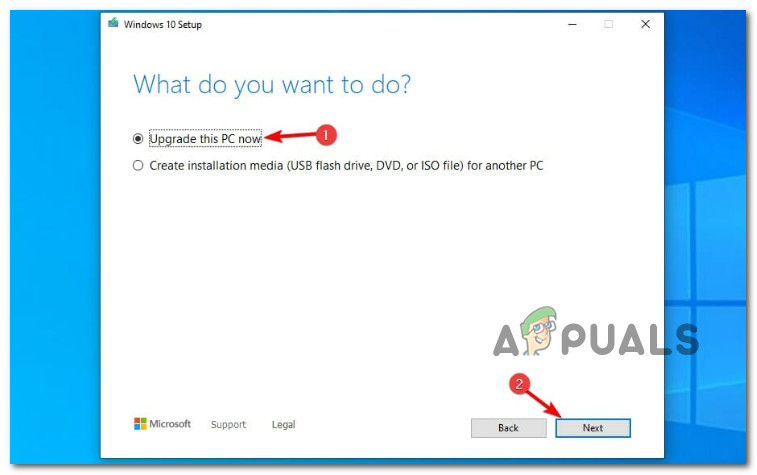
5. Select Accept to consent with the Microsoft License Terms and choose Upgrade this PC now option.
6. Let the download complete and wait for the Choose what to keep option to display. Select keep everything and follow the remaining instructions on your screen to proceed with the upgrade.
Method 4: Restore Old Spupdsvc.exe File
The spupdsvc.exe file is a software component of the Windows 10/11 operating system that can be found in the C:\Windows\System32 folder. It is a process file that periodically updates the Windows operating system. If Windows Update isn’t working, you can try replacing the old Spupdsvc.exe file with a new one. Here’s how to go about it:
1. Hit the Windows key, type Command Prompt, then click on Run as administrator.

2. After typing the following command, press Enter. This will replace the previous Spupdsvs.exe file with a new one:
cmd /c ren%systemroot%System32Spupdsvc.exe Spupdsvc.old Spupdsvc.old

To see if the Window update error 0X80070003 has been resolved, run a Windows update. If this did not help, proceed to the next step to fix some update files are missing or have problems Window 10.
Also Read: Fix Error Code 0xc1800103 0x90002
Method 5: Repair Corrupt System Files
SFC or the System File Checker is an in-built tool that allows you to repair corrupt files. This is how you can get things going and fix error 0X80070003. Check our guide to repair system files on Windows 10.

Method 6: Manually Install Updates
Sometimes you will face this kind of error when the file is not correctly being downloaded. So, you can manually download and install updates from Microsoft Update Catalog to fix error 0X80070003.
1. Hit the Windows + I keys simultaneously to launch Windows Settings.
2. Here, open the Update & Security setting.

3. Then, select the View update history option.

4. In the list, note down the KB number pending to be downloaded due to an error message.
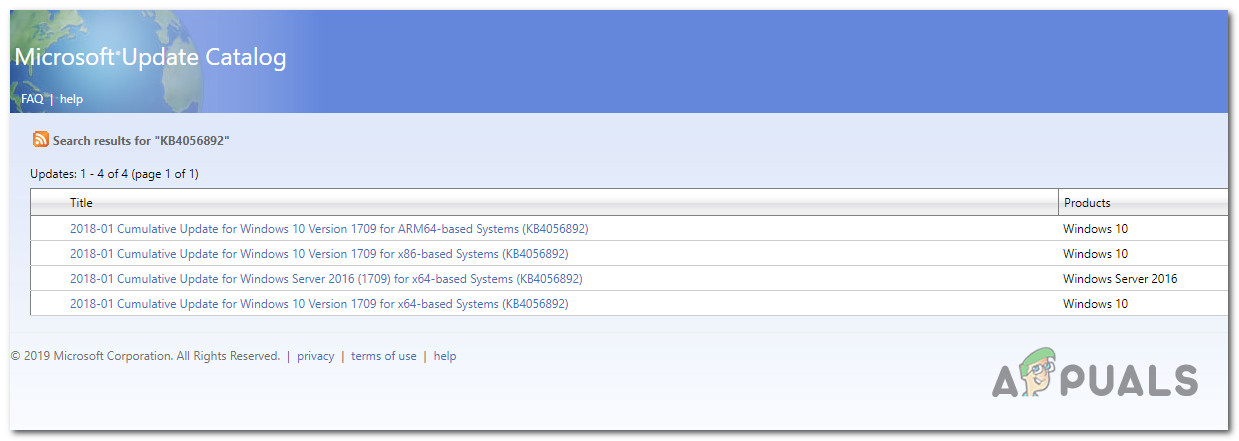
5. Next, go to the Microsoft Update Catalog website.

6. Enter the (Knowledge Base) KB Number in the search bar and click on Search.

7. Select the desired Update from the given list, as shown.

Note: The complete information about the update can be viewed on the Update Details screen.

8. Click on the corresponding Download button of the particular update.

9. In the window that appears, click on the hyperlink to download the respective update.

10. Once downloaded, press Windows + E keys to open File Explorer. Double-click on the .msu file from the folder where it was saved.
11. Choose Open with Windows Update Standalone Installer (default) and click on OK.

12. Click on Yes to confirm and allow Windows to install the desired update.
Note: It may take a few minutes for the installation to be completed, and you will receive a notification.
13. Finally, reboot your PC after saving unsaved data to implement the update.
Also Read: Fix 0x80004002: No Such Interface Supported on Windows 10
Method 7: Reset Windows Update Components
The Windows Update service could be to blame for the Windows 10/11 Update error code 0x80070003. If the Windows Update troubleshooter was ineffective, restart the Windows Update service. Here’s how to go about it:
1. Launch the Run dialog box.
2. Type services.msc and hit the Enter key to open the Services window.

3. Right-click on Background Intelligent Transfer services and click on Stop from their drop-down menus.

4. Load the File Explorer and paste the following in the address bar:
C:\Windows\SoftwareDistribution\Download
5. Next, press Ctrl+A to deal with all the folders at once and press delete.
6. Finally, go back to Services and right-click on Windows Update services, Cryptographic Services, and Background Intelligent Transfer. But this time, select Start from the drop-down menu and get things done.
Method 8: Disable Third-party Antivirus (If Applicable)
To your surprise, many users throughout the globe reported disarming third-party antivirus software useful to fix error 0X80070003. This prevents the software from blocking timely updates and thus, facilitating unobstructed updates. Check our guide to disable Antivirus on Windows 10.

Also Read: How to Fix Windows Update Error 80072ee2
Method 9: Reset Windows 10
It is essential to keep in mind that resetting Windows 10 uninstalls the software which did not came along initially with the device. Therefore, this must be the last resort to some update files are missing or have problems Window 10 issue. Follow the steps given in our guide to reset Windows 10 without losing data.

Recommended:
- 6 Ways to Earn Free Walmart Gift Cards
- How to View Windows 10 Crash Logs and Error Logs
- Fix Error 0x800705b3 in Windows Update
- Fix 0x800f0831 Windows 10 Update Error
Error 0x80070003 has been haunting Windows 10 users for a long time. Although the terms may seem daunting and unintelligible, it is not that tricky. We have mentioned the top 10 best ways to resolve and fix error 0x80070003. We hope this article helped you grasp the basics and eliminate the issue from its root.
Error code 0x80070003 occurs when Windows is trying to install a system update. Deconstructing this error code, the initial four digits (0x800) belong to the system error code range, and the subsequent four digits (0x70003) pertain to a precise error known as (ERR_PATH_NOT_FOUND). This error code has a singular interpretation, which applies specifically when faced with challenges during the update installation process.
Main cause of this error:
As confirmed by Microsoft, The BITS (Background Intelligent Transfer Service), a service that is responsible for configuring and installing Windows update causes this error code when it fails to start properly.
Basically, error 0x80070003 during update installation indicates that Windows is encountering difficulties in locating the necessary files to properly apply the update, potentially due to issues with file paths or references.
Other reported causes of this error:
After we’ve investigated this particular issue thoroughly, it turns out that there are actually several different underlying causes that might end up causing this error code. Here’s a shortlist of culprits:
- Common WU inconsistency: Running the Windows Update Troubleshooter and applying recommended fixes can resolve issues caused by common update inconsistencies.
- Corrupted DataStore logs: Deleting the DataStore.edb file can help if corrupted references in the Windows log file are causing the problem.
- Stuck Windows Update service: Sometimes, essential services get stuck in a limbo state, obstructing update installation. Restarting necessary services through the Services screen can resolve this.
- Corrupted WU dependencies: The error might be due to corrupted Windows Update dependencies. Resetting the entire Windows Update component can address this.
- Broken Windows Update component: If the Windows Update component is malfunctioning, quick fixes include using Microsoft Update Catalog, the Media Creation Tool, or the Windows Update Assistant.
- System File corruption: Corruption affecting WU system files or associated dependencies can lead to the error. Running SFC and DISM scans or utilizing System Restore snapshots can help. In extreme cases, a clean install or repair install might be necessary.
Now that we went over every potential scenario that might end up causing the 0x80070003 error in your case, let’s go over each verified fix in order until you find the method that’s effective in your case.
1. Reset the BITS Service Configuration
As this issue is mainly caused by BITS service failing to start, it indicates that the BITS service is misconfigured. To resolve this issue, we are going to reset the BITS service and it’s configurations to default by following the instructions provided by Microsoft. Follow these steps:
- Right-click on the Start Menu and Press ‘Command Prompt (Admin)‘
- Then put these commands in one-by-one and press enter:
sc config bits binpath= "%systemroot%\system32\svchost.exe –k netsvcs"
sc config bits depend= RpcSs/EventSystem
sc config bits start= delayed-auto
sc config bits type= interact type=own
sc config bits error= normal
sc config bits obj= LocalSystem
sc privs bits privileges= SeCreateGlobalPrivilege/SeImpersonatePrivilege/SeTcbPrivilege/SeAssignPrimaryTokenPrivilege/SeIncreateQuotaPrivilege
sc sidtype bits unrestricted
sc failure bits reset= 86400 actions=restart/60000/restart/120000?
- Now restart your computer and try updating Windows again.
2. Run the Windows Update Troubleshooter
Windows Update Troubleshooter, is designed to automatically identify and fix common Windows Update problems.
If you haven’t tried this method yet, follow the instructions below to run the Windows Update Troubleshooter and apply the recommended fix automatically:
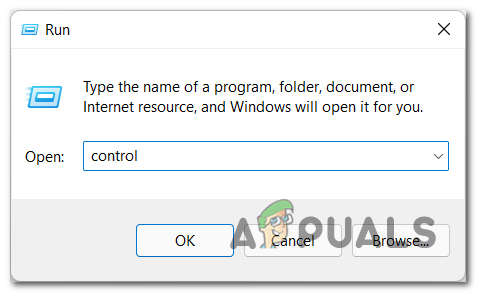
- Open a Run dialog box by pressing the Windows key + R.
- Type ‘control’ inside the text box and press Enter to open up the Control Panel interface.

Accessing the Control Panel Menu Note: You may be prompted by the User Account Control – if so, click Yes to grant admin access.
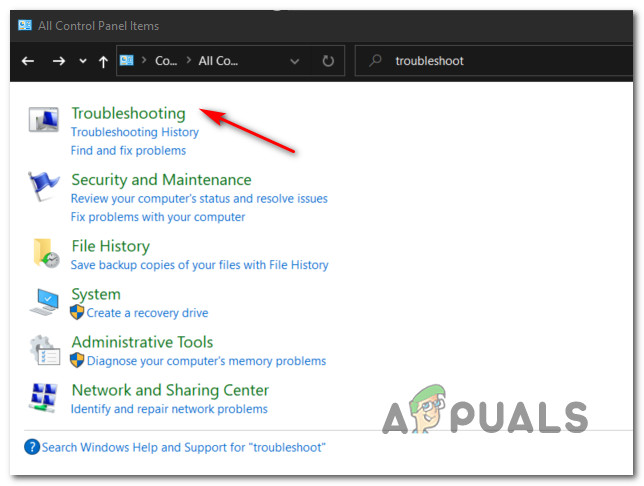
- Once you’re inside the Control Panel window, use the search function to look for ‘troubleshoot’.
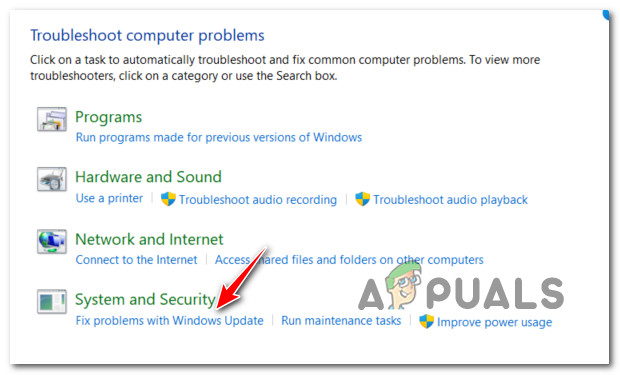
- From the list of results, click on all the different categories Troubleshooting.

Accessing the Troubleshooting tab - Go under System and Security and click on Fix problems with Windows Updates.

Fix Problems with Windows Update - After you get to the first Windows Update Troubleshooter prompt, click Next and wait for the initial scan to finish.
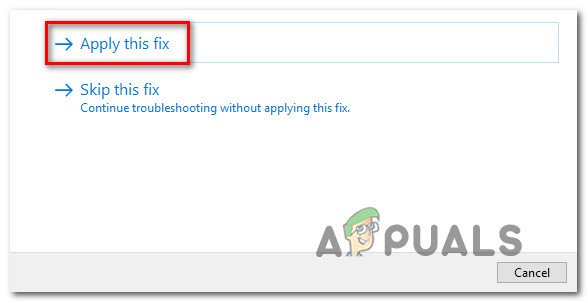
- If a viable fix is found, click on Apply this fix to apply it to the recognizable scenario.

Apply the recommended fix Note: Keep in mind that with some types of recommended fixes, you might be required to do a series of manual steps.
- After applying the fix successfully, restart your PC and attempt to install the failing update once again.
If the Windows Update still fails to install with the same 0x80070003, move down to the next method below.
3. Clear the DataStore Folder
- First things first, open up File Explorer by pressing the Windows key + E or by clicking on the appropriate icon inside the taskbar.
- Once you’re inside File Explorer, navigate to the following location:
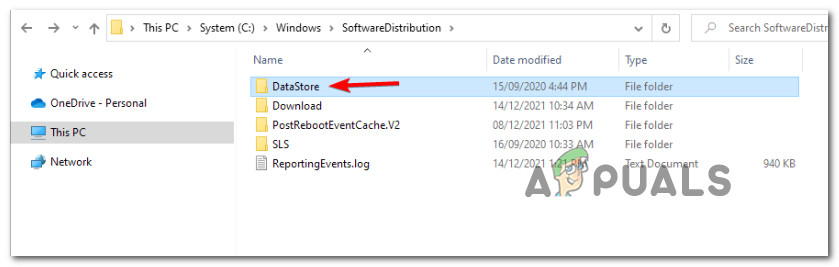
C:\Windows\SoftwareDistribution
- Once you’re inside the SoftwareDistribution folder, double-click on DataStore.

Accessing the DataStore menu - From the SoftwareDistribution folder, double-click on Download from the list of subfolders.
- Once you’re inside the Download folder, press Ctrl + A to select everything inside, then right-click on a selected item and click on Delete from the context menu.
- After the Download folder of DataStore is completely empty, restart your PC and wait for the next startup to complete.
- After your PC boots back up, attempt to install the pending update once again and see if the problem is now fixed.
In case the same issue is still occurring, move down to the next method below.
4. Restart the main Windows Update Service
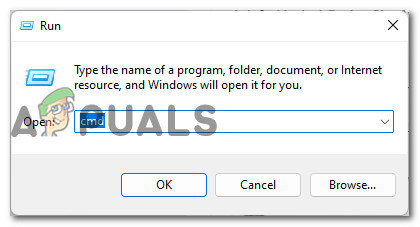
- Press Windows key + R to open up a Run dialog box.
- Next, type ‘cmd’ inside the text box.
- Press Ctrl + Shift + Enter to open up an elevated Command Prompt window with admin access.

Open up a CMD prompt - At the User Account Control prompt, click Yes to grant admin access to the CMD Prompt.
- Type the following commands in the same order and press Enter after each one to effectively restart and re-register the main Windows Update service:
net stop wuauserv
regsvr32 %windir%\system32\wups2.dll
net start wuauserv
- Once every command has been processed successfully, close the elevated Command Prompt and attempt to install the failing update once again.
If the same kind of error is still occurring, move down to the next method below.
5. Reset the Windows Update component
- The first step is to open a Run dialog box by pressing the Windows key and R simultaneously.
- After that, type “cmd” into the text box and press Ctrl + Shift + Enter to open an elevated Command Prompt with admin access.
- Keep in mind that you will need to click ‘Yes’ when the User Account Control prompt appears in order to grant administrative privileges.
- Once you’re in the elevated Command Prompt, use the following commands (in order) to stop all Windows Update-related services:
net stop wuauserv

net stop cryptSvc

net stop bits

net stop msiserver
Note: These commands will effectively stop the Windows Update Services, MSI Installer, Cryptographic services, and BITS services.
- After every relevant service has been stopped, you can clear and rename the SoftwareDistribution and Catroot2 folders by using these commands:
ren C:\Windows\SoftwareDistribution SoftwareDistribution.old
ren C:\Windows\System32\catroot2 Catroot2.old
Note: These two very important folders store updated files used by the WU component. Renaming these folders will force your OS to create new healthy equivalents that will not be affected by corruption.
- Now that the folders have been cleared, run the following commands to re-enable the services we disabled earlier:
net start wuauserv
net start cryptSvc
net start bits
- Restart your PC one final time and see if the 0x80070003 error has been eliminated.
If the same kind of issue is still occurring, move down to the next method below.
6. Install the pending update manually
- Start by visiting the home page of the Microsoft Update Catalog (MUC) directory in your preferred browser.
- In the MUC root directory, use the search function to look for the update that’s failing in your particular case (for example KB5005188).

Install the failing update - When the results come up, go through them and choose the appropriate update versions that you need to install, taking into account your current OS architecture and the Windows versions you’re using.

Download and install the correct update via MUC - Once you know which update is compatible with your machine, click on the Download button next to the correct driver.
- After the download is finally done, open File Explorer and navigate to the folder where the update was downloaded (most likely in the Download folder).
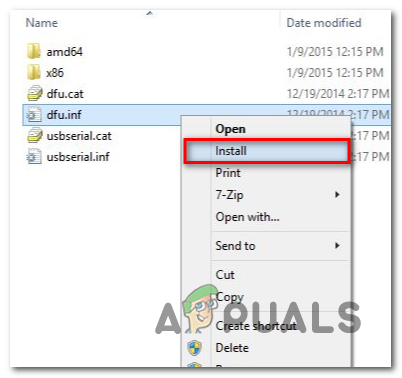
- After you’re inside the right folder, find the .ini file and right-click it before clicking Install from the context menu.

Install the update from the ini file - Follow the remaining directions on the screen to finish installing the Windows Update that was failing to install previously.
- Restart your PC one final time and see if the problem is now fixed.

If the issue is still not fixed as you’re seeing the 0x80070003 even when attempting to install the pending update using the Microsoft Update Catalog, move down to the next method below.
7. Bring Your Windows up to date using Windows Update Assistant
- Start by opening up any browser and visit the official download page of Windows.
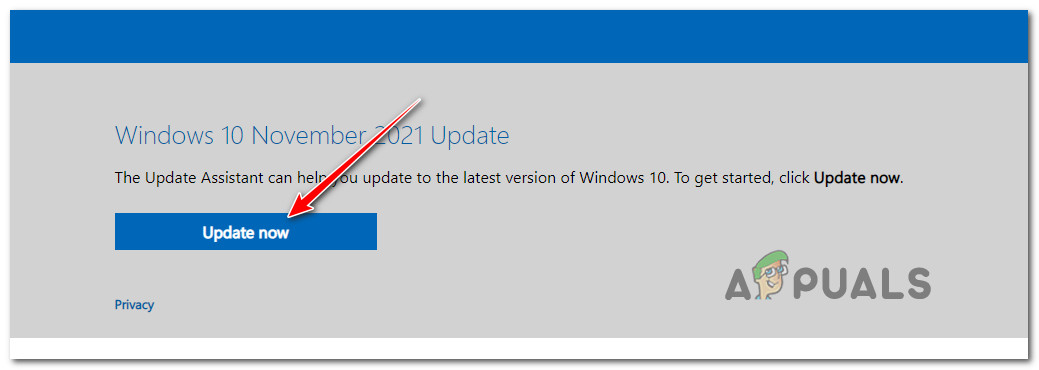
- Once you get to the correct page, click on the Update now button under (Windows 10).

Update Now - Wait until the download is complete, then right-click on the executable that you’ve just downloaded and click on Run as Administrator.
- At the confirmation prompt, click on Yes to grant admin privileges.
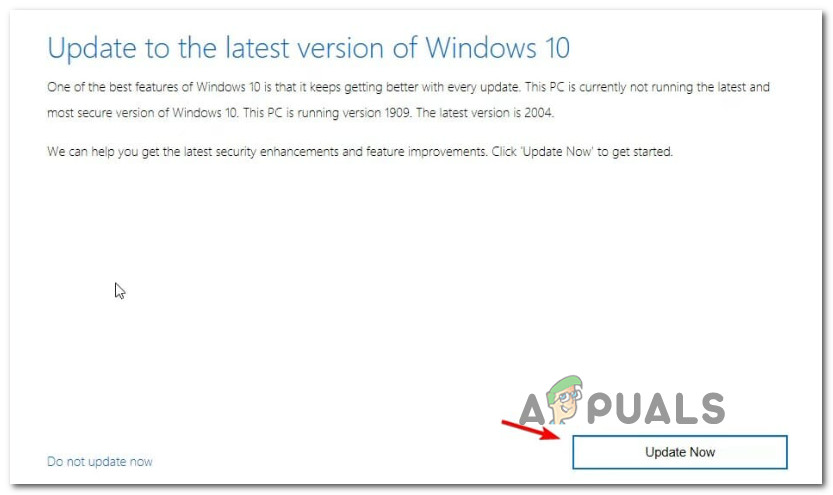
- Once you’ve successfully opened the Windows Update Assistant, click on the Update Now button and wait until the update is downloaded.

Install the latest update available via Windows Update - Once the download is complete, you will be asked to restart your PC in order to allow the update to install.
- Once your PC restarts you will see a “Finishing Up’ window as the installation of the pending update is complete.
If the steps above we’re interrupted at some point by the 0x80070003 error (or a different one), try the next method below.
8. Bring Your Windows up to date using Media Creation Tool
- Open any browser and visit the official download page of Windows.
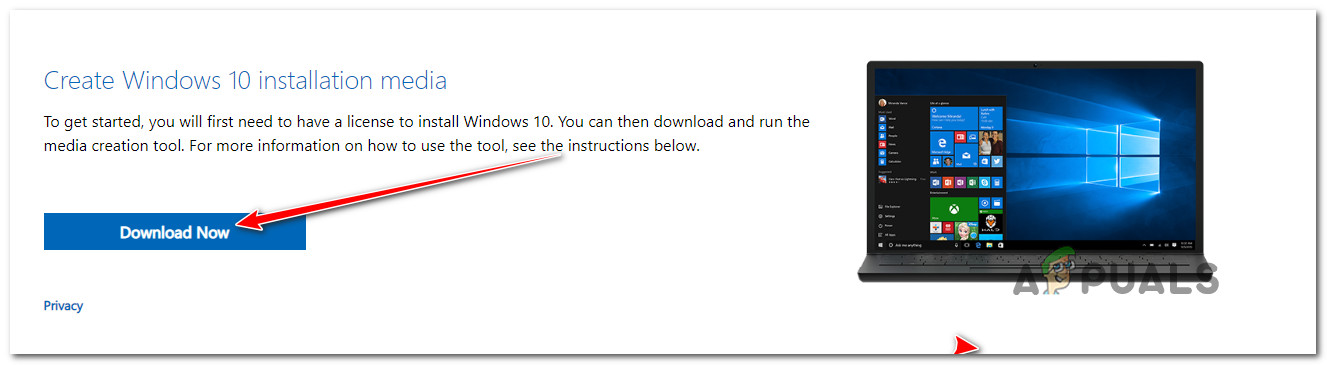
- Once you arrive at the correct page, click on the Download button (under Create Windows 10 installation media).

Downloading the latest version of the media creation tool - Once the executable of the tool is downloaded locally, double-click on it and click Yes at the UAC (User Account Control) prompt.
- Accept the Terms of Service, then select the Upgrade this PC now toggle before clicking on Next.

Upgrading this PC - Wait for all the downloads to finish, then choose to Keep everything in order to ensure that you aren’t clean installing.
- Follow the remaining instructions to complete the upgrade operation, then restart your PC and see if the problem is now fixed.
If you’re still experiencing the 0x80070003 error during the updating process or something else interrupts the upgrading, move down to the next method below.
9. Deploy SFC and DISM Scans
Begin with a basic SFC scan.
Note: Keep in mind that this tool only works locally and won’t require an internet connection.
After the SFC scan is complete, reboot your computer and check if the issue has been fixed once the startup is finished.
If you’re still seeing the 0x80070003 error when trying to run the Windows Update Troubleshooter, try running a DISM scan next and follow the on-screen prompts to finish up.

Important: One key difference between SFC and DISM is that DISM uses a sub-component of Windows Update to download healthy equivalents of any corrupted system files it finds. Because of this, you need to make sure you have a stable internet connection before beginning this operation.
After the DISM scan is successful, restart your computer once again and see if that has fixed the 0x80070003 error. If not, move on to the next potential fix below.”
10. Deploy a Clean Install or Repair install
If you haven’t had any success so far, it’s likely because you’re dealing with some kind of inconsistency that can’t be fixed in a conventional way.
There are two available options:
- Repair install (in-place repair) – This procedure only touches your system files and leaves everything else intact. This should be your first approach if you have essential personal data that you can’t afford to lose. But keep in mind that you’ll need compatible installation media.
- Clean install – This is the easiest procedure out of the bunch. You can deploy this operation without compatible installation media, but keep in mind that you’ll lose any personal files, documents, and media present on the operating system partition.
Kamil Anwar
Kamil is a certified MCITP, CCNA (W), CCNA (S) and a former British Computer Society Member with over 9 years of experience Configuring, Deploying and Managing Switches, Firewalls and Domain Controllers also an old-school still active on FreeNode.
Readers help support Windows Report. We may get a commission if you buy through our links.
Read our disclosure page to find out how can you help Windows Report sustain the editorial team. Read more
Trying to update Windows but getting error code 0x80070003? You’re not alone.The full error message: Some update files are missing or have problems. We’ll try to download the update again later. Error code: (0x80070003).
So, how do you fix this? You’ll need to adjust settings, fix file corruption, and modify the registry. It may seem like a lot, but don’t worry – we’ve outlined each step below. Just follow along!
How do I fix error code 0x80070003?
1. Modify the Registry
-
1. Press Windows + R to open Run, type regedit in the text field, and hit Enter.

-
2. Click Yes in the UAC prompt.
-
3. Paste the following path in the address bar and hit Enter:
HKEY_LOCAL_MACHINE\SYSTEM\CurrentControlSet\Services\WIMMount
-
4. Now, double-click on the ImagePath entry on the right.
-
5. Make sure the Value data here has system32\drivers\wimmount.sys listed under it. If it doesn’t, make the changes and click on OK.

-
6. Now, press Windows + E to open File Explorer, paste the following path in the address bar, and hit Enter:
C:\Windows\System32\drivers\
-
7. Verify you have the wimmount.sys file here.

-
8. Finally, restart the computer.
Windows updates can run into trouble due to corrupted registry files, so you may need to change your Registry settings. Apply the provided steps below without changing other files.


Once done, check if you can now download Windows Updates without encountering the 0x80070003 error.
2. Run the Windows Update troubleshooter
- Download Windows Update Troubleshooter.
- Once the file is downloaded, run it.
- Select one of the available options and click on Next.

- Wait for the process to finish.
- If the issue is still there, repeat the process, but select a different troubleshooter.

3. Run the DISM and SFC scan
- Press Windows + R to open Run, type cmd, and hit Ctrl + Shift + Enter.
- Click Yes in the UAC prompt.
- Now, paste the following three commands one at a time and hit Enter after each:
DISM /Online /Cleanup-Image /CheckHealthDISM /Online /Cleanup-Image /ScanHealthDISM /Online /Cleanup-Image /RestoreHealth
- Next, execute the following command to run the SFC scan:
sfc /scannow
- Once done, check if you are now able to install the updates.


Corrupt system files are a likely reason you are getting the 0x80070003 update error in Windows, and the SFC (System File Checker) scan and DISM (Deployment Image Servicing and Management) tool should do the trick in this case.
4. Restart or stop the Windows Update Service
- Press Windows + R to open Run, type services.msc, and then hit Enter.
- Now, right-click on the Windows Update service, and select the Stop button.
- Reboot your PC.
- Return to the Windows Update service, right-click on it, and select Start.


This solution usually works, but if you’re having issues with services, check out what to do when the Windows Update service isn’t running.
- Windows Update is not working in Windows 10/11
- We couldn’t complete the Updates/Undoing changes
- 5+ best Windows update repair tools for Windows 10/11
- How to use the Windows Update troubleshooter in Windows 10 & 11
- Update error 0x800f0922 on Windows 10/11 [Install Failed]
5. Reset the Windows Update Components
In case the previous methods didn’t work, it could be corrupt Windows Update components to blame. Here, the simplest solution is to reset the Windows Update Components.
You can do that by running a batch file or manually executing the commands. The process is usually quick and highly effective at eliminating the 0x80070003 error with the KB5007186 update.
6. Manually download each update
- Visit the Microsoft Update Catalog website.
- Enter the KB number of the update you want to download.

- Now locate the update that matches your PC architecture and download it.

- Once the update is downloaded, run it and follow the instructions on the screen to install it.


7. Perform an in-place upgrade
- Visit the official Windows 10 download page and click on the Download Now button.

- After the tool is downloaded, right-click on it and select Run as administrator.
- Click Yes in the UAC prompt.

- Wait for the tool to get things ready.

- Click on Accept to agree to the Microsoft Software License Terms.
- Choose Upgrade this PC now and click Next.
- Wait for the update to download. This can take a while.
- When you reach the Choose what to keep screen, select Keep everything and then proceed with the in-place upgrade.
- Now follow the instructions to complete the process.


This is by far the most effective method to fix the 0x80070003 error. And remember, the installed applications and stored files won’t be affected during the process.
How to fix update error 0x80070003 on Windows 11?
1. Run a quick SFC scan
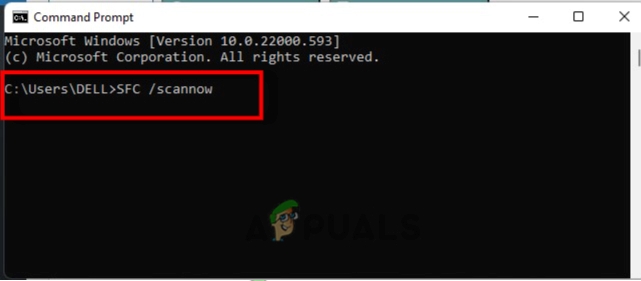
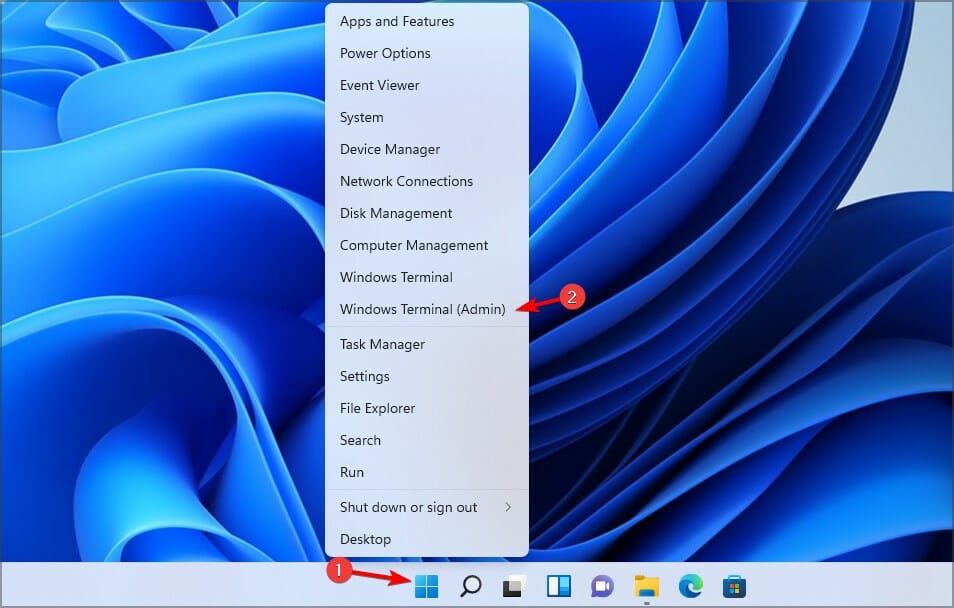
- Right-click the Start button and select Windows Terminal (Admin).

- Now run the following command:
sfc /scannow
- Wait for it to finish. The process can take 10 minutes or more.
- After it’s finished, check if the problem is still there.

The reason why you’re getting error code 0x80070003 is that you have problems with essential Windows services. Corrupt system files and misconfigured Registry settings are also common culprits.
But if you follow the steps above carefully, the error code 0x80070003 should be fixed by the time you reach this part.
In case the problem persists, you have no option but to reinstall Windows 10, and remember, you will lose the applications and files stored on the computer.
Also, you may use a reliable Windows Update repair tool and fix all such errors automatically and in no time.
Should you run into any issues along the way, let us know in the comments below.
Ivan Jenic
Windows Hardware Expert
Passionate about all elements related to Windows and combined with his innate curiosity, Ivan has delved deep into understanding this operating system, with a specialization in drivers and driver troubleshooting.
When he’s not tackling diverse driver-related problems, Ivan enjoys watching good movies and spending time hiking with his family and friends.