
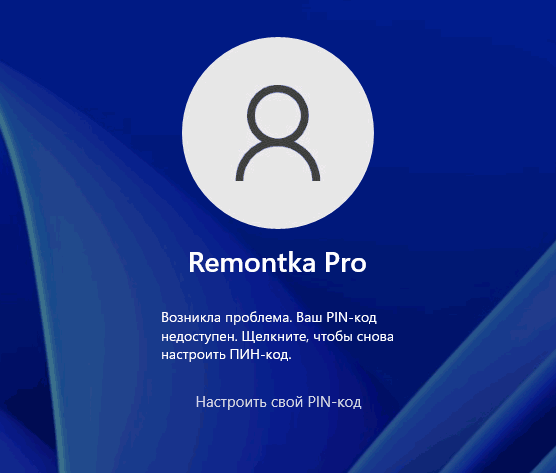
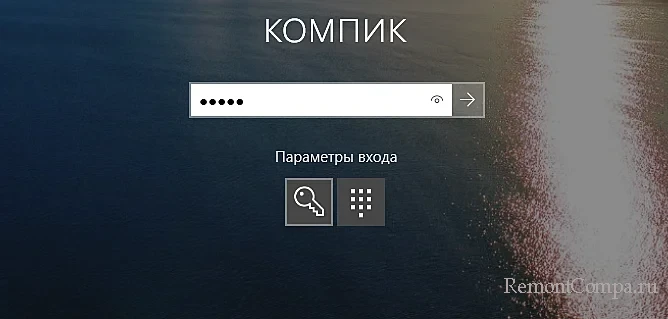
При очередном включении компьютера или ноутбука вас может встретить сообщение: «Возникла проблема. Ваш PIN-код недоступен. Щелкните, чтобы снова настроить ПИН-код». Иногда нажатие «Настроить свой PIN-код» позволяет заново создать его, но чаще вы снова возвращаетесь в это же окно.
В этой пошаговой инструкции подробно о том, что делать, если ПИН-код недоступен, чтобы исправить ситуацию и зайти в Windows 10 или Windows 11.
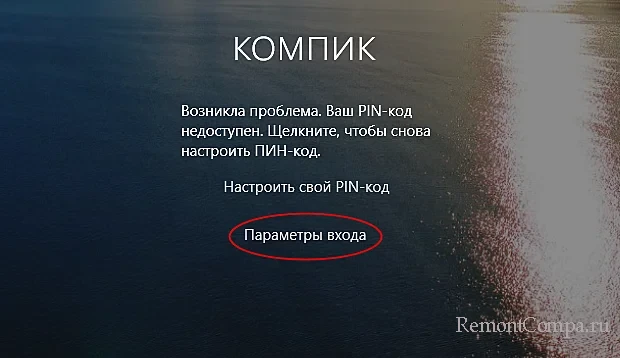
Решение проблемы, если отображается пункт «Параметры входа»
Если ниже сообщения о том, что ваш PIN-код недоступен есть ссылка «Параметры входа», можно нажать по ней, а затем войти в систему, используя пароль учётной записи Майкрософт, при условии, что вы его помните. Если нет — далее поговорим и о сбросе пароля.
После входа в Windows с паролем, можно начать решать проблемы с ПИН-кодом. Рекомендуемые шаги для рассматриваемого сценария:
- Нажмите правой кнопкой мыши по кнопке «Пуск», выберите пункт «Выполнить», введите services.msc и нажмите Enter.
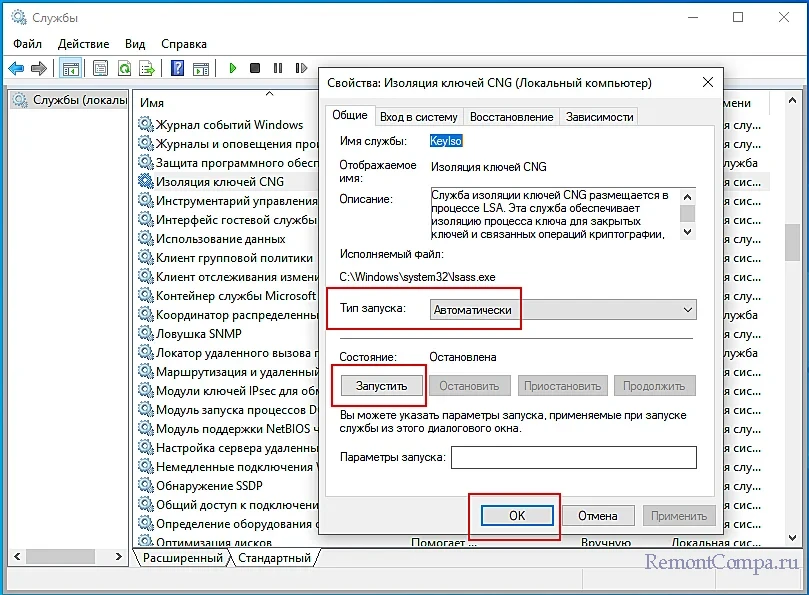
- Откроется список служб. Найдите в списке «Изоляция ключей CNG» и дважды нажмите по имени службы.
- Если тип запуска службы установлен в «Отключена», измените на «Вручную», примените настройки и перезагрузите компьютер — это должно исправить проблему и описанные далее шаги использовать не требуется.

- Если тип запуска службы установлен правильно (Вручную), попробуйте использовать точки восстановления системы на дату, когда проблемы не было. Об этом в инструкциях Точки восстановления Windows 11, Точки восстановления Windows 10.
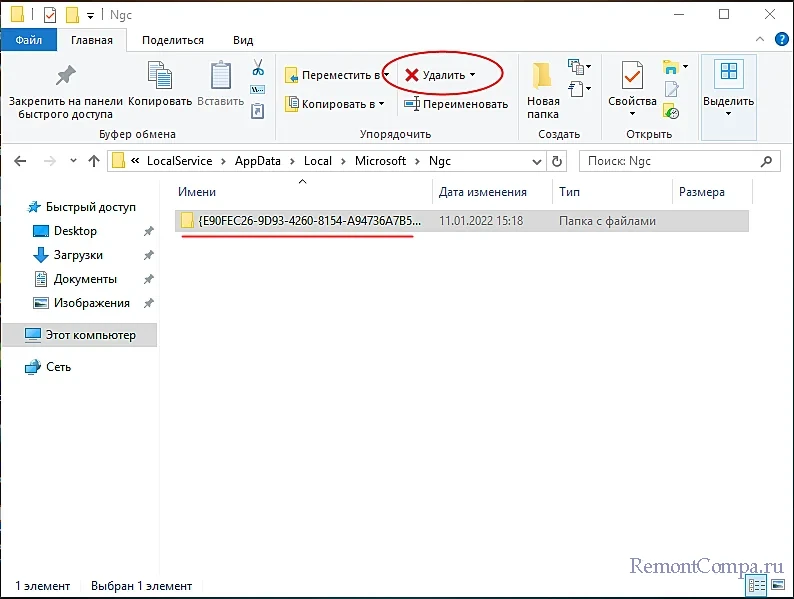
- При отсутствии точек восстановления, есть ещё один подход: удалите содержимое системной папки
C:\Windows\ServiceProfiles\LocalService\AppData\Local\Microsoft\NGC
но учитывайте, что это удалит ПИН-коды всех пользователей компьютера. Удалить её в проводнике не получится, вместо этого, запустите командную строку от имени администратора и по порядку введите следующие команды:
takeown /f C:\Windows\ServiceProfiles\LocalService\AppData\Local\Microsoft\NGC /r /d y
icacls C:\Windows\ServiceProfiles\LocalService\AppData\Local\Microsoft\NGC /grant Администраторы:F /t
RD /S /Q C:\Windows\ServiceProfiles\LocalService\AppData\Local\Microsoft\Ngc
MD C:\Windows\ServiceProfiles\LocalService\AppData\Local\Microsoft\Ngc
icacls C:\Windows\ServiceProfiles\LocalService\AppData\Local\Microsoft\Ngc /T /Q /C /RESET
После удаления содержимого папки и перезагрузки компьютера вам могут предложить заново создать ПИН-код, либо его можно будет создать вручную в параметрах учетных записей в пункте «Варианты входа».

Как исправить ошибку «Возникла проблема ПИН-код недоступен», если параметры входа не отображаются
Если выбор варианта входа с паролем вместо ПИН-кода недоступен, можно использовать следующий способ решить проблему (внимание: если проблема возникла после включения опции Диагностический запуск в msconfig, используйте отдельную инструкцию):
- На экране блокировки нажмите по изображенной в правом нижнем углу кнопки «Питания», а затем, удерживая клавишу Shift нажмите «Перезагрузка».
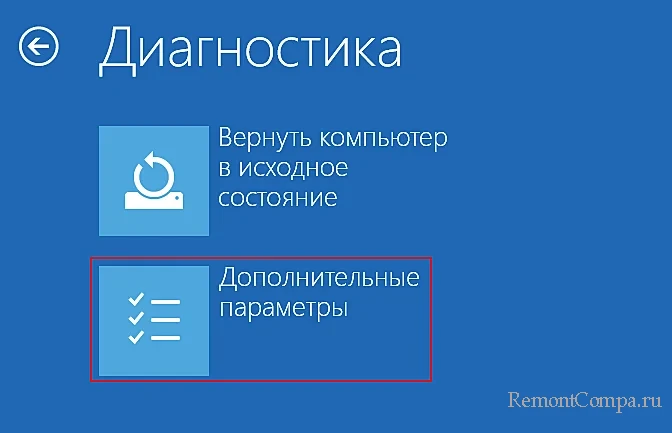
- После перезагрузки вы попадете в среду восстановления Windows 10 или Windows Перейдите в раздел Поиск и устранение неисправностей — Дополнительные параметры.
- Здесь в первую очередь я рекомендую попробовать использовать пункт «Восстановление системы» — при наличии точек восстановления вы быстро сможете вернуть компьютер к состоянию, когда вход с ПИН-кодом работал исправно.

- Если предыдущий вариант не подошел, откройте пункт «Командная строка», а затем введите команду regedit и нажмите Enter.
- Откроется редактор реестра. В нём выберите раздел HKEY_LOCAL_MACHINE, а затем в меню выберите «Файл» — «Загрузить куст» и укажите путь к файлу
C:\Windows\System32\config\SYSTEM
Внимание: буква системного диска в среде восстановления может отличаться, кроме этого, может быть несколько дисков, содержащих такую папку. Убедитесь, что файл открывается с того диска, где у вас по факту установлена Windows (определить можно, например, по размеру этого диска).

- Появится запрос о назначении имени для загруженного куста — задайте любое удобное вам. В результате внутри раздела реестра HKEY_LOCAL_MACHINE появится подраздел с заданным вами именем.
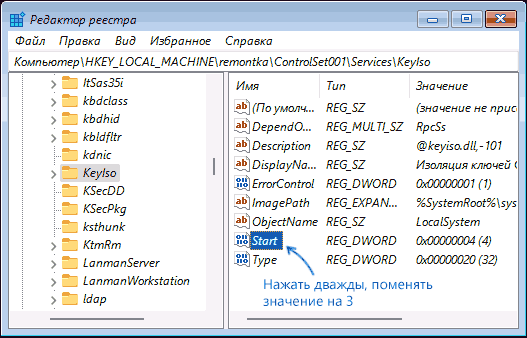
- В этом подразделе перейдите в
ControlSet001\Services\KeyIso
и обратите внимание на значение параметра с именем Start в правой панели. Если его значение отличается от 3, дважды нажмите по параметру, установите значение 3, примените настройки. Если значение уже такое, перейдите к 10-му шагу.

- Выберите подраздел реестра с заданным вами на 6-м шаге именем, а затем в меню редактора реестра выберите в меню «Файл» — «Выгрузить куст» и подтвердите выгрузку сделанных изменений.
- Закройте редактор реестра, командную строку и перезагрузите компьютер — ПИН-код Windows 10 или Windows 11 должен работать.
- Если на 7-м шаге значение параметра уже равно 3, можно закрыть редактор реестра, а затем удалить ПИН-код в командной строке, используя по порядку следующие команды (при необходимости измените букву диска C на актуальную букву системного раздела диска):
takeown /f C:\Windows\ServiceProfiles\LocalService\AppData\Local\Microsoft\NGC /r /d y
icacls C:\Windows\ServiceProfiles\LocalService\AppData\Local\Microsoft\NGC /grant Администраторы:F /t
RD /S /Q C:\Windows\ServiceProfiles\LocalService\AppData\Local\Microsoft\Ngc
MD C:\Windows\ServiceProfiles\LocalService\AppData\Local\Microsoft\Ngc
icacls C:\Windows\ServiceProfiles\LocalService\AppData\Local\Microsoft\Ngc /T /Q /C /RESET


После этого можно закрыть командную строку, перезагрузить компьютер. В результате вам будет предложено либо зайти с паролем, либо создать ПИН-код сразу после ввода пароля учетной записи Майкрософт.
Сброс пароля, удаление ПИН-кода и перевод учетной записи в «Локальную»
Если предыдущие способы не помогают попасть в систему, либо вы не помните пароль учётной записи Майкрософт, вы можете использовать LiveCD для того, чтобы сбросить пароль учетной записи, конвертировать её из учетной записи Майкрософт в локальную, что автоматически отключит использование ПИН-кода для этого аккаунта.
- Используя какой-либо другой компьютер, загрузите образ ISO WinPE Sergei Strelec с сайта sergeistrelec.ru и запишите его на флешку, например, с помощью Rufus.
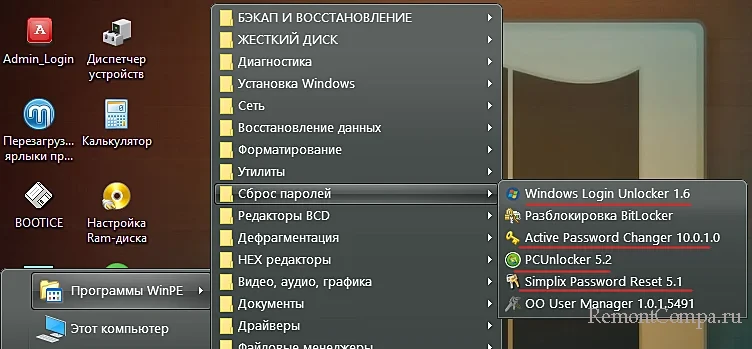
- Загрузитесь с созданной флешки (может потребоваться отключить Secure Boot в BIOS) на компьютере, где ПИН-код недоступен, в меню «Пуск» перейдите в раздел «Программы WinPE» — «Сброс паролей» и запустите утилиту Windows Login Unlocker.

- В списке учетных записей нажмите правой кнопкой мыши по учетной записи, в которую не получается войти и выберите пункт «Reset password» (для сброса/удаления пароля) или «Change password» (для изменения пароля).

- Появится запрос, с сообщением о том, что это учетная запись Майкрософт и она будет преобразована в локальную учетную запись — нажмите Ок.


После выполнения указанных действий вы получите сообщение о том, что пароль был успешно сброшен, утилиту можно закрыть и загрузиться с обычного жесткого диска или SSD — без пароля или с установленным вами паролем.
Если создание загрузочной флешки в текущей ситуации невозможно, есть ещё один вариант: используйте 2-й способ из статьи Как включить скрытую учетную запись Администратора в Windows 11 (подойдет и для Windows 10), затем зайдите в эту учетную запись и уже из неё выполняйте управление пользователями для исправления проблемы.
Использование традиционного пароля при входе в учётную запись Windows не является единственным способом авторизации. В Windows 10 и 11 для входа в систему также может использоваться графический пароль, ключ безопасности и пин-код — привязанный к основному паролю четырёхзначный код. Использование пин-кода существенно упрощает процедуру авторизации, но только при условии, что отвечающие за данный способ авторизации компоненты работают нормально. В противном случае пользователь может столкнуться с серьёзными проблемами, вплоть до невозможности входа в учётную запись.
Примером может служить ошибка входа в учётную запись «Возникла проблема. Ваш ПИН-код недоступен». При этом пользователю предлагается настроить свой пин-код повторно, но ссылка на настройку опции не работает.

Чаще всего причиной появления этой ошибки становится отключение пользователем из соображений оптимизации важных служб, например, службы изоляции ключей CNG. К ошибке может привести бездумное применение программ-твикеров, повреждение системных файлов, сбои в конфигурации пользователя, действия вредоносного программного обеспечения. Соответственно, вероятность удачного восстановления функции будет зависеть от того, насколько серьёзной является причина ошибки.
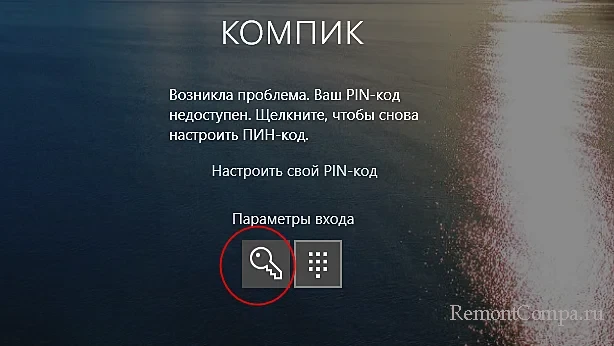
Если вы не можете войти в систему с пин-кодом, попробуйте войти с обычным паролем. Нажмите на экране с ошибкой «Параметры входа», кликните по значку ключа и введите в поле свой пароль.
Если вход будет выполнен удачно, первым делом зайдите в оснастку «Службы» и проверьте состояние службы «Изоляция ключей CNG». Она должна выполняться и иметь тип запуска «Вручную» или «Автоматический». Если её настройки отличаются от указанных, измените их.
Если вы до этого отключали и другие службы, включите их. Перезагрузите компьютер и попробуйте войти в систему с использованием пин-кода.
Восстановить доступ к учётной записи можно также удалив файлы конфигурации пин-кода, но так как с экрана входа в систему у вас не будет доступа к Проводнику, компьютер придётся загрузить с LiveCD, например, с WinPE 10-8 Sergei Strelec. Перейдите во встроенном в LiveCD файловом менеджере в расположение
C:\Windows\ServiceProfiles\LocalService\AppData\Local\Microsoft\NGCи очистите содержимое последнего каталога.
Загрузившись в обычном режиме, вы попадёте на рабочий стол с формой для ввода обычного пароля. Если на компьютере имеется другая учётная запись, вместо LiveCD для доступа к папке NGC можете использовать её, но это тоже не очень удобное решение, так как оно связано с необходимостью изменения прав доступа. Да, после очистки папки NGC пин-код нужно будет создать заново.
Если вам не удаётся войти с использованием обычного пароля, потребуется его сброс. Для этих целей опять же используем WinPE 10-8 Sergei Strelec, точнее, входящие в его состав утилиты Windows Login Unlocker, Active Password Changer PCUnlocker или Simplix Password Reset. При сбросе основного пароля будет удалён и пин-код, причём не имеет значения, какой тип учётной записи вы используете (локальную или Microsoft).
Если устранить ошибку описанными выше способами не удаётся, есть вероятность, что неполадка вызвана либо повреждением системных файлов, либо отключением некоторых критически важных служб. В таком случае может помочь откат системы к точке восстановления, созданной на момент нормальной работы Windows. Для выполнения отката придётся загрузиться в среду восстановления. Для этого на экране входа в систему открываем меню электропитания и перезагружаем компьютер с зажатой клавишей Shift.

Попав в среду восстановления, перейдите по цепочке Диагностика → Дополнительные параметры → Восстановление системы и запустите процедуру отката к точке восстановления.
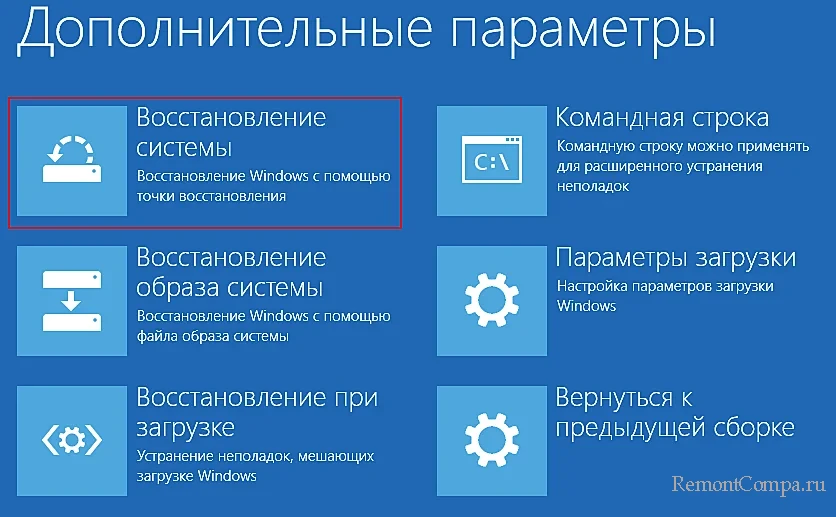
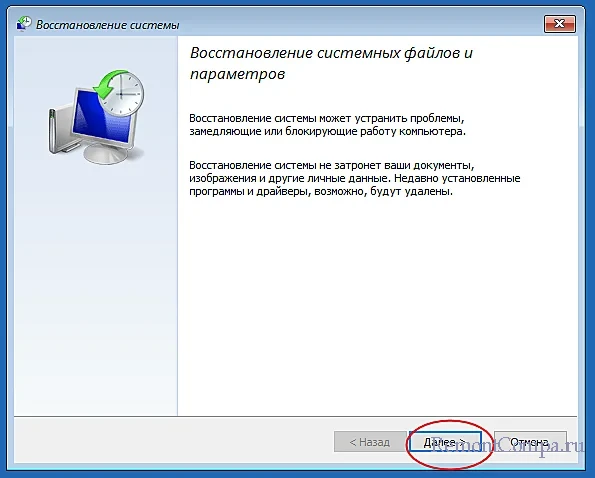
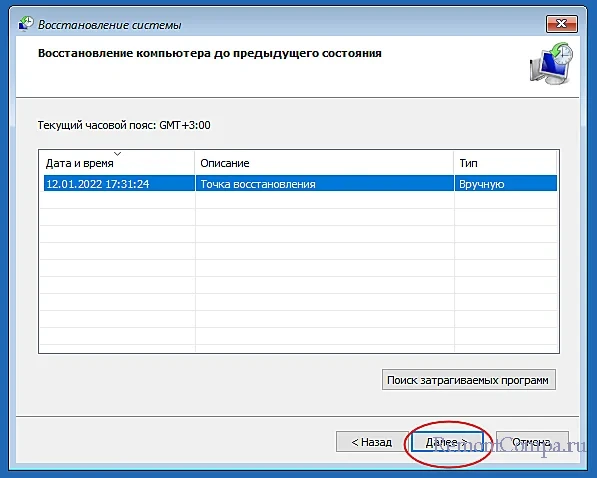
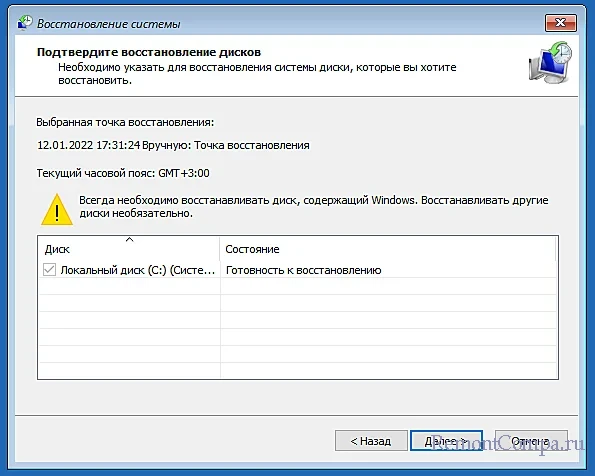
В случае проблем с доступом к функции, используйте для входа в среду WinPE установочный диск с Windows. Выберите Поиск и устранение неисправностей → Восстановление системы и проследуйте указаниям мастера. Откат восстановит значительную часть критически важных файлов и вернёт службы в их исходное состояние, обеспечив тем самым нормальную работу функции входа в учётную запись.
The Windows update error 0xc000006d is mostly encountered when users try to log in to their system after updating the Windows. It generally appears with a small message “Something went wrong and your PIN is not available status:0xc000006d, substatus: 0xc0070016”.
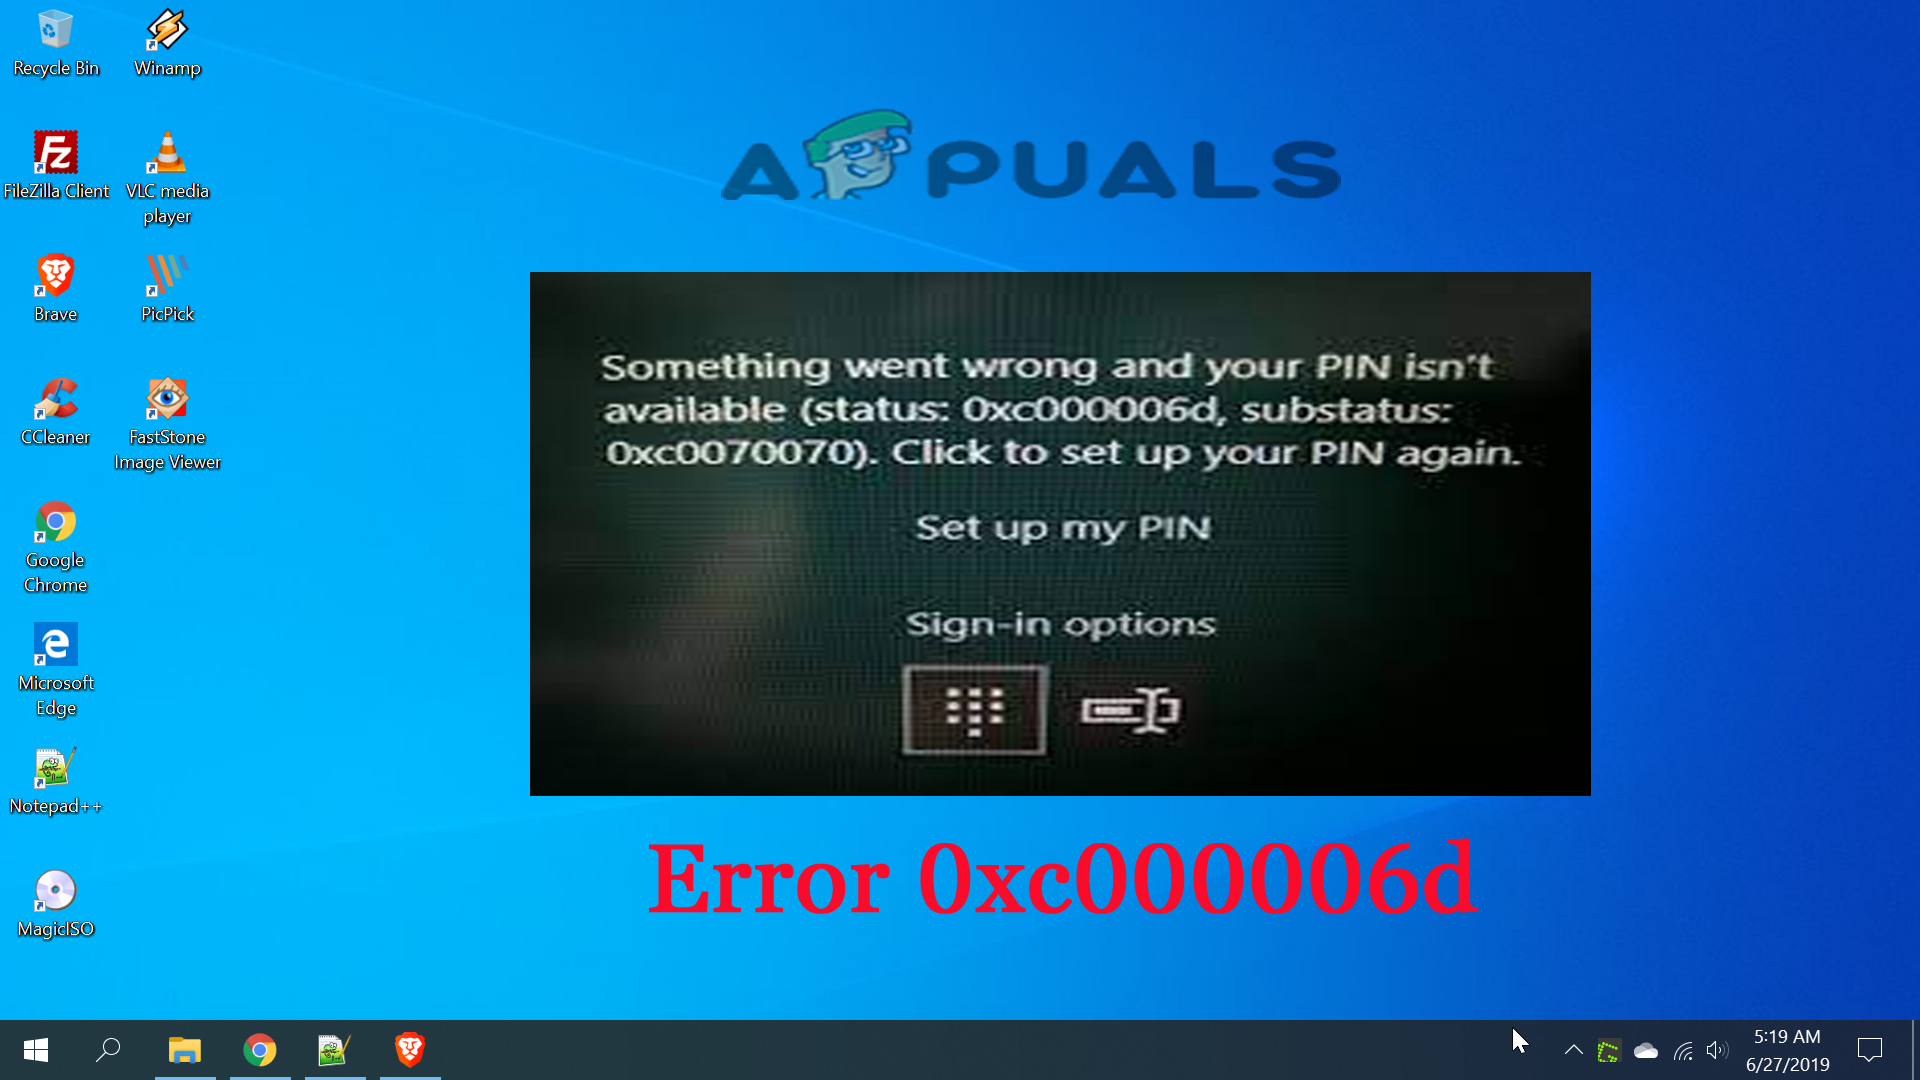
This event is generated on the system where a login attempt was made thereby hindering the users to log in to the Windows by giving them a warning message that the credentials entered by them are incorrect or could not be verified. The error is seen on both the Windows 10 as well as Windows 11 systems. Therefore, this error needs to be fixed as soon as possible.
So, here in this article, you will find the most probable causes of this error and the effective solutions to get past the error and update the Windows system. But before diving deep into the solutions let’s first have a quick look at some causes of this error. As it is always important to know the root cause of the error because it not only helps you to pick the most suitable solution but also it saves your time and patience too.
- Windows Updated Cache: The Windows update cache gets stored every time you install the update and this temporary cache stored while updating your Windows version may trigger such an error and stop the update from installing. So, you can fix this issue by clearing the updated windows cache.
- Incomplete or Incorrect Windows Installation process: Sometimes the Windows update process gets interrupted or stopped in between then you might face this error while logging in to your system. Check for the Windows installation process and then try updating it again.
- Malfunction System Operation- If somehow, you’re the operation malfunctions due to internal glitches and bugs then it might cause this 0xc000006d error to occur. So, try finding the source of the malfunctioning operation and try to fix it.
- The local WU component issues- In many cases, you are likely to see the error when some sort of corruption affects the Windows update dependencies and files. You need to fix the error by fixing the corruption issue, you can update the operating system build through the Media creation tool.
- Antivirus Confliction – The antivirus program installed on your system is more likely to conflict with the update process and block the update process from installing and this may lead to the error and stop the update from installing or getting stuck in between.
- System Files Corruption – Corrupted Windows system files are likely to cause various issues and errors with the Windows system and the update process. Repairing the corrupted system file may work for you to solve the error.
Now, that you are aware of some possible causes of such errors, you can easily be able to pick the most suitable and effective solutions among the various to fix the same.
Run Windows Update Troubleshooter
Before starting with the other solutions listed it is suggested to run the inbuilt Windows Update troubleshooter. Both Windows 10 and Windows 11 incorporate various inbuilt repair strategies which help you to fix various failures that cause the update to get stuck in between.
The inbuilt Windows Update Troubleshooter comprises numerous automated reparation tactics which will be functional automatically if any type of irregularity is found. The utility will automatically recommend a viable fix that you can apply with a simple click.
Some users facing the same problem are able to fix the problem with the Windows Update troubleshooter and are able to install the pending update without seeing the error.
Follow the steps given to run the tool:
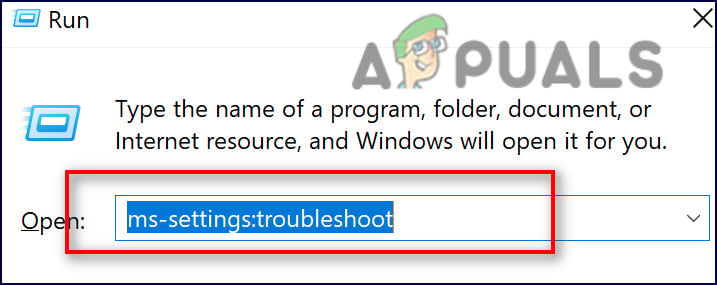
- Press the Win key + R to launch the Run dialog box. And in the Run box type “ms-settings-troubleshoot” and hit Enter for opening the Troubleshooting tab of the Settings app.

Run ms-settings.troubleshoot - Then in the Troubleshooting tab, go to the Getup and running section and then click on Windows Update.
- Here, click on Run the troubleshooter from the appeared menu.

Open up the Windows Update troubleshooter - At this point, the troubleshooter will start scanning and automatically begin to scan your system of any irregularities. Wait until the scan process is complete.

Note: This capacity will decide if any of the maintenance systems included with it are a counterpart for your specific Windows rendition.
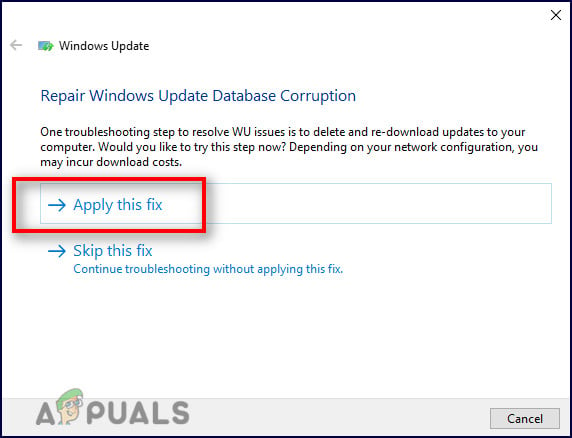
- After some time, you will be given another window in which you can tap on Apply this fix to apply the suggested fix.

Apply this fix to the windows update - Note: You could have to adhere to a progression of extra guidelines to implement the suggested fix, contingent upon which one gets suggested.
When you run this tool and apply the suggested fix, restart your PC and check whether the mistake code is settled.
Perform SFC Scan
In some instances, some malfunctioned system operations can also trigger such errors. So if this is the case then try finding the source of malfunctioned operation and resolve it by performing an SFC scan on your system. To do so you can simply follow the below-guided steps accordingly:
- Go to the search box or press Win+R
- Now, type cmd on the search box, then right-click on the cmd icon and go for the option Run as an administrator.
Launch the Command Prompt - If you are prompted for the admin password, enter the password and click OK.
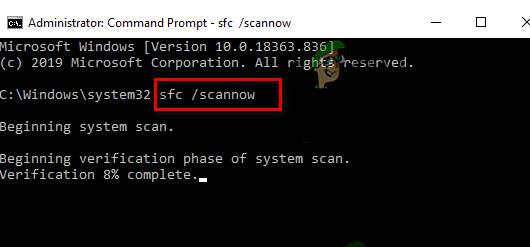
- Then on the cmd panel type the command sfc/scannow and hit Enter.

Perform an SFC Scan - Now, wait for the SFC to scan your entire system and repair the corrupted or malfunctioned system operations.
Note: [Do not perform any other action while the scanning is in process]
Once the scanning is done, restart your system and check if any updates are available. If prompted update your Windows version once again to avoid such errors.
Clear The Temporary Windows Update Cache
Sometimes the temporary cache generated while the Windows updating process leads to such an error when installing the update. Therefore, try clearing the cache first to get past this error. To do so follow the quick steps below:
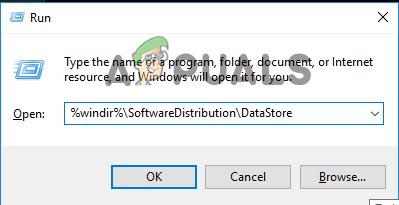
- Press the Win+R key all together to open the Run command.
- Type %windir%\SoftwareDistribution\DataStore in the box and click OK.

Type %windir%\SoftwareDistribution\DataStore - Now it will open the Windows Explorer in the correct location.
- Delete all the appeared contents on this folder.
After deleting all the temporary cache data restart your system and check for the updates, if any available update your Windows once again without any interruptions.
Restart The System and try with Safe Mode
If you are still seeing the error:0xc000006d while installing the update, then it is worth trying booting the Windows system in safe mode and then installing the update. Starting your system with Safe Mode with networking allow the limited programs and device to run and allow you to install the update without seeing any error.
Follow the steps below to do so:
- Click on the Power symbol at the login screen.
- Press Shift and click on Restart
- Once your system gets restarted, select the Troubleshoot
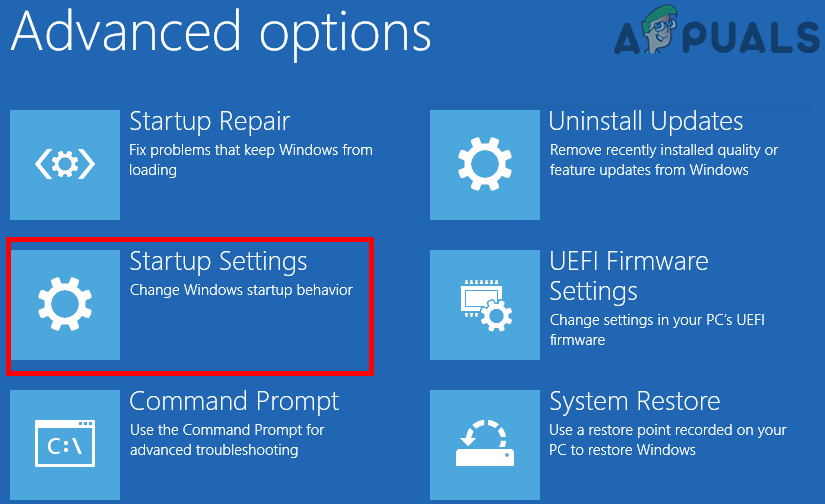
Accessing the Troubleshoot menu - Go for the Advanced options under Troubleshoot screen.
- Select Startup Settings.

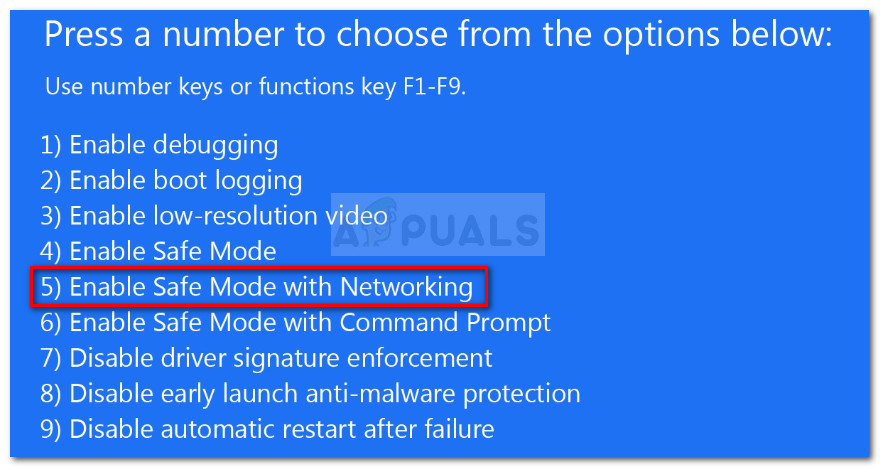
Accessing the Startup Settings menu - Now click on Restart and follow the onscreen steps to go for Safe Mode with networking options and verify if you are able to log on or not.

Safe Mode with Networking - If you logged on successfully then create a new user account and link the Microsoft account to verify if the issue persists.
If still seeing the error then head to the next possible solution.
Clean Windows Update Download Path
If still seeing the error 0xc000006d then the next step is to clean the Windows Update download path. As there are ample chances that some sort of corruption or missing files is stopping the update from installing.
Note: Clearing the download path is very dangerous as you need to clean it via the Windows registry and a small mistake can damage your entire system and your Windows system won’t run.
Now, here it is suggested that you must perform this solution only when you are an experienced user as messing up your computer with Regedit, could make you lose your files.
So, to clean the Windows Update path follow the below steps:
- Press Win+R keys simultaneously.
- Now type regedit and hit Enter.

Accessing the Regedit screen - Now, go for the navigation on the left side of the newly appeared window and navigate for
- HKEY_LOCAL_MACHINE\SOFTWARE\Policies\Microsoft\Windows\WindowsUpdate

Head to the location HKEY_LOCAL_MACHINE\SOFTWARE\Policies\Microsoft\Windows\WindowsUpdate
- HKEY_LOCAL_MACHINE\SOFTWARE\Policies\Microsoft\Windows\WindowsUpdate
- On finding it search for WIStatusServer and WUServer on the right-hand side.
- Now, clean the listed downloaded path that appeared on the screen. If the path is not listed then you cannot clear the path.

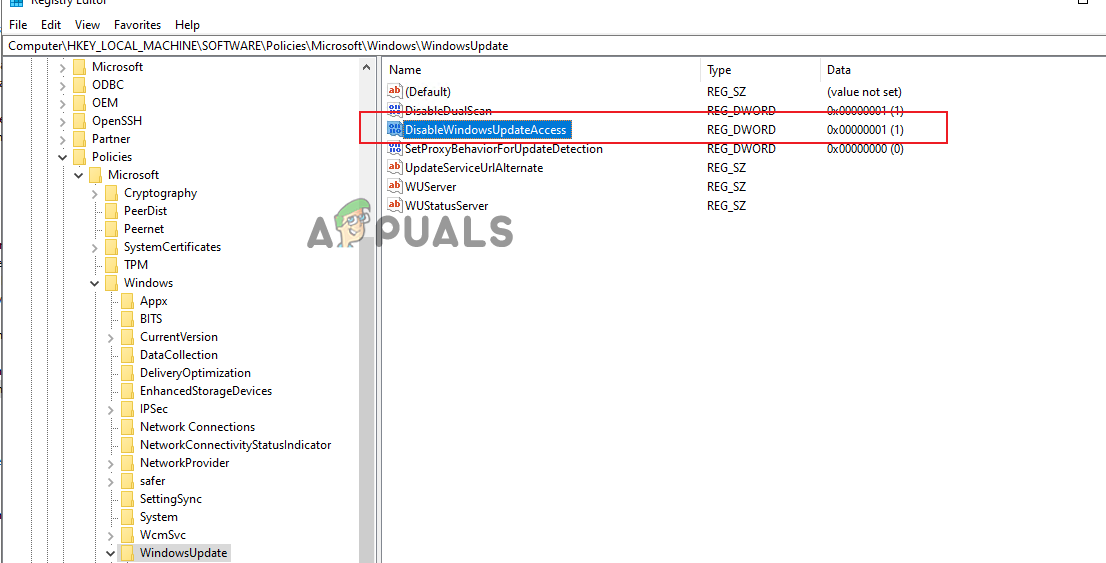
Finally, after cleaning restart your computer and check for the updates again. If available install it this time successfully and log in to your system.
Reconfigure the way of Behaving of WU-related Services
Another possible reason behind why you can hope to manage this issue is a situation where a few Windows Update-related administrations and conditions are not designed as expected.
So, here it is suggested to check the WU dependencies are not disabled as this might be conflicting with the update process and stopping the update from downloading. You can do this by getting to the administrations screen and confirming that the below-given services are all enabled:
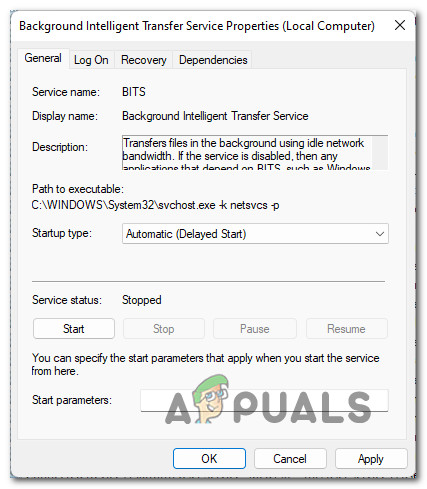
- Background Intelligent Transfer Service
- COM+ Event System
- DCOM Server Process Launcher
- Windows Update
- Remote Procedure Call (RPC)
This is the way to guarantee that the above administrations are enabled completely:
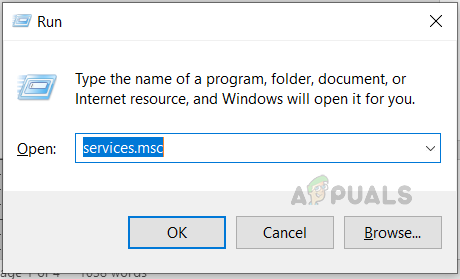
- Start by hitting the Windows key + R to open up a Run box.
- Next, type ‘services.msc’ inside the text box and press Enter to open up the Administrations screen

Type services.msc and click Ok - Inside the Administrations screen, look down through the rundown of administrations and ensure that each help underneath is empowered:
- Background Intelligent Transfer Service
- COM+ Event System
- DCOM Server Process Launcher
- Windows Update
- Remote Procedure Call (RPC)
Note: Really look at each support to check whether they’re crippled by right-clicking. On the off chance that you have the choice to tap on Start, it implies the assistance is debilitated – for this situation you want to enable it by tapping on Start.
Note: As a little something extra advance, double-tap on each help referenced above and change the Startup type of each to Automatic from the General tab.
Now try installing the update to see if the error 0xc000006d is resolved on Windows 10/11 system.
Clean Install Using Media Creation Tool
If in case the local Windows Update Component (WU) is broken Then in this case it is best to install the update using the Media Creation tool to deal with the forthcoming updates.
This strategy may be somewhat boring, however, it will assist you with downloading and installing the update without seeing any errors.
Follow the instructions given below for specific instructions for performing a system-wide update using the Media Creation Tool:
- Open up your internet browser and visit one of the Media Creation tool download pages, in the event that you’re utilizing Windows 10 or Windows 11:
- Windows 10
- Windows 11
- Then, from the committed page, click on the Download Now option (under the option create Windows 11 Installation Media) and hold on until the executable is downloaded locally.

Downloading the compatible installation media
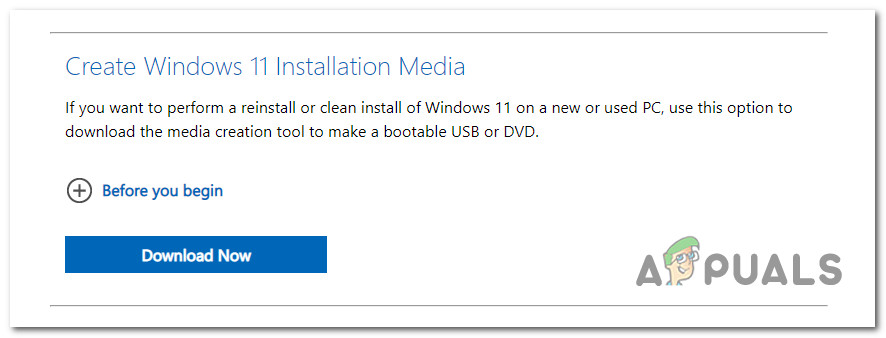
Once the executable is downloaded, open it with administrator privileges and adhere to the on-screen guidelines to finish the refreshing technique.
Above are the most potential solutions mentioned to fix Windows update error 0xc000006d error. I hope you find these solutions effective and be able to resolve your problem in no time on applying them.
I see that issue 454 appears to be another instance of this. I’m following that report to verify possible unescaped characters in password. The customer is remote and we don’t have direct communication.
Customer reported info:
Samba version 4.8.3.
server max protocol = SMB3
server min protocol = LANMAN1
Authentication — server is connected to AD using centrify.
INFO [com.hierynomus.smbj.connection.Connection] - Successfully connected to: server1.company.com
Connection established.
        remote host name: server1.company.com
        connection info: ConnectionInfo{
  serverGuid=75616b72-3062-3430-4545-000000000000,
  serverName='server1.company.com',
  negotiatedProtocol=NegotiatedProtocol{dialect=SMB_2_1, maxTransactSize=8388608, maxReadSize=8388608, maxWriteSize=8388608},
  clientGuid=161a2176-bb4e-49b5-4545-2b7a6bee37ef,
  clientCapabilities=[SMB2_GLOBAL_CAP_DFS],
  serverCapabilities=[SMB2_GLOBAL_CAP_DFS, SMB2_GLOBAL_CAP_LEASING, SMB2_GLOBAL_CAP_LARGE_MTU],
  clientSecurityMode=0,
  serverSecurityMode=1,
  server='null'
}`

Authentication:
`[com.hierynomus.smbj.auth.NtlmAuthenticator] - Initialized Authentication of <Username> using NTLM
[com.hierynomus.smbj.connection.Connection] - Granted 1 (out of 1) credits to SMB2_SESSION_SETUP with message id << 1 >>
[com.hierynomus.smbj.transport.tcp.direct.DirectTcpTransport] - Writing packet SMB2_SESSION_SETUP with message id << 1 >>
[com.hierynomus.protocol.commons.concurrent.Promise] - Awaiting << 1 >>
[com.hierynomus.smbj.transport.PacketReader] - Received packet com.hierynomus.mssmb2.SMB2PacketData@3a081950
[com.hierynomus.smbj.connection.Connection] - Server granted us 1 credits for com.hierynomus.mssmb2.SMB2PacketData@3a081950, now available: 1 credits
[com.hierynomus.protocol.commons.concurrent.Promise] - Setting << 1 >> to `SMB2_SESSION_SETUP with message id << 1 >>`
[com.hierynomus.smbj.connection.Connection] - More processing required for authentication of <Username> using com.hierynomus.smbj.auth.NtlmAuthenticator@7cf10a6f
[com.hierynomus.smbj.auth.NtlmAuthenticator] - Received token: a1 ... 00
[com.hierynomus.asn1.ASN1InputStream] - Read ASN.1 object: ASN1TaggedObject[ASN1Tag[CONTEXT_SPECIFIC,CONSTRUCTED,1],<unknown>]
[com.hierynomus.asn1.ASN1InputStream] - Read ASN.1 object: ASN1TaggedObject[ASN1Tag[CONTEXT_SPECIFIC,CONSTRUCTED,0],<unknown>]
[com.hierynomus.asn1.ASN1InputStream] - Read ASN.1 object: ASN1TaggedObject[ASN1Tag[CONTEXT_SPECIFIC,CONSTRUCTED,1],<unknown>]
[com.hierynomus.asn1.ASN1InputStream] - Read ASN.1 object: ASN1TaggedObject[ASN1Tag[CONTEXT_SPECIFIC,CONSTRUCTED,2],<unknown>]
[com.hierynomus.asn1.ASN1InputStream] - Read ASN.1 object: ASN1Sequence[[ASN1TaggedObject[ASN1Tag[CONTEXT_SPECIFIC,CONSTRUCTED,0],<unknown>], ASN1TaggedObject[ASN1Tag[CONTEXT_SPECIFIC,CONSTRUCTED,1],<unknown>], ASN1TaggedObject[ASN1Tag[CONTEXT_SPECIFIC,CONSTRUCTED,2],<unknown>]]]
[com.hierynomus.asn1.ASN1InputStream] - Read ASN.1 object: ASN1Enumerated[1]
[com.hierynomus.asn1.ASN1InputStream] - Read ASN.1 object: ASN1ObjectIdentifier[1.3.6.1.4.1.311.2.2.10]
[com.hierynomus.asn1.ASN1InputStream] - Read ASN.1 object: ASN1OctetString[[78, ... 0]]
[com.hierynomus.ntlm.messages.NtlmChallenge] - Windows version = WindowsVersion[WINDOWS_MAJOR_VERSION_6, WINDOWS_MINOR_VERSION_1, 0, NTLMSSP_REVISION_W2K3]
[com.hierynomus.smbj.auth.NtlmAuthenticator] - Received NTLM challenge from: <DOMAIN>
[com.hierynomus.smbj.connection.Connection] - Granted 1 (out of 1) credits to SMB2_SESSION_SETUP with message id << 2 >>
[com.hierynomus.smbj.transport.tcp.direct.DirectTcpTransport] - Writing packet SMB2_SESSION_SETUP with message id << 2 >>
[com.hierynomus.protocol.commons.concurrent.Promise] - Awaiting << 2 >>
[com.hierynomus.smbj.transport.PacketReader] - Received packet com.hierynomus.mssmb2.SMB2PacketData@37479732
[com.hierynomus.smbj.connection.Connection] - Server granted us 1 credits for com.hierynomus.mssmb2.SMB2PacketData@37479732, now available: 1 credits
[com.hierynomus.protocol.commons.concurrent.Promise] - Setting << 2 >> to `SMB2_SESSION_SETUP with message id << 2 >>`
com.hierynomus.mssmb2.SMBApiException: STATUS_LOGON_FAILURE (0xc000006d): Authentication failed for '<Username>' using com.hierynomus.smbj.auth.NtlmAuthenticator@7cf10a6f
        at com.hierynomus.smbj.connection.Connection.authenticate(Connection.java:182)
-
Windows Support Forums
-
General Support
You should upgrade or use an alternative browser.
Solved Getting error code 0xc000006d sub: 0x0 on attempted login
-
Thread starter
Thread starterLandon Hotujac
-
Start date
Start date
- Local time
- 11:37 AM
- Posts
- 12
- OS
- Windows 11 Pro
-
-
#1
User profile cannot be loaded.”
AND I’ve tried running the Startup Repair and couldn’t repair, running Windows Memory Diagnostics also didn’t work, and I also can’t free space to reset my PC, I’ve also tried running in safe mode. Even uninstalling the latest feature and quality update, it won’t let me uninstall them because of my full disk space (silly me for not freeing up). Nothing works, so please help me. I apologize if this topic is for threads to help people and not get help.
- Windows Build/Version
- Windows 11 Pro (Idk the build)
My Computer
-
- OS
- Windows 11 Pro
- Computer type
- PC/Desktop
- Manufacturer/Model
- ASUS (idek)
- CPU
- Intel Core i7 9700K
- Memory
- 16384 MB
- Graphics Card(s)
- Nvidia GeForce RTX 2080 Super
- Monitor(s) Displays
- 1
- Screen Resolution
- 1920*1080
- Keyboard
- Razer Black Widow V3
- Mouse
- Razer Mamba Elite
- Browser
- Opera GX
- Antivirus
- Windows Defender
- Local time
- 11:37 AM
- Posts
- 12
- OS
- Windows 11 Pro
-
-
#2
My Computer
-
- OS
- Windows 11 Pro
- Computer type
- PC/Desktop
- Manufacturer/Model
- ASUS (idek)
- CPU
- Intel Core i7 9700K
- Memory
- 16384 MB
- Graphics Card(s)
- Nvidia GeForce RTX 2080 Super
- Monitor(s) Displays
- 1
- Screen Resolution
- 1920*1080
- Keyboard
- Razer Black Widow V3
- Mouse
- Razer Mamba Elite
- Browser
- Opera GX
- Antivirus
- Windows Defender
-
-
#3
On another machine download and burn a UEFI iso onto flash drive one of the many Linux distros that you can run directly from a flash drive without installing (Linux Mint or Ubuntu are good) Enter your bios and turn off secure boot. Restart and at boot hit f12 which should bring up your boot menu. Select your UEFI flash drive from the boot options. Linux will give you the option of installing or running from you media, choose run from media. Once Linux loads, you will be presented with a desktop that resembles Windows XP. Use the explorer within linux to browse to the folders of your personal files. Copy the files onto external media.
Go back into your bios and enable secure boot.
RECOVERY OPTIONS
Choose one of these methods
1. Enable the hidden administrator account using one of the options here https://www.winhelponline.com/blog/…strator-windows-10-recovery-options-advanced/
After enabling the administrator, restart and select the administrator account from the login screen. Create a new user account.
Once you have a new user account logout of administrator and login to new account
Note-once you have a working account built,disable hidden administrator account. Open command prompt and type
net user administrator /active:no
Remove the old corrupted user account.
OR
2. Reset your PC and from within recovery environment. Hold down shift key while booting. It should enter recovery environment. Choose «remove everything» option. It will reinstall Windows and boot to the OOBE where you create a new user account.
OR
3. Clean install Windows. Clean Install Windows 11 Tutorial
Personally, if it were me I would clean install.
My Computers
-
- OS
- Windows 11 Pro 24H2 26100.3775
- Computer type
- PC/Desktop
- Manufacturer/Model
- Dell Optiplex 7080
- CPU
- i9-10900 10 core 20 threads
- Motherboard
- DELL 0J37VM
- Memory
- 32 gb
- Graphics Card(s)
- none-Intel UHD Graphics 630
- Sound Card
- Integrated Realtek
- Monitor(s) Displays
- Benq 27
- Screen Resolution
- 2560×1440
- Hard Drives
- 1tb Solidigm m.2 nvme+256gb SKHynix m.2 nvme /External drives 512gb Samsung m.2 sata+1tb Kingston m2.nvme+ 4gb Solidigm nvme
- PSU
- 500w
- Case
- MT
- Cooling
- Dell Premium
- Keyboard
- Logitech wired
- Mouse
- Logitech wireless
- Internet Speed
- so slow I’m too embarrassed to tell
- Browser
- #1 Edge #2 Firefox
- Antivirus
- Defender+MWB Premium
-
- Operating System
- Windows 10 Pro 22H2 19045.3930
- Computer type
- PC/Desktop
- Manufacturer/Model
- Dell Optiplex 9020
- CPU
- i7-4770
- Memory
- 24 gb
- Monitor(s) Displays
- Benq 27
- Screen Resolution
- 2560×1440
- Hard Drives
- 256 gb Toshiba BG4 M.2 NVE SSB and 1 tb hdd
- PSU
- 500w
- Case
- MT
- Cooling
- Dell factory
- Mouse
- Logitech wireless
- Keyboard
- Logitech wired
- Internet Speed
- still not telling
- Browser
- Firefox
- Antivirus
- Defender+MWB Premium
- Local time
- 11:37 AM
- Posts
- 12
- OS
- Windows 11 Pro
-
-
#4
It would seem your user profile is corrupted. There are a number of ways to deal with getting you back into your computer but if you have files that are valuable to you , you first have to recover them which makes the recovery process more complex. If you do not have important files to recover, go straight to RECOVERY OPTIONS below.How To Recover Personal Files
On another machine download and burn a UEFI iso onto flash drive one of the many Linux distros that you can run directly from a flash drive without installing (Linux Mint or Ubuntu are good) Enter your bios and turn off secure boot. Restart and at boot hit f12 which should bring up your boot menu. Select your UEFI flash drive from the boot options. Linux will give you the option of installing or running from you media, choose run from media. Once Linux loads, you will be presented with a desktop that resembles Windows XP. Use the explorer within linux to browse to the folders of your personal files. Copy the files onto external media.Go back into your bios and enable secure boot.
RECOVERY OPTIONS
Choose one of these methods
1. Enable the hidden administrator account using one of the options here https://www.winhelponline.com/blog/…strator-windows-10-recovery-options-advanced/
After enabling the administrator, restart and select the administrator account from the login screen. Create a new user account.Once you have a new user account logout of administrator and login to new account
Note-once you have a working account built,disable hidden administrator account. Open command prompt and type
net user administrator /active:no
Remove the old corrupted user account.OR
2. Reset your PC and from within recovery environment. Hold down shift key while booting. It should enter recovery environment. Choose «remove everything» option. It will reinstall Windows and boot to the OOBE where you create a new user account.OR
3. Clean install Windows. Clean Install Windows 11 Tutorial
Personally, if it were me I would clean install.
I wonder how long it took you to type that ._.
My Computer
-
- OS
- Windows 11 Pro
- Computer type
- PC/Desktop
- Manufacturer/Model
- ASUS (idek)
- CPU
- Intel Core i7 9700K
- Memory
- 16384 MB
- Graphics Card(s)
- Nvidia GeForce RTX 2080 Super
- Monitor(s) Displays
- 1
- Screen Resolution
- 1920*1080
- Keyboard
- Razer Black Widow V3
- Mouse
- Razer Mamba Elite
- Browser
- Opera GX
- Antivirus
- Windows Defender
- Local time
- 11:37 AM
- Posts
- 12
- OS
- Windows 11 Pro
-
-
#6
I wonder how long it took you to type that ._.
It would seem your user profile is corrupted. There are a number of ways to deal with getting you back into your computer but if you have files that are valuable to you , you first have to recover them which makes the recovery process more complex. If you do not have important files to recover, go straight to RECOVERY OPTIONS below.How To Recover Personal Files
On another machine download and burn a UEFI iso onto flash drive one of the many Linux distros that you can run directly from a flash drive without installing (Linux Mint or Ubuntu are good) Enter your bios and turn off secure boot. Restart and at boot hit f12 which should bring up your boot menu. Select your UEFI flash drive from the boot options. Linux will give you the option of installing or running from you media, choose run from media. Once Linux loads, you will be presented with a desktop that resembles Windows XP. Use the explorer within linux to browse to the folders of your personal files. Copy the files onto external media.Go back into your bios and enable secure boot.
RECOVERY OPTIONS
Choose one of these methods
1. Enable the hidden administrator account using one of the options here https://www.winhelponline.com/blog/…strator-windows-10-recovery-options-advanced/
After enabling the administrator, restart and select the administrator account from the login screen. Create a new user account.Once you have a new user account logout of administrator and login to new account
Note-once you have a working account built,disable hidden administrator account. Open command prompt and type
net user administrator /active:no
Remove the old corrupted user account.OR
2. Reset your PC and from within recovery environment. Hold down shift key while booting. It should enter recovery environment. Choose «remove everything» option. It will reinstall Windows and boot to the OOBE where you create a new user account.OR
3. Clean install Windows. Clean Install Windows 11 Tutorial
Personally, if it were me I would clean install.
I don’t like to lose my progress. Inin my opinion are not doing 2 and 3
My Computer
-
- OS
- Windows 11 Pro
- Computer type
- PC/Desktop
- Manufacturer/Model
- ASUS (idek)
- CPU
- Intel Core i7 9700K
- Memory
- 16384 MB
- Graphics Card(s)
- Nvidia GeForce RTX 2080 Super
- Monitor(s) Displays
- 1
- Screen Resolution
- 1920*1080
- Keyboard
- Razer Black Widow V3
- Mouse
- Razer Mamba Elite
- Browser
- Opera GX
- Antivirus
- Windows Defender
- Local time
- 11:37 AM
- Posts
- 12
- OS
- Windows 11 Pro
-
-
#7
My Computer
-
- OS
- Windows 11 Pro
- Computer type
- PC/Desktop
- Manufacturer/Model
- ASUS (idek)
- CPU
- Intel Core i7 9700K
- Memory
- 16384 MB
- Graphics Card(s)
- Nvidia GeForce RTX 2080 Super
- Monitor(s) Displays
- 1
- Screen Resolution
- 1920*1080
- Keyboard
- Razer Black Widow V3
- Mouse
- Razer Mamba Elite
- Browser
- Opera GX
- Antivirus
- Windows Defender
-
-
#8
My Computers
-
- OS
- Windows 11 Pro 24H2 26100.3775
- Computer type
- PC/Desktop
- Manufacturer/Model
- Dell Optiplex 7080
- CPU
- i9-10900 10 core 20 threads
- Motherboard
- DELL 0J37VM
- Memory
- 32 gb
- Graphics Card(s)
- none-Intel UHD Graphics 630
- Sound Card
- Integrated Realtek
- Monitor(s) Displays
- Benq 27
- Screen Resolution
- 2560×1440
- Hard Drives
- 1tb Solidigm m.2 nvme+256gb SKHynix m.2 nvme /External drives 512gb Samsung m.2 sata+1tb Kingston m2.nvme+ 4gb Solidigm nvme
- PSU
- 500w
- Case
- MT
- Cooling
- Dell Premium
- Keyboard
- Logitech wired
- Mouse
- Logitech wireless
- Internet Speed
- so slow I’m too embarrassed to tell
- Browser
- #1 Edge #2 Firefox
- Antivirus
- Defender+MWB Premium
-
- Operating System
- Windows 10 Pro 22H2 19045.3930
- Computer type
- PC/Desktop
- Manufacturer/Model
- Dell Optiplex 9020
- CPU
- i7-4770
- Memory
- 24 gb
- Monitor(s) Displays
- Benq 27
- Screen Resolution
- 2560×1440
- Hard Drives
- 256 gb Toshiba BG4 M.2 NVE SSB and 1 tb hdd
- PSU
- 500w
- Case
- MT
- Cooling
- Dell factory
- Mouse
- Logitech wireless
- Keyboard
- Logitech wired
- Internet Speed
- still not telling
- Browser
- Firefox
- Antivirus
- Defender+MWB Premium
- Local time
- 11:37 AM
- Posts
- 12
- OS
- Windows 11 Pro
-
-
#9
then looks like you will have to do 2 or 3
Well 2 won’t work
My Computer
-
- OS
- Windows 11 Pro
- Computer type
- PC/Desktop
- Manufacturer/Model
- ASUS (idek)
- CPU
- Intel Core i7 9700K
- Memory
- 16384 MB
- Graphics Card(s)
- Nvidia GeForce RTX 2080 Super
- Monitor(s) Displays
- 1
- Screen Resolution
- 1920*1080
- Keyboard
- Razer Black Widow V3
- Mouse
- Razer Mamba Elite
- Browser
- Opera GX
- Antivirus
- Windows Defender
- Local time
- 11:37 AM
- Posts
- 12
- OS
- Windows 11 Pro
-
-
#10
I don’t like to lose my progress. Inin my opinion are not doing 2 and 3
And i don’t wanna do 3
My Computer
-
- OS
- Windows 11 Pro
- Computer type
- PC/Desktop
- Manufacturer/Model
- ASUS (idek)
- CPU
- Intel Core i7 9700K
- Memory
- 16384 MB
- Graphics Card(s)
- Nvidia GeForce RTX 2080 Super
- Monitor(s) Displays
- 1
- Screen Resolution
- 1920*1080
- Keyboard
- Razer Black Widow V3
- Mouse
- Razer Mamba Elite
- Browser
- Opera GX
- Antivirus
- Windows Defender
- Local time
- 11:37 AM
- Posts
- 12
- OS
- Windows 11 Pro
-
-
#11
It would seem your user profile is corrupted. There are a number of ways to deal with getting you back into your computer but if you have files that are valuable to you , you first have to recover them which makes the recovery process more complex. If you do not have important files to recover, go straight to RECOVERY OPTIONS below.How To Recover Personal Files
On another machine download and burn a UEFI iso onto flash drive one of the many Linux distros that you can run directly from a flash drive without installing (Linux Mint or Ubuntu are good) Enter your bios and turn off secure boot. Restart and at boot hit f12 which should bring up your boot menu. Select your UEFI flash drive from the boot options. Linux will give you the option of installing or running from you media, choose run from media. Once Linux loads, you will be presented with a desktop that resembles Windows XP. Use the explorer within linux to browse to the folders of your personal files. Copy the files onto external media.Go back into your bios and enable secure boot.
RECOVERY OPTIONS
Choose one of these methods
1. Enable the hidden administrator account using one of the options here https://www.winhelponline.com/blog/…strator-windows-10-recovery-options-advanced/
After enabling the administrator, restart and select the administrator account from the login screen. Create a new user account.Once you have a new user account logout of administrator and login to new account
Note-once you have a working account built,disable hidden administrator account. Open command prompt and type
net user administrator /active:no
Remove the old corrupted user account.OR
2. Reset your PC and from within recovery environment. Hold down shift key while booting. It should enter recovery environment. Choose «remove everything» option. It will reinstall Windows and boot to the OOBE where you create a new user account.OR
3. Clean install Windows. Clean Install Windows 11 Tutorial
Personally, if it were me I would clean install.
I couldn’t see the admin account
My Computer
-
- OS
- Windows 11 Pro
- Computer type
- PC/Desktop
- Manufacturer/Model
- ASUS (idek)
- CPU
- Intel Core i7 9700K
- Memory
- 16384 MB
- Graphics Card(s)
- Nvidia GeForce RTX 2080 Super
- Monitor(s) Displays
- 1
- Screen Resolution
- 1920*1080
- Keyboard
- Razer Black Widow V3
- Mouse
- Razer Mamba Elite
- Browser
- Opera GX
- Antivirus
- Windows Defender
-
-
#12
What do you mean a reset won’t work? Are you not able to get into recovery options??
My Computers
-
- OS
- Windows 11 Pro 24H2 26100.3775
- Computer type
- PC/Desktop
- Manufacturer/Model
- Dell Optiplex 7080
- CPU
- i9-10900 10 core 20 threads
- Motherboard
- DELL 0J37VM
- Memory
- 32 gb
- Graphics Card(s)
- none-Intel UHD Graphics 630
- Sound Card
- Integrated Realtek
- Monitor(s) Displays
- Benq 27
- Screen Resolution
- 2560×1440
- Hard Drives
- 1tb Solidigm m.2 nvme+256gb SKHynix m.2 nvme /External drives 512gb Samsung m.2 sata+1tb Kingston m2.nvme+ 4gb Solidigm nvme
- PSU
- 500w
- Case
- MT
- Cooling
- Dell Premium
- Keyboard
- Logitech wired
- Mouse
- Logitech wireless
- Internet Speed
- so slow I’m too embarrassed to tell
- Browser
- #1 Edge #2 Firefox
- Antivirus
- Defender+MWB Premium
-
- Operating System
- Windows 10 Pro 22H2 19045.3930
- Computer type
- PC/Desktop
- Manufacturer/Model
- Dell Optiplex 9020
- CPU
- i7-4770
- Memory
- 24 gb
- Monitor(s) Displays
- Benq 27
- Screen Resolution
- 2560×1440
- Hard Drives
- 256 gb Toshiba BG4 M.2 NVE SSB and 1 tb hdd
- PSU
- 500w
- Case
- MT
- Cooling
- Dell factory
- Mouse
- Logitech wireless
- Keyboard
- Logitech wired
- Internet Speed
- still not telling
- Browser
- Firefox
- Antivirus
- Defender+MWB Premium
-
-
#13
Sir, if you can’t get into your PC with your account or the administrator nor can you get into recovery options, a clean install is all that’s left.
My Computers
-
- OS
- Windows 11 Pro 24H2 26100.3775
- Computer type
- PC/Desktop
- Manufacturer/Model
- Dell Optiplex 7080
- CPU
- i9-10900 10 core 20 threads
- Motherboard
- DELL 0J37VM
- Memory
- 32 gb
- Graphics Card(s)
- none-Intel UHD Graphics 630
- Sound Card
- Integrated Realtek
- Monitor(s) Displays
- Benq 27
- Screen Resolution
- 2560×1440
- Hard Drives
- 1tb Solidigm m.2 nvme+256gb SKHynix m.2 nvme /External drives 512gb Samsung m.2 sata+1tb Kingston m2.nvme+ 4gb Solidigm nvme
- PSU
- 500w
- Case
- MT
- Cooling
- Dell Premium
- Keyboard
- Logitech wired
- Mouse
- Logitech wireless
- Internet Speed
- so slow I’m too embarrassed to tell
- Browser
- #1 Edge #2 Firefox
- Antivirus
- Defender+MWB Premium
-
- Operating System
- Windows 10 Pro 22H2 19045.3930
- Computer type
- PC/Desktop
- Manufacturer/Model
- Dell Optiplex 9020
- CPU
- i7-4770
- Memory
- 24 gb
- Monitor(s) Displays
- Benq 27
- Screen Resolution
- 2560×1440
- Hard Drives
- 256 gb Toshiba BG4 M.2 NVE SSB and 1 tb hdd
- PSU
- 500w
- Case
- MT
- Cooling
- Dell factory
- Mouse
- Logitech wireless
- Keyboard
- Logitech wired
- Internet Speed
- still not telling
- Browser
- Firefox
- Antivirus
- Defender+MWB Premium
- Local time
- 11:37 AM
- Posts
- 12
- OS
- Windows 11 Pro
-
-
#14
Sir, if you can’t get into your PC with your account or the administrator nor can you get into recovery options, a clean install is all that’s left.
It erases the UEFI firmware at clean install?
My Computer
-
- OS
- Windows 11 Pro
- Computer type
- PC/Desktop
- Manufacturer/Model
- ASUS (idek)
- CPU
- Intel Core i7 9700K
- Memory
- 16384 MB
- Graphics Card(s)
- Nvidia GeForce RTX 2080 Super
- Monitor(s) Displays
- 1
- Screen Resolution
- 1920*1080
- Keyboard
- Razer Black Widow V3
- Mouse
- Razer Mamba Elite
- Browser
- Opera GX
- Antivirus
- Windows Defender
- Local time
- 11:37 AM
- Posts
- 5,459
- OS
- Windows 10
-
-
#15
The attempted logon is invalid.
This is either due to a bad username or authentication information.
If there are important computer files then you may be able to save them:
a) manual copy and paste using windows Recovery Environment (RE): Notepad
b) boot to Ubuntu /Linux > using Graphical User Interface (GUI) > copy and paste
c) perform custom install so that Windows saves files to Windows.old > restore important files from Windows.old after it installs a fresh copy of Windows
All of the above require the reinstallation of drivers and applications.
My Computer
-
- OS
- Windows 10
- Computer type
- Laptop
- Manufacturer/Model
- HP
- CPU
- Intel(R) Core(TM) i7-4800MQ CPU @ 2.70GHz
- Motherboard
- Product : 190A Version : KBC Version 94.56
- Memory
- 16 GB Total: Manufacturer : Samsung MemoryType : DDR3 FormFactor : SODIMM Capacity : 8GB Speed : 1600
- Graphics Card(s)
- NVIDIA Quadro K3100M; Intel(R) HD Graphics 4600
- Sound Card
- IDT High Definition Audio CODEC; PNP Device ID HDAUDIO\FUNC_01&VEN_111D&DEV_76E0
- Hard Drives
- Model Hitachi HTS727575A9E364
- Antivirus
- Microsoft Defender
- Other Info
- Mobile Workstation
- Local time
- 11:37 AM
- Posts
- 12
- OS
- Windows 11 Pro
-
-
#16
0xc000006d = Status_Logon_FailureThe attempted logon is invalid.
This is either due to a bad username or authentication information.
If there are important computer files then you may be able to save them:
a) manual copy and paste using windows Recovery Environment (RE): Notepad
b) boot to Ubuntu /Linux > using Graphical User Interface (GUI) > copy and paste
c) perform custom install so that Windows saves files to Windows.old > restore important files from Windows.old after it installs a fresh copy of Windows
All of the above require the reinstallation of drivers and applications.
well how the heck am I supposed to perform custom install if I’m stuck on “YoUr CrEdEnTiAlS cOuLd NoT bE vErIfIeD.”
My Computer
-
- OS
- Windows 11 Pro
- Computer type
- PC/Desktop
- Manufacturer/Model
- ASUS (idek)
- CPU
- Intel Core i7 9700K
- Memory
- 16384 MB
- Graphics Card(s)
- Nvidia GeForce RTX 2080 Super
- Monitor(s) Displays
- 1
- Screen Resolution
- 1920*1080
- Keyboard
- Razer Black Widow V3
- Mouse
- Razer Mamba Elite
- Browser
- Opera GX
- Antivirus
- Windows Defender
- Local time
- 11:37 AM
- Posts
- 5,459
- OS
- Windows 10
-
-
#17
My Computer
-
- OS
- Windows 10
- Computer type
- Laptop
- Manufacturer/Model
- HP
- CPU
- Intel(R) Core(TM) i7-4800MQ CPU @ 2.70GHz
- Motherboard
- Product : 190A Version : KBC Version 94.56
- Memory
- 16 GB Total: Manufacturer : Samsung MemoryType : DDR3 FormFactor : SODIMM Capacity : 8GB Speed : 1600
- Graphics Card(s)
- NVIDIA Quadro K3100M; Intel(R) HD Graphics 4600
- Sound Card
- IDT High Definition Audio CODEC; PNP Device ID HDAUDIO\FUNC_01&VEN_111D&DEV_76E0
- Hard Drives
- Model Hitachi HTS727575A9E364
- Antivirus
- Microsoft Defender
- Other Info
- Mobile Workstation
- Local time
- 11:37 AM
- Posts
- 12
- OS
- Windows 11 Pro
-
-
#18
If you cannot perform a custom install then use Ubunt / Linux or Windows RE notepad options to backup files followed by a clean install.
How am I supposed to enter notepad if the other buttons aren’t showing on the blue options screennother than Turn off PC?
My Computer
-
- OS
- Windows 11 Pro
- Computer type
- PC/Desktop
- Manufacturer/Model
- ASUS (idek)
- CPU
- Intel Core i7 9700K
- Memory
- 16384 MB
- Graphics Card(s)
- Nvidia GeForce RTX 2080 Super
- Monitor(s) Displays
- 1
- Screen Resolution
- 1920*1080
- Keyboard
- Razer Black Widow V3
- Mouse
- Razer Mamba Elite
- Browser
- Opera GX
- Antivirus
- Windows Defender
- Local time
- 11:37 AM
- Posts
- 12
- OS
- Windows 11 Pro
-
-
#19
How am I supposed to enter notepad if the other buttons aren’t showing on the blue options screennother than Turn off PC?
I mean screen other and not screennother
My Computer
-
- OS
- Windows 11 Pro
- Computer type
- PC/Desktop
- Manufacturer/Model
- ASUS (idek)
- CPU
- Intel Core i7 9700K
- Memory
- 16384 MB
- Graphics Card(s)
- Nvidia GeForce RTX 2080 Super
- Monitor(s) Displays
- 1
- Screen Resolution
- 1920*1080
- Keyboard
- Razer Black Widow V3
- Mouse
- Razer Mamba Elite
- Browser
- Opera GX
- Antivirus
- Windows Defender
- Local time
- 11:37 AM
- Posts
- 5,459
- OS
- Windows 10
-
-
#20
My Computer
-
- OS
- Windows 10
- Computer type
- Laptop
- Manufacturer/Model
- HP
- CPU
- Intel(R) Core(TM) i7-4800MQ CPU @ 2.70GHz
- Motherboard
- Product : 190A Version : KBC Version 94.56
- Memory
- 16 GB Total: Manufacturer : Samsung MemoryType : DDR3 FormFactor : SODIMM Capacity : 8GB Speed : 1600
- Graphics Card(s)
- NVIDIA Quadro K3100M; Intel(R) HD Graphics 4600
- Sound Card
- IDT High Definition Audio CODEC; PNP Device ID HDAUDIO\FUNC_01&VEN_111D&DEV_76E0
- Hard Drives
- Model Hitachi HTS727575A9E364
- Antivirus
- Microsoft Defender
- Other Info
- Mobile Workstation
Similar threads
-
Windows Support Forums
-
General Support