
В Windows Server 2016 можно столкнуться с ситуацией, когда встроенный клиент Windows Update очень долго выполняет проверку обновлений. Характерно то, что проблема может проявляться плавающим образом и воспроизводиться не всегда. Замечено, что чаще всего проблема проявляется в случае, если система была недавно включена или перезагружена. В этой заметке мы поговорим о том, какие могут быть причины у такого поведения и как это можно попробовать исправить.
При попытке вызвать проверку обновлений из интерфейса настроек системы в Settings > Update & security > Windows Update мы можем столкнуться с длительным циклом ожидания в статусе «Checking for updates…»
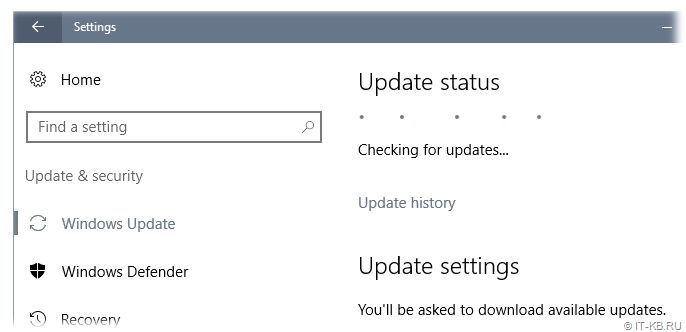
Результатом такого ожидания может стать возникновение ошибки типа:
We couldn't connect to the update service. We'll try again later, or you can check now. If it still doesn't work, make sure you're connected to the Internet.
Это привносит проблемы и в других операциях обслуживания системы.
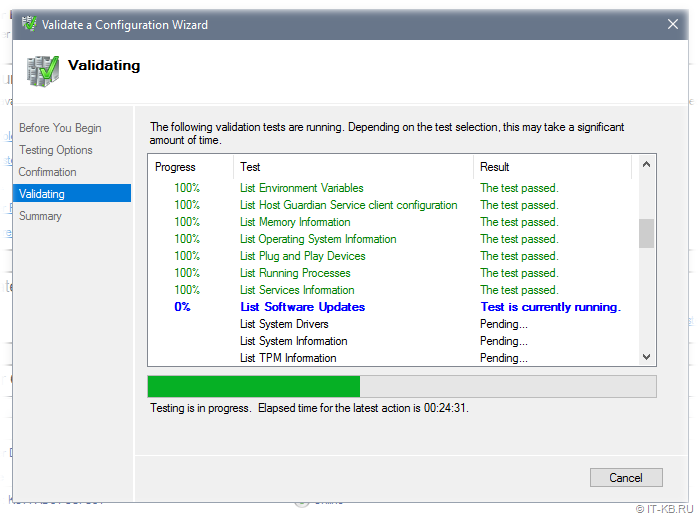
Отражение проблемы с Windows Update в Failover Cluster Manager
В качестве примера отрицательного влияния проблемной работы Windows Update можно привести мастер проверки конфигурации кластера, вызываемый из оснастки Failover Cluster Manager. В ходе выполнения валидации кластера, на этапе сбора информации об установленных на кластерных узлах обновлениях («List Software Updates«) мы можем получить состояние длительного ожидания.
В ходе изучения ситуации по следам «коллективного разума» я обнаружил, что самые разнообразные проблемы c Windows Update в Windows Server 2016 известны давно и с ними столкнулись многие:
- TechNet Forums : Windows Server 2016 Updates slow!
- Superuser : Windows Update stuck on Checking for updates
- Born’s Tech and Windows World : Windows Server 2016: Slow updates
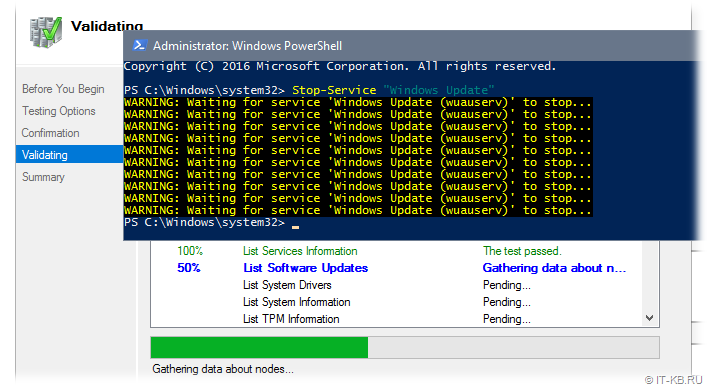
Методом «а если попробовать…» было выявлено, что в качестве обходного решения в вышеописанной ситуации с Failover Cluster Manager, может быть простой перезапуск службы «Windows Update«.
Возможно, потребуется сделать лишь остановку этой службы, а запустится служба через несколько секунд автоматически. Если служба не остановилась с первого раза (остановка привела к ошибке), то пробуем выполнить остановку повторно. Выполнить остановку службы можно как через оснастку управления службами services.msc, так и через PowerShell.
Stop-Service "Windows Update"
Сразу после того, как служба будет остановлена (а затем сама автоматически запустится) мы увидим сдвиг в работе механизма проверки обновлений.
В случае с кластером, выполнить остановку/перезапуск службы «Windows Update» нам может потребоваться на всех узлах кластера, начиная с того, на котором запущен мастер проверки.
В попытках понять, что же не так с проверкой обновлений в Windows Server 2016 и проведения ряда экспериментов с видимыми настройками клиента Windows Update в графической среде, стало очевидно то, что наличие включённой опции «Defer feature updates» в Settings > Update & security > Windows Update > Advanced options явным образом влияет на воспроизведение проблемы.

То есть, как только мы отключаем данную опцию, включенную в Windows Server 2016 по умолчанию, то механизм проверки обновлений начинает работать так, как мы этого от него ожидаем при наличии сервера WSUS.
Дальнейшее изучение вопроса показало, что причиной странного поведения клиента Windows Update может являться механизм «Dual Scan» (подробней в статьях «Improving Dual Scan on 1607» и «Demystifying Dual Scan»), который заставляет при проверке обновлений в качестве источника использовать не только форсировано настроенный в доменных групповых политиках сервер WSUS в локальной сети, но и Интернет-службы Windows Update.
Соответственно, при условии, что компьютеры имеют ограниченный доступ в Интернет или не имеют его вовсе, может возникнуть эффект длительного ожидания с возникновением ошибок разного содержания.
Чтобы решить описанную проблему, нам потребуется провести настройку групповой политики Active Directory, с помощью которой настраиваются наши серверы на базе Windows Server 2016. Однако, как выяснилось, в этом вопросе всё не так очевидно, понятно и однозначно, как хотелось бы.
Варианты решения с готовыми политиками GPO (неработающие в нашем случае)
Примечание: Если важен только готовый рецепт и не интересны эксперименты по следам ранее предложенных в Интернете приёмов(которые в нашем случае не помогли), то можете смело пропустить этот раздел заметки и читать заключительный раздел.
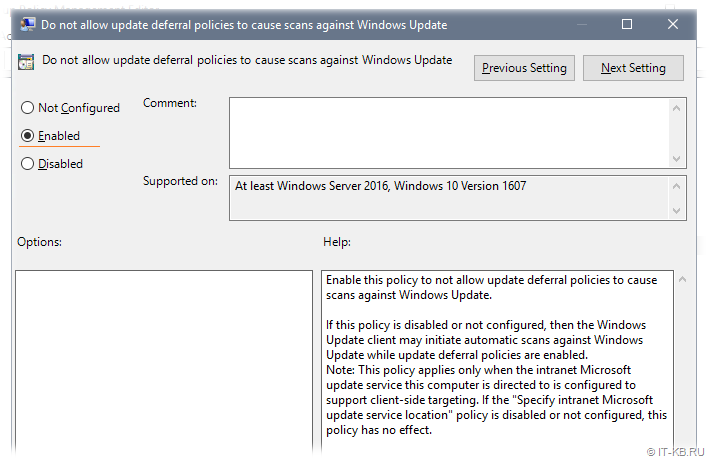
В ранних выпусках Windows 10 (с версии 1607) и Windows Server 2016 за отключение попыток использования онлайн репозитория Windows Update отвечала политика:
«Do not allow update deferral policies to cause scans against Windows Update«
в разделе:
Computer Configuration > Administrative Templates > Windows Components > Windows Update.
В результате применения этой политики в системном реестре Windows появляется параметр DisableDualScan, установленный в 1:
Windows Registry Editor Version 5.00

[HKEY_LOCAL_MACHINE\SOFTWARE\Policies\Microsoft\Windows\WindowsUpdate]
"DisableDualScan"=dword:00000001
И, судя по старым статьям, на более ранних версиях Windows 10 описанная политика могла быть полезна для решения проблемы.
Однако, в более поздних версиях Windows 10 (начиная с версии 2004), Windows 11, а так же, возможно, в более новых версиях Windows Server, данная политика была перенесена в подраздел Legacy Policies и была заменена новой политикой:
«Specify source service for specific classes of Windows Updates«
в разделе:
Computer Configuration > Administrative Templates > Windows Components > Windows Update > Manage updates offered from Windows Server Update Service.
Предполагается включение этой политики и выбор WSUS в качестве источника для всех предлагаемых типов обновлений.
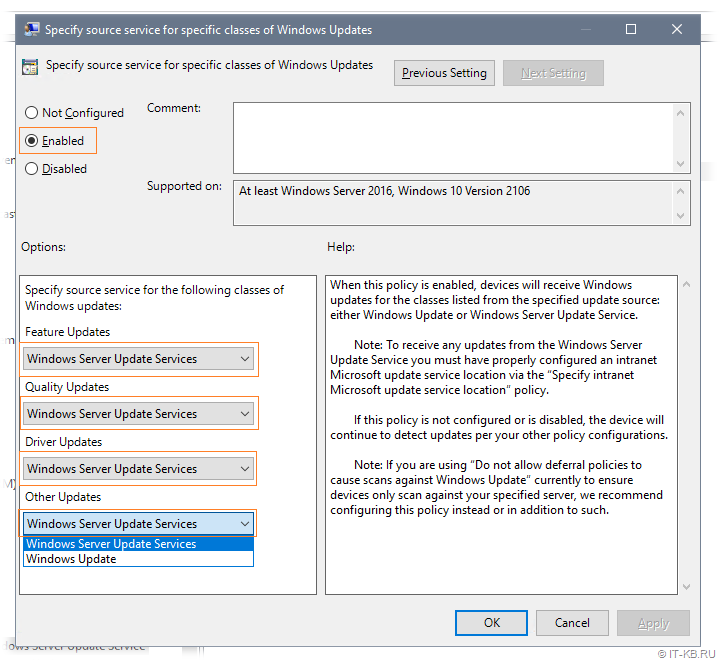
В результате применения этой политики в системном реестре Windows появляется 4 параметра с соответствующими именами, установленных в 1:
Windows Registry Editor Version 5.00

[HKEY_LOCAL_MACHINE\SOFTWARE\Policies\Microsoft\Windows\WindowsUpdate]
"SetPolicyDrivenUpdateSourceForFeatureUpdates"=dword:00000001
"SetPolicyDrivenUpdateSourceForQualityUpdates"=dword:00000001
"SetPolicyDrivenUpdateSourceForDriverUpdates"=dword:00000001
"SetPolicyDrivenUpdateSourceForOtherUpdates"=dword:00000001
Логично предполагать, что включать и настраивать данную политику резонно лишь для серверных систем, которые в локальных сетях, как правило, обновляются с сервера WSUS и имеют ограниченный доступ в Интернет. Для клиентских же систем, часть из которых может оказаться мобильными и периодически перемещающимися из локальной сети во внешние сети с доступом в Интернет, в некоторых ситуациях может оказаться логичней использовать настроенный по умолчанию механизм выбора источника (то есть, чтобы в качестве дополнительного источника мог выступать онлайн репозиторий Windows Update).
Эксперименты с двумя выше описанными политиками показали, что на данный момент времени сами по себе (ни по отдельности ни вместе) эти политики не решают проблему в нашем конкретном случае.
В ходе дальнейшего изучения опыта борьбы коллег со странностями работы Windows Update в Windows Server 2016 обнаружил статью «Windows admin blog : Некорректное отображение информации на WSUS | Проблемы обновления со WSUS (Dual Scan)», где в качестве одного из решений предложено включение «олдскульной» политики:
«Do not connect to any Windows Update Internet locations«
в разделе:
Computer Configuration > Administrative Templates > Windows Components > Windows Update > Manage updates offered from Windows Server Update Service.
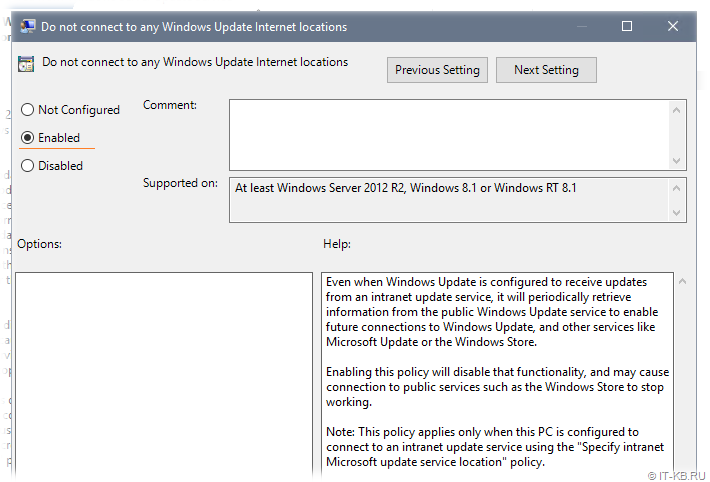
В результате применения этой политики в системном реестре Windows появляется параметр DoNotConnectToWindowsUpdateInternetLocations, установленный в 1:
Windows Registry Editor Version 5.00

[HKEY_LOCAL_MACHINE\SOFTWARE\Policies\Microsoft\Windows\WindowsUpdate]
"DoNotConnectToWindowsUpdateInternetLocations"=dword:00000001
Однако, практика показала, что применение данной политики может привести к появлению новой ошибки в ходе проверки обновлений:
There were some problems installing updates, but we'll try again later. If you keep seeing this and want to search the web or contact support for information, this may help: (0x8024500c)
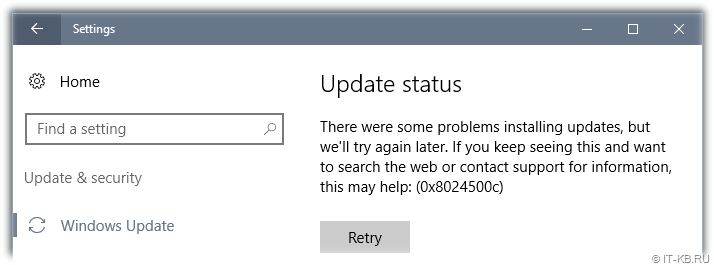
Причём избавиться от этой ошибки не поможет ни перезапуск службы, ни перезагрузка системы, а по свидетельствам очевидцев, эта ошибка воспроизводится так же и на Windows 10.
Понимая то, что данная политика не решает проблемы, можно было бы не упоминать о ней в нашей заметке. Однако помимо того, что она не только не закрывает исходную проблему, но и может создать новую трудно интерпретируемую проблему, мы и упоминаем здесь о ней, как о неподходящем варианте решения.
Перебрав ряд других групповых политик, как по одиночке, так и в в разных комбинациях, мне так и не удалось найти решения на базе каких-либо готовых политик.
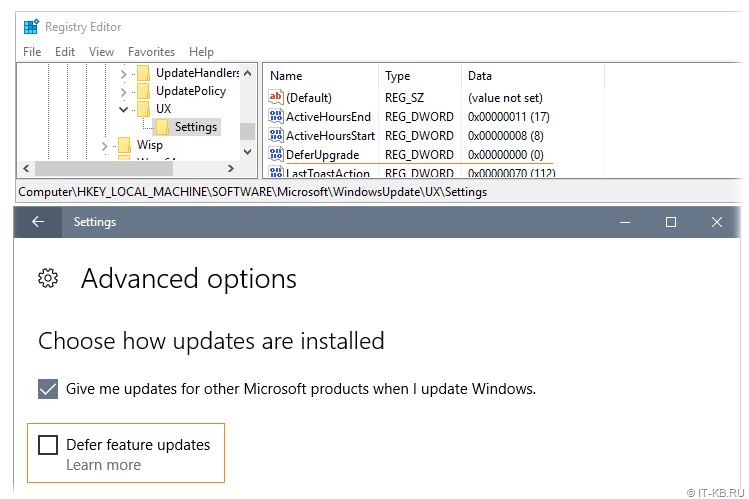
Отключение опции «Defer feature updates» с помощью GPP
В конечном итоге пришлось прибегнуть к помощи Group Policy Preferences (GPP) для управления опцией «Defer feature updates«, отображаемой в графической оболочке Windows Server 2016.
Отключение данной опции приводит к следующему изменению в системном реестре:
Windows Registry Editor Version 5.00

[HKEY_LOCAL_MACHINE\SOFTWARE\Microsoft\WindowsUpdate\UX\Settings]
"DeferUpgrade"=dword:00000000
Соответственно, для настройки серверов с Windows Server 2016 на явное отключение данной опции мы можем создать в доменной групповой политике, применяемой к серверам, объект GPP, настраивающий параметр реестра DeferUpgrade.

С помощью Item-level targeting можем указать то, что данный параметр реестра будет обновляться только на системах семейства Windows Server 2016.
Для оперативной проверки результата выполняем на конечном сервере обновление групповых политик и инициируем процедуру проверки обновлений:
gpupdate /force
UsoClient.exe startscan
Убедимся в том, что после применения GPO в реестре на серверных системах с Windows Server 2016 применились изменения и в графической консоли настроек системы опция «Defer feature updates» отображается в выключенном состоянии.
Все последующие проверки обновлений Windows теперь должны начать работать напрямую с WSUS без длительных попыток обращения к Интернет-службам Windows Update.
Skip to content
ISSUE
Check for updates throws 0x8024500C
BACKGROUND
The computer is Windows Server 2016
Managed by WSUS
| Name | IsDefaultAUService | ServiceID | ServiceUrl |
| Windows Server Update Service | False | 3da21691-e39d-4da6-8a4b-b43877bcb1b7 | |
| Windows Update | True | 9482f4b4-e343-43b6-b170-9a65bc822c77 |
BEHAVIOUR
Tough it is managed by WSUS, the computer still scans against Windows Update as can be seen from windows update log.
LOGS
[2] 006C.0D58::06/29/22-11:40:03.8481412 [reporting] creporter_cpp1968 CReporter::ReportEventInternal() - ReportEvent() hr=0.
[2] 006C.0D58::06/29/22-11:40:03.8481454 [agent] updatemanager_cpp10777 CAgentUpdateManager::FindUpdates() - * START * Finding updates CallerId = UpdateOrchestrator  Id = 2
[2] 006C.0D58::06/29/22-11:40:03.8481459 [agent] searchcall_cpp459 CSearchCall::TraceProperties() - Online = Yes; AllowCachedResults = No; Ignore download priority = No
[2] 006C.0D58::06/29/22-11:40:03.8481468 [agent] searchcall_cpp465 CSearchCall::TraceProperties() - Criteria = "IsInstalled=0 and DeploymentAction='Installation' or IsPresent=1 and DeploymentAction='Uninstallation' or IsInstalled=1 and DeploymentAction='Installation' and RebootRequired=1 or IsInstalled=0 and DeploymentAction='Uninstallation' and RebootRequired=1"
[2] 006C.0D58::06/29/22-11:40:03.8481496 [agent] searchcall_cpp468 CSearchCall::TraceProperties() - ServiceID = {9482F4B4-E343-43B6-B170-9A65BC822C77} Windows Update
[2] 006C.0D58::06/29/22-11:40:03.8481501 [agent] searchcall_cpp492 CSearchCall::TraceProperties() - Search Scope = {Machine}
[2] 006C.0D58::06/29/22-11:40:03.8481538 [agent] searchcall_cpp504 CSearchCall::TraceProperties() - Caller SID for Applicability: S-1-5-21-600568555-2949159410-3023380020-42937
[2] 006C.0D58::06/29/22-11:40:03.8481543 [agent] searchcall_cpp525 CSearchCall::TraceProperties() - ProcessDriverDeferrals is set
[2] 006C.0D58::06/29/22-11:40:03.8481543 [agent] searchcall_cpp531 CSearchCall::TraceProperties() - RegisterService is set
[2] 006C.0D58::06/29/22-11:40:03.8499020 [agent] Unknown_cxx00 CAgentServiceManager::GetServiceObject() - GetServiceObject couldn't find service '117CAB2D-82B1-4B5A-A08C-4D62DBEE7782'.
[2] 006C.0D58::06/29/22-11:40:03.8499146 [endpointproviders] Unknown_cxx00 CSLSEndpointProvider::GetEndpointFromSLS() - Getting service 9482F4B4-E343-43B6-B170-9A65BC822C77 SLS SecondaryServiceAuth URL
[2] 006C.0D58::06/29/22-11:40:03.8501451 [endpointproviders] Unknown_cxx00 CSLSEndpointProvider::GetWUClientData() - EP: error: 0x8024500C : - failed to get SLS data
[2] 006C.0D58::06/29/22-11:40:03.8501488 [endpointproviders] Unknown_cxx00 CSLSEndpointProvider::GetEndpointFromSLS() - Failed to obtain 9482F4B4-E343-43B6-B170-9A65BC822C77 redir SecondaryServiceAuth URL, error = 0x8024500C
[2] 006C.0D58::06/29/22-11:40:03.8501507 [agent] Unknown_cxx00 CAgentServiceManager::RefreshServiceAuthCabs() - Failed to obtain the authorization cab URL for service 117cab2d-82b1-4b5a-a08c-4d62dbee7782, hr=0
[2] 006C.0D58::06/29/22-11:40:03.8501511 [agent] Unknown_cxx00 CAgentServiceManager::RefreshServiceAuthCabs() - Caller Service Recovery failed to opt in to service 117cab2d-82b1-4b5a-a08c-4d62dbee7782, hr=0X8024500C
[2] 006C.0D58::06/29/22-11:40:03.8501549 [agent] Unknown_cxx00 CAgentServiceManager::GetServiceRegisteredWithAU() - Found default AU service '9482F4B4-E343-43B6-B170-9A65BC822C77' for all non policy driven services.
REASON
This can arise when a combination of two registry keys have been added to HKLM\Software\Policies\Microsoft\Windows\WindowsUpdate:
- ExcludeWUDriversInQualityUpdate
- DoNotConnectToWindowsUpdateInternetLocations
These two settings do not work together.
SOLUTION
Delete the ExcludeWUDriversInQualityUpdate registry (or do it via GPO) and rescan may resolve the issue.
Некоторые пользователи, пробуя установить апдейт системы с помощью центра обновлений Windows получают сообщение об ошибке 0x8024500C. Иногда эту же ошибку можно встретить обновляя программу UWP при помощи Microsoft Store. Что можно сказать по этому поводу? Вероятнее всего служба Центра обновлений заблокирована. Методы исправления рассмотрим в данном материале.
Ошибка 0x8024500C
Причин данной неполадки существует множество. Ей может стать и общий сбой, и неверно работающие службы, и сетевые проблемы, и повреждённые файлы системы, и VPN-клиенты и много других вариантов.
Для начала попробуем восстановить системные файлы, если вдруг они имеют повреждения. Попробуем применить системные утилиты.
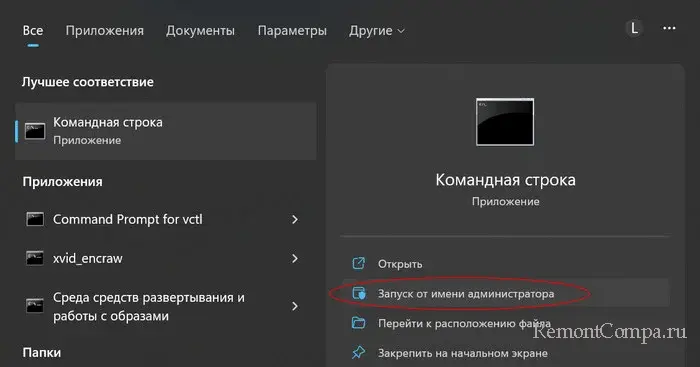
1. Жмём Win+R. Пишем «cmd» и подтверждаем нажатием кнопки «Ок».
2. Прописываем строки
sfc /scannow
DISM /Online /Cleanup-Image /RestoreHealth
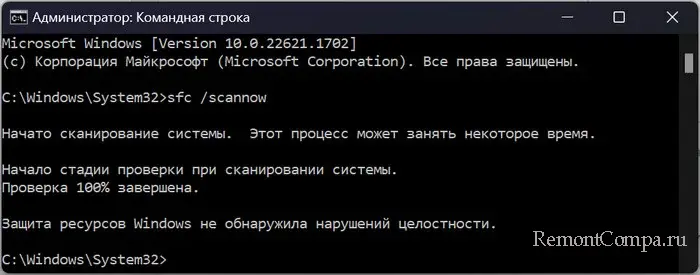
3. При выполнении данных команд важно, чтобы у вас было стабильное соединение с сетью. Дожидаемся окончания сканирования и восстановления файлов.
4. Перезапускаем ПК.
Теперь можно применить стандартное средство ликвидации неисправностей. Иногда оно помогает устранить сбои.
1. Жмём Win+I. Выбираем раздел «Система».
2. Теперь жмём «Устранение неполадок» — «Другие средства устранения неполадок».
3. Напротив «Центр обновления Windows» кликаем на «Запуск».
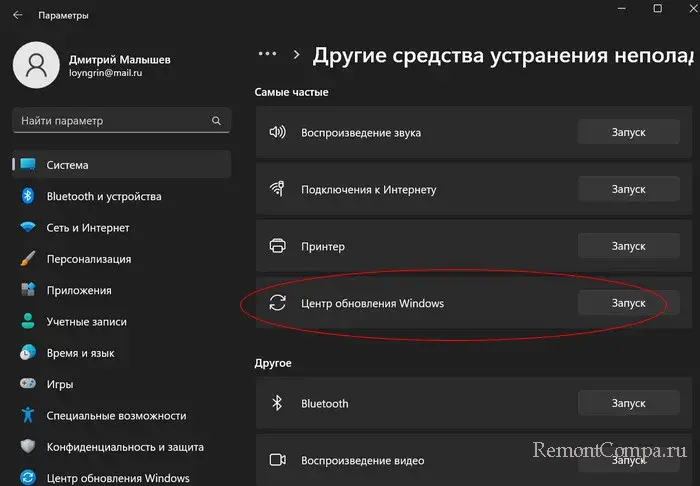
4. Далее следуем указаниям и ожидаем пока мастер не продиагностирует винду и не укажет на проблемы.
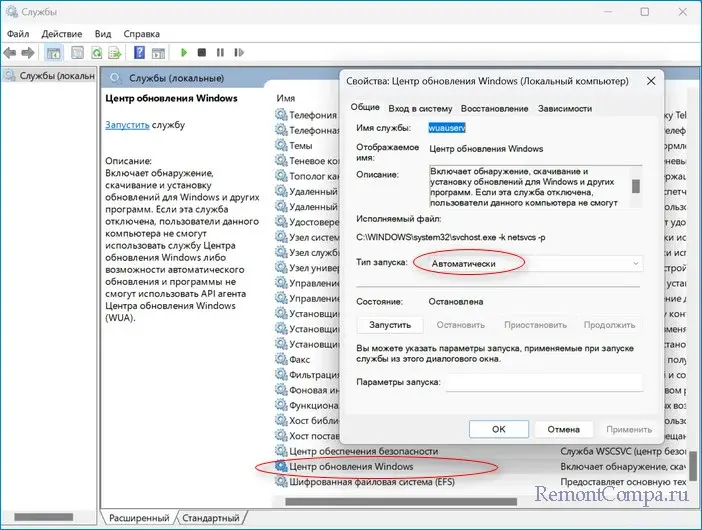
Теперь рекомендуется проверить работу служб. Нас интересует «Фоновая интеллектуальную службу передачи (BITS)», «Служба центра обновления Windows «, «Служба криптографии», «Установщик Windows». Для них мы будем выполнять поочерёдно такие действия:
1. Щелкаем Win+R, прописываем «services.msc», жмём «Ок».
2. Выбираем одну из служб представленных выше. Кликаем по ней два раза и попадаем в свойства.
3. Пункт «Тип запуска» выбираем «Автоматически».
4. Теперь жмём «Остановить» и «Запустить».
5. Повторяем действия с остальными службами.
6. Перезапускаем ПК.
Следующим из методов является очистка диска. Воспользоваться можно как сторонними приложениями по типу CCleaner, так и стандартным средством. Мы приведём пример утилиты от Microsoft.
1. Нажимаем Win+R. Печатаем «cleanmgr» и жмём Enter.
2. Выбираем системный локальный диск, обычно это «C».
3. Ставим везде отметки и жмём «Очистить системные файлы».
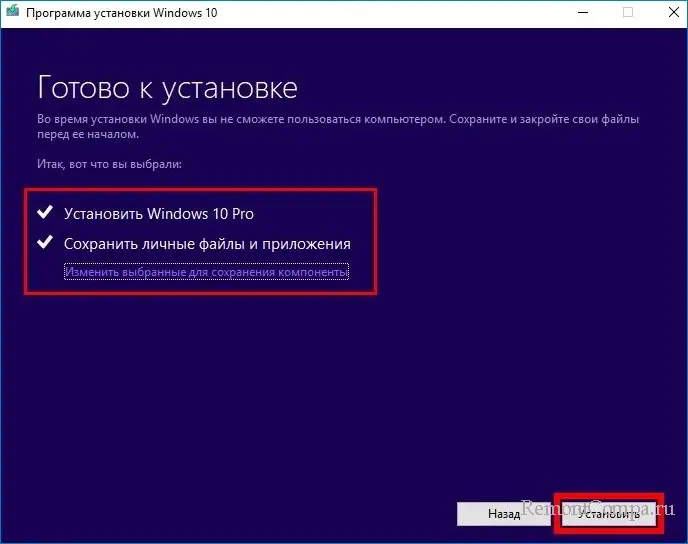
Устранить ошибку, одновременно обновив винду можно и через MediaControlTool.
1. Заходим на веб-ресурс Microsoft. Скачиваем приложение соответствующее вашей версии Windows. Запускаем его.
2. Выбираем «Обновить этот компьютер» — «С сохранением файлов».
3. Обновляем.
Причиной возникновения проблемы также может быть сторонний VPN-клиент или включенный прокси-сервер. Чтобы исключить такие варианты, отключим и то, и другое.
1. Нажимаем Win+R. Пишем «appwiz.cpl» и нажимаем Enter.
2. Выбираем наш VPN и удаляем его.
Теперь займёмся прокси.
1. Жмём Win+R, печатаем «ms-settings: network-proxy» и нажимаем Ввод.
2. Заходим в «Настройка прокси вручную» и ставим переключатель в положение «Выкл».
3. Перезапускаем ПК.
Установить апдейт также можно вручную. Для этого:
1. Нажимаем Win+I. Заходим в раздел «Обновления и безопасность».
2. Выбираем «Просмотреть историю обновлений».
3. Смотрим номер апдейта, который вызвал проблему.
4. Теперь переходим на сайт центра загрузки Microsoft и находим этот апдейт по коду.
5. Скачиваем его и устанавливаем.
6. Перезагружаем ПК.
Все вышеописанные способы исправления достаточно эффективны в борьбе с ошибкой 0x8024500C.
Error
Just finished troubleshooting an error with Windows 10 clients (build 1607 and above) contacting WSUS server getting 0x8024500c like below while searching updates.

The client had an on-premise WSUS server which they wanted to push out Windows Updates, instead of using the internet (windowsupdate.microsoft.com).
Cause/Solution
They had configured the following group policy to enable:
- Computer Configuration\Administrative Templates\Windows Components\Windows Update
- Do not connect to any Windows Update Internet location
This caused the Windows Update on the clients to break, instead they should disabled the above and configured the following instead:
- Computer Configuration\Administrative Templates\System\Internet Communication Management\Internet Communication settings
- Turn off access to all Windows Update features
The above will allow users to download apps on the Windows Store, but still only allowing the users to use the on-premise WSUS server.
Unfortunately Microsoft introduced a new feature called “Dual Scan” (read more about it here) which allows the Windows clients to access both WSUS and the internet, which would potentially bypass the local WSUS.
To disable the dual scan, the client needs to have the following registry keys deleted.
- HKEY_LOCAL_MACHINE\SOFTWARE\Microsoft\PolicyManager\current\device\Update
- BranchReadinessLevel
- DeferFeatureUpdatesPeriodInDays
- DeferQualityUpdatesPeriodInDays
- DeferUpdatePeriod
- DeferUpgradePeriod
- ExcludeWUDriversInQualityUpdate
- PauseDeferrals
- PauseFeatureUpdates
- PauseQualityUpdates
- HKEY_LOCAL_MACHINE\SOFTWARE\Microsoft\WindowsUpdate\UX\Settings
- BranchReadinessLevel
- DeferFeatureUpdatesPeriodInDays
- DeferQualityUpdatesPeriodInDays
- ExcludeWUDriversInQualityUpdate
- DeferUpgrade
If though you set the matching group policies to “Not Configured” or “Disable”, it will not delete the keys but only set them to zero (DWORD) in the registry.
For those clients that are running build 1607, you need to install kb4025334 which will add a local policy “Do not allow update deferral policies to cause scan against Windows Update” under “Computer Configuration\Administrative Templates\Windows Components\Windows Update“.
You can set this group policy on those 1607 clients by adding the following registry through group policy.
- HKEY_LOCAL_MACHINE\SOFTWARE\Policies\Microsoft\Windows\WindowsUpdate
- Key: DisableDualScan
- Value: 0x1
- Type: DWORD
The WSUS server was also tuned a little, because all resources was used. This caused the clients to take a long time to talk and eventually timeout.
- All superseded updates was declined in the WSUS management console.
- The WSUS IIS application pool (“WsusPool“) was also tunned with the following settings (remember IISRESET afterwards):
- .NET Framework Version: v4.0
- Already on Windows Server 2012 above, but this server was Windows Server 2008 R2
- Queue Length: 2000
- Private Memory Limit: 7843200
- .NET Framework Version: v4.0
You can test the Windows Update by executing the following command in a elevated command prompt.
- usoclient.exe StartScan
Troubleshooting
Registry Keys
If you want to see what registry keys you have on your client, you can run the following in a command prompt with elevated rights.
- reg query HKLM\SOFTWARE\Policies\Microsoft\Windows\WindowsUpdate /s
- reg query HKLM\SOFTWARE\Microsoft\PolicyManager\current\device\Update
- reg query HKLM\SOFTWARE\Microsoft\WindowsUpdate\UX\Settings
Windows Update Log
Check the Windows Update log by running the following command in PowerShell.
- Get-WindowsUpdateLog
CBS Log
Check the Component-Based Servicing log here.
- C:\Windows\Logs\CBS
That is my 2 cents, hope you can use it!

Are you getting error 0x8024500C while installing or updating apps from the Windows app store? If YES, then you are at the right place, in this blog you will learn how to fix Windows Store Error Code 0x8024500C.
The Windows app store error code 0x8024500C generally appears after updating Windows 10 system to Creators Update or Anniversary Update.
After updating, when the user tries to install any app from Windows Store then they will get the error code 0x8024500C. You can access the App Store, but you can’t download apps or install them.
Try that again
Something went wrong
The error code is 0x8024500C, in case you need it.
The error: 0x8024500c occurs due to damaged or infected registry entries, incompatible Windows Store updates, faulty Windows Store cache, Proxy server failure, and more.
So, in order to get rid of the 0x8024500C error and install apps from the Windows app store without any error, follow the below-listed solutions.
To fix error 0x8024500C, we recommend Advanced System Repair:
This software is your one stop solution to fix Windows errors, protect you from malware, clean junks and optimize your PC for maximum performance in 3 easy steps:
- Download Advanaced System Repair rated Excellent on Trustpilot.
- Click Install & Scan Now to install & scan issues causing the PC problems.
- Next, click on Click Here to Fix All Issues Now to fix, clean, protect and optimize your PC effectively.
How to Fix Windows 10 App Store Error Code 0x8024500c?
Solution 1: Clear Windows Store Cache
Sometimes the Windows Store Cache gets corrupted and starts causing conflict while updating
- Go to the start menu > type wsreset > hit the Enter key.
- Now, right-click on the wsreset option and choose Run as Administrator.
- If any UAC appears then click on Yes.
- This will clear the Windows app store cache.
Solution 2: Disable Proxy Connection
- Open the web browser (Chrome, Mozilla, or any other) and go to Settings.
- Search for the Connections tab and click on LAN Settings.
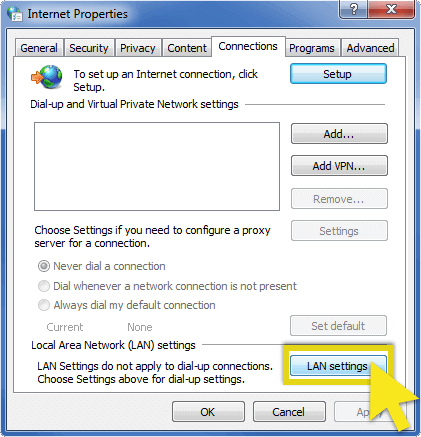
- Unmark the “Use a proxy server for your LAN” checkbox.
- Click OK to save the modifications and close the current window.
Now check if the Windows update error 0x8024500c is fixed or not.
Solution 3: Make sure the System’s Date and Time are Correct
Sometimes the error may appear because of the wrong system’s time and date. So, it is suggested to set the system’s time and date correctly. You should first synchronize the time and date with the internet and automatically detect your time zone.
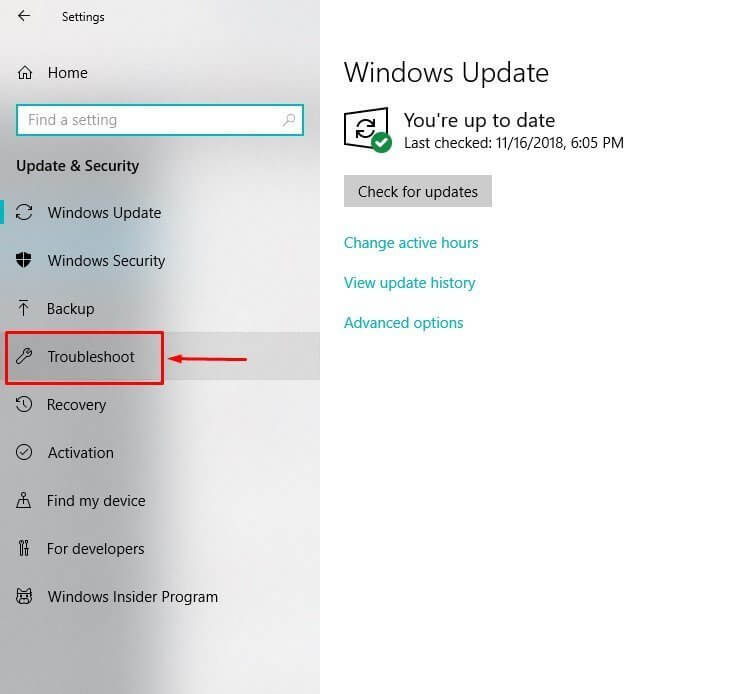
Solution 4: Run App Troubleshooter
This built-in Windows 10 troubleshooter can automatically fix all the issues. using this inbuilt troubleshooter, you can easily fix faulty app settings which include odd screen resolution and wrong security or account settings.
Follow the steps given:
- Press Windows + I key and navigate to Update & Security

- And click on Troubleshoot on the left side window
- Next, scroll down to Windows Store apps > click on it.
- Then click Run the troubleshooter.
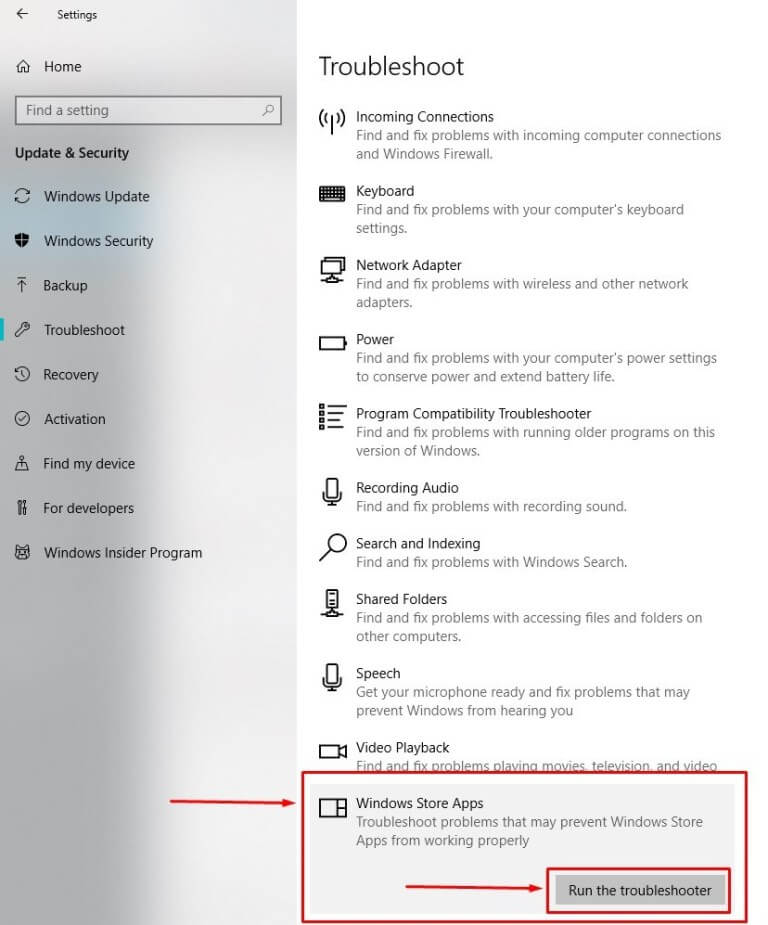
- Follow the onscreen instructions and wait for the whole process to complete
Lastly, reboot your Windows system and check if the error code 0x8024500c in Windows Store
Solution 5: Repair Corrupted System Files
The 0x8024500c error also appears when the system files get corrupted, so here it is suggested to repair corrupted Windows system files. Here it is suggested to run the inbuilt DISM command on your Windows, this scans your system files and repairs them.
- Open the command prompt with the admin privilege.
- To do this press the Windows key + X and click on the Command Prompt (Admin)
- Type the below-given command OR Copy and Paste these. Press ENTER after each of the commands.
- Dism /Online /Cleanup-Image /CheckHealth
- Dism /Online /Cleanup-Image /ScanHealth
- Dism /Online /Cleanup-Image /RestoreHealth
I hope now the Windows store error code 0x8024500c is fixed but if you are still getting the error then scan your system with the automatic repair utility.
Solution 6: Reinstall Windows Store
If none of the above-given fixes won’t work for you then reinstalling the Windows store cache may work for you to fix Windows 10 0x8024500c error code.
Follow the steps to do so:
- Open the run dialogue box by pressing the Windows key + R
- Type PowerShell.
- Right-click on the search results and choose Run as Administrator.
- Type Get-Appxpackage –Allusers and hit Enter key.
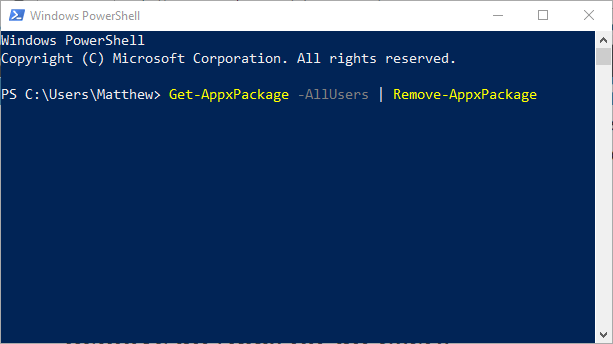
- Now you need to search for the Windows Store Entry and note down the package name (use ctrl+C).
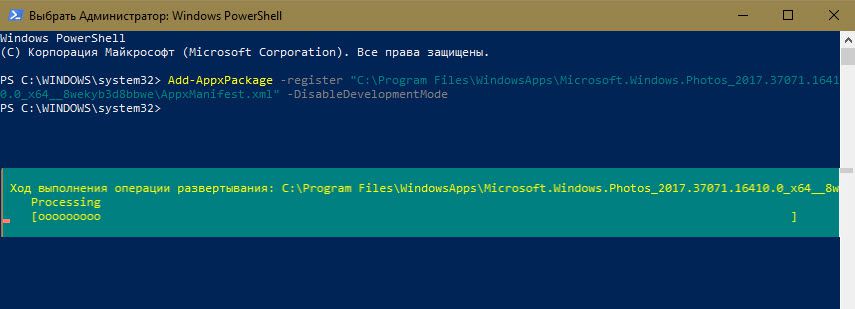
- After that, type Add-AppxPackage -register “C:\\Program Files\\WindowsApps\\” –DisableDevelopmentMode command.
NOTE: Now, replace PackageFullName with the Windows Store package name (previously copied by you).
- Again open the PowerShell with administrative rights (as shown above).
- Paste Add-AppxPackage -register “C:\\Program Files\\WindowsApps\\” –DisableDevelopmentMode command > hit Enter.
- At last, restart your PC to save all changes.
Best & Easy Solution to Fix Windows Store Error 0x8024500c
In many cases, the manual solutions won’t work for you to fix Windows update errors or issues, so in this case, you can run the PC Repair Tool, which is an advanced repair tool, that just by scanning once detects and fix various Windows issues and errors.
This automatic tool is straightforward to use and you don’t need any professional skill to operate it. Simply, download, install, and run. It will automatically fix all types of issues like DLL errors, registry errors, driver issues, etc. and also optimize the Windows PC/laptop performance.
Get the PC Repair Tool, to fix Error Code 0x8024500c
Conclusion
So, this is all about how to fix Windows store error code 0x8024500c. I tried my best to share with you the possible working solutions.
Follow the given solutions one by one carefully and get past the error on your Windows system.
I hope these solutions prove effective for you, but if there’s anything I missed out, please let us know on our Facebook page.
Good Luck..!
Hardeep has always been a Windows lover ever since she got her hands on her first Windows XP PC. She has always been enthusiastic about technological stuff, especially Artificial Intelligence (AI) computing. Before joining PC Error Fix, she worked as a freelancer and worked on numerous technical projects.