
The error 0X80242FFF mostly occurs when you were trying to install a pending Windows 10 Update on your PC. This problem appears because of varied reasons. A few of them include missing system files, corrupted update components, outdated .NET Framework, etc. Apart from these, a buggy update download might also result in similar issues.
When you encounter this bug, you may also see an error message that reads the following –
“
0x80242FFF -2145112065 WU_E_UH_UNEXPECTED An update handler error not covered by another WU_E_UH_* code“.
Today, in this tutorial, we will discuss five different ways that should help you to get rid of this problem on your device. They are as follows –
- Run Windows Update Troubleshooter
- Run SFC/DISM Scans
- Download and Install Latest .NET Framework
- Manually Install pending updates
- Reset Windows Update Components
If you are not able to update Windows 10 because of an error code 0X80242FFF, try applying these workarounds –
Note: Before you apply any solution, make sure to create a system restore point. The generated backup might help if some new issue arises while restoring the system’s default configuration.
1] Run Windows Update Troubleshooter
Microsoft provides an in-built tool to find and fix all update-related problems in Windows 10. The same goes by the name “Update Troubleshooter” and is pretty effective in scrutinizing critical bugs and solve them automatically. To do so, use these steps –
- Right-click on the Windows icon and select Settings.
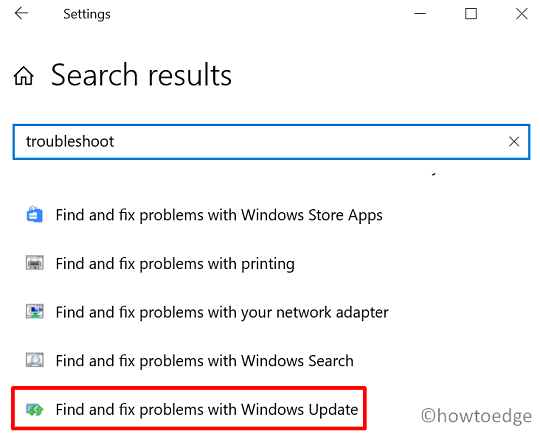
- Type “Troubleshoot” in the search field and press Enter.
- Scroll down and locate – “Find and Fix problems with Windows Update“.
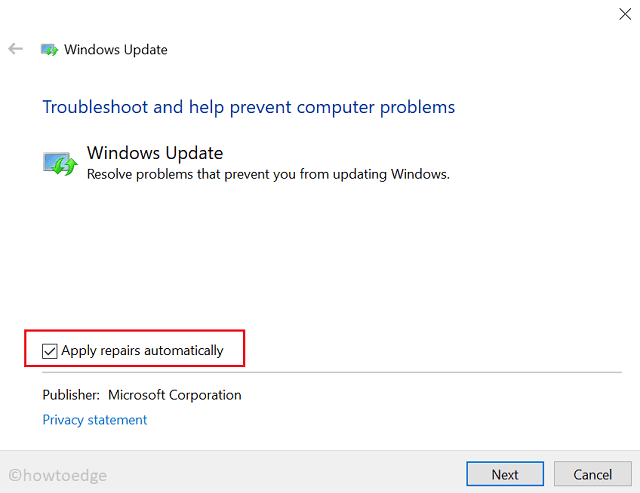
- On the subsequent screen, click Advanced then tick the box that reads – “Apply repairs automatically“.
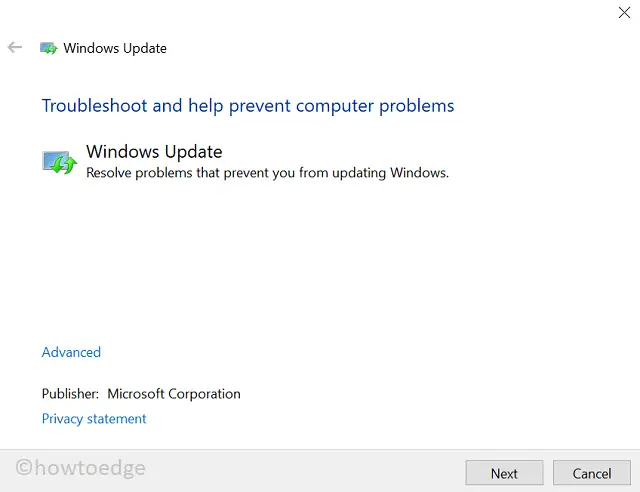
- Click Next to start the diagnosis.
- The troubleshooter will stop and restart update-related services, check problems with restart, and others.
- After this tool completes troubleshooting, click View detailed information. Here, you will find the bugs that it finds and repairs.
- Reboot your PC next and see if this indeed solves the 0X80242FFF error or not.
2] Run SFC/DISM Scans
Sometimes, this error may also appear because of damaged or missing system files. There’s no direct way to determine if this indeed is the case. However, you may run a utility program i.e. “System File Checker” to find and repair the buggy update download. Here’s how to run an SFC scan in Windows 10 –
- Press Win + R to invoke the Run dialog.
- Type “cmd” and press Ctrl + Shift + Enter keys altogether.
- Doing so will open the Command Prompt as an Admin.
- Type “
sfc/scannow” near the blinking cursor and press Enter.
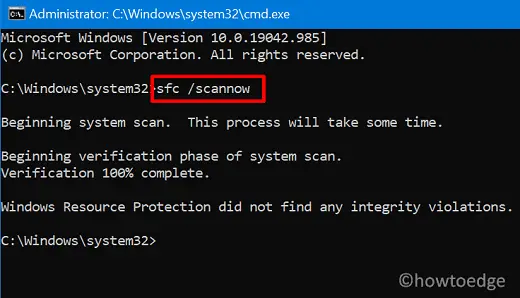
- Let this process reach 100% to get if there was indeed an issue with system files or not.
If the process results in fixing system files or replacing missing files, restart your PC. Else, execute the below code to inspect any issue on Windows 10 image –
DISM /Online /Cleanup-Image /RestoreHealth

- The above code will run to check if there lie any issues on the Windows 10 Image or not. In case, this finds any problem with it, the same gets automatically resolved as well.
- Reboot your computer next so that changes made come into effect.
3] Download and Install Latest .NET Framework
The error code 0X80242FFF may also occur if you are on an outdated .NET Framework in Windows 10. If that’s the case, you should try downloading and installing the latest framework on your device.
After you install the latest .NET Framework in Windows 10, restart your PC. From the next logon, check if the problem still persists or has been resolved by now.
4] Manually Install Pending Updates
If you are still not able to install pending updates on your computer, visit Update Catalog and manually download the required update. For this, you need to have the specific KB number that you are going to install. Here’s how the process goes –
- First of all, visit Windows 10 Update History page.
- Select Windows 10 version on the left pane that is running on your computer.
- On the extended pane, select the latest update and note down its KB number.
- Next, visit the Update Catalog site and type the cumulative update number on the search bar.
- Press Enter to get a list of well-matching results.
- Pick your system configuration i.e. x86, x64, or ARM64, and hit the Download button.
- On the next screen, tap over the available link. The standalone package starts downloading on your device.
- When the download completes, open the folder containing this file.
- Double-click over the setup file to begin its installation.
- Your PC may restart several times during this process, just wait till this is over.
Your PC is now on an updated build version of Windows 10.
5] Reset Windows Update Components
Though the above method must have resolved the issue that you were struggling with, we suggest resetting Windows update components as well. Performing this will resolve any issue related to Windows 10 update and you might not get into any additional errors moving ahead.
Resetting Windows Update Components implies stopping/restarting all update-related services and renaming the cache folders. Here’s how to perform this task –
- First of all, get rid of any network connection on your device. For Example – Ethernet, WiFi, etc.
- Next, launch Command Prompt having administrative rights.
- If the UAC window comes into the display, hit Yes.
- Copy/paste the below codes one by one followed by the Enter key separately.
net stop wuauserv
net stop cryptSvc
net stop bits
net stop msiserver
- The above four codes will stop all update-related services on Windows 10.
- Run the below two codes to rename the cache folders –
ren C:\Windows\SoftwareDistribution SoftwareDistribution.old
ren C:\Windows\System32\catroot2 catroot2.old
- Now that you have renamed the above two folders, restart the services that you have stopped earlier. Once again, run these commands separately –
net start wuauserv
net start cryptSvc
net start bits
net start msiserver
- In the end, type “exit” and press Enter to come out of the Command Prompt window.
- Restart your PC next so as to save the changes made above.
From the next logon, you should not get into any update issue in near future. I hope you find this guide useful in fixing error code 0X80242FFF on Windows 10.
Some Windows 10 users are encountering the 0x80242fff when they attempt to install a pending Windows Update on their computer. Most commonly this particular error code is reported to occur with the KB3069068 update.
After investigating this particular issue, it turns out that there are several different underlying potential culprits that might be responsible for the apparition of this error code. Here’s a list of scenarios that might trigger the 0x80242fff error:
- Generic glitch with Windows Update – As it turns out, there are generic glitches that could affect the update function on Windows 10 (under different circumstances). The vast majority of these possible occurrences are covered by a repair strategy present inside the Windows Update Troubleshooter. If this scenario is applicable, you should be able to fix the problem by running the Windows Update Troubleshooter and applying the recommended fix.
- Windows Update component is stuck in a ‘limbo’ state – Another reason why you might expect to see this issue is a sub-component of Windows Update that is currently stuck in a limbo state (it’s neither opened nor closed). In this case, you should be able to resolve the issue by running the automated WU agent or by manually resetting every WU dependency.
- Windows Update function is not working – There are also situations where the issue might be related to a roadblock imposed at as system level that is preventing your OS from installing pending updates automatically. In this case, you should be able to bypass the apparition of the error by using the Microsoft Update Catalog to install the pending updates manually.
- Underlying system file corruption – Under certain circumstances, you should be aware that you can encounter this issue due to some kind of system file corruption that is affecting the Windows Update component. In this case, you should be able to resolve the issue by going with an in-place repair or clean install procedure.
Now that you are familiar with every potential fix that might be responsible for this issue, here’s a list of verified methods that other affected users have successfully used to resolve the error and install the pending updates without the same 0x80242fff:
Method 1: Running the Windows Update Troubleshooter
Before we explore other advanced repair strategies capable of resolving the 0x80242fff, let’s see if your Windows is not capable of resolving the issue automatically. Windows 10 is notoriously known for including a lot of built-in repair strategies capable of resolving the majority of issues related to the WU component.
Several users that we’re facing this exact issue have managed to resolve the 0x80242fff by running the Windows Update troubleshooter and applying the recommended fix.
The Windows Update Troubleshooter contains dozens of repair strategies that will be applied automatically if a viable inconsistency is found. If the scan finds a viable repair strategy, it will automatically recommend a viable fix that you can apply with a simple click.
Here’s a quick guide on running the Windows Update troubleshooter to resolve the 0x80242fff error code on Windows:
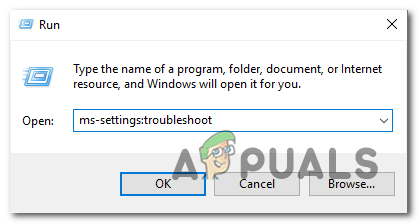
- Start by pressing a Run dialog box by pressing Windows key + R. Next, type “ms-settings-troubleshoot” and press Enter to open up the Troubleshooting tab of the Settings app.

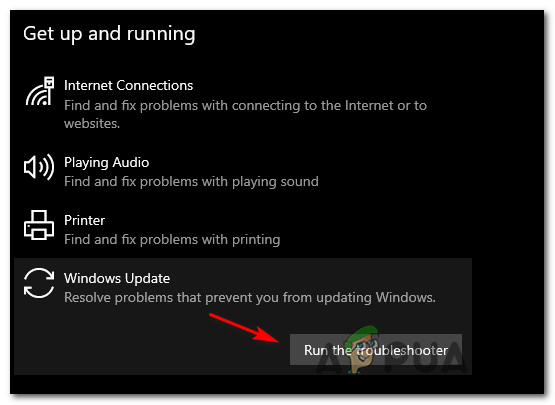
Opening the Troubleshooting tab - Inside the Troubleshooting tab, move over to the right section of the Settings screen and scroll down to the Get up and running section. Inside, click on Windows Update, then click on Run the troubleshooter from the newly appeared context menu.

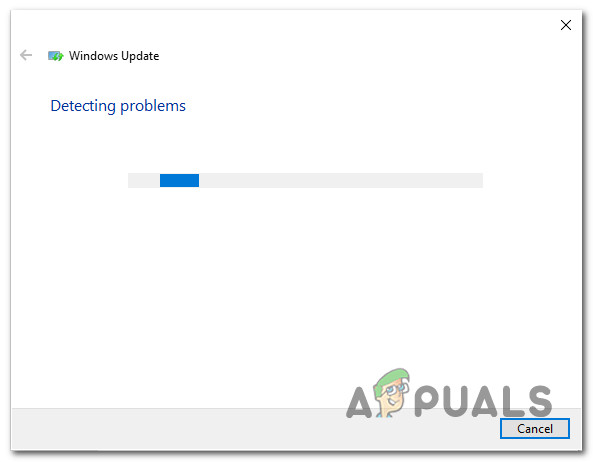
Running the Windows Update Troubleshooter - After you start the Windows Update Troubleshooter, it will automatically begin to scan your system of any inconsistencies. Wait patiently until the initial scan is complete.

Detecting problem with Windows Update Note: The purpose of this is to determine whether any of the repair strategies included with it are a match for the particular issue that you’re having.
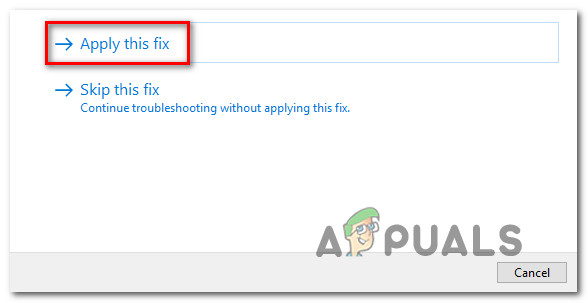
- If a viable repair strategy is identified, you’ll be presented with a new window in which you can click on Apply this fix to apply the recommended repair strategy.

Applying the recommended fix Note: Depending on the type of fix, you might need to follow the on-screen instructions to enforce the recommended fix.
- After the fix is successfully applied, restart your computer and see if the issue is resolved once the next startup is complete.
If the Windows Update Error 0x80242fff is still occurring (or the troubleshooter didn’t find a viable repair strategy), move down to the next potential fix below.
Method 2: Restarting every Windows Update component
If Windows Update didn’t find a viable repair strategy, chances are you’re likely dealing with a glitch that is affecting your OS’s ability to complete the installation of new Windows updates.
In situations like this, you should deploy a series of repair strategies in order to reset every Windows Update component that might be causing issues with your pending Windows updates.
Most likely, this type of issue occurs because of one or more WU (Windows Update) components that are currently stuck in a limbo state (they’re neither open nor closed). If this scenario is applicable, you will be able to fix the problem by resetting all WU components that are involved in the updating process.
Here are two different methods that you can follow in order to reset all Windows Update components. Follow whichever one you feel more comfortable with:
A. Resetting WU via the WU Agent
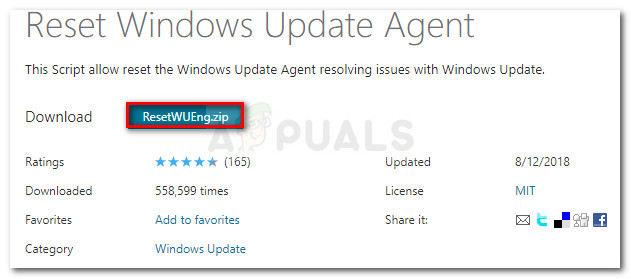
- Open our browser and visit this Microsoft Technet download page to download the Reset Windows Update Agent script.

Downloading the Windows Reset agent - Once the download is finally complete, extract the zip archive with a utility like WinRar, WinZip, or 7Zip and paste it into an easy to access location.
- Next, double-click on the ResetWUENG.exe file, click Yes at the User Account Control.
- From the next screen, follow the instructions to run the script on your computer. Once the operation is complete, this fix will reset all your WU components.
- Finally, restart your computer and see if you’re able to install the failing update once the next startup sequence is complete.
B. Resetting WU via elevated CMD
- Press Windows key + R on your keyboard to open up a Run dialog box. Then, type “cmd” inside the text box and press Ctrl + Shift + Enter to open up an elevated Command Prompt.

Opening a CMD prompt Note: At the UAC (User Account Control) prompt, click Yes to grant administrative privileges.
- Inside the elevated Command Prompt, type the following commands in order and press Enter after each one to stop all WU related services:
net stop wuauserv
net stop cryptSvc
net stop bits
net stop msiserver
Note: Just so you know what you’re actually instructing the terminal to do, these commands will stop the Windows Update Services, MSI Installer, Cryptographic services, and BITS services.
- After every relevant service has been stopped, run the following commands to clear and rename SoftwareDistribution and Catroot2 folders:
ren C:\Windows\SoftwareDistribution SoftwareDistribution.old
ren C:\Windows\System32\catroot2 Catroot2.old
Note: These two folders are holding updated files use by the WU component. Renaming these folders will force your OS to create new healthy equivalents that will not be affected by corruption.
- Now that the folders have been cleared, run the following commands to re-enable the services that we’re previously disabled:
net start wuauserv
net start cryptSvc
net start bits
net start msiserver
- Restart your computer once again and see if the issue has been resolved at the next computer startup.
If the same issue is still occurring even after you have successfully refreshed every Windows Update component, move down to the next potential fix below.
Method 3: Install the failing Update Manually
In case the two methods above didn’t allow you to identify any underlying issues with the Windows Update component, one quick fix that that should allow you to bypass the 0x80242fff error is to use the Windows Update Catalog to find the update that is failing to install and install them manually (most commonly KB3069068).
This operation was confirmed to work by a lot of affected users – This process might be a little tedious (especially if you’re dealing with multiple updates that are all failing with the same error), but it’s worth it if you want to avoid relying on the built-in Windows Update component.
If you decide to go through with this fix, follow the step by step instructions below:
- Open your browser and access the root address of the Microsoft Update Catalog.
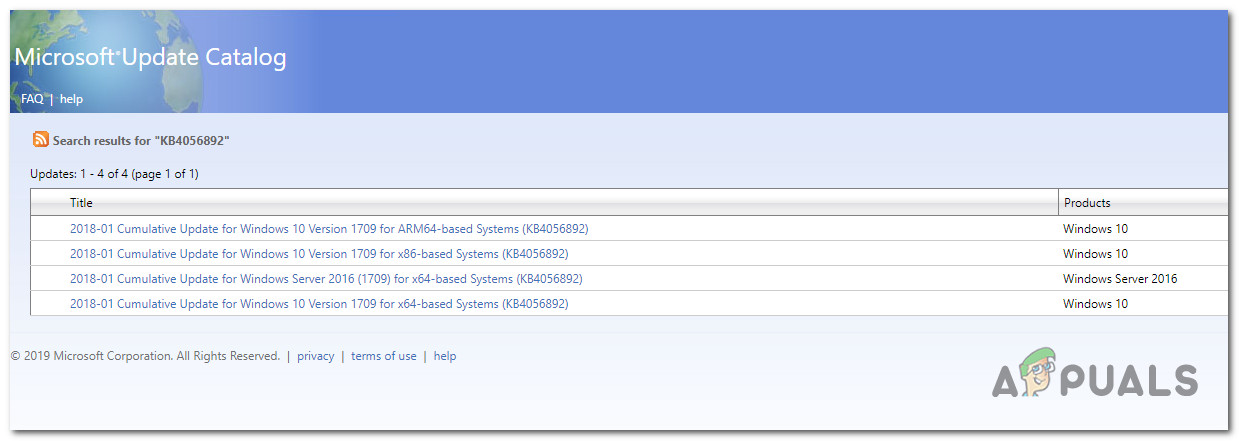
- Once you are inside, use the search function in the top-left corner of the screen to search for the update that is failing with the 0x80242fff. (most commonly update KB3069068)

Searching for the update to install manually - Once the results are successfully generated, go ahead and look for the appropriate update while keeping in mind your current OS architecture and the Windows version that you’re using.

Searching for the right Windows Update - After you managed to locate the correct update, go ahead and click on the Download button associated with the correct driver.
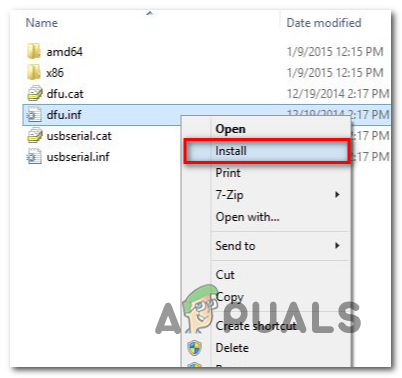
- Next, open File Explorer and navigate manually to the location where the driver was downloaded. When you get to the location where you downloaded the driver that was previously failing, right-click on the .inf file and choose Install from the newly appeared context menu.

Installing the INF driver Note: If multiple updates are failing with the same error code, repeat steps 3 to 5 with every Windows Update that was previously failing when you attempted to install it conventionally.

In case the same problem is still occurring when you try to install the updates via the Windows Update catalog, move down to the next potential fix below.
Method 4: Refresh every Windows Component
If none of the other fixes above have allowed you to resolve the 0x80242fff, there’s a big chance that you’re actually dealing with some kind of system file corruption that cannot be resolved conventionally.
In this case, your best hope at fixing the issue conventionally is to reset every WIndows component with a procedure like a clean install or install repair (in-place repair).
The easiest procedure out of the bunch is clean installation. But keep in mind that unless you’ll back up your data in advance, you can expect to lose all your personal data present on your OS driver – The major advantage of this method is that you will not be required to use compatible installation media.
However, if you’re looking for the focused approach, you’ll need compatible installation media to initiate a repair install (in-place repair procedure).
As opposed to clean installing, this operation is considerably more tedious, but the main advantage is that you’ll be able to refresh every potentially corrupted component without losing data from your apps, games, documents, and personal media that’ currently stored on your OS drive.
Kevin Arrows
Kevin Arrows is a highly experienced and knowledgeable technology specialist with over a decade of industry experience. He holds a Microsoft Certified Technology Specialist (MCTS) certification and has a deep passion for staying up-to-date on the latest tech developments. Kevin has written extensively on a wide range of tech-related topics, showcasing his expertise and knowledge in areas such as software development, cybersecurity, and cloud computing. His contributions to the tech field have been widely recognized and respected by his peers, and he is highly regarded for his ability to explain complex technical concepts in a clear and concise manner.
The Update in Windows 10, the error occurs often 0x80242fff. What this means exactly and how it can fix, we can tell you in this practical tip.
Windows 10: Update error 0x80242fff — you can do
- Download the Windows Update Troubleshooting here , download and then run this from. You follow the instructions.
- May be this error is triggered by other programs in the Background. Therefore, close all programs, if you are looking for Updates. This also applies to your Firewall and anti-virus program. May be, these are accountable for this mistake.
- In most cases, it can help if you remove your LAN cable from PC and Wi-Fi off. Then open the command prompt as Administrator [Ctrl] + [X].

Windows 10: error 0x80242fff
Further steps: Windows 10 error 0x80242fff fix
Enter the following commands:
- net stop wuauserv
- net stop cryptSvc
- net stop bits
- net stop msiserver
- ren C:\Windows\SoftwareDistribution SoftwareDistribution.old
- ren C:\Windows\System32\catroot2 catroot2.old
- net start wuauserv
- net start cryptSvc
- net start bits
- net start msiserver
- exit
Windows 10: Troubleshooting check
After that, you can restore the Internet connection and try again.
- You should also make sure that the Update service is working. Right click on the taskbar and select «Task Manager». In the Tab «services» search for «wuauserv» and make sure this service is started and running.
- If this is not the case, right-click it and select «Start». Now the error should no longer occur.
Details: 0x80242fff error code generally found in windows updates when it is in auto-update settings.
Disclaimers: Before you attempt to fix an issue with the windows update, we highly recommend you to take a registry back up and create a system restore point as a precaution method. In case if something goes wrong, we can restore your computer to the same stage and fix the issues. (In case if you not sure how to back it up, talk to an expert for assistance.)

Why Windows Updates are Important:-
Updates are nothing but enhancement features for present software. There may be security updates also to protect your machine from malware, virus attacks. Generally, windows operating system configured to check and install updates automatically through its internal service called windows update.
Why is Your Computer Getting Windows Update Error?
There are several reasons that any machine may get issues with windows update service client in the operating system. Like,
- Firewall issues
- Internet connection issues
- Files system corruption issues
- Windows update service damaged
0x80242fff Windows Update Error Code Solution Step By Step:-
Here you have to follow steps as per causes of this error code 0x80242fff in windows update service client/
Firewall Check:-
First change your antivirus/firewall settings to OFF,
Windows Firewall is software that runs on your computer and provides protection against network attacks from the Internet or other computers on the network.
To turn off firewall,
Type in FIREWALL in start button search bar and open firewall application,
From the left side panel, find Turn windows firewall on /off option, as shown in pic,
Then choose to Turn off windows firewall in private and public network options.
Note: Once 0x80242fff windows update error gets fixed, you should turn on the windows firewall application.
Change Your Internet Connection:-
Switch your internet to another network and try to do updates.
Also, When you try to access Google.com, your computer contacts its DNS server and asks for Google.com’s IP address. The default DNS servers your network uses are provided by your Internet service provider, and they may sometimes experience problems.
You can try accessing a website at its IP address directly, which bypasses the DNS server.
File System Corruption:-
Perform a SFC scan from command line as admin and fix if there are any files system corruptions.
You can perform a system file scan process which can be started on a command prompt window with administrative rights.
SFC /SCANNOW is the command line which needs to be executed.
How to do a SFC Scan:-
1. Click on the start button and type “cmd”
2. Open “Command prompt window” and type “SFC/SCANNOW” PRESS enter button,
3. The scanning process start and this process takes sometime to finish. Please wait until it gives results.

This video shows how to do SFC Scan:
If the computer says, no integrity violations found, then try to reinstall the program which may sometimes replaces the corrupted files on your office program.
Windows Update Client Damage:-
There are some fix it tools to solve some common issues, windows troubleshooter tool is one of that kind. It fix many issues by downloading pre-requisites of windows updates that are pending and then proceed to download original security patches or any other windows updates using updates client application.
Use windows troubleshooter using a fix it tool, and then try a manual install of updates.
Click here to download
There are some advanced methods to fix this 0x80242fff windows update error using some commands and resetting your operating system to a healthy restoring point.
Restoring Health :-
1. Open Cmd prompt as admin mode,
2. Type in the command as follows and press enter,
dism /online /cleanup-image /restore health
3. It will take time to go back to the healthy restore point.(You can also restore in by mounting the windows source file as DVD or USB stick)
dism /online /cleanup-image /restore Health /source: c:\offline /limit access (assuming source file in c:/ drive)
Reset the Windows Operating System:-
NOTE: Try this only if you don’t have much data on your computer, because it takes a time to take backup of existing files and install your current application again.
- If you are using windows 10, just type in “RESET PC” in the Cortana search bar(windows start button search) and select RESET PC from the results.
- Then under the RESET PC, click on get started button to proceed.
- There are two options to keep your files and complete clean. (You must take backup of your desktop files, pictures, downloads, documents before proceeding to completely clean.)
- After reset, you may do updates cleanly without any issue.
Still, have issues regarding Windows updates? Reach our Microsoft certified technicians on the chat.

Live chat support
Chat with our Technician to fix your computer issues Now!
————————————————————————
Related Issues to Windows Update Error Codes in Windows 10/8/7:
Error code 800f0900, Error code 0xc004f200, Error code 0xc1900200, Error code error 0x8e5e03fb, Error code 0x80073701, Error code 0x8e5e03fb, Error code kb4012215, Error code 0x80073712, Error code kb3176936, Error code 0x80240fff, Error code 0x80070057, Error code kb4013198, Error code kb4012219, Error code 0x800706d9, Error code 80244022, Error code 800736cc, Error code Kb2919442, Error code 0x80070490, Error code 0x80240190xc190020e, Windows Update Error Code 0xc190020e, Windows Update Error 0xc190020e, fehlercode 0xc190020e, Errore 0xc190020e
Updated May 2025: Stop these error messages and fix common problems with this tool. Get it now at this link
- Download and install the software.
- It will scan your computer for problems.
- The tool will then fix the issues that were found.
Microsoft is constantly releasing new updates that fix bugs and improve system performance. Although updating Windows and installing expected Windows updates can be a simple process, some problems can occur, such as error 0x80242fff.
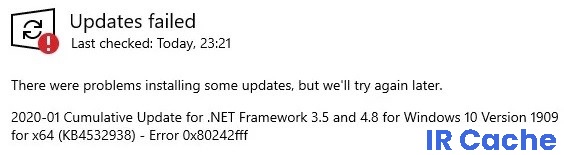
According to some reports, Windows users have received error 0x80242fff when installing Windows Pending Update, which looks like this: “There were problems installing some updates, but we will try again later.” Error 0x80242fff.”
In this troubleshooting article, we will take a look at Windows Update and recommended solutions you can try to fix Windows 10 update error 0X80242FFF.
Table of Contents:
What are the causes of update failure – error 0X80242FFF?
- Damaged system file: Under certain circumstances, you should know that this problem can occur due to the corruption of a system file that affects the Windows Update component.
- Windows Update fails: There are also situations where the problem is due to a system-level lock that prevents the operating system from automatically installing pending updates.
- Common Windows Update Failure: It turns out that there are common failures that can affect the Windows 10 update function (under various circumstances). The vast majority of these possible cases are covered by the repair strategy available in the Windows Update troubleshooter.
How to fix Update Failed – Error 0X80242FFF?
Updated: May 2025
This tool is highly recommended to help you fix your error. Plus, this tool offers protection against file loss, malware, and hardware failures, and optimizes your device for maximum performance. If you already have a problem with your computer, this software can help you fix it and prevent other problems from recurring:
- Step 1 : Install the PC Repair and Optimizer Tool. (Windows 10, 8, 7, XP, Vista).
- Step 2 : Click Start Scan to determine what problems you are experiencing with your computer.
- Step 3 : Click Repair Allto resolve all problems.
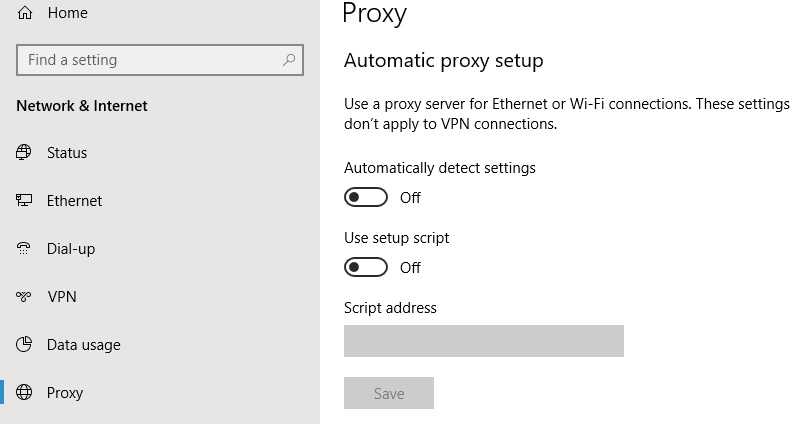
Disable the proxy server
- Press the Windows + I key combination to open the Settings application.
- Now go to the Network and Internet section.
- Select Proxy on the left-hand menu. Disable all options in the right pane.
After that, your proxy should be disabled and the update error should be fixed. If you still want to protect your online privacy, we highly recommend you use a VPN rather than a proxy.
Disabling the Windows Firewall
- Press the Windows + S key and type Firewall.
- Select Windows Defender Firewall from the list.
- Select Enable or disable the Windows Defender firewall.
- Select Disable Windows Defender Firewall (not recommended) for private and public networks.
- Then click OK to save your changes.
Perform an onsite update
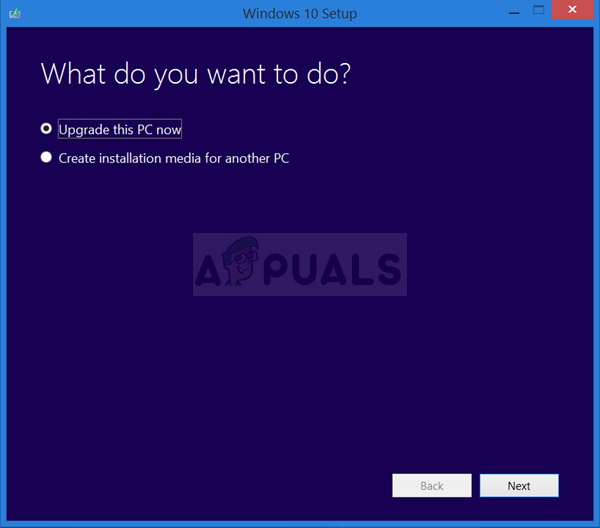
- Download and run the media creation tool.
- Select Update this computer now.
- Wait for the installer to prepare the necessary files.
- Select Download and install updates (recommended).
- Now click Next.
- The installer will now download the updates. This may take some time, so please be patient.
- Once the updates are downloaded, follow the instructions on the screen.
- Once you get to the “Ready to Install” screen, click Save.
- Select Save personal files and applications and click Next.
- Follow the instructions to complete the setup.
Perform an SFC scan
- Press the Windows + X key and select Command Prompt (Admin) from the list (or PowerShell for older systems).
- Type sfc /scannow and press Enter.
- The SFC scan will now begin. The scan may take about 15 minutes, so do not interrupt it.
Start the system in clean boot mode
- Press the Windows +R key, type MSConfig and press Enter.
- Go to the Services tab and check the Hide all Microsoft services checkbox.
- Then click Disable All and confirm by clicking Apply.
- Click the Autorun tab and select Open Task Manager.
- Disable all autorun programs individually and click OK.
- Restart your computer and try the update.
APPROVED: To fix Windows errors, click here.
Frequently Asked Questions
The 0x80242fff error occurs most often when trying to upgrade from Windows 8.1 to Windows 10 or when Windows Update components become corrupted. Because the error window doesn’t show much information about its origin, it can be difficult to find and fix.
- Try running Windows Update again.
- Unplug your devices and reboot.
- Check the available disk space.
- Use the Windows 10 troubleshooter.
- Stop Windows 10 updates.
- Manually delete the Windows update files.
- Download the latest update and install it manually.
- Check your system for malware.
- Check the status of your proxy server.
- Check the integrity of your system files.
- Boot your system into clean boot mode.
- Reset the Windows Update services.
- Turn off the Windows firewall.
- Download an update from the Microsoft Update directory.
- Perform the update locally.