
Ошибка 0x80242016, возникающая во время обновления ОС Windows 10, встречается пользователям все чаще и чаще. Более того, даже новая версия ОС Майкрософт, Windows 11, по всей видимости, подвержена такой же проблеме. Тщательно ознакомившись с информацией в сети, мы пришли к выводу, что ошибка 0x80242016 может появляться по следующему ряду причин:
- Типичный баг в работе ОС Windows.
- Некоторые службы или компоненты Центра обновления работают некорректно.
- Повреждение временных файлов Центра обновления.
- Повреждение системных файлов, хранилища компонентов и образа Windows.
- Баг в работе системного поисковика Windows.
Уже стало страшно? Нет нужды паниковать! 0x80242016 — довольно распространенная ошибка Центра обновления Windows, которая решается набором давно известных методов. В сегодняшней статье мы посмотрим с вами как раз на эти самые методы.
Метод №1 Средство устранения неполадок
Прежде чем пытаться делать что-то «сложное», давайте попробуем воспользоваться с вами средством устранения неполадок, которое уже встроено в Windows 10. Данное средство не гарантирует решения проблем, однако в некоторых случаях оно действительно помогает пользователям.
Чтобы запустить средство устранения неполадок Центра обновления, вам нужно сделать следующее:
- нажмите ПКМ на меню Пуск и выберите пункт «Параметры»;
- перейдите в раздел «Обновление и безопасность», затем — в подраздел «Устранение неполадок»;
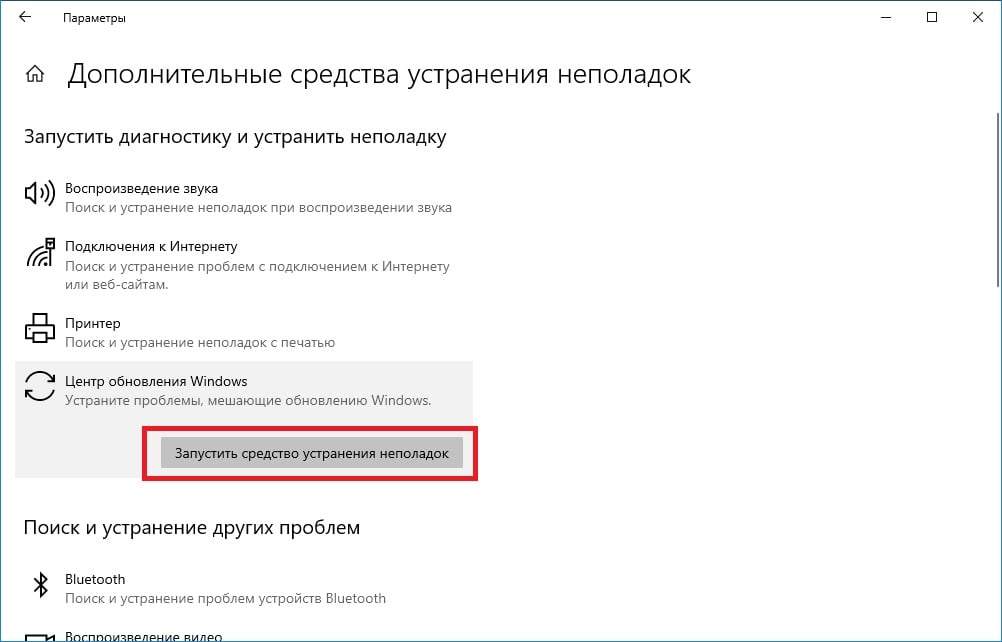
- опуститесь в самый низ окошка и кликните на пункт «Дополнительные средства устранения неполадок»;
- найдите в списке средств «Центр обновления Windows» и выберите его ЛКМ;
- кликните на кнопку «Запустить средство устранения неполадок»;
- следуйте инструкциям на экране, чтобы устранить потенциальные проблемы с обновлением в своей системе.
Как только закончите, закройте все окна, перезагрузите компьютер и проверьте наличие ошибки 0x80242016.
Метод №2 Перезапуск служб Центра обновления
Некоторые службы Центра обновления могут по той или иной причине прекратить свою работу. В таком случае пользователю необходимо запустить службы вручную, воспользовавшись Командной строкой (от администратора, разумеется) либо системным компонентом «Службы». К Центру обновления относятся следующие службы:
- Фоновая интеллектуальная служба передачи (BITS)
- Службы криптографии
- Центр обновления Windows
- Установщик модулей Windows
Чтобы запустить службу, вам нужно сделать на своем ПК следующее:

- нажмите на клавиатуре WIN+R, чтобы открыть диалоговое окошко «Выполнить»;
- пропишите в пустой строке значение «CMD» и нажмите комбинацию CTRL+SHIFT+ENTER;
- открыв консоль, выполните в ней ряд следующих команд:
- SC config wuauserv start=auto
- SC config bits start=auto
- SC config cryptsvc start=auto
- SC config trustedinstaller start=auto
- завершив ввод команд, закройте Командную строку и перезагрузите компьютер.
Заполучив контроль над системой, откройте Центр обновления и проверьте наличие ошибки 0x80242016.
Метод №3 Сброс компонентов Центра обновления Windows
Проблемы с Центром обновлениям могут возникать по причине повреждения одного или нескольких компонентов последнего. Дабы устранить полученные повреждения, необходимо провести так называемый «сброс компонентов». Данная операция выполняется как в ручном, так и в автоматическом режиме. Мы рассмотрим оба варианта.
Ручной сброс компонентов Центра обновления
Сброс компонентов Центра обновления вручную происходит через ввод множества команд в Командной строке. Разумеется, Командная строка запускается, само собой, от имени администратора.
- Нажмите комбинацию WIN+R, чтобы вызвать окошко «Выполнить»;
- вставьте в пустую строку «CMD» и нажмите комбинацию CTRL+SHIFT+ENTER;
- вызвать консоль, выполните в ней следующий набор команд:
- net stop bits
- net stop wuauserv
- net stop cryptsvc
- Del «%ALLUSERSPROFILE%\Application Data\Microsoft\Network\Downloader\qmgr*.dat»
- Ren %Systemroot%\SoftwareDistribution\DataStore DataStore.bak
- Ren %Systemroot%\SoftwareDistribution\Download Download.bak
- Ren %Systemroot%\System32\catroot2 catroot2.bak
- sc.exe sdset bits D:(A;;CCLCSWRPWPDTLOCRRC;;;SY)(A;;CCDCLCSWRPWPDTLOCRSDRCWDWO;;;BA)(A;;CCLCSWLOCRRC;;;AU)(A;;CCLCSWRPWPDTLOCRRC;;;PU)
- sc.exe sdset wuauserv D:(A;;CCLCSWRPWPDTLOCRRC;;;SY)(A;;CCDCLCSWRPWPDTLOCRSDRCWDWO;;;BA)(A;;CCLCSWLOCRRC;;;AU)(A;;CCLCSWRPWPDTLOCRRC;;;PU)
- cd /d %windir%\system32
- regsvr32.exe atl.dll
- regsvr32.exe urlmon.dll
- regsvr32.exe mshtml.dll
- regsvr32.exe shdocvw.dll
- regsvr32.exe browseui.dll
- regsvr32.exe jscript.dll
- regsvr32.exe vbscript.dll
- regsvr32.exe scrrun.dll
- regsvr32.exe msxml.dll
- regsvr32.exe msxml3.dll
- regsvr32.exe msxml6.dll
- regsvr32.exe actxprxy.dll
- regsvr32.exe softpub.dll
- regsvr32.exe wintrust.dll
- regsvr32.exe dssenh.dll
- regsvr32.exe rsaenh.dll
- regsvr32.exe gpkcsp.dll
- regsvr32.exe sccbase.dll
- regsvr32.exe slbcsp.dll
- regsvr32.exe cryptdlg.dll
- regsvr32.exe oleaut32.dll
- regsvr32.exe ole32.dll
- regsvr32.exe shell32.dll
- regsvr32.exe initpki.dll
- regsvr32.exe wuapi.dll
- regsvr32.exe wuaueng.dll
- regsvr32.exe wuaueng1.dll
- regsvr32.exe wucltui.dll
- regsvr32.exe wups.dll
- regsvr32.exe wups2.dll
- regsvr32.exe wuweb.dll
- regsvr32.exe qmgr.dll
- regsvr32.exe qmgrprxy.dll
- regsvr32.exe wucltux.dll
- regsvr32.exe muweb.dll
- regsvr32.exe wuwebv.dll
- netsh winsock reset
- net start bits
- net start wuauserv
- net start cryptsvc
- закройте Командную строку и перезагрузите ПК.
Ни в коем случае не меняйте символы в командах, иначе они попросту не сработают. Кроме того, не нужно выполнять команды в случайном порядке, а только в том, в котором они указаны выше.
Автоматический сброс компонентов Центра обновления
В данном варианте вам практически не придется работать: создать текстовый файл, вставить в него скрипт от одного из Интернет-умельцев, переделать текстовик в BAT-файл и выполнить его от имени администратора. Звучит как что-то сложное, но все совсем не так — и сейчас мы это вам докажем.
- Нажмите ПКМ на Рабочий стол и выберите пункты «Создать→Текстовый документ»;
- откройте только что созданный текстовик и вставьте в него следующий скрипт:
:: Run the reset Windows Update components.
:: void components();
:: /*************************************************************************************/
:components
:: —— Stopping the Windows Update services ——
call :print Stopping the Windows Update services.
net stop bitscall :print Stopping the Windows Update services.
net stop wuauservcall :print Stopping the Windows Update services.
net stop appidsvccall :print Stopping the Windows Update services.
net stop cryptsvccall :print Canceling the Windows Update process.
taskkill /im wuauclt.exe /f
:: —— Checking the services status ——
call :print Checking the services status.sc query bits | findstr /I /C:»STOPPED»
if %errorlevel% NEQ 0 (
echo. Failed to stop the BITS service.
echo.
echo.Press any key to continue . . .
pause>nul
goto :eof
)call :print Checking the services status.sc query wuauserv | findstr /I /C:»STOPPED»
if %errorlevel% NEQ 0 (
echo. Failed to stop the Windows Update service.
echo.
echo.Press any key to continue . . .
pause>nul
goto :eof
)call :print Checking the services status.
sc query appidsvc | findstr /I /C:»STOPPED»
if %errorlevel% NEQ 0 (
sc query appidsvc | findstr /I /C:»OpenService FAILED 1060″
if %errorlevel% NEQ 0 (
echo. Failed to stop the Application Identity service.
echo.
echo.Press any key to continue . . .
pause>nul
if %family% NEQ 6 goto :eof
)
)call :print Checking the services status.
sc query cryptsvc | findstr /I /C:»STOPPED»
if %errorlevel% NEQ 0 (
echo. Failed to stop the Cryptographic Services service.
echo.
echo.Press any key to continue . . .
pause>nul
goto :eof
):: —— Delete the qmgr*.dat files ——
call :print Deleting the qmgr*.dat files.del /s /q /f «%ALLUSERSPROFILE%\Application Data\Microsoft\Network\Downloader\qmgr*.dat»
del /s /q /f «%ALLUSERSPROFILE%\Microsoft\Network\Downloader\qmgr*.dat»:: —— Renaming the softare distribution folders backup copies ——
call :print Deleting the old software distribution backup copies.cd /d %SYSTEMROOT%
if exist «%SYSTEMROOT%\winsxs\pending.xml.bak» (
del /s /q /f «%SYSTEMROOT%\winsxs\pending.xml.bak»
)
if exist «%SYSTEMROOT%\SoftwareDistribution.bak» (
rmdir /s /q «%SYSTEMROOT%\SoftwareDistribution.bak»
)
if exist «%SYSTEMROOT%\system32\Catroot2.bak» (
rmdir /s /q «%SYSTEMROOT%\system32\Catroot2.bak»
)
if exist «%SYSTEMROOT%\WindowsUpdate.log.bak» (
del /s /q /f «%SYSTEMROOT%\WindowsUpdate.log.bak»
)call :print Renaming the software distribution folders.
if exist «%SYSTEMROOT%\winsxs\pending.xml» (
takeown /f «%SYSTEMROOT%\winsxs\pending.xml»
attrib -r -s -h /s /d «%SYSTEMROOT%\winsxs\pending.xml»
ren «%SYSTEMROOT%\winsxs\pending.xml» pending.xml.bak
)
if exist «%SYSTEMROOT%\SoftwareDistribution» (
attrib -r -s -h /s /d «%SYSTEMROOT%\SoftwareDistribution»
ren «%SYSTEMROOT%\SoftwareDistribution» SoftwareDistribution.bak
if exist «%SYSTEMROOT%\SoftwareDistribution» (
echo.
echo. Failed to rename the SoftwareDistribution folder.
echo.
echo.Press any key to continue . . .
pause>nul
goto :eof
)
)
if exist «%SYSTEMROOT%\system32\Catroot2» (
attrib -r -s -h /s /d «%SYSTEMROOT%\system32\Catroot2»
ren «%SYSTEMROOT%\system32\Catroot2» Catroot2.bak
)
if exist «%SYSTEMROOT%\WindowsUpdate.log» (
attrib -r -s -h /s /d «%SYSTEMROOT%\WindowsUpdate.log»
ren «%SYSTEMROOT%\WindowsUpdate.log» WindowsUpdate.log.bak
):: —— Reset the BITS service and the Windows Update service to the default security descriptor ——
call :print Reset the BITS service and the Windows Update service to the default security descriptor.sc.exe sdset wuauserv D:(A;;CCLCSWLOCRRC;;;AU)(A;;CCDCLCSWRPWPDTLOCRSDRCWDWO;;;BA)(A;;CCDCLCSWRPWPDTLCRSDRCWDWO;;;SO)(A;;CCLCSWRPWPDTLOCRRC;;;SY)S:(AU;FA;CCDCLCSWRPWPDTLOCRSDRCWDWO;;WD)
sc.exe sdset bits D:(A;;CCLCSWLOCRRC;;;AU)(A;;CCDCLCSWRPWPDTLOCRSDRCWDWO;;;BA)(A;;CCDCLCSWRPWPDTLCRSDRCWDWO;;;SO)(A;;CCLCSWRPWPDTLOCRRC;;;SY)S:(AU;FA;CCDCLCSWRPWPDTLOCRSDRCWDWO;;WD)
sc.exe sdset cryptsvc D:(A;;CCLCSWLOCRRC;;;AU)(A;;CCDCLCSWRPWPDTLOCRSDRCWDWO;;;BA)(A;;CCDCLCSWRPWPDTLCRSDRCWDWO;;;SO)(A;;CCLCSWRPWPDTLOCRRC;;;SY)S:(AU;FA;CCDCLCSWRPWPDTLOCRSDRCWDWO;;WD)
sc.exe sdset trustedinstaller D:(A;;CCLCSWLOCRRC;;;AU)(A;;CCDCLCSWRPWPDTLOCRSDRCWDWO;;;BA)(A;;CCDCLCSWRPWPDTLCRSDRCWDWO;;;SO)(A;;CCLCSWRPWPDTLOCRRC;;;SY)S:(AU;FA;CCDCLCSWRPWPDTLOCRSDRCWDWO;;WD):: —— Reregister the BITS files and the Windows Update files ——
call :print Reregister the BITS files and the Windows Update files.cd /d %SYSTEMROOT%\system32
regsvr32.exe /s atl.dll
regsvr32.exe /s urlmon.dll
regsvr32.exe /s mshtml.dll
regsvr32.exe /s shdocvw.dll
regsvr32.exe /s browseui.dll
regsvr32.exe /s jscript.dll
regsvr32.exe /s vbscript.dll
regsvr32.exe /s scrrun.dll
regsvr32.exe /s msxml.dll
regsvr32.exe /s msxml3.dll
regsvr32.exe /s msxml6.dll
regsvr32.exe /s actxprxy.dll
regsvr32.exe /s softpub.dll
regsvr32.exe /s wintrust.dll
regsvr32.exe /s dssenh.dll
regsvr32.exe /s rsaenh.dll
regsvr32.exe /s gpkcsp.dll
regsvr32.exe /s sccbase.dll
regsvr32.exe /s slbcsp.dll
regsvr32.exe /s cryptdlg.dll
regsvr32.exe /s oleaut32.dll
regsvr32.exe /s ole32.dll
regsvr32.exe /s shell32.dll
regsvr32.exe /s initpki.dll
regsvr32.exe /s wuapi.dll
regsvr32.exe /s wuaueng.dll
regsvr32.exe /s wuaueng1.dll
regsvr32.exe /s wucltui.dll
regsvr32.exe /s wups.dll
regsvr32.exe /s wups2.dll
regsvr32.exe /s wuweb.dll
regsvr32.exe /s qmgr.dll
regsvr32.exe /s qmgrprxy.dll
regsvr32.exe /s wucltux.dll
regsvr32.exe /s muweb.dll
regsvr32.exe /s wuwebv.dll:: —— Resetting Winsock ——
call :print Resetting Winsock.
netsh winsock reset:: —— Resetting WinHTTP Proxy ——
call :print Resetting WinHTTP Proxy.if %family% EQU 5 (
proxycfg.exe -d
) else (
netsh winhttp reset proxy
):: —— Set the startup type as automatic ——
call :print Resetting the services as automatics.
sc.exe config wuauserv start= auto
sc.exe config bits start= delayed-auto
sc.exe config cryptsvc start= auto
sc.exe config TrustedInstaller start= demand
sc.exe config DcomLaunch start= auto:: —— Starting the Windows Update services ——
call :print Starting the Windows Update services.
net start bitscall :print Starting the Windows Update services.
net start wuauservcall :print Starting the Windows Update services.
net start appidsvccall :print Starting the Windows Update services.
net start cryptsvccall :print Starting the Windows Update services.
net start DcomLaunch:: —— End process ——
call :print The operation completed successfully.echo.Press any key to continue . . .
pause>nul
goto :eof
:: /*************************************************************************************/
- пробежитесь глазами по скрипту и убедитесь, что ничего в нем не было нарушено;
- нажмите на кнопку «Файл» в строке меню окна Блокнота и выберите пункт «Сохранить как…»;
- назовите файл «UpdSerReset» и измените его расширение с «.txt» на «.bat»;
Заметка: если вы не видите расширений файлов, то вам необходимо активировать опцию «Расширения имен файлов» в параметрах Проводника Windows (вкладка «Вид»).
- выберите в качестве расположения свой Рабочий стол и нажмите на кнопку «Сохранить»;
- кликните на файл «UpdSerReset.bat» ПКМ и выберите пункт «Запуск от имени администратора»;
- подождите несколько секунд, после чего нажмите на любую кнопку, когда в Командной строке появится соответствующее сообщение;
- перезагрузите компьютер.
Описанный выше процесс должен исправить ошибку 0x80242016, если она была вызвана повреждениями компонентов Центра обновления. Если же ничего не изменилось, то давайте двигаться дальше.
Метод №4 Запуск SFC и DISM
Ошибка 0x80242016 может возникнуть в процессе обновления из-за поврежденных системных файлов, хранилища компонентов или образа Windows 10 в целом. Так или иначе проблема довольно серьезная, однако ее можно исправить, задействовав такие утилиты, как SFC и DISM.
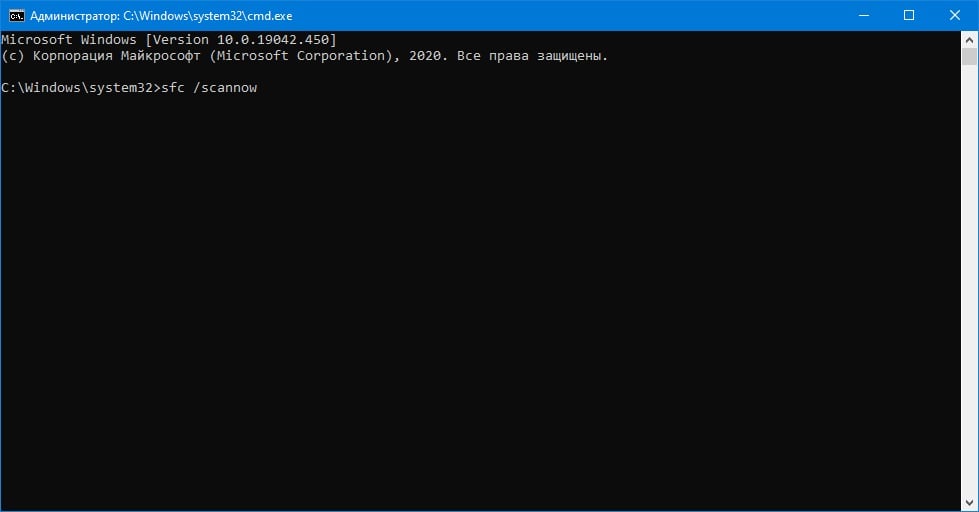
- Откройте Командную строку от имени администратора, как это было показано во втором методе;
- вставьте в консоль команду «sfc /scannow» (без кавычек) и нажмите ENTER;
- подождите окончания выполнения команды и ознакомьтесь с результатами работы SFC;
- перезагрузите компьютер и снова вызовите Командную строку;
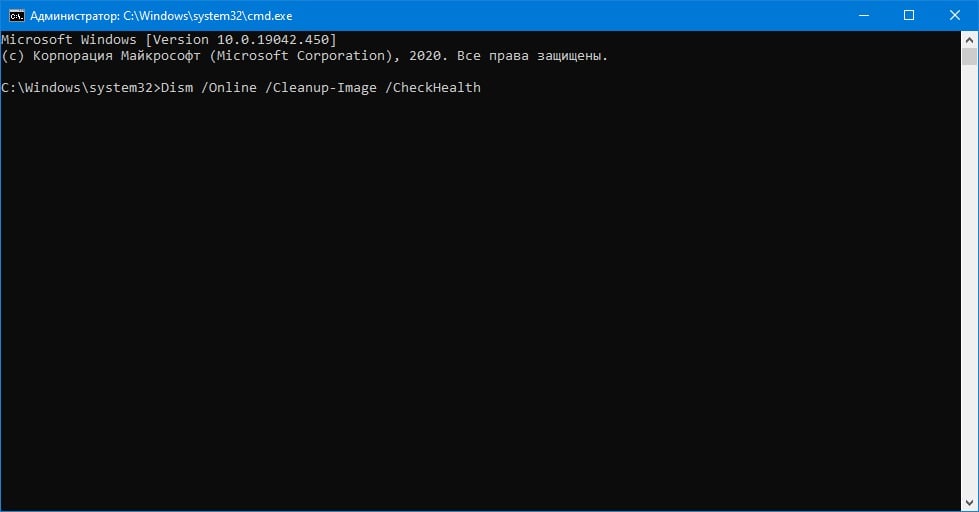
- поочередно выполните следующий набор команд:
- DISM /Online /Cleanup-Image /CheckHealth
- DISM /Online /Cleanup-Image /ScanHealth
- DISM /Online /Cleanup-Image /RestoreHealth
- ознакомьтесь с результатами работы DISM и перезагрузите ПК еще раз.
Вы практически наверняка избавитесь от ошибки 0x80242016 после использования SFC и DISM, если обе утилиты нашли в ОС Windows 10 какие-то повреждения и устранили их.
Метод №5 Коррекция параметров поисковой системы
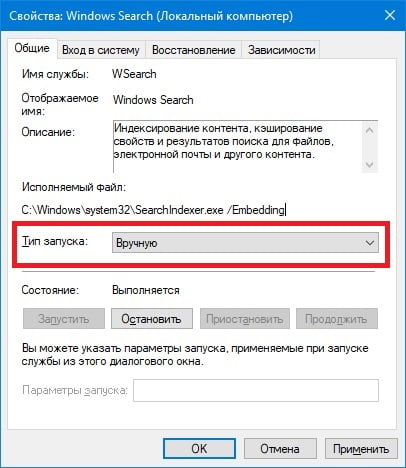
Пользователи инсайдерских превью-билдов Windows 10 утверждают, что им удалось избавиться от ошибки 0x80242016, внеся некоторые изменения в параметры службы «Windows Search». Данная служба отвечает за индексирование контента, кэширование свойств и результатов поиска для файлов, электронной почты и другого контента в операционной системе. На вашем ПК установлена такая же версия Windows? Тогда попробуйте сделать следующее:
- нажмите на клавиатуре WIN+R для вызова окошка «Выполнить»;
- вставьте в пустую строку окна значение «services.msc» и нажмите ENTER;
- найдите в списке службу «Windows Search» и дважды кликните на нее ЛКМ;
- выберите в типе запуска службы значение «Вручную»;
- нажмите на кнопки «Применить» и «OK»;
- перезагрузите свой ПК.
Зайдите в Центр обновления Windows 10 и проверьте наличие ошибки 0x80242016.
К сожалению, если никакие из вышеуказанных методов не помогли вам с ошибкой 0x80242016, то вы практически наверняка имеете дело с серьезными повреждениями ОС, которые не решаются обычными способами. В таком случае вам придется либо возвращать ПК в исходное состояние (запускается через Параметры), либо полностью переустанавливать Windows.
Are you getting the error 0x80242016 while you are trying to install certain feature updates through Windows Update in Windows 10/11? If you encounter this error, then you can refer to the solutions provided in this article from MiniTool.
According to the user reports, error code 0x80242016 often occurs while they update Windows. Error 0x80242016 can prevent them from downloading new updates, which can cause compatibility and security issues.
Here is a user report from the Microsoft forum:
So today I wanted to upgrade to the latest insider builds because for some reason my computer never checked or installed any updates for a month, and I am using the fast rig, when I tried installing the latest one it could find and restarted, it said it couldn’t finish installing it, then I get this error code. https://answers.microsoft.com/en-us/windows/forum/all/windows-10-failure-to-update-0x80242016
What Causes Error Code 0x80242016?
Before solving the error 0x80242016, it’s important to figure out what causes the problem. There are several reasons why this error may appear in Windows 10 and Windows 11. The following are the reasons for this issue:
- Incomplete or incorrect update files installed: If some update files were not installed correctly, you may see Windows update error 0x80242016.
- Virus or Malware Infection: Virus and malware entities can interfere with the update process, which leads to Windows update 0x80242016 error.
- Incomplete application installations: If some applications are not fully installed when trying to install an update, they can confuse the system and throw errors.
- Corrupt Temporary WU (Windows Update) File: Temporary WU files are generated by new updates and stored in SoftwareDistribution and Catroot2 folders. When these files are corrupted, this error code can occur.
- Misconfigured system files: Some misconfigured system files can also trigger update issues in Windows 10/11.
- Insufficient disk space: If junk files take up a large part of your hard disk space, then there is not enough space in your hard disk to install Windows. Therefore, Windows update error 0x80242016 may occur.
- Windows Search bugs: If you’re using an internal build, the Windows update error 0x80242016 may be due to improvements brought by Windows Search.
Now that we know all the potential causes of the 0x80242016 error, please try the following solutions.
Before you start troubleshooting, you can try some general tricks to get rid of this error 0x80242016:
- Restart your PC and try installing the update again.
- Install the update are performing a clean boot.
- Make sure you are connected to a stable internet.
- Unplug any attached USB drives or any other external devices.
- Check that your PC’s date and time are correct.
If you tried the suggestions above and the error code persists, you can try the following to fix it.
How to Fix Windows update error 0x80242016
There are 7 applicable ways to fix Windows update 0x80242016. We recommend you try them in order until the issue gets solved.
Way 1: Run the Windows Update Troubleshooter
Run this built-in Windows Update troubleshooter to fix the most common update issues on Windows 10. Please follow the guidelines below:
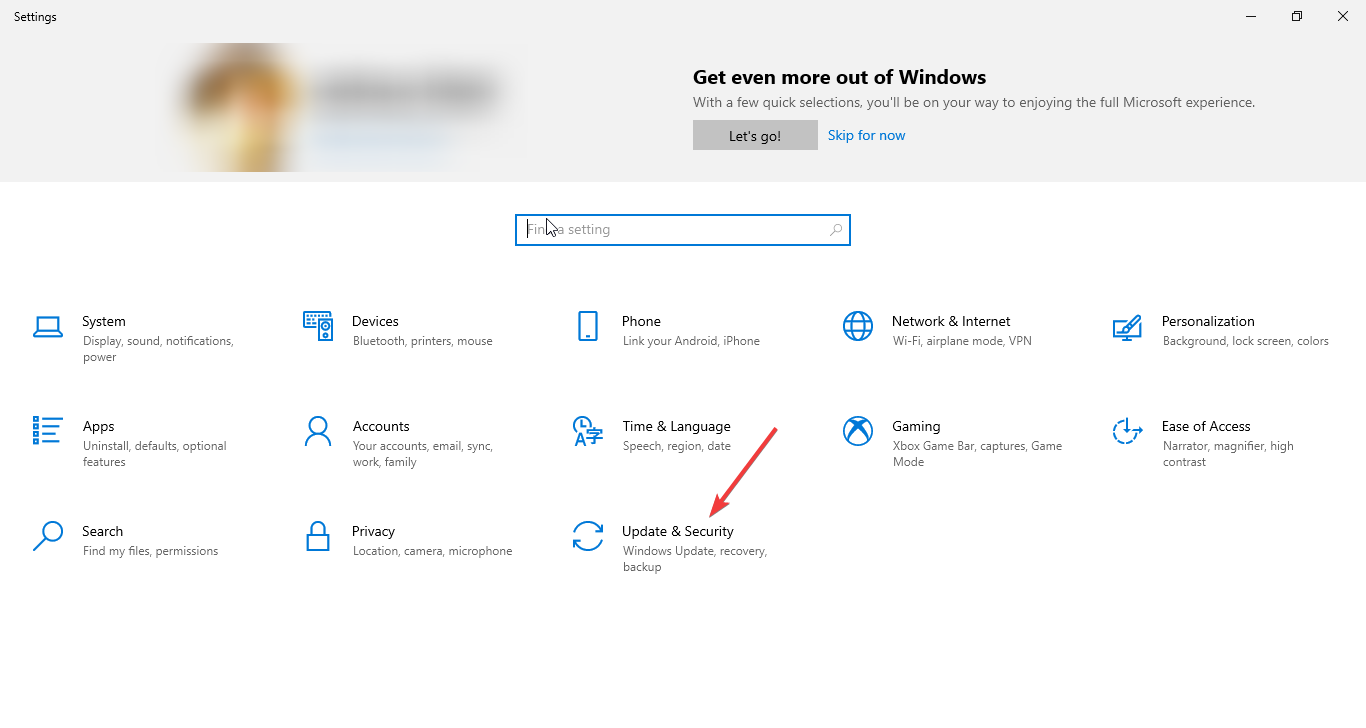
Step 1: Press the Win + I key to open Settings, and navigate to the Update & Security > Troubleshoot option.
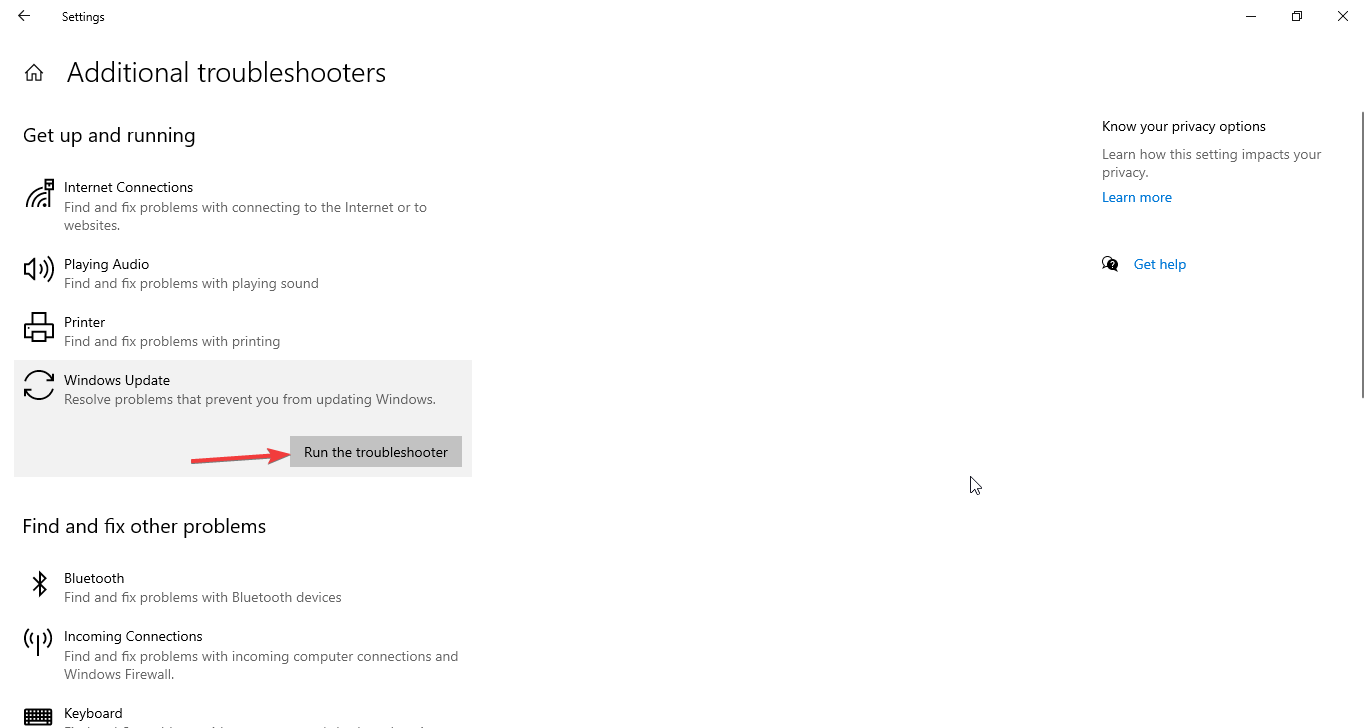
Step 2: Under the Get up and running section, click on the Windows Update option and select the Run the troubleshooter button from the extended pane. For Windows 11, there is a little difference.
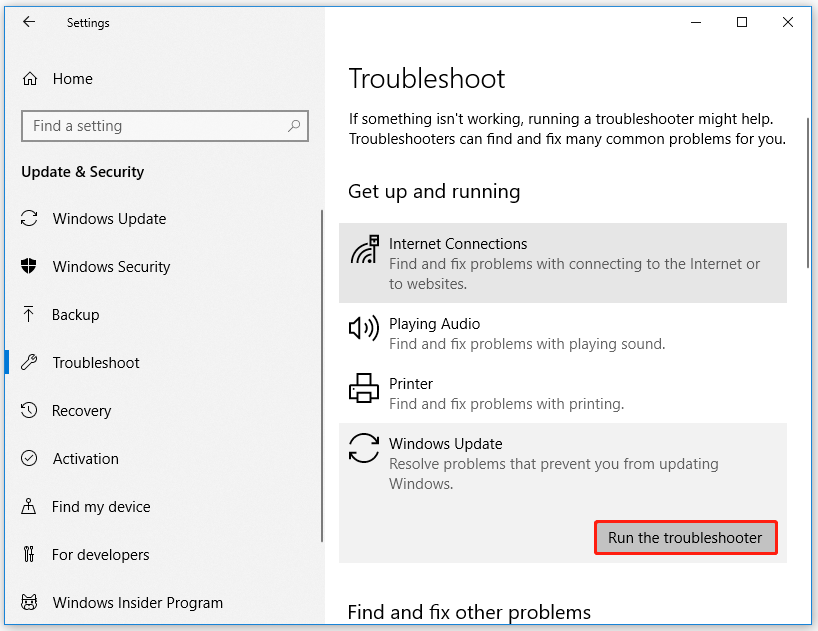
Step 3: Follow the on-screen instructions. And when you see the Apply this fix option in the window, click on it to fix this error.
Step 4: Restart your computer.
Way 2: Temporarily Disable Antivirus
If Windows cannot be updated due to error 0x80242016, the problem may be with your antivirus software. Although antivirus tools provide protection, they may misinterpret update files as potential threats. To fix this, you can disable antivirus and security software. Here is the guide:
Step 1: Open Windows Settings, and then click on Update & Security > Windows Security > Virus & threat protection.
Step 2: Locate the Virus & threat protection settings section in the right window, and then click on Manage settings.
Step 3: Turn off the Real-time protection if off, leaving your device vulnerable option.
Way 3: Free up Space to Upgrade Windows
Some users have reported that Windows update error 0x80242016 is caused by insufficient free space on the system reserved partition on the hard drive. Well, you should try running the Disk Cleanup tool to clear any temporary or junk files or running the MiniTool Partition Wizard to extend the system partition. Here are the detailed steps:
Option 1: Run Disk Cleanup
Step 1: Press the Win + E key to open the File Explorer.
Step 2: Click on This PC, and then right-click on your system drive and select the Properties option.
Step 3: In the next pop-up window, click on the Disk Cleanup button.
Step 4: In the new window, select the files you want to delete and then click OK.
If you encounter the Windows Update Cleanup stuck issue while running the Disk Cleanup tool, you can refer to this article: Top 7 Fixes to Disk Cleanup Stuck on Windows Update Cleanup
After clearing the junk files, you can try installing the update and check if the error 0x80242016 disappears.
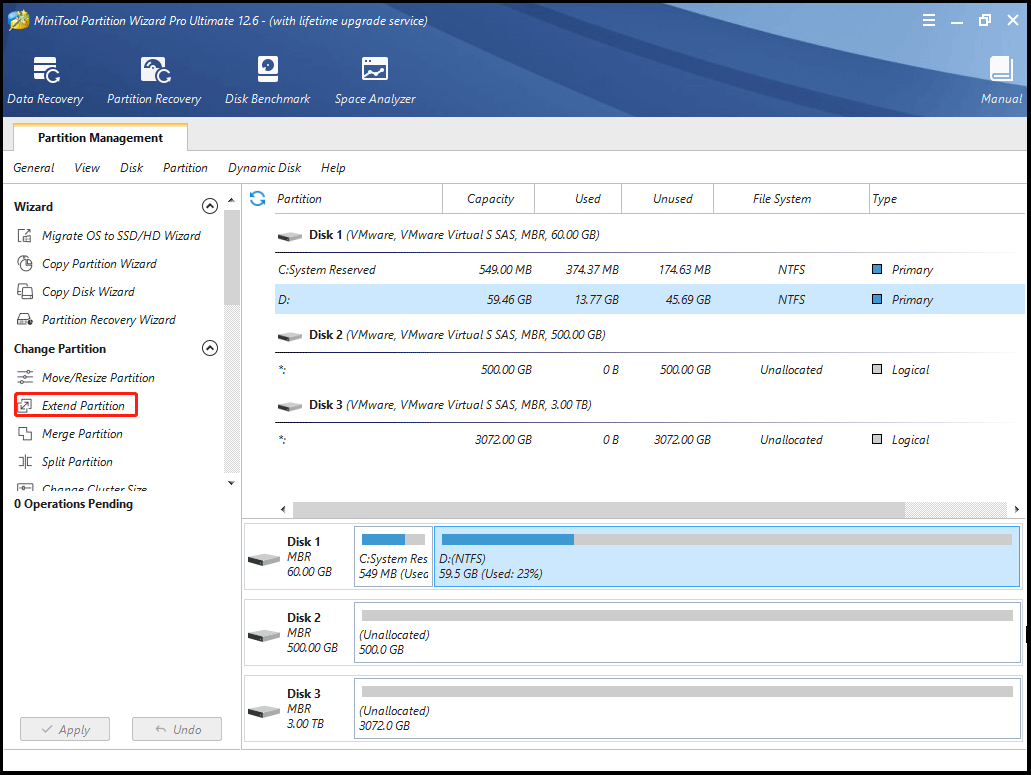
Option 2: Run MiniTool Partition Wizard
After you clear junk files by Disk Cleanup, but there is still not enough space to upgrade Windows, you can extend the system partition with a reliable tool. MiniTool Partition Wizard, a wonderful professional partition manager, is recommended here.
As you know, a hard disk might be divided into several local drives. If a local drive is running out of space but there is enough free space on other drives of the same disk, you can enlarge the drive with the Extend Partition feature of MiniTool Partition Wizard.
Besides, MiniTool Partition Wizard can help you recover missing data, scan bad sectors, fix file system errors, etc.
To get more storage space, here is the guide:
MiniTool Partition Wizard DemoClick to Download100%Clean & Safe
Step 1: To extend the system partition, you’d better use the bootable edition to avoid damage to the system or data loss. So, connect the USB drive to your computer. Then launch MiniTool Partition Wizard and click the Bootable Media icon to create a boot drive.
Note: MiniTool Bootable Media Builder will format the USB flash drive when building the MiniTool Boot Flash Drive. So, make sure the USB flash drive doesn’t contain any important files.
Step 2: Boot from the USB drive.
Step 3: Select the system drive and click Extend Partition on the left operation panel.
Tip: In the bootable version of MiniTool Partition Wizard, the system partition might not be assigned with C. Therefore, please make sure you select the correct partition.
Step 4: In the drop-down menu, select where to take free space. Then drag the light blue block to decide how much free space you want to take. Finally, click the OK button.
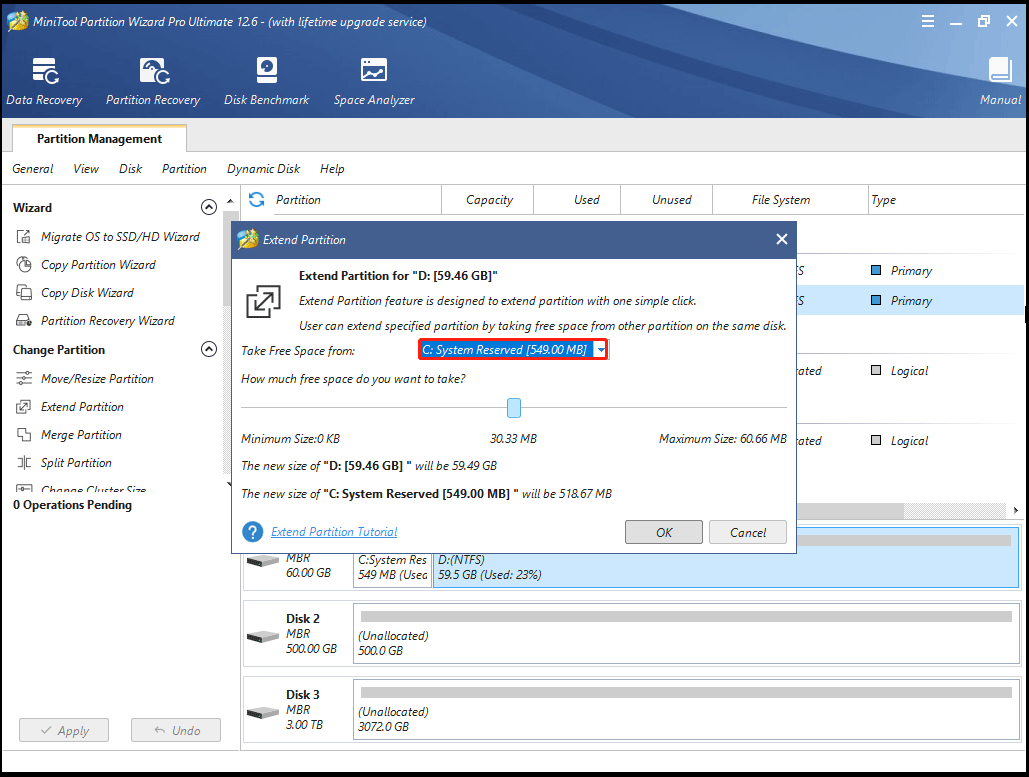
Step 4: Click the Apply button to execute the operation.
Once done, you can restart your computer and try to install the update.
Way 4: Reset Windows Update Components
The SoftwareDistribution and Catroot2 folders are used to temporarily store the files needed to install the update files. Inconsistent WU system files are another factor that can prevent your computer from installing updates with error 0x80242016. In this case, you can reset all Windows components and dependencies involved in the process to resolve the issue. This method works great if multiple updates fail with the same error code.
To reset the Windows Update Components, follow these steps:
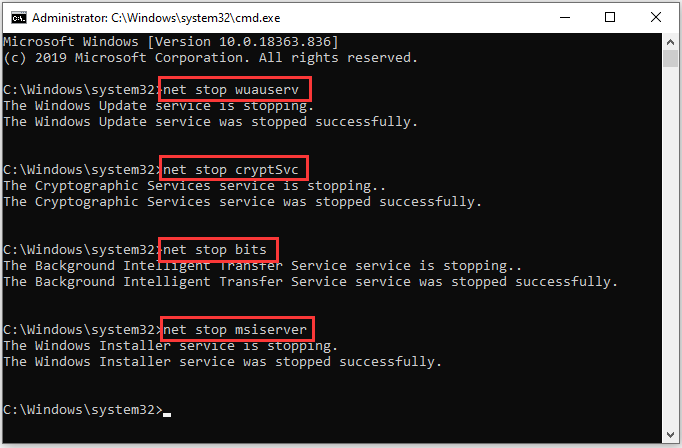
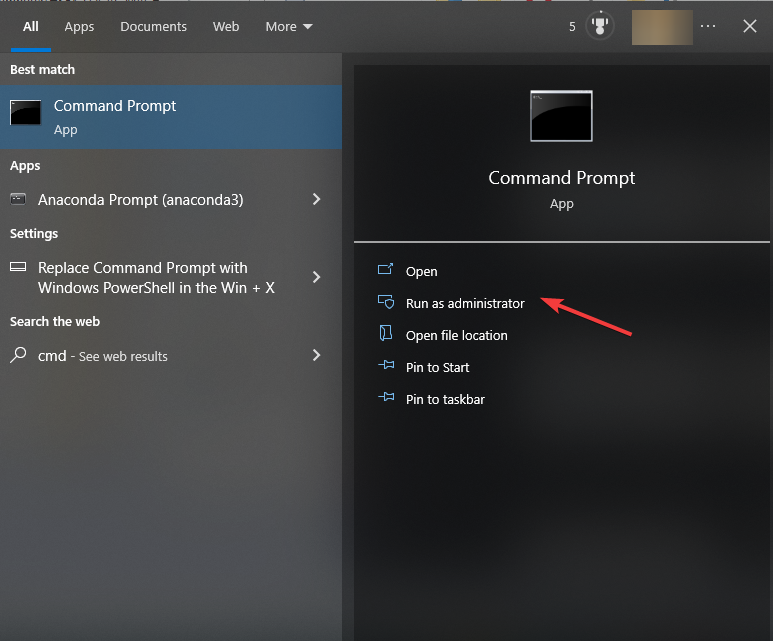
Step 1: Type cmd in the Windows Search box, and then right-click on Command Prompt from the search results and select the Run as administrator option.
Step 2: In the Command Prompt window, enter the following commands in sequence, and press Enter after each command:
- net stop wuauserv
- net stop cryptSvc
- net stop bits
- net stop msiserver
Step 3: When the services have been disabled, type the following commands and press Enter after each one to rename the SoftwareDistribution:
- ren C:\Windows\SoftwareDistribution SoftwareDistribution.old
- ren C:\Windows\System32\catroot2 Catroot2.old
Step 4: Type the following commands to restart BITS, Cryptographic, MSI Installer, and Windows update services:
- net start wuauserv
- net start cryptSvc
- net start bits
- net start msiserver
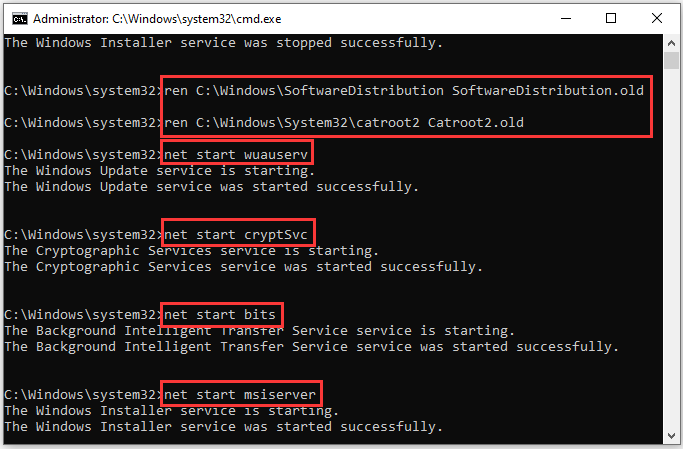
Step 5: Restart your computer and try updating Windows to see if Windows 0x80242016 is fixed.
Way 5: Run SFC and DISM Scan
The corrupted system files or Windows images can trigger Windows update error 0x80242016. To fix this problem, Windows provides two utilities.
The first tool is SFC (System File Checker), which detects and restores missing components. The other is the DISM (Deployment Image Servicing and Management) tool, which fixes more complex system errors. It uses different algorithms to find problems and fix corrupt data that SFC might miss.
Here’s how to perform these scans:
Step 1: Open the Command Prompts as administrator.
Step 2: In the Command Prompt window, type the following command: sfc /scannow and press Enter.
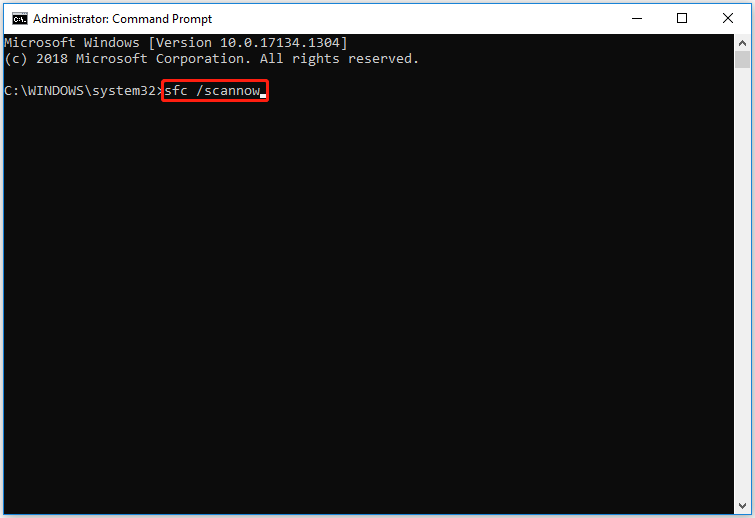
Step 3: After the scanning process is complete, if it describes that the corruption is resolved, close Command Prompt and restart your computer.
If the issue persists, or you cannot run or complete an SFC scan, you will need to use a DISM scan instead.
Step 1: Open the Command Prompt as administrator. Then type DISM.exe /Online /Cleanup-image /Restorehealth. Then press Enter.
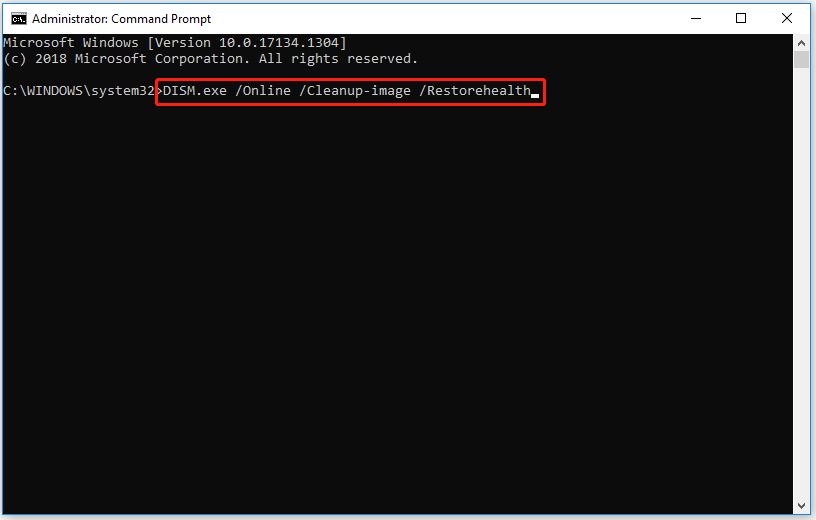
Step 2: After the scanning process is complete, restart your computer to check if the error has been solved.
Way 6: Disable Windows Search Service
If you’re using an Insider Preview build, there’s a good chance you’re encountering error 0x80242016 caused by improvements brought by Windows Search. This type of issue is unique to Microsoft Insider users and is caused by the main Windows Search service crashing and forcing the installer to roll back the most recent upgrade.
If you’re looking for instructions on how to resolve this particular situation, here’s how to do it:
Step 1: Press the Win + R key to open the Run dialog box, and then type services.msc in it and press Enter.
Step 2: In the Services window, find the entry named Windows Search from the list of services in the right pane. Then right-click it and select Properties.
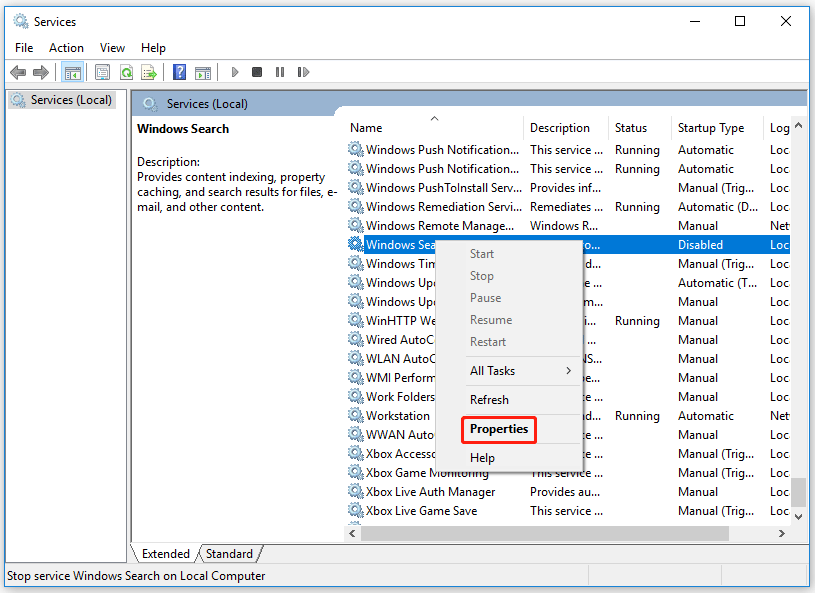
Step 3: In the next pop-up box, under the General tab, change the Startup type drop-down menu to Manual, and then click on the Apply button to save the changes.

After that, restart your computer and check if the Windows update error 0x80242016 exists.
Way 7: Perform a Clean Install
If all the ways above fail to solve Windows 0x80242016, you may be dealing with underlying system file corruption that cannot be repaired by normal recovery procedures.
The last thing you can try is to perform a clean install of the operating system to reset every Windows component. You need to be aware that this will delete most of your files, including app and game installations, user preferences, and personal files on your system drive. Therefore, you’d better back them up before starting to reinstall Windows.
To perform a clean install of Windows 10, read the instructions in this article: How to do a clean install of Windows 10?
To get more information in Windows 11 clean install, refer to this post: How to Reinstall Windows 11? Try 3 Simple Ways Here Now!
If you can’t install some updates due to Windows update error 0x80242016, these ways in this post may be helpful for you. I’d like to share them with you. Click to Tweet
Bottom Line
To sum up, this article has introduced the causes of the Windows update error 0x80242016 and how to solve the Windows update problem in several ways. If you have the same problem, try these methods.
Or, if you have any better solution to the error 0x80242016, you can share it in the following comment zone.
If you need any help while using MiniTool Partition Wizard, you are welcome to send us an email at [email protected].
With pre-set Windows settings, users generally receive updates automatically but the process doesn’t go well always. People keep encountering errors every now and then which prevent the operating system from installing any rollout. Similar fatal codes may also occur when you initiate the update process manually. Error 0x80242016 is one such issue that you may experience while attempting to install updates automatically or manually. Even if the system finishes downloading the update files, the error may arrive during the installation.
Windows 10 update error code 0x80242016 may also appear with another dreadful code that says WU_E_UH_POSTREBOOTUNEXPECTEDSTATE. According to some tech experts, the issue usually takes place due to Windows search service. Since there is no say from the officials, we can’t decide on that particular cause. Therefore, you might need to try out different workarounds to find out what really works for your system. Before trying out advanced resolutions, make sure your PC is connected to a stable and active internet connection.
Error code 0x80242016
Here is how to fix Windows 11/10 update error code 0x80242016 –
1] Reboot Windows and initiate the update process again
Some of the update errors get fixed automatically when you restart the PC and start the process afresh. To reboot the device, here are the steps to follow –
- Save all ongoing tasks.
- Once on the desktop screen, press – Alt + f4.
- From the appearing dialog box, click the drop-down list and select – Restart.
- Click – OK.
When the system powers up, try to reinstall the update.
For Windows 10
- Press – Windows + I.
- Click – Update & Security.
- Move to the right of the dedicated settings page.
- Click – Check for updates.
- Download available updates and install them.
For Windows 11
- Open Settings app.
- From left column, choose – Windows Update.
- Shift to right.
- Click – Check for updates.
2] Reset Windows update to fix 0x80242016
Plenty of services are needed to make the Windows update process work error-free. When the system finds any of the required services unavailable, issues like 0x80242016 may evolve that obstruct the installation of the latest update. Thus, restarting the services is necessary. While doing so, you will have to reset associate components too in order to make it more effective.
- Press – Windows + S.
- Type in – cmd.exe.
- Hit – Ctrl + Shift + Enter.
- When User Account Control prompt for your consent, click – Yes.
- Copy the following commands in turn and paste them into the elevated Command Prompt. Make sure to press Enter after each line –
net stop wuauserv

net stop cryptSvc

net stop bits

net stop msiserver

ren C:\Windows\SoftwareDistribution SoftwareDistribution.old

ren C:\Windows\System32\catroot2 Catroot2.old

net start wuauserv

net start cryptSvc

net start bits

net start msiserver
- Close the Command Prompt.
- Restart Windows.
- After getting back to operation, retry the installation process.
3] Disable Windows search service
If Windows search service crashes time and again, Windows 11/10 update error code 0x80242016 may occur while installing the LCU patch. To overcome the issue, disable the service and then try again.
- Press Windows key and type services.msc.
- Hit – Enter.
- When the dedicated window shows up, look for Windows Search.
- Double-click the same to bring forth its properties.
- Set the Startup type to Disabled.
- Click Apply followed by OK.
- Reboot your computer.
4] Run DISM along with System File Checker
When the system fails to read a file that is required to complete the installation process of Windows update, unexpected errors may evolve. To eliminate the corruption of system elements moreover recover missing ones, System File Checker is the ultimate choice. But the utility sometimes fails to resolve the corruption, in such a case, you will have to run DISM tool to make System File Checker work again. Therefore, it will be wise to execute DISM first and then SFC scan.
- Click the search icon from the taskbar.
- Type – cmd.
- From the right side of the result flyout, click – Run as administrator.
- To approve User Account Control, hit – Yes.
- In the appearing black pane, insert the following commands one by one and hit Enter after each–
dism /online /cleanup-image /scanhealth
dism /online /cleanup-image /checkhealth
dism /online /cleanup-image /restorehealth
- After executing the above commands, type in
sfc /scannowin the same black pane. - Press – Enter.
- Wait and let the scanning process hits 100%.
- Once done, close Command Prompt and reboot the PC.
- When the system powers up, initiate the update again.
5] Make use of Windows update troubleshooter to fix 0x80242016
Microsoft included a dedicated troubleshooter in Windows 10 and 11 that solves update-related errors. When you run the utility, it will go through all associated files to detect what is giving rise to error code 0x80242016. If the issue is not complicated enough, the troubleshooter will offer an automatic fix too.
For Windows 10
- Press – Windows + I.
- Click – Update & Security.
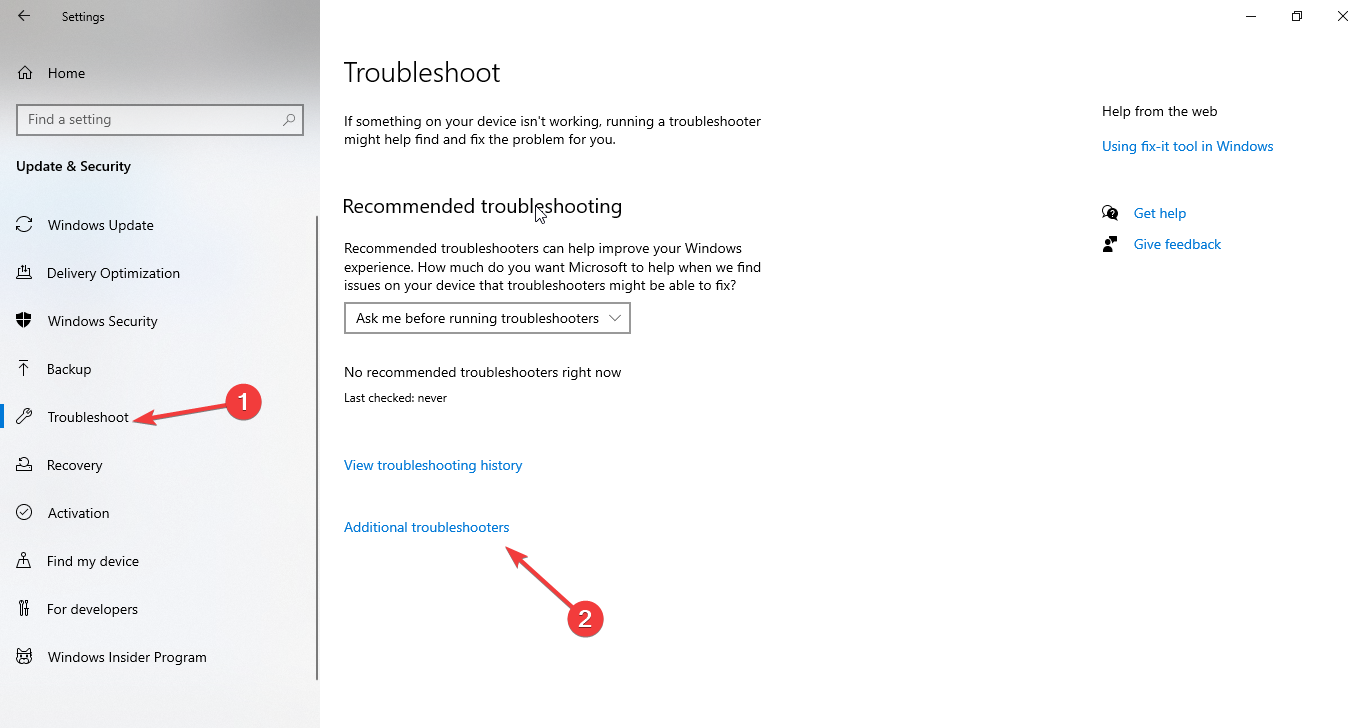
- From the left sidebar, pick – Troubleshoot.
- Move to right-pane and then click – Additional troubleshooters.
- Select – Windows update.
- From the expanded tray, click – Run the troubleshooter.
- Keep following on-screen instructions.
- When the utility comes with a resolution after scanning the system, click – Apply this fix.
For Windows 11
- Right-click on Start button and choose – Settings.
- Choose – Troubleshoot present on the right pane.
- From next page, click – Other troubleshooters.
- Click – Run present alongside Windows update.
6] Download standalone package manually
The system oftentimes ends up downloading broken update files and when you try to install the same, numerous error codes arise. Such a situation usually emerges when you use update assistant to install a CU patch. If this is the cause behind error code 0x80242016, download the standalone package manually and then try to install it.
- Visit the webpage of Microsoft Update Catalog using any of your preferred web browsers.
- Click the search bar of the website.
- Insert the KB number that is failing to install moreover giving the update error.
- Click – Search.
- From the appearing search result, find the suitable version that goes with your PC specs.
- Click Download present next to the compatible package.
- Doing so will bring forth a new window.
- Hit the link that ends with msu.
- If prompted, opt for Save File and then click – OK.
- Visit the directory where the system stores downloaded items.
- Double-click the msu file you got.
- To allow User Account Control, click – Yes.
- Comply with on-screen instructions to finish the process.
7] Unplug USB peripherals and retry the installation process
External hardware like printer, mouse, keyboard, or scanner oftentimes found to cause preventing Windows update. The exact reason behind this abnormal behavior is yet to be known. However, you can easily solve this kind of issue by disconnecting the peripherals.
First of all, unplug all the USB cords that are used to make connections between the accessories and Windows 11/10 PC. After that, check for updates and try to install the available patches. Once the system ends up installing the patch without error code 0x80242016, connect all the peripherals one after another.
8] Turn off security suit for a while
Active antimalware programs oftentimes misconstrue update files and assume them as vulnerable threats. That’s why the security suite prevents them from entering into the system. However, this doesn’t necessarily mean that the update you are trying to download is malware itself.
If you are getting Windows 11/10 update error code 0x80242016 just because your antimalware program is misreading the update files, disable the antivirus program. Though keeping the security suite disabled for always is not recommended at all, you have to bring back the same in action after installing the update successfully.
Disable built-in Firewall to get rid of 0x80242016
- Press – Windows key.
- In the search bar, insert – firewall.cpl.
- Hit – Enter.
- From the left sidebar of the newly appeared page, click – Turn Windows Defender Firewall on or off.
- Tick the checkbox of Turn off Windows Defender Firewall (not recommended) option for both Private network settings and Public network settings.
- Click – OK.
Turn off or uninstall third-party security suite
Before uninstalling the antivirus program, disable the same to check whether it helps to fix update error. The process of doing so may vary from software to software but most of the options should remain the same or in different words with similar meaning.
- Click the up arrow symbol from the notification bar.
- Right-click the icon of installed antimalware.
- Choose Disable or the one that has a similar meaning.
- If asked, set a time slot after which the program will be enabled automatically.
After disabling the program, try installing the problematic update and see if the error appears anymore. If yes, uninstall the program completely to get rid of any interruption caused by the tool.
- In Windows search, type – appwiz.cpl.
- Press – Enter.
- When the Programs and Features window shows up, find the third-party antivirus program installed on your Windows 10.
- Right-click the same and then choose – Uninstall.
- Comply with on-screen instructions to finish the removal process.
9] Check whether Date & Time is correct
If the date and time of your Windows 10 PC are incorrect, the system can trigger update error code 0x80242016. Hence, make sure that you configured them correctly. To do so –
- Click Start button.
- Type in – control panel.
- Hit – Enter.
- Set the View by option to Category.
- Opt for – Clock and Region.
- From the right pane of the consequent page, hit – Date and Time.
- Jump into Internet Time tab.
- Click – Change settings.
- Check the box present before Synchronize with an Internet time server.
- Hit – Update now.
- Finally, click – OK.
10] Start Windows with clean boot to resolve 0x80242016
Many times third-party programs or services cause abnormalities in the system which later ends up with unexpected error codes. To avoid any issue caused by those components, make a suitable environment where the system starts with basic elements only. This way, no conflict will take place moreover you can install Windows updates without any hitch.
- Click the search icon present on the taskbar.
- Type – msconfig.exe.
- Hit – Enter.
- When System Configuration turns up, select the radio button set alongside Selective startup.
- Also, uncheck – Load startup items.
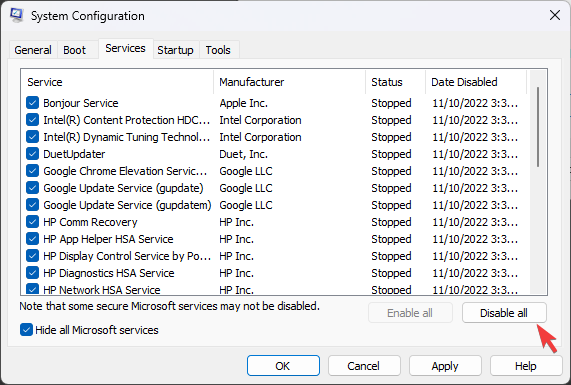
- Shift to Services tab.
- Tick the checkbox set before Hide all Microsoft services.
- Click – Disable all.
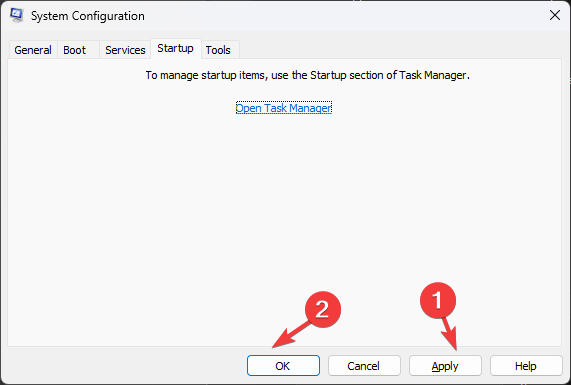
- Move to the Startup tab.
- Click the link – Open Task Manager.
- When the dedicated window prompts, right-click on a program listed there and choose – Disable.
- Repeat the same for all startup programs.
- Close Task Manager.
- Get back to System Configuration window.
- Click Apply and then OK.
- Restart the PC to start clean boot.
Methods list:
1] Reboot Windows and initiate the update process again
2] Reset Windows update
3] Disable Windows search service
4] Run DISM along with System File Checker
5] Make use of Windows update troubleshooter
6] Download standalone package manually
7] Unplug USB peripherals and retry the installation process
8] Turn off security suit for a while
9] Check whether Date & Time is correct
10] Start Windows with clean boot
That’s all!!!
Readers help support Windows Report. We may get a commission if you buy through our links.
Read our disclosure page to find out how can you help Windows Report sustain the editorial team. Read more
If you fail to install 0x80242016, then you are not alone. Users often get such update errors while installing Windows updates on their computers. Luckily the issue can be fixed using simple methods.
This guide will walk you through the steps to fix the issue right after discussing the causes. Let’s get started!
What causes the failed to install 0x80242016 error?
There are a few reasons for the installation error to happen. Some of the popular ones are mentioned here:
- Wrong Registry values – If the values on your Registry Editor are corrupt, your computer might not work correctly. Hence you get an installation error when updating.
- Damaged system files – You can get this error if your system files are damaged or corrupt. To fix it, you need to run an SFC scan.
- Corrupt update component files – If the Windows update component is missing files or becomes corrupt, then it might trigger the error.
- Corrupted temp files – Whenever you install updates, some temporary files are created on your PC. If these files get damaged, then you might see the error.
- Computer infected with virus or malware – If your computer is infected with malware or virus, it might interfere with the update process, hence the issue.
- Not enough disk space – Before installing the update, you must check for sufficient hard disk space, as insufficient space could result in an error.
What can I do to fix Windows Update error 0x80242016?
Before engaging in advanced troubleshooting steps, you should consider performing the following checks:
- Remove all the peripherals except the essential ones.
- Disable Firewall.
- Ensure you have a stable internet connection.
- Check the date and time mentioned on the computer because an incorrect date and time can cause this issue.
1. Rename the Software Distribution folder & reset Windows Update components
- Go to the Search bar, type CMD and click Run as administrator.

- Copy and paste the following command to stop the Windows Update service and press Enter. You might have to do it a couple of times to ensure it is not running:
taskkill /f /fi "SERVICES eq wuauserv" - Type the following commands one after the other and press Enter after each command:
net stop cryptSvcnet stop bitsnet stop appidsvcnet stop msiservernet stop wuauservren C:\Windows\SoftwareDistribution SoftwareDistribution.oldrmdir C:\Windows\SoftwareDistribution\DataStorermdir C:\Windows\SoftwareDistribution\DownloadRen C:\Windows\System32\catroot2 Catroot2.oldnet start wuauservnet start cryptSvcnet start appidsvcnet start bitsnet start msiserver - Close the Command Prompt window and restart your PC when the process is complete.
2. Run Windows Update troubleshooter
- Press Windows + I to open Settings.
- Go to Update & Security.

- Now go to Troubleshoot from the left pane, and click the Additional troubleshooters link.
- On the next page, select Windows Update and click Run the troubleshooter button.
- Follow the on-screen instructions to complete the process.
- Microsoft releases Windows 10 (KB5058379/ KB5058392 / KB5058383/ KB5058387) May 2025 Patch Tuesday
- Microsoft extends Microsoft 365 apps support on Windows 10 to 2028
- Microsoft says a “really bad” bug halted Windows 11 25H2 rollout to Canary channel
- Microsoft pushes Windows 11, but this project wants you to switch to Linux instead
3. Run the SFC and DISM commands
- Open Command Prompt using the steps mentioned in Method 1.
- Type the following commands and press Enter after every command:
sfc/scannowdism /online /cleanup-image /scanhealthdism /online /cleanup-image /checkhealthdism /online /cleanup-image /restorehealth - Once complete, reboot your computer.
4. Disable the Windows Search service
- Press Windows + R to open the Run window.
- Type services.msc and press Enter to open Services.
- Locate and double-click the Windows Search service.

- Select Startup type as Automatic.

- Click Apply and OK to confirm the changes.


5. Run Windows in a Clean boot environment
- Press Windows + R to open the Run window.

- Type msconfig and press Enter.
- On the System Configuration window, go to the Services tab, place a checkmark next to Hide all Microsoft services, then click Disable all.

- Go to the Startup tab, and click Open in Task Manager.
- Right-click on all Enabled items one by one and select Disable.

- Click Apply and OK to confirm.
- Select Restart. Once restarted, try to install updates again.


So, these are methods that you can use to fix installation error code 0x80242016. If nothing has helped you, you must consider resetting Windows to resolve the issue.
If you have any questions or concerns about the process, feel free to let us know in the comments section below.
Vlad Turiceanu
Windows Editor
Passionate about technology, Windows, and everything that has a power button, he spent most of his time developing new skills and learning more about the tech world.
Coming from a solid background in PC building and software development, with a complete expertise in touch-based devices, he is constantly keeping an eye out for the latest and greatest!
Updating your PC regularly ensures that your PC runs smoothly. But many users have reported Windows update failed with error 0x80242016. So, if you are also facing the discussed problem, you are on the right page. In this guide, we will tell you the reasons for Windows 11 update errors and how to troubleshoot that Windows 11 0x80242016 error. So, keep reading until the end to learn more!

Table of Contents
Let us first discuss the reasons for Windows update failed with error 0x80242016:
- Poor internet connection
- Corrupted faulty system files
- Conflict with third-party software
- Corrupt software distribution folder
Now, you know the reasons. So, let us learn how to fix Windows 11 update error.
Method 1: Basic Troubleshooting Methods
Before utilizing the advanced and complex methods to fix the Windows 11 0x80242016 error, first, try out the basic troubleshooting methods mentioned in the following sections.
1A. Restart PC
Restarting your PC or laptop is the first possible method to resolve the Windows 11 update error. Rebooting your PC will remove temporary data and resets some components, both of which can assist in fixing Windows update failed with error 0x80242016 problem. Therefore, restart your computer. We know that you can do it by yourself, but you can learn some more tricks in our guide on 6 Ways to Reboot or Restart a Windows 10 Computer.
1B. Fix Slow Internet Connection
An unstable and unreliable internet connection can also cause the Windows 11 0x80242016 error. So, first, go and check the internet speed on your computer by running a Speedtest.
On the other hand, if it is slow and inconsistent, you will have to fix your internet connection. Let’s see the steps for that:
1. Click on the Windows icon from the taskbar on your Windows 11 PC/laptop and type Troubleshoot settings in the search bar.
2. Click on Open.
3. Then, click on Other troubleshooters.

4. Click on Run from the Internet Connections section.

5. Now, click on Troubleshoot my connection to the Internet.

Also Read: Why is Windows 11 Suddenly So Slow and How to Fix It?
Method 2: Run Windows Update Troubleshooter
You can take the assistance of Windows 11 inbuilt Windows Update Troubleshooter, as it can resolve the issues related to Windows 11 update error. Read the below-mentioned steps to run the Windows Update Troubleshooter:
1. First, press Windows + I keys together to open Settings.
2. Click on System > Troubleshoot.

3. Click on Other troubleshooters.

4. Now, click on the Run option for the Windows Update field.

5. Wait till the troubleshooter detects problems.

6. Procced as per the onscreen instruction.
7. Restart the PC and check if the issue is resolved.
Method 3: Repair System Files
If corrupt files are present on your device, it can lead to Windows 11 0x80242016 error. So, we suggest you repair the system files. System File Checker (SFC command) is a tool you can use to check for and repair faulty files on your computer. Moreover, Deployment Image Servicing and Management (DISM) can be used to fix Windows OS issues.
1. Type Command Prompt in the Windows search bar and click on Run as administrator.

2. Type the following command and hit the Enter key.
DISM /Online /Cleanup-Image /RestoreHealth

3. Wait for some time until the process ends. DISM will now restore the files that need to be repaired in the current installation.
4. Once the process gets over, execute the following command.
sfc /scannow

After the process gets over, the files will be repaired.
Also Read: Fix Windows Update Service Could Not be Stopped
Method 4: Disable Windows Search Properties
Some users have reported that modifying Windows Search Startup type behavior to Manual can resolve the problem. The steps for the same are given below:
1. Open the Run dialog box by pressing Windows + R keys simultaneously.
2. Now, type services.msc and press the Enter key.

3. After that, scroll down and right-click on Windows Search.

4. From the context menu, click on Properties.

5. In Windows Search Properties (Local Computer) window, click on the General tab.

6. Click on the Startup type drop-down field.
7. From the drop-down menu, select Manual.

8. Next, click on Apply to save the changes.

9. Restart the PC and check whether the discussed issue is resolved.
Also Read: How to Fix Windows 11 Update Stuck
Method 5: Disable Antivirus Temporarily (If Applicable)
The third-party Antivirus installed on your computer can cause the Windows update failed with error 0x80242016 because it can occasionally interfere with the Windows update procedure. So, you can briefly turn off the security software and then try installing the update once again. Read and follow our guide on How to Disable Antivirus Temporarily on Windows 10 to learn how to do it.
Method 6: Manually Download and Install Updates
You can use the Microsoft Windows Update Catalog to download and install the updates on the operating system manually.
Note: Know the KB number of the update before you download the update on your computer.
1. Open Settings by pressing Windows + I keys together.
2. After that, click on Windows Update from the left pane.

3. Note down the KB number for the update that has failed.

4. Next, visit the Microsoft Update Catalog page on your browser.

5. In the search box, type the noted KB number and click on Search.

6. After that, click on the Download option for the respective file.

7. In the window that appears, right-click on the hyperlink and select the Save the linked content as… option.

8. Choose the desired location to save the installer with the .msu extension and click on Save.
9. Now, press Windows + E keys simultaneously to open File Explorer and locate the Downloaded file.
10. Double-click on the .msu file.
11. Click on Yes in the installer prompt.
Note: It may take a few minutes for the installation to be completed and after that, you will receive a notification regarding the same.
12. Restart the PC/laptop after saving your unsaved data.
Also Read: 14 Ways to Clear Cache in Windows 11
Method 7: Clear Windows Update Cache
Clearing Windows updates cache can help you to fix Windows 11 update error 0x80242016 by making more space for new updates. To clear Windows update cache:
1. Press Windows + X keys together to open the Quick Link menu.
2. Select Task Manager from the menu, as shown.
3. Click on File > Run new task from the menu bar on the top.

4. Type wt.exe. Then, check the box marked Create this task with administrative privileges and click on OK.

5. Press the Ctrl + Shift + 2 keys together to open Command Prompt in a new tab.
6. Type net stop bits and press the Enter key.

7. Type net stop wuauserv as shown and press the Enter key.

8. Type net stop cryptsvc and hit Enter.

9. Then, press the Windows + R keys together to open the Run dialog box.
10. Type C:\Windows\SoftwareDistribution\Download and click on OK, as depicted below.

11. Press Ctrl + A keys to select all files and folders present in the said folder. Then, press Shift + Del keys together to delete them permanently.
12. Click on Yes in the Delete Multiple Items confirmation prompt.
13. Go to the SoftwareDistribution folder by clicking on it in the address bar at the top.

14. Open the DataStore folder by double-clicking on it.

15. Once again, use Ctrl + A keys and then hit Shift + Del keys together to select and delete all files and folders, as illustrated below.
Note: Click on Yes in the Delete Multiple Items confirmation prompt.

16. Switch back to the Windows Terminal window.
17. Type net start bits and press the Enter key.

18. Then, type the command: net start wuaserv and press the Enter key.

19. Type the command: net start cryptsvc and hit Enter to restart update related services.

20. Close all windows and restart the PC.
Let’s see another method to fix the Windows update failed with error 0x80242016.
Also Read: 16 Settings You Should Change to Protect Your Privacy in Windows 11
Method 8: Restart Windows Update Service
In the software distribution folder, temporary files are stored. These temporary files are used while the PC performs its update. When the software distribution folder gets corrupted, Windows 11 0x80242016 can occur. So, clean the discussed folder and then restart the Windows update service. The steps to clean and restart the Windows update service are given below:
1. First, press the Windows key on the keyboard.
2. After that, type cmd in the search box and select Open.
3. Type the following command and press Enter key.
net stop wuauserv

4. Next, execute the below-mentioned command to stop the update and background intelligent transfer service.
net stop bits

5. Now, navigate to the below-mentioned folder location path:
This PC > Windows (C:) >Windows > SoftwareDistribution

6. After that, delete all the content by selecting it.
7. Now, run the command mentioned below and press the Enter key.
net start wuauserv

8. Next, run the following command.
net start bits

Recommended:
- Top 10 Best Blue Light Filter App for PC
- Fix ERR_HTTP2_PROTOCOL_ERROR in Google Chrome
- Fix Windows 11 Update Error 0x800f0988
- Complete List of Windows 11 Run Commands
So, we hope you have understood how to fix the Windows update failed with error 0x80242016 with the detailed methods to your aid. You can let us know any queries or suggestions about any other topic you want us to make an article on. Drop them in the comments section below for us to know.