
Частая ошибка, возникающая как правило при обновлении Windows 10 до следующей версии (обновление компонентов) — 0x80240fff, приводящая в результате к невозможности обновить систему без какой-либо дополнительной информации о причинах проблемы.
В этой инструкции подробно о способах исправить ошибку 0x80240fff при обновлении компонентов Windows 10, от простых к сложным, один из них, надеюсь, позволит вам решить проблему.
- Устранение неполадок Центра обновлений Windows
- Очистка данных обновлений и перезапуск служб
- Приостановка обновления компонентов (только Windows 10 Pro и Enterprise)
- Дополнительные способы исправить 0x80240fff
Устранение неполадок Центра обновлений Windows 10 при ошибке 0x80240fff
Первое, что можно попробовать при появлении ошибки 0x80240fff во время обновления Windows 10 — встроенное устранение неполадок. При этом я рекомендую использовать не раздел «Устранение неполадок» в «Параметры» — «Обновление и безопасность», а следующий путь:
- Откройте панель управления, убедитесь, что в пункте «Просмотр» установлено «Значки» и перейдите к пункту «Устранение неполадок».

- Нажмите «Просмотр всех категорий» в панели слева.
- По порядку запустите устранение неполадок для «Фоновая интеллектуальная служба передачи (BITS)», а уже затем — «Центр обновления Windows».

- Если ошибки были найдены и исправлены, попробуйте установить обновление повторно.


В случае, если описанный метод не сработал, можно попробовать ручное устранение неполадок обновлений Windows 10.
Очистка данных обновлений и перезапуск служб
Попробуйте выполнить следующие действия для исправления ошибки 0x80240fff при обновлении Windows 10:
- Запустите командную строку от имени администратора, для этого можно начать набирать «Командная строка» в поиске на панели задач, а затем нажать правой кнопкой мыши по найденному результату и выбрать «Запуск от имени администратора».
- По порядку введите команды
net stop wuauserv
net stop bits
net stop cryptsvc

- Не закрывайте командную строку и удалите в проводнике содержимое папки С:\Windows\SoftwareDistribution\Download\ также, если в корне системного диска есть папки ESD, Windows.WS или Windows.BT — удалите их тоже.
- В командной строке введите по порядку команды
net start cryptsvc
net start bits
net start wuauserv

Проверьте, выполняется ли поиск и успешная установка обновлений без ошибок теперь.
Приостановка обновлений компонентов
По некоторым отзывам, в случае возникновения ошибки 0x80240fff во время обновления, помогает включение приостановки обновлений компонентов и в дальнейшем это обновление происходит уже без ошибок. Функция приостановки недоступна для домашней редакции системы, только Pro или Enterprise.

Найти нужный пункт можно в Параметры — Обновления и безопасность — Центр обновления Windows — Дополнительные параметры — «Выберите, когда устанавливать обновления» и в первом пункте отложите обновление компонентов на любое количество дней.
Дополнительные способы исправить ошибку 0x80240fff
Среди дополнительных методов решить проблему с обновлением компонентов:
- Использовать средство обновления с официального сайта https://www.microsoft.com/ru-ru/software-download/windows10. Причем если Update Assistant не помогает (пункт «Обновить сейчас»), можно скачать средство установки Windows 10 (второй пункт — «Скачать средство сейчас») и в нем на экране после принятия лицензии выбрать «Обновить этот компьютер сейчас».
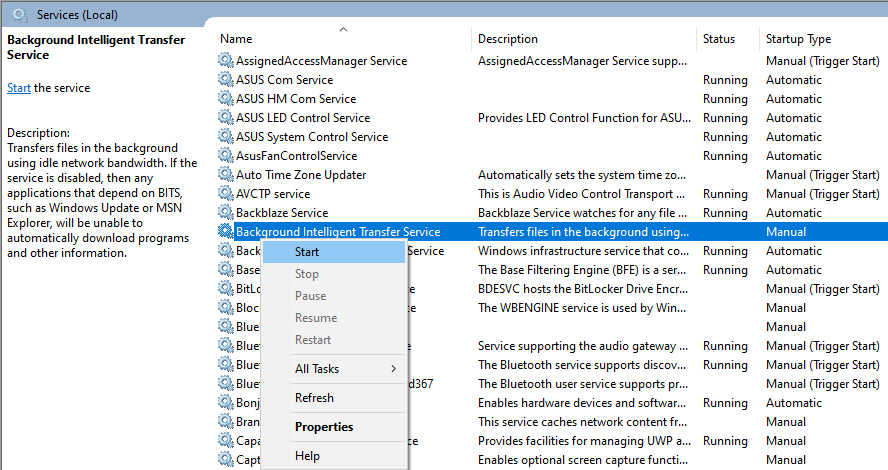
- Перепроверьте в списке служб (Win+R — services.msc), не отключена ли Фоновая интеллектуальная служба передачи (BITS). Дважды кликнув по ней, попробуйте включить тип запуска для нее в «Автоматически», применить настройки, перезагрузить компьютер и проверить решило ли это проблему.
- Теоретически может помочь использование сторонних утилит для управления и установки обновлений Windows 10.
- Если на компьютере установлены сторонние антивирусы или файрволлы, попробуйте отключить или удалить их перед обновлением.
- Если ни один из методов до сих пор не помог, выполните проверку целостности системных файлов Windows 10.
Table of contents
- Option 1: Pausing Updates
- Option 2: Using the Media Creation Tool
- Option 3: Using the Windows Update Troubleshooter
- Solutions for Windows 10 Pro Users
- Method 1: Using the Settings App
- Method 2: Using the Local Group Policy Editor
Windows Update is supposed to release patches that fix bugs and improve Windows 10’s performance. However, it is not flawless. At times, it can go wrong and cause annoying errors on anyone’s PC. There are even instances wherein you can’t install updates successfully because a pesky error is preventing you from doing so.
So, what if a Windows 10 update is blocked by the Error 0x80240fff? Well, worry no more because we’ve prepared several solutions for you to try.
Option 1: Pausing Updates
It’s possible that the new build for Windows 10 is causing the Error 0x80240fff. So, your best option is to pause updates until Microsoft releases a patch for it. Here are the steps:
- Launch the Settings app by pressing Windows Key+I on your keyboard.
- Select Update & Security, then move to the right pane.
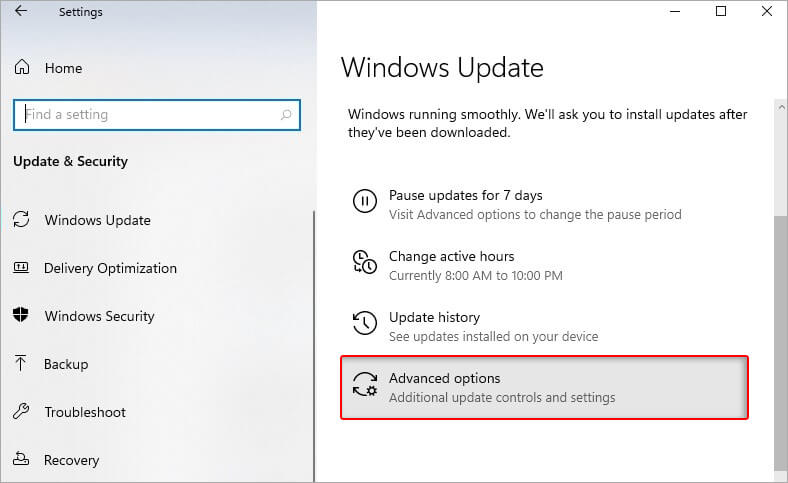
- Click the Advanced Options link.
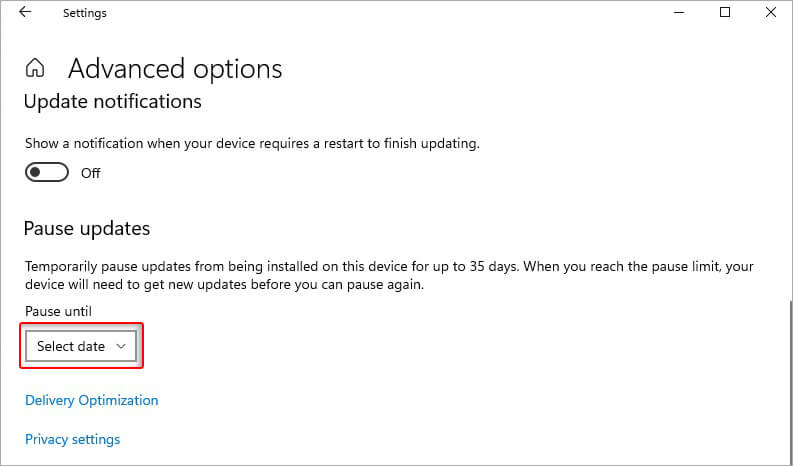
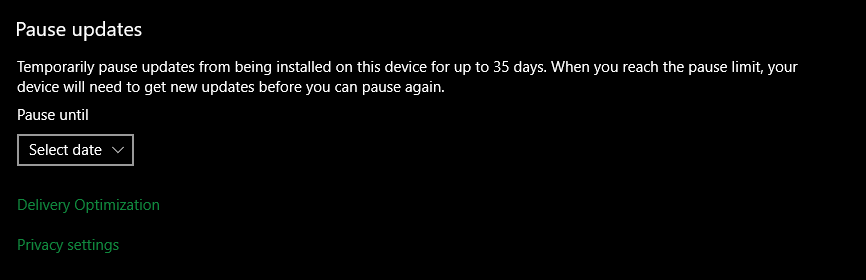
- Go to the Pause Updates section, then click the Select Date drop-down list.
Choose a date from the list. In most cases, you’ll be able to pause updates for about a month. Unfortunately, for Windows 10 Home operating systems, there is no option to defer upgrades for longer than a month.
If you’re still using an older version of Windows 10 Home, you may not be able to see the Pause Updates option on the Settings app. Don’t worry because there is still a way for you to know how to repair the Windows Update Error 0x80240fff. You can upgrade your operating system by downloading the ISO of the latest version. Here are the steps:
- Visit Microsoft’s official site, then download the Media Creation Tool.
- After downloading the tool, run it. Keep in mind that you need to use the administrator account on your computer.
- Once you get to the License Terms page, select Accept.
- On the next page, select the ‘Upgrade this PC now’ option.
- Click Next.
- The Media Creation Tool will start downloading and installing the latest version of Windows 10.
- Don’t forget to select the ‘Keep personal files and apps’ option to ensure that none of your vital data will be deleted.
- Once you’ve saved files and closed any open apps, select Install.
Do note that the process may take several minutes to complete. So, make sure you keep your computer on.
Option 3: Using the Windows Update Troubleshooter
If anything goes wrong with Windows Update, you can use its dedicated troubleshooter to resolve the issues. Doing so will repair Windows Update components, allowing you to install updates without the Error 0x80240fff getting in the way. To run the troubleshooter, follow the instructions below:
- Click the Windows icon on your taskbar.
- Click the gear icon to launch the Settings app.
- Once the Settings window is up, select Update & Security.
- Go to the left-pane menu, then click Troubleshoot.
- Move to the right pane, then click Windows Update.
- Click the Run the Troubleshooter button.
Let the troubleshooter resolve Windows Update issues. If the tool recommends further actions, make sure you follow them.
Solutions for Windows 10 Pro Users
If you want to learn how to resolve the Windows 10 Update Error 0x80240fff on a Windows 10 Pro PC, you need to learn how to ‘defer upgrades’ on it. Doing so will fix the issue by changing the server that you are downloading updates from. On Windows 10 Pro and Enterprise, there are various ways to do this. We will show them all to you.
Method 1: Using the Settings App
- Click the Windows icon on your taskbar, then click the gear icon to open the Settings app.
- Once you’re on the Settings app, click Update & Security.
- Go to the right pane and click the Advanced Options link.
- Select the box beside the ‘Defer feature updates’ option.
After performing these steps, you must restart your PC to ensure that the changes will take effect.
Method 2: Using the Local Group Policy Editor
- On your keyboard, press Windows Key+R to open the Run dialog box.
- Inside the Run dialog box, type “gpedit” (no quotes), then hit Enter.
- Once the Group Policy Editor is up, go to the left pane, and follow this path:
Computer Configuration ->Administrative Templates ->Windows Components ->Windows Update
- On the right pane, you will see several group policies. You need to look for one called ‘Defer Upgrades and Updates’, then double-click it.
- A new window will appear. Select Enabled to be able to defer upgrades and updates.
Once you’ve completed these steps, you will see two fields at the bottom portion of the window. To select the number of months, follow the instructions below:
- On the left pane, click the up and down arrows to enter the number of months you wish to defer upgrades.
- You are free to choose between one to eight months. You can also enter any number between 1 to 8 instead of using the up and down arrows.
Keep in mind that the number of months you enter is added to a four-month delay. Once you request to postpone upgrades, your computer will switch to the enterprise-oriented “Current Branch for Business” (CBB) upgrade track from the consumer-level “Current Branch” (CB) one.
When you check the box beside the ‘Pause Upgrades and Updates’ option, you will be able to put a temporary hold on updates and upgrades. This will last until the next monthly update comes or until Microsoft releases the next big upgrade. Now, when a new update or upgrade is available, the value in the policy will go back to its default state.
Pro Tip: To ensure that updates will be installed smoothly, we recommend that you optimize your system, using Auslogics BoostSpeed. This tool will get rid of junk files safely, remove corrupt registry keys, and help most operations and processes go at a faster pace. This way, updates will be downloaded and installed without any hindrances.
What other error codes would you like us to fix?
Let us know in the comments below!
Microsoft releases various security patches and minor or major updates to ensure a better user experience. Most of us regularly keep our Windows system up-to-date with the latest system updates, drivers, apps, etc. But what if you install a critical Windows update, and instead of fixing existing issues, it starts creating new errors? One such error a Windows update may cause is the code- 0x80240fff.
Like many other system errors, 0x80240fff is a cryptic error that doesn’t give you much information but disturbs your Windows update installing process. Therefore, if you are bothered by this critical issue, here are some proven DIY methods to help you fix it.
How to Fix 0x80240fff Error?
#1 Defer Updates
The most common way to eliminate the 0x80240fff Windows Update error is to defer updates for a few days. This option was earlier available only for Windows 10 Pro users. However, now, Windows 10 Home users can also use it.
- Open the Settings app and go to Update & Security > Windows Update.
- There, scroll down and click Advanced options.
- At the bottom, you’ll see the option – Pause updates. From the drop-down menu, select a date, and then Windows won’t install any update until that date.
- Doing so will change the Windows update server and may solve the problem.
#2 Run Windows Update Troubleshooter
Windows systems come with multiple built-in troubleshooting tools that can solve various problems. For example, you can try running Windows Update Troubleshooter to fix the 0x80240fff error code with the help of the following steps:
- Press Windows + I to open Settings and then follow Update & Security > Troubleshoot.
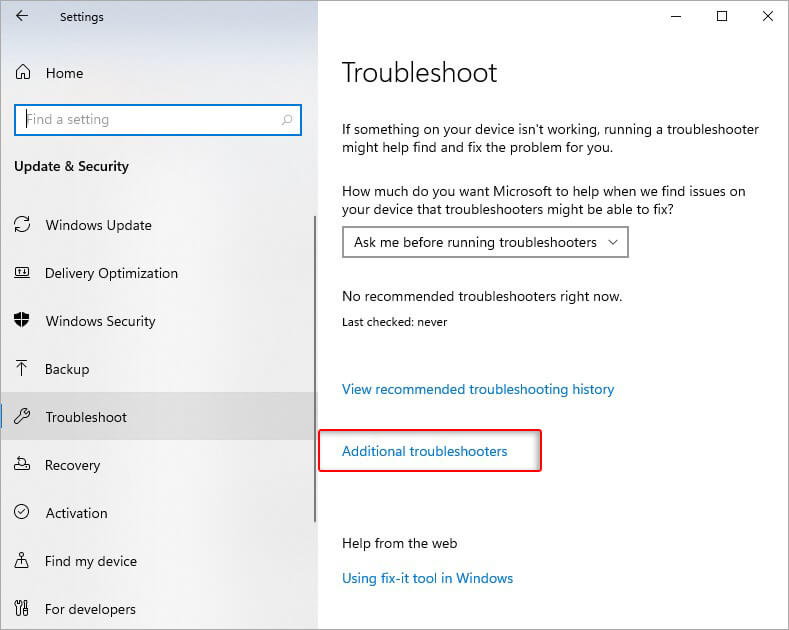
- Next, click Additional troubleshooters.
- On the next prompt, click Windows Update and Run the troubleshooter.

- If there are any issues, the utility will try to troubleshoot them.
- Once the process is done, reboot your system and check if the error code is fixed.
#3 Disable any Antivirus App
Sometimes, an antivirus application on your system may interrupt your Windows update installation process. You can try disabling the antivirus. For example, if you’ve Windows Defender antivirus enabled on your system, you can disable it and then try to reinstall the update. If you don’t face the 0x80240fff error code this time, there must be an issue with your antivirus. Follow the given steps to disable Windows Security:
- Press Windows + I to open the Settings app and follow Update & Security > Windows Security. Else, you can open the Search bar and type Windows Security.
- Now, click Virus & threat protection > Manage Settings.
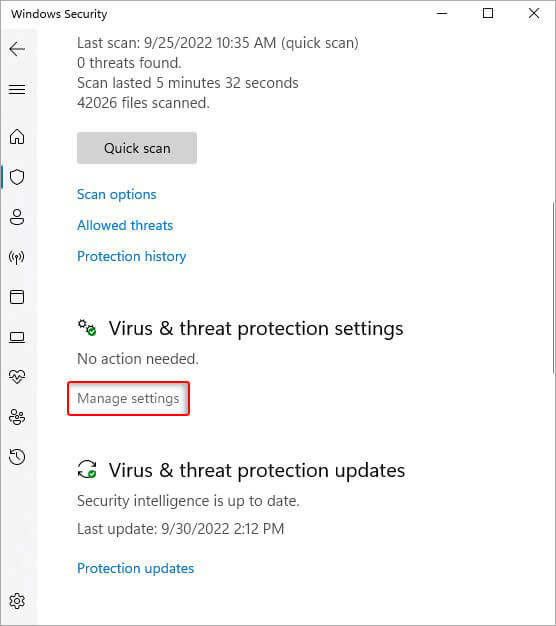
- Toggle the button given under Real-time protection and turn it Off.
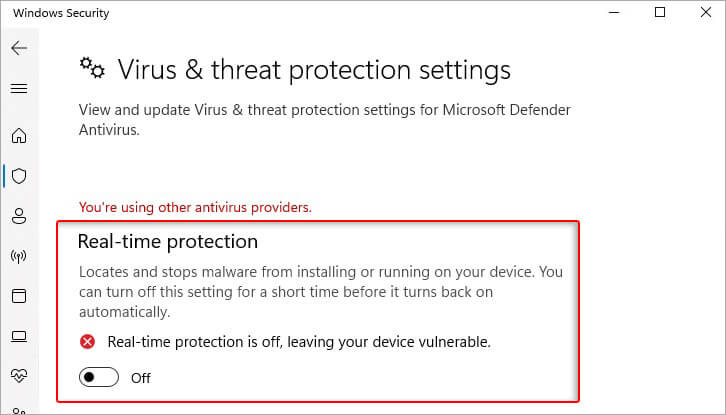
Here, one thing is to remember that scheduled scans will continue to run in the background. However, the downloaded files will not be scanned until the following scan is planned. Some users have been able to fix the error code with this method.
#4 Restart Windows Update Services
Windows Updates also heavily relies on multiple background services. When some background service fails, you may have issues installing Windows Update and encounter a 0x80240fff error code. Hence, try restarting the Windows Update Services with the following steps:
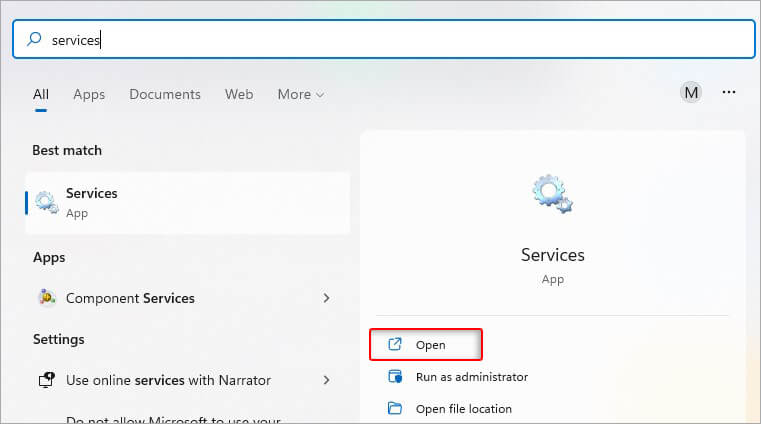
- In the Search bar, type Services and click Open.
Now, check the status of the following services is «Running.».
- Application Identity
- Background Intelligent Transfer Service
- Cryptographic Services
- Windows Update
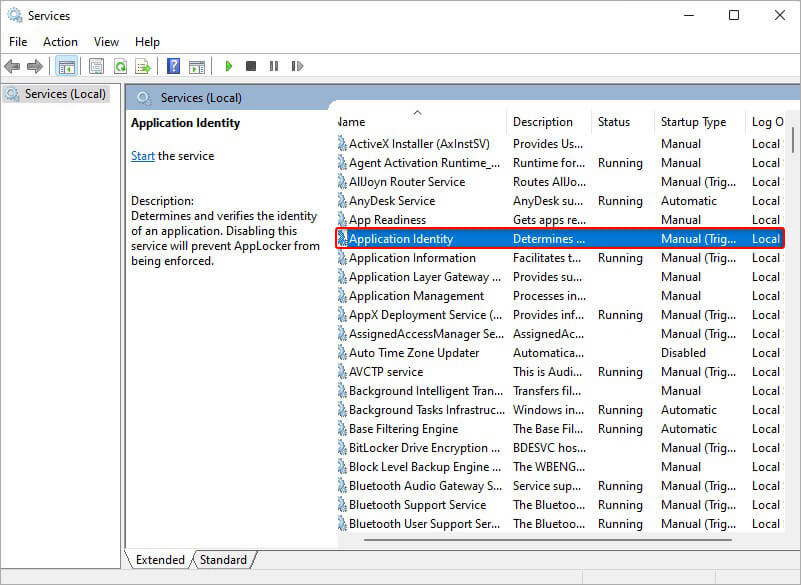
- If the status is Running, right-click on the services one by one and then click Restart.
- If a service is not running, right-click on the same and click Start.
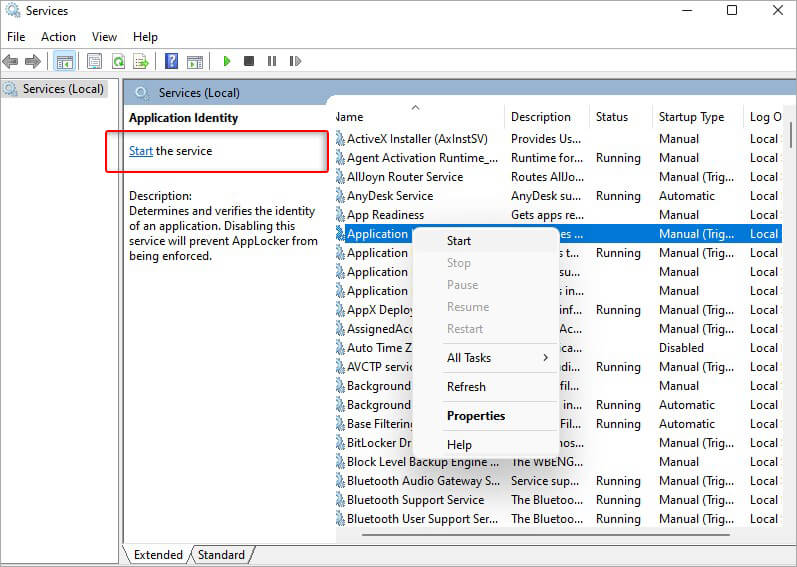
- Finally, reboot your system and check if you can install updates now.
#5 RUN SFC Scan
You can also try running the System File Checker (SFC) utility to fix the 0x80240fff Windows Update error. This utility checks for issues with the system files that may be causing this error. To run an SFC scan, follow these steps.
- Run Command Prompt utility as administrator.
- In the open CMD window, type SFC/Scannow and hit Enter
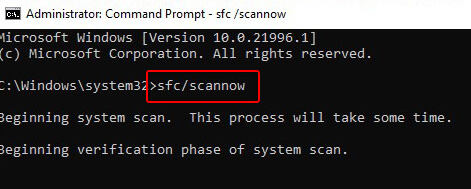
- Don’t interrupt the process and wait until the process is completed.
- Finally, close the window and restart your system.
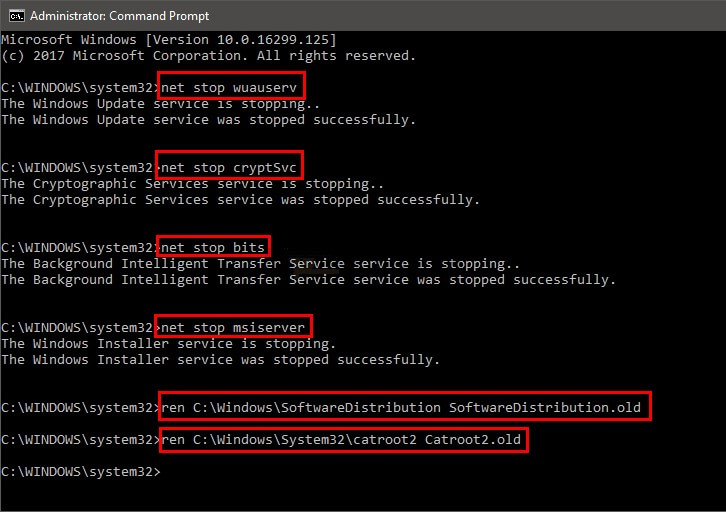
#6 Reset Windows Update Components
You can also try resetting Windows Update Components to fix this issue. Open Command Prompt and type the following commands followed by Enter.
net stop wuauserv
net stop cryptSvc
net stop bits
net stop msiserver
Ren C:\Windows\SoftwareDistribution SoftwareDistribution.old
Ren C:\Windows\System32\catroot2 Catroot2.old
net start wuauserv
net start cryptSvc
net start bits
net start msiserver
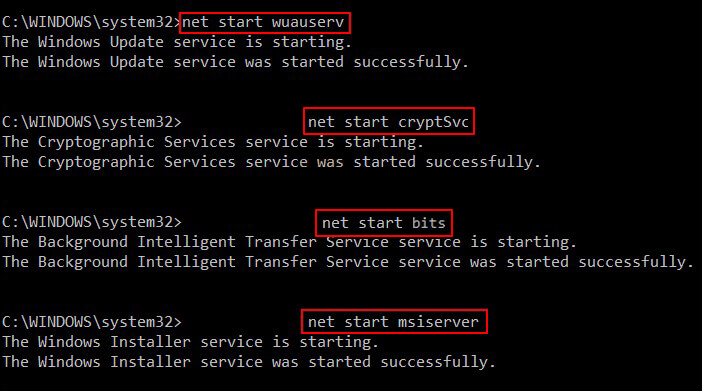
Once done, close the window, reboot the system, and check if the error is fixed.
#7 Install Windows Update with Windows Update Assistant
Some users have suggested that they have been able to fix the update error in Windows 11 with the help of Windows Update Assistant. You can use Windows Update Assistant to download the quality and feature updates.
#8 Reinstall Windows
You can also visit Microsoft’s Windows 10 page to download the latest update. If you face any issues with downloading the latest update, you can create a bootable media drive with the Windows Media Creation tool and then choose to boot your system from it. Finally, reinstall the latest updates for Windows 10 following the on-screen instructions. For Windows 11, refer to this page.
Remember, when you reinstall Windows to fix the 0x80240fff error, it may cause permanent data loss. Hence, always have a backup of your system or drive data. If, in the worst-case scenario, you don’t back up and lose your files, worry not! You can use professional data recovery software to recover lost data.
Was this article helpful?
FAQs
Why is Windows 10 failing to install updates?
The primary reason behind Windows 10 failing to download updates may be a lack of space on the system drive. If your system is running low on storage space to download the updates, the installation process may not work. Therefore, clearing some space on your drive is advised.
What is error code 0x800700c1?
Error code 0x800700c1 is also related to Windows Update. It occurs when your system fails to download the needed files. The reasons may include corrupted update files, paused updates, or problems with Windows update services.
How do I force Windows 10 to install updates?
If you don’t want to wait for the automatic updates, you can install updates by following Settings > Update & Security > Windows Update. There, click Check for updates and then click Install now to download the available updates.
Seeing the error code 0x80240fff in Windows 10? Like most Windows errors, it’s cryptic and doesn’t give you much info on its own.
We’re here to help. Let’s look at what Windows Update error 0x80240fff means and how to fix this issue.
What Is Error 0x80240fff?
Error 0x80240fff in Windows 10 is related to Windows Update. You’ll see it in the Windows Update menu (located at Settings > Update & Security > Windows Update) when you check for updates manually or after Windows fails an automatic check for updates.
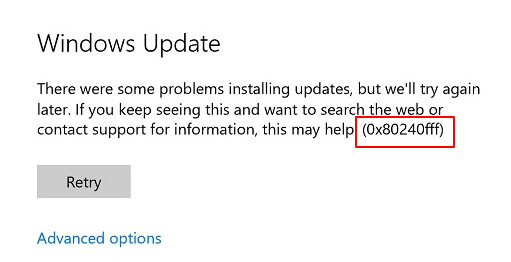
The error message usually looks something like this:
There were some problems installing updates, but we’ll try again later. If you keeping seeing this and want to search the web or contact support for information, this may help (0x80240fff)
Here’s what to do when Windows Update won’t work because of this error.
1. Restart Your PC
Like all troubleshooting, it’s important to start simple. Before moving into advanced procedures, simply reboot your PC to clear up any temporary glitches that might cause this error.
Once you’ve restarted, it’s also worth making sure that your computer is properly online. Visit a few different websites to make sure that your computer isn’t having a wider network issue, which will prevent it from downloading Windows updates. If it is, see our guide to network troubleshooting for help.
2. Defer Windows Updates
Strangely enough, the most common fix for the 0x80240fff Windows Update error is to defer updates for a few days. If you’re not aware, this feature allows you to temporarily pause Windows Update—useful when you don’t want your computer to automatically restart or make any changes during mission-critical tasks.
In prior versions, this feature was only available for Windows 10 Pro users, but now those on Windows 10 Home can use it too. Head to Settings > Update & Security > Windows Update, then click Advanced options.
At the bottom of this page, you’ll see a Pause updates header. Use the dropdown box to select a date, and Windows won’t install any updates until that time. Once it hits, Windows will install all pending updates before you can pause again.
Many have reported that deferring updates fixes error 0x80240fff. This may be because it changes the server that you receive updates from, so if one is having trouble, you can try installing the update from another server later.
You don’t want to defer security updates for too long, though. Try deferring for 3-5 days, then see if Windows Update works again afterward.
3. Run the Windows Update Troubleshooter
Windows 10 includes several built-in troubleshooting tools that can help you clear up common issues in a variety of areas. While they don’t always have an effect, they’re worth trying when you have an issue, just in case.
To use the Windows Update troubleshooting tool, go to Settings > Update & Security > Troubleshoot. On this page, click the Additional troubleshooters link at the bottom. Then on the resulting screen, click Windows Update > Run the troubleshooter in the Get up and running section to check for issues with the service.

If this finds anything, it will try to fix the issues automatically. Try checking for updates again once the troubleshooter completes.
4. Disable Any VPN Connections and Antivirus Apps
Since having a VPN enabled on your computer affects all of its connections, there’s a chance that your VPN is interfering with checking for Windows Updates. If nothing has fixed your issue yet and you use a VPN, turn it off before checking for updates again.
If this doesn’t work, try disabling your antivirus app temporarily. There’s a chance that this is preventing Windows Update from doing its job.

5. Restart Windows Update Services
Windows Update relies on a lot of background services, so it will fail if one of those services has a problem. If you’ve gotten this far and still see error 0x80240fff, you should next try restarting some services that may have failed.
Type services into the Start menu to search for the utility, then open the Services menu from the results. This will open an extensive list of services.
For each of the ones listed below, if you see that it’s already Running, right-click on it and choose Restart. In case it’s not running, right-click it and choose Start.
- Application Identity
- Background Intelligent Transfer Service
- Cryptographic Services
- Windows Update
Afterward, try running Windows Update again.
6. Run the System File Checker
When you have issues with any core Windows component, the SFC (system file checker) tool is an important troubleshooting step. This checks for corrupted Windows system files and tries to fix them.
To run SFC, right-click on the Start button (or hit Windows Key + X) and choose Command Prompt (Admin) or Windows PowerShell (Admin) from the list. Once there, type the following:
sfc /scannow
This will run a scan and display the results when it’s done. Note that this could take some time.
7. Install the Newest Windows Version Manually
In case you’re seeing the 0x80240fff error when you try to download the latest feature update for Windows 10, you can try installing the latest Windows 10 version through other means.
Instead of relying on Windows Update, you should try to download Windows 10 from Microsoft’s official page. This will download an installer that will attempt to put the latest version on your system with an in-place upgrade.
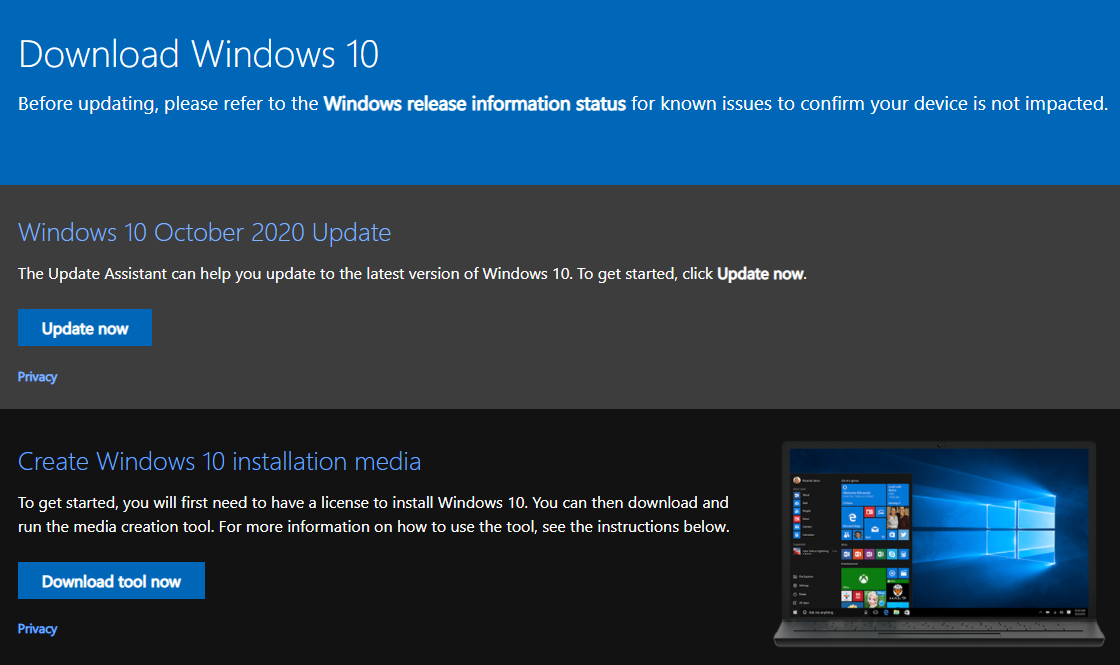
If this doesn’t work, you can use the Media Creation Tool to create Windows 10 install media from a USB flash drive. This requires you to boot into the flash drive and install the latest revision manually.
Either of these should work well if your issue is a temporary hiccup with Windows Update itself, and you just want the latest feature update.
Fixing Up Error 0x80240fff in Windows 10
Now you know the ways to fix up Windows Update error 0x80240fff when it pops up. Because this is related to Windows Update, the source of the problem is likely either your network connection or some Windows component. With any luck, you’ll have an easy fix and can keep your PC updated properly.
If these steps didn’t solve your problem, there’s more you can do to resolve general Windows Update issues.
Image Credit: Datenschutz-Stockfoto/Shutterstock
Many times the insufficiency to get the updates installed ceases the users from utilizing all the new features. Windows 10 or 11 update error 0x80240fff is one such problem that does not affect everyone but definitely hits on devices running older versions or if the current update contains bugs and issues. While trying to update the PC through the Settings app, the aforementioned error code appears not allowing users to complete the installation. Though the error is completely unexpected, there are certain common reasons that could be a possible cause for it.
The loss of system files, the conflict between firewall and updates, bugs in the patches, poor internet connection, improper functioning of Windows Update services, outdated version, and more are some of the reasons why you get hindrance in the update procedure. So this article will share some of the applicable solutions that would help you in mitigating the error 0x80240fff.
Windows 11 or 10 update error 0x80240fff
Here is How to Fix Windows 10/11 update error 0x80240fff –
1] Run Windows Update Troubleshooter
The expert engineers suggest that applying Windows Update troubleshooter successfully deals with the Windows 11/10 Update Error 0x80240fff. This built-in tool will scan the system for possible causes and depending on it will attempt to fix them. Follow the steps given below to carry out the process –
- Press the Win logo and the I key on the keyboard simultaneously to open Windows Settings.
- Click Update & Security tab from the interface of the app.
- Select Troubleshoot from the left sidebar of the available sections. Switch to the right pane and select Windows Update.
- Hit Run the troubleshooter button.
- Wait for the utility to scan and display the result, Once it gets over, reboot the PC for effective results.
Note – Make sure that your computer is connected to the internet while carrying out this task.
2] Defer Updates to Fix Windows 10/11 update error 0x80240fff
You may be one of those users who would prefer to study the entire update release and then go for it. For such customers, Windows 10 or 11 provides an option to defer updates, i.e delay the update. This feature to wait and watch, read the reports, know the pros and cons of the update could help in overcoming the Windows 11 or 10 update error 0x80240fff. More than a workaround, this acts as a preventive measure from any sort of further update issue. You can either do this through Settings, Group Policy, or Registry Editor. Though this is a temporary solution, it worked for many users and this is how you would proceed with applying this defer feature –
Through Settings App
- Do a right-click on Start and choose the cog icon.
- On the Settings app, select Update & Security.
- Switch to the right pane and click Advanced options.
- Go to the section that says “Choose when updates are installed“. Click the drop-down under feature update and select the number by which you want the updates to defer.
- Again click the drop-down under quality updates and choose the number of days you want to delay it.
- Once you do this, the Windows Update will wait for the chosen number of days before trying to install it again.
Using Group Policy Editor
If the aforementioned option is missing in settings to halt the update, you should try out the gpedit.msc.
- Type gpedit in the taskbar search and select the Edit group policy from the results list.
- Once into Local Group Policy Editor, navigate to the below-mentioned path –
Computer Configuration => Administrative Templates => Windows Components => Windows Update => Windows Update for Business
- Find and double-click the policy namely Select when Preview Builds and Feature Updates. Choose Enabled.
- Click the drop-down and select the preferred Windows readiness level and then insert the period for which you want to delay the updates. Click Apply and OK.
- Now, perform a double-click on the policy Select when Quality Updates are received. In its Properties box, choose Enabled.
- Assign a figure to defer the updates.
- Click Apply and OK.
3] Use Media Creation Tool
You can pretty effortlessly deploy the Media Creation Tool to install Windows 11 or 10. This action will ensure that you would not encounter any error messages throughout the installation procedure. Try it out –
- Launch any web browser and navigate to the Microsoft Official Site.
- Click the Download tool now underneath the “Create Windows 10 installation media”.
- Click Accept to the terms and conditions of the tool. Once the download gets over double click the executable file to run the tool.
- Upon the popup of the utility choose to Create installation media for another PC.
- On the following screen select the radio button ISO file. Click Next and the downloading of Windows 10 will begin.
- Once the ISO file is ready, burn it into a Disc and run it. Hopefully, this would bypass the occurrence of Windows 10 update error 0x80240fff.
4] Manually Install Cumulative Updates
The giant software company Microsoft rolls out Tuesday patches, preview builds, and more on a regular basis. These releases carry out several fixes for bugs and problems, new features to make the system more stable and healthy to use. So when the automatic update procedure fails to happen successfully, you can try to install certain small patches manually. Follow the below guidelines to accomplish the task –
- Visit the Windows 10 update history site and find out the latest release by the company.
- Locate the version installed in your system on the left pane and select it.
- After selecting it, scroll down and you will see the cumulative updates list with dates and KB number (In this release section).
- Copy the entire KB number, for example, KB4530684. Now open Microsoft Update Catalog page and search for the KB number you copied.
- Depending on your system architecture download the necessary file.
- Run the file to install the update manually and you will not encounter Windows 10 update error 0x80240fff.
5] Restart Windows Update Services to Resolve Windows 10 update error 0x80240fff
Another applicable resolution to get rid of “Windows 11 or 10 update error 0x80240fff” is to ensure that all the services related to Windows Update are functioning appropriately. Hence, the best way is to restart them. Moreover, this will clear out the buggy elements and make the update procedure operate normally. This is how you would do it –
- Go to the taskbar search box and type cmd.exe. Hover over Command Prompt and select Run as administrator from the right extended pane.
- Click Yes upon the prompt of User Account Control.
- Once the elevated Command Prompt shows up, insert the below-given commands and press Enter after each one to kill MSI Installer, Windows Update Services, BITS, and Cryptographic services respectively.
net stop msiserver
net stop wuauserv
net stop bits
net stop cryptSvc
- While proceeding ahead, you need to rename SoftwareDistribution and Catroot2 folders separately. To do so, copy and run the below commands and hit Enter.
ren C:\Windows\SoftwareDistribution SoftwareDistribution.old
ren C:\Windows\System32\catroot2 Catroot2.old
- After successfully renaming the above folders, you need to restart MSI Installer, Windows Update Services, BITS, and Cryptographic services. Execute the below commands and press Enter to accomplish the task.
net start wuauserv
net start cryptSvc
net start bits
net start msiserver
- As a final step, restart Windows 10 PC and check for the Windows 11 or 10 update error 0x80240fff.
6] Turn off Windows Defender Firewall
Conflict between certain latest updates and the Windows Defender Firewall occurs at times which further leads to several complications. Subsequently, Windows 11 or 10 fails to download and install any updates and comes across error code 0x80240fff. Therefore, the tweak that you need to apply here is to disable the Firewall feature temporarily. Perform the following task to complete this process –
- Press “Win logo and R” keys altogether to open Run dialog box. Type in control panel and click OK.
- Make the applet into a small or large view and select Windows Defender Firewall.
- On the left pane, do a click on “Turn Windows Defender Firewall on or off“.
- Select the checkbox corresponding to the option – “Turn off Windows Defender Firewall” for both private and public networks.
- Click OK to save the changes.
7] Fix Windows 11 or 10 update error 0x80240fff by Running System File Checker
Missing or broken System files definitely leads to throwing issues. As frequent changes in the system take place, certain important components get adversely affected. So, this can also be one of the prime causes of Windows 11 or 10 Update Error 0x80240fff. To deal with such a situation, you need to run System File Checker, the built-in tool that could scan, detect and recover the missing files. Now, explore the below-given steps to execute this utility –
- First of all, Open Command Prompt as Administrator by using any of your preferred methods.
- The simple way is to get access to the taskbar search and type cmd.
- Right-click on Command Prompt and choose Run as administrator.
- Hit Yes on the UAC popup.
- Insert the mentioned below command and hit Enter to initiate the scan.
sfc /scannow
- The tool would start detecting the missing files and retrieve them from the Windows cache folder. Once it finishes, reboot the device and check for the error code while updating the system.
8] Verify your disk for any available corruption
Bad areas in the disk may occur after its prolonged use which further leads to various issues like Windows 10 or 11 update error 0x80240fff. Hence, it is advisable for you to perform a disk check and resolve the corruption. This is how you need to proceed further to use this built-in utility –
- On the taskbar search, insert cmd. Hover over Command Prompt and on the right-pane select Run as administrator.
- When UAC shows up, hit Yes.
- Upon the appearance of the black window, insert the command in the below format –
chkdsk [Drive:] [parameters]
- In the above command, chkdsk only detects the disk’s status but it will not rectify issues from the volume. Therefore, after the drive letter, you need to add these parameters –
/f /r /x - So, the entire command that you need to execute will be –
chkdsk C: /f /r /x
-
- The parameter “f” in the above command guides chkdsk to repair the errors on the volume.
- Whereas “r” will trace out the bad areas in the volume and then will make an attempt to recover the readable data.
- The last parameter “x” indicates the volume to dismount before the process starts.
- Once the scan gets over, reboot the device and try to update the system.
9] Run DISM Tool
Another built-in command that works for Windows update issues is to execute the DISM tool. It scans and repairs the corrupted system files related to Windows update. Go through the below guidelines to carry out this solution –
- Get access to the Run, type cmd. Press Ctrl+Shift+Enter in one go to directly Open Command Prompt as Admin From Run Dialog.
- Hit Yes on the UAC pop-up.
- Insert the below-given command line in the black window that appears and hit Enter.
DISM /Online /Cleanup-Image /RestoreHealth
- To restore the system’s health, the above command will take some time. After it gets over, try to update the PC.
Methods:
1] Run Windows Update Troubleshooter
2] Defer Updates
3] Use Media Creation Tool
4] Manually Install Cumulative Updates
5] Restart Windows Update Services
6] Turn off Windows Defender Firewall
7] Run System File Checker
8] Verify your disk for any available corruption
9] Run DISM Tool
That’s all!!