
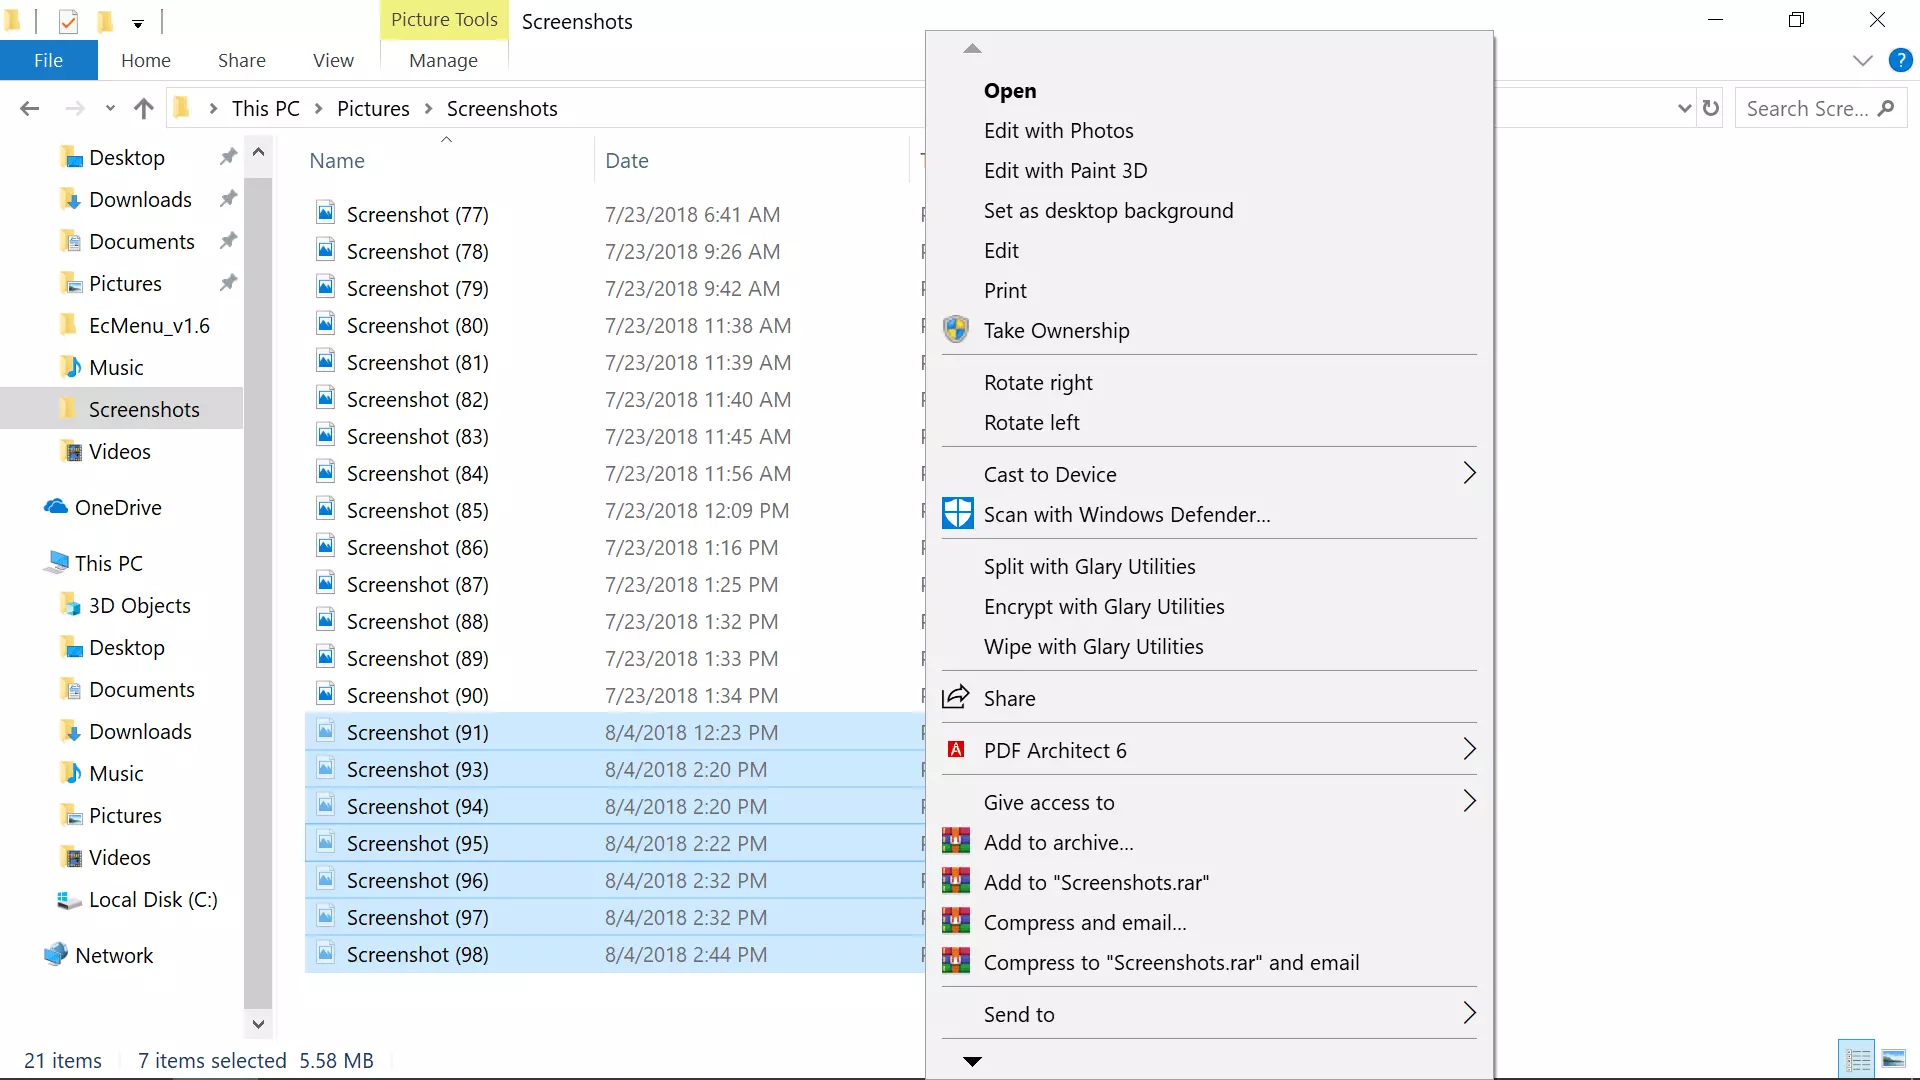
Ошибка 0X8024001E может появиться в момент инсталляции любой программы из Windows Store. Она имеет место в семействе Windows, начиная с «семерки», но пик по количеству проблем произошел в Windows 10. Код относится к ошибкам при обновлении Windows, но также появляется при попытке инсталляции или апгрейда программ наподобие Windows Mail. Невозможность выполнения синхронизации зацикливает процесс обращения к серверу и сильно снижает быстродействие системы.
Почему появляется ошибка 0x8024001E?
Самые распространенные причины:
- повреждение или отсутствие dll-библиотек;
- неполадки с отдельными ключами реестра;
- вирусная активность в системе;
- проблемные обновления;
- скопление кэша приложений.
Как исправить ошибку 0x8024001E в Windows 7, 8.1 и 10?
Первым делом стоит удостовериться, что ошибку 0x8024001E вызывает не проблема с интернетом. Стоит просто загрузить какой-то сайт в браузере. Если все прошло успешно, значит дело не в подключении к сети.
Способ 1: выставляем правильное время
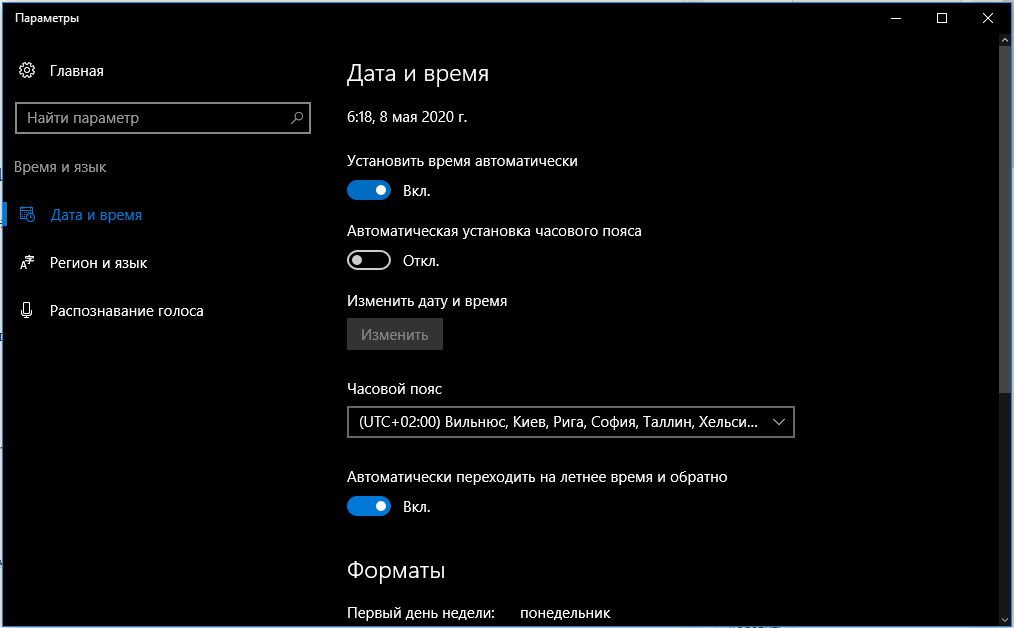
Часто Windows сталкивается со сбоями из-за некорректного времени в системе. Стоит установить настройку для получения точного времени с интернета и перезагрузить компьютер. Если причина была во времени, сейчас обновления должны заработать.
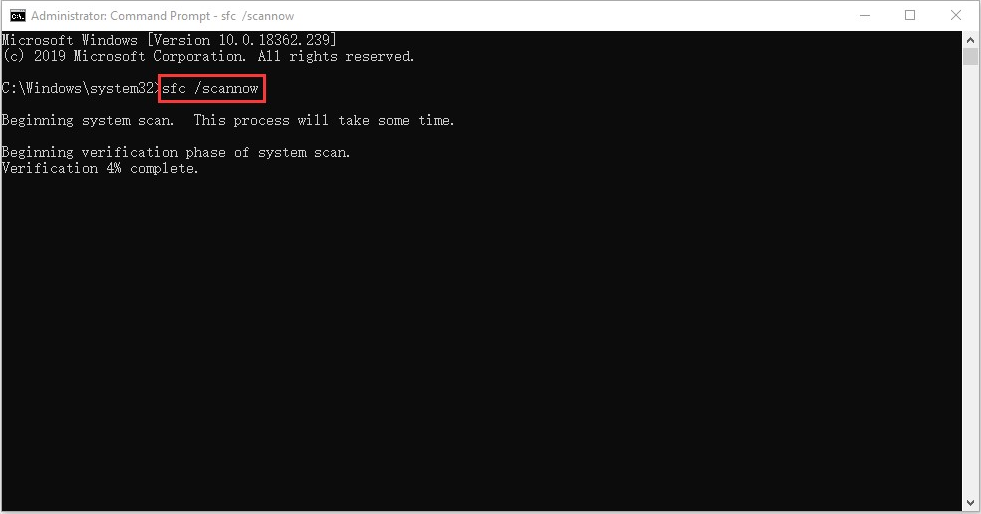
Способ 2: сканируем системные файлы
Если через ПКМ по Пуску открыть «Командную строку» и вставить sfc /scannow, запустится проверка целостности и исправности файлов Windows. Если проблема в них, алгоритм запустит автоматическое исправление файлов.
Способ 3: переустанавливаем приложение
Простое удаление и переустановка приложения часто помогают справиться с ошибкой 0x8024001E.
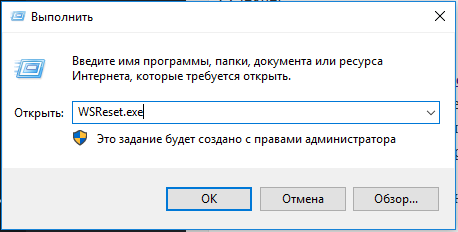
Способ 4: удаляем кэш Windows Store
Банальное скопление временных данных для магазина Windows Store нередко перерастает в проблему и ошибку 0x8024001e. Это сказывается не только на стабильности операционной системы, но и на общей производительности.
Инструкция:
- Жмем на сочетание Win + R и пишем WSReset.exe.

- После запуска консоли отобразится Windows Store, как только это случилось перезагружаем ПК.
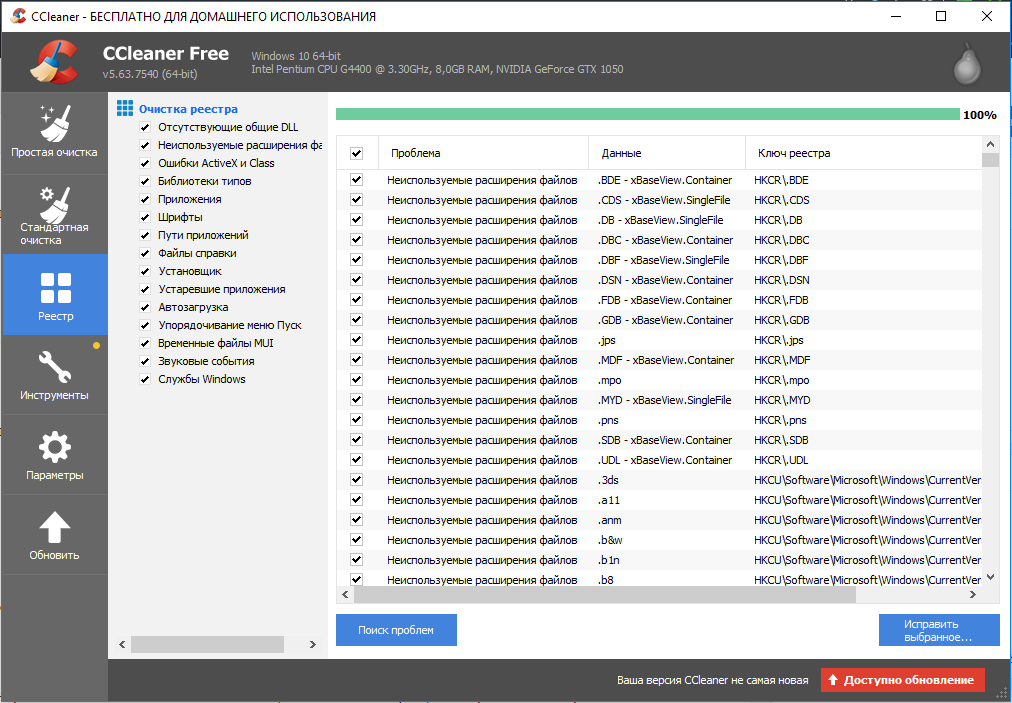
Способ 5: восстановление реестра
Существует масса утилит, которые способны просканировать реестр на ошибки и автоматически их исправить. Одним из самых популярных приложений своего рода является CCleaner.
Что нужно сделать:
- Скачиваем программу CCleaner.
- Переходим на вкладку «Реестр».
- Жмем на кнопку «Поиск проблем».

- Нажимаем на пункт «Исправить выбранное» и подтверждаем запуск процедуры.
Способ 6: принудительно включаем службу обновления
В части случае ошибка 0x8024001E отображается по причине неактивного «Центра обновления Windows». Если запустить его повторно, все заработает исправно.
Алгоритм действий:
- Вводим в поиск services.msc и запускаем одноименный файл.
- Листаем список в конец до пункта «Центра обновления Windows» и открываем его двойным кликом.
- Жмем на кнопку «Запустить».
- Перезагружаем компьютер.
Способ 7: удаляем приложения
Альтернативный вариант исправления – запустить переустановку приложений.
Пошаговое руководство:
- Через поиск запускаем PowerShell.
- Задаем команду Get-AppxPackage.

- Вводим код Get-AppxPackage-AllUsers I Remove-AppxPackage, где вместо AllUsers можем указать отдельное приложение.

Перечисленных мер достаточно, чтобы полностью искоренить ошибку 0x8024001E с Windows. Мы не знаем, какой способ поможет, но один из них должен дать удовлетворительный результат.
Error Code 0x8024001e — What is it?
Error Code 0x8024001e is most commonly associated with the installation of apps from the Windows store, although versions of the error have been present in multiple versions of the Windows operating system. At its most basic level, the error says that a program has not been installed, even after the installation wizard has run through to completion.
Common symptoms include:
- Inability to open or run apps downloaded from the Windows store
- The error message reads, “Something happened and this app couldn’t be installed. Please try again.”
The solutions to Error Code 0x8024001e are somewhat complex, so it is a good idea to get in touch with a computer repair professional if you do not feel confident in your ability to follow the steps below to complete. However, most users should be able to follow the steps below and achieve the desired results.
Solution
Error Causes
There are a couple of different causes that can lead to the appearance of Error Code 0x8024001e. In some cases, extraneous data left in the app cache can cause the problem. In other cases, particular processes may need to be manually reset to clear the problem. Last, but not least, unresolved updates may lead to Error Code 0x8024001e causing issues with downloaded and installed apps from the Windows Store.
Further Information and Manual Repair
There are three primary methods to address the appearance of Error Code 0x8024001e. These should work for all users, regardless of the specific cause for their machine. The methods below do require some advanced skills in computing, so be sure to contact a Windows repair technician if you have trouble following the instructions below.
Here are the top ways to repair Error Code 0x8024001e on Windows 10:
Method One: Clear the App Cache and Use Power User Options
In many cases, simply clearing your app cache can resolve the errors that pop up when you are downloading, installing, or updating any apps that have come from the Windows store. This method may not perfectly resolve the problem every time, but it is a step that should always be done before any others.
Next, open up the Power User options by pressing both the Windows key and the X key at the same time. Choose “Command Prompt (Admin)” from the options that appear. Then type in the commands into the prompt, one at a time:
- net stop wuauserv
- cd/windows
- rename SoftwareDistribution SoftwareDistribution.bck
- net start wuauserv
Restart your computer after these changes have been made so that all changes can take effect. You may be able to access the desired programs and apps after this is complete.
Method Two: Run Your Registry Repair Tools
Sometimes, the best way to repair Error Code 0x8024001e is to simply open up the Window Registry tools and run the repair process. This will scan your registry for any errant entries, corrupted entries, or missing entries, repairing them automatically as the device is able to do. This process may take some time to complete, so plan accordingly.
After this process is complete, it is always a good idea to restart your computer to apply any changes that have been made. Reattempt to install or run the program in question one this is done.
Method Three: Run Windows Updates as Necessary
Last, open up the Windows Update tools to check to see if any of your programs need to be updated or if your operating system needs to be updated. Install each of the updates, restarting your computer after the entire process has been completed so that they can fully take effect on your machine. You should be able to run the programs that had caused problems once this is complete.
It is important to keep up-to-date on your system and program updates to avoid future errors in installations and downloads from the Windows store.
In most cases, using the steps above should allow you to use the apps that you’ve downloaded from the Windows store without Error Code 0x8024001e popping back up. If the problem persists or if you have not been able to follow the steps listed above to remedy the error, it is a good idea to contact a qualified professional who is experienced in working with Windows 10 errors.
Method Four: Use An Automated Tool
If you wish to always have at your disposal a utility tool to fix these Windows 10 and other related issues when they do arise, download and install a powerful automated tool.
Do You Need Help with Your Device?
Our Team of Experts May Help
Troubleshoot.Tech Experts are There for You!
GET HELP
Troubleshoot.Tech experts work with all versions of Microsoft Windows including Windows 11, with Android, Mac, and more.
Share this article:
You might also like
What Is Error 103?
Error 103 is an error that is usually encountered by those who use Google Chrome. This error is usually generated because of a conflict arising between Google Chrome and the antivirus program running on the user’s computer. Primarily, error 103 is an incompatibility issue. It is not critical in nature.
However, since it will disrupt the smooth functioning of the browser, it is strongly advised to rectify this error that is generated due to any temporary conflicts between the logic of the two programs namely Google Chrome and antivirus.
In layman’s terms, it would be only justified to say that this error has a lot to do with the way programs react to each other in real-time.
Solution
Error Causes
When the error is displayed to the user, it usually states something like ‘chrome error 103 connection aborted’, ‘chrome error 103 err_connection_aborted’ or ‘Error 103 (net: ERR_CONNECTION_ABORTED): Unknown error.
This begs the question, what triggers this error? Here it is important to understand that Google Chrome constantly applies to upgrade.
In most instances, the upgrades almost go unnoticed. In the meanwhile, there are other programs running on any system such as firewall, Antispyware, or antivirus programs. All such programs govern the functionality of the web browser.
Now, when the web browser attempts to update and any programs on the system view the update as a threat, the connection to the internet will be terminated. It is also important to understand that these programs will keep you from upgrading or from doing anything with your browser.
Further Information and Manual Repair

Before we move on to the discussion of fixing the underlying causes for error 103, it is important to understand all those programs that are most likely to generate this error. A list of all such programs is outlined below as follows.
- Kaspersky Pure 3.0
- Kaspersky ONE
- Kaspersky small office security 2013
- Kaspersky internet security 2013
- Kaspersky antivirus 2013
A downside associated with error 103 is that it won’t disappear on its own. That’s why it is important to make some manual changes as there are no tools available online to rectify this error automatically. Follow the steps listed below to easily fix the problem.
- Click on the Start button.
- In the search box, enter ‘expand.exe’.
- Right-click on the file that appears and select the option ‘Open Folder Location’.
- Now, copy the file and paste it at the destination ‘C:\Windows\System32’.
- If you are not able to find the file, it is advised you copy it from Windows Installation Disk.
- Now, click on the ‘Start’ button again.
- Find and select ‘Run’.
- Now enter ‘C: ’ in the search box and press Ok.
- Now right-click anywhere on the screen, select new, and then select folder.
- Rename this folder. Change the name from ‘New Folder’ to ‘Temp’.
- Now go to the Start button again.
- Select ‘Run’ once again.
- Type ‘cmd.exe’ in the command prompt and press Ok.
- Now type Command. Press enter.
- Now type this code as it is: ‘set TMP=C:temp’ and press enter.
- Now restart the browser.
- If it fails, install Google Chrome once again.
- Just make sure everything is in sync to avoid any data loss.
Read More
Error Code0x80070426 — What is it?
When Windows evolved into Windows 10, the program known as Windows Security Essentials is no longer. It is now the program known as Windows Defender. When a computer is upgraded from a previous version of Windows up to Windows 10, the Windows Defender takes over and will replace the Security Essentials. In a small percentage of Windows 10 upgrades, something will go wrong and the new program will fail to replace Security Essentials. The result will be that the operating system has both of the programs installed. In this case, Windows Defender will not offer any protection and Security Essentials will not be able to defend either. This error code will also present itself when the Windows Mail App in Windows 10 fail to retrieve and sync email from the user’s account.
Common symptoms include:
- There will be an error message that says: “An error has occurred in the program initialization. If this problem does continue, contact your System Admin. Error code 0x80070426.”
- The computer will be left completely vulnerable to spyware and viruses.
- The Windows Mail App will not be able to retrieve mail and will not sync with the PC user’s mail.
- The user can be doing anything on their computer and the error code will show up unprompted.
- The computer will lock up, become slow, crash, or even freeze when dealing with error code 0x80070426.
- The programs from an older version of Windows do not replace the newer version from Windows 10.
Solution
Error Causes
Error code 0x80070426 will present itself when a PC user has upgraded their OS from a previous version of Windows to the new Windows 10 version. When this happens, a small portion of users will experience the disconnect between older versions of specific programs, namely the virus protection. When the previous version of the program under a different name is not completely removed and the new virus protection program is installed, the programs will cancel each other out and collectively offer no protection.
This error code may also be found when Windows 10 tries to sync the user’s email with the Windows Mail App.
Further Information and Manual Repair
There are a few methods to repair this problem. It should be noted that should anyone feel that the instructions are too complicated, they should contact a Windows repair technician to ensure that the error is fixed properly.
Method One: Uninstall Microsoft Essentials
Hold down the Windows Key and press R. Type in taskmgr into the run dialogue. You should locate the Windows Defender Service (this may show up as Windefend). Right-click on it and then choose Stop.
This will stop the program, but the program will start back up automatically when the computer restarts. While this program is stopped, uninstall Essentials.
To do this: go to Control Panel, Programs, and Features, Uninstall a Program. Alternately, you may hold down the Windows Key and press R, type in appwiz.cpl, click OK, and then locate Microsoft Essentials. Uninstall it, and then restart your computer.
After this is done, go to Settings, Update, and Security. Choose Windows Defender and ensure that Real-time protection is on. Refer back to the Task Manager, Services. Make sure that Defender service is on and running.
Method Two: If the problem occurs in the Windows Mail App
When error code 0x80070426 presents itself in the form of an error with the Mail app, it may be necessary to run an SFC scan.
Right-click on the Start menu or Windows icon, and select Command prompt. The command prompt may be navigated by using shortcut keys Win and X and then select it.
Run the command prompt and then type in sfc /scannow and then press enter. The SFC scan will be run, and be careful not to abort the process before it has finished. This will scan for any files that are lost or corrupt on the PC.
If the scan has found any corrupt files, type in this code and then hit Enter: findstr /c:”[SR]” %windir%LogsCBSCBS.log >”%userprofile%Desktopsfcdetails.txt.
To skip the repair of corrupt or missing files, type in: Dism /Online /Cleanup-Image /RestoreHealth. The details of the scan can be found on the sfcdetails.txt file that will be on the desktop.
Method Three: Use An Automated Tool
If you wish to always have at your disposal a utility tool to fix these Windows 10 and other related issues when they do arise, download and install a powerful automated tool.
Read More
Sometimes, some applications after they are installed will put their shortcut in the context menu (right-click on desktop) for easy access, most of the time these are some system tied applications like AMD and Nvidia control panels or archives like WinRAR or 7ZIP but it can happen even for some usual application to do this.
There are some applications that you use frequently and they could be worth putting in the context menu, if you want to avoid clutter on the desktop or in the taskbar this is the third place that you should consider placing shortcuts.
Doing this will require some playing and tweaking in the Windows registry editor so be careful when editing the registry since bad entries can lead to system crash or instability. Follow step-by-step instructions.
Adding apps to the context menu in the registry
Creating entry
Open the registry editor by searching Regedit and pressing enter than inside of the registry editor search for the next key:
HKEY_CLASSES_ROOT\Directory\Background\shell
Select shell and right-click on it, hover over New and in the submenu click on Key. In the next step, you need to name a key, this name will be the thing that will be shown in the context menu when you right-click on a desktop so type in the name that you would like or the name of the application that you wish to add to the menu.
If you wish you can even add a keyboard shortcut to launch this specific application. To do this select entry that you have created and edit the default value, inside the edit string in the Value data field type first & and after that key that you would like as a shortcut. Now after right click if you hit your shortcut key app will be launched right away.
Adding command
The next task is to create a command key that will actually hold the command to launch the application. Right-click on the entry that you have created, hover over New, and click on Key.
Next, you’ll need to create the command key that will actually hold the command used to launch the application. Right-click on the new Notepad key, and then choose New \ Key from the menu. Name this key ‘command’, all in lower case and without hyphens.
Now in order to finish setting the launcher, you need the full path of the file that you would like to run. Locate your file in file explorer or in another tool and copy its path by SHIFT + right-clicking on the file itself and choosing copy as path option.
Now click on the command key and double click on the default key on right to edit it, inside the field value data paste your path to executable. close and save the registry and you are done.
Read More
What is Windows Update Error 0xC1900209? Before you can install any updates on your Windows 10 computer, there are a lot of conditions that have to be fulfilled and one of these conditions is software compatibility. It is one of the important factors in installing Windows Updates. So if one of the software in your computer is not compatible with the new Windows Update for your OS, then the Windows 10 setup will not proceed and will block the installation of the new update. This both applies to the cumulative updates and feature updates. In such cases, you will get the following error message when you run Windows Update:
“0xC1900209, Incompatible software is blocking the upgrade process. Uninstall the application and try the upgrade again.”
This error message comes under the umbrella of the Windows 10 pre-upgrade validation using Setup.exe. And for you to identify the incompatible app, you need to grab a Windows 10 install image using the Windows Media Creation tool to download the suitable Windows 10 version and mount it. After that, execute the setup.exe file that’s located in the root folder of the Windows 10 install image. Once you execute the setup file, the upgrade wizard will give you a list of incompatible apps.
Once you have determined which software is not compatible with the Windows Update, there are two options you can try to resolve the Windows Update error 0xC1900209 – you can either try to update the conflicting software or uninstall it. For more details, follow the given options below.
Option 1 – Try to update the conflicting software
If you are using an older version of the software that’s in conflict with the Windows Update, you might want to update it to its latest version and then try to apply the updates again to your Windows 10 computer. You can update the concerned software by visiting the official website of the software or any of its distribution sources. On the other hand, you can also use the Check for updates feature of that particular software if it’s available.
Option 2 – Try to uninstall the conflicting software
If updating the problematic program didn’t work, the next option you can try is to uninstall it. All you have to do is follow these steps to uninstall it successfully:
- Tap the Win + R keys to open the Run dialog box.
- Then type “appwiz.cpl” in the field and tap Enter to open the Programs and Features in Control Panel.
- Next, arrange the list of installed programs in the order of the installation date.
- After that, look for the problematic program and right-click on it, and then select Uninstall.
- Once the uninstallation process is done, restart your computer and see if the Windows Update error 0xC1900209 is fixed or not.
Read More
Upgrading your computer from Windows 7 or Windows 8 to Windows 10 or even upgrading Windows 10 to a new version is not that simple. The setup initially checks for all the drivers and other software utilities installed on your computer and verifies and blockages or upgrade or upgrade blocks with respect to any of those drivers or any of those software utilities regardless if you use the Windows 10 ISO or the Windows 10 Upgrade Assistant. One of these common errors, when you upgrade or update your computer, is the “The Display is not compatible with Windows 10” error. This kind of Windows Upgrade error is related to the compatibility of the Graphics Driver installed in your computer. But worry not for this post will guide you in fixing this problem.
The “The display is not compatible with Windows 10” error has the same workarounds as the following errors:
- These devices aren’t fully compatible with Windows 10.
- The display is not compatible with Windows 10. Check with the manufacturer for support.
- The display manufacturer hasn’t made your display compatible with Windows 10. Check with the manufacturer for support.
To resolve this Windows Upgrade error, here are some suggestions that could help:
Option 1 – Check for incompatible drivers in your computer
- Open the Device Manager from the WinX Menu.
- Then expand the list for Display Adapters.
- Next, right-click on the NVIDIA Graphics Card list and select Enable.
- After that, right-click on it again and click on the “Update Driver Software…” option.
- After doing so, a new window will appear and from there, click on the “Search automatically for updated driver software” option.
- Then check if Windows is now able to detect your Graphics Card as well as the latest driver for it. If not, proceed to the next step.
- Right-click on the driver again and click on the “Update Driver Software…” option.
- Now click on the Browse my computer for driver software option and then click on Let me pick from a list of device drivers on my computer.
- Afterward, select a compatible driver for your computer named NVIDIA Graphics Card and then proceed.
- Wait for the whole process to be completed and restart your computer to successfully apply the changes made.
Option 2 – Get the latest version of Graphics drivers from the manufacturer’s website
In case you don’t know the manufacturer of the Graphics Processing Unit or GPU of your computer, you need to check first. They’re usually NVIDIA, Intel, or AMD. So if your computer’s Graphics Processing Unit is manufactured by NVIDIA, you need to get the latest version from their official website.
Option 3 – Try to install the latest Graphics driver in Compatibility Mode
If you’re not able to install the Graphics drivers you’ve downloaded, you can try installing them again but this time using Compatibility mode. Follow the steps below to do so:
- You need to download the driver and place it on your desktop.
- After that, right-click on it and select Properties.
- Next, switch to the Compatibility tab where you should see two options:
- Compatibility troubleshooter, and let Windows figure out what works best for you. If it fails, follow the next.
- Manually choose the version of Windows it was correctly working.
- You also have the option to change the DPI settings and see if that helps. Then click the Apply and OK buttons.
- Now right-click on the file and select the “Run as administrator” option to install. After that, you should now be able to change your screen aspect ratio to what you were using early on.
Note: If you have other programs that won’t work on the existing version of Windows, then make sure to run the program in a Compatibility mode.
Option 4 – Try to run the Program Compatibility Troubleshooter
You might also want to run the Program Compatibility Troubleshooter. This built-in troubleshooter is available in the Windows Update & Security section. From there, select Troubleshoot. This will find a list of programs for you and since you have already downloaded the driver files, just click on Not Listed located at the top of the program list. After that, browse and select the driver files and then let the program do its job.
Read More
Upgrading your Windows 10 computer does not always go smoothly and you often encounter not just one but various errors so, in this post, we are going to cover several Windows 10 upgrade errors such as 80240020, 8007002C, 80246007, 80070004. All these upgrade errors are related to the Windows Update folder. Thus, you need to clear the Software Distribution folder, repair the System Image and fix System Health in order to resolve all these Windows 10 Upgrade errors.
Before you get started on the steps to resolve these tons of errors, you have to disable your security program for the meantime, disconnect your peripherals, remove USBs connected to your PC and then make sure that your PC is connected to the main power supply. Once you have everything covered, carefully follow the options given below.
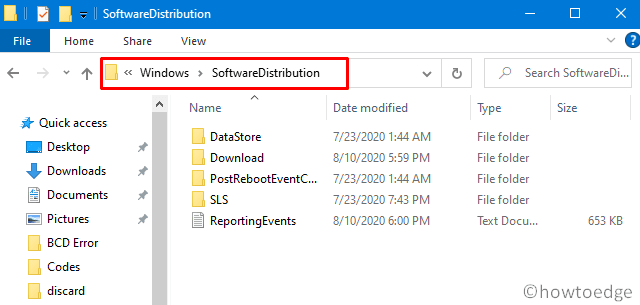
Option 1 – Delete Windows 10 Update Files in the SoftwareDistribution folder
The Software Distribution folder in the Windows operating system is a folder that can be found in the Windows directory and is used to store files temporarily which might be required to install the Windows Update on your PC. Thus, it is required by the Windows Update and maintained by WUAgent. A lot of users tried deleting the files in this folder to fix the problem and so far it has worked. Like them, you can try clearing the Windows Update cache by simply deleting the contents of the folder named “SoftwareDistribution” since Windows apparently can’t clear and re-download the update contents once they are corrupted. Thus, deleting the contents of this folder will make Windows download the contents again which will fix the problem. To do that, follow the steps below.
- Open the WinX Menu.
- From there, open Command Prompt as admin.
- Then type in the following command – don’t forget to hit Enter right after typing each one of them.
net stop wuauserv
net stop bits
- After entering these commands, it will stop the Windows Update Service and the Background Intelligent Transfer Service.
- Next, go to the C:\Windows\SoftwareDistribution folder and get rid of all the folders and files thereby tapping the Ctrl + A keys to select them all and then click on Delete. Note that if the files are in use, you won’t be able to delete them.
- Once all the contents in the Software Distribution folder are deleted, restart your PC and then go back to Command Prompt and input the following commands again.
net start wuauserv
net start bits
Since the folder has already been flushed, it will be populated afresh the instant your restart your computer and open Windows Update.
- Now Open Settings and check for Windows Updates. Windows 10 should begin the download right away.
Option 2 – Try using the DISM tool
Running the DISM Tool helps in repairing the Windows System Image as well as the Windows Component Store in Windows 10. Using this built-in tool, you have various options such as the “/ScanHealth”, “/CheckHealth”, and “/RestoreHealth”.
- Open the Command Prompt with admin privileges.
- Then type in the following commands and make sure to hit Enter right after you type each one of them:
- Dism /Online /Cleanup-Image /CheckHealth
- Dism /Online /Cleanup-Image /ScanHealth
- exe /Online /Cleanup-image /Restorehealth
- Do not close the window if the process takes a while as it will probably take a few minutes to finish.
Note: If it happens that the Windows Update client is broken, you need to run the following command to repair it then restart your PC and click on Update once again.
DISM.exe /Online /Cleanup-Image /RestoreHealth /Source:C:RepairSourceWindows /LimitAccess
Note: The Windows Upgrade error, with error code 80240020 is an expected error message that happens when the upgrade requires customer user action. Thus, you need to do the following steps to resolve this particular Windows Upgrade error.
- Tap the Win + R keys to open the Run dialog box.
- Then type “regedit” in the field and hit Enter to open the Registry Editor.
- After that, navigate to this registry key: HKEY_LOCAL_MACHINESOFTWAREMicrosoftWindowsCurrentVersionWindowsUpdate
- Now right click on WindowsUpdate located in the left pane and then create a new key and name it as “OSUpgrade”
- Next, right-click in an empty space in the left pane and create a new DWORD and name it “AllowOSUpgrade” and enter “1” as its value.
Option 3 – Try running the Windows Update in a Clean Boot State.
Putting your PC in a Clean Boot state can also help you install Windows Updates or Upgrades without any trouble because, during this state, you can start the system with a minimum number of drivers and startup programs that will surely help you in isolating the root cause of the issue.
- Log onto your PC as an administrator.
- Type in MSConfig in the Start Search to open the System Configuration utility.
- From there, go to the General tab and click “Selective startup”.
- Clear the “Load Startup items” checkbox and make sure that the “Load System Services” and “Use Original boot configuration” options are checked.
- Next, click the Services tab and select the “Hide All Microsoft Services” checkbox.
- Click Disable all.
- Click on Apply/OK and restart your PC. (This will put your PC into a Clean Boot State. And configure Windows to use the usual startup, just simply undo the changes.)
- After that, try to install the Windows Updates or upgrade again.
Read More
Social media is here to stay it seems, from Facebook, Instagram, Twitter, etc each site has its users and its rules. Companies, bloggers, public figures, and people, in general, are using them on a daily basis and some are posting cool ads, nice graphics, videos, and many more in order to gain followers or just to share something that they think is worth.

Making your post look good is somewhat essential if you plan on reaching a larger audience and Adobe’s Express aims to fill that gap. It is the latest Adobe product that is purposely made for graphic and video creation for social media.
Adobe is well known in the world of professional design in all spheres like print, web, and motion, with this application, they want to take over social media design with Express. The direct competitor to Spark and canva, Express is filled with high-quality adobe templates and some great stuff found in photoshop like automatic background removal which gives it an edge over other applications.
The good thing about Express is that there is a completely free version and premium, like its competitors but with some benefits that clearly show that Adobe is determined to place its application on top of the game. The free plan includes:
- Thousands of unique templates, design assets, and Adobe Fonts.
- A limited collection of royalty-free Adobe Stock-free collection photos.
- Basic editing and photo effects including remove background and animate.
- Create on both web and mobile.
- 2GB of storage.
For 10 USD per month of 100 USD prepaid annual fee, you get a premium plan that includes:
- All premium templates and design assets.
- The entire collection of over 160 million royalty-free Adobe Stock collection* photos.
- Over 20,000 licensed Adobe Fonts, curved type, grids, and font pairs.
- Premium features like refine cutout, resize, and graphic groups.
- Plan, schedule, and publish social media content across multiple channels.
- Add your branding, logo, colors, and fonts in one tap.
- Convert & export to and from PDFs and other file types.
- Create, manage, and share your templates and assets with Creative Cloud Libraries.
- Create on both web and mobile.
- 100GB of storage.
The application itself is incredibly easy to learn and to work with and literally, anyone can pick it up and start creating immediately. No matter are you just starting with social media or using Canva or Spark, give Express a go, make a free account and try it, I guarantee that you will find some features amazing, and its ease of use relaxing.
Read More
Raptor Lake, a new and upcoming Intel 13th generation CPU will break the 6GHz barrier for the first time ever in normal working mode, overclocked mode in Intel words will go as high as 8GHz. CPU will be 15% faster than Alder lake in single-threaded tasks and a stunning 41% faster in multi-threaded workloads.
The current world record for overclocking is 8.72GHz done with AMD FX-8370 and Intel is aiming at breaking that record with Raptor Lake, of course, this kind of extreme overclocking will require some top-of-the-line nitrogen cooling systems.

Raptor Lake will run on the current LGA 1700 socket, so you will not need to buy another motherboard for CPU and they will also be manufactured on a 10nm process which means that you will need to take care of cooling and power supply if they really go over 6GHz.
Mid-range Intel Core i5-13600K processor will come with 14 cores inside and 20 threads running at a maximum P-core frequency of 5.1GHz, while Core i7-13700K will have 16 cores and 24 threads and run on 5.3GHz max P-core frequency. Best i9-13900K will come packed with 24 cores, 8 of them will be P-cores, and the rest 16 are E-cores, and 32 threads. It will reach 5.4GHz frequency but it was stated it can go to 5.8GHz with Thermal Velocity Boost.
After this statement, we can clearly see that the 6GHz breaker CPU will probably be an i9 special KS variant. In other words, specially tested and picked existing i9 running at higher speeds as was with Alder Lake as well where normal i9-12900K ran at 5.2GHz while i9-12900KS was running at 5.5GHz.
Read More
In this post, you will be guided on how you can fix error 0x80070013 while executing various operations in your Windows 10 computer like System Restore, Windows Backup, or Windows Updates. When you encounter error 0x80070013, you will see the following error messages.
For System Restore, it states:
“System Restore did not complete successfully. Your computer’s system files and settings were not changed.
Details: System Restore failed while scanning the file system on the drive <Partition Letter>
The drive might be corrupt. You might want to retry System Restore after running chkdsk /R on this disk.
An unspecified error occurred during System Restore. (0x80070013)
You can try System Restore again and choose a different restore point. If you continue to see this error, you can try an advanced recovery method.”
Whereas in Windows Backup, it states:
“Check your backup, Windows Backup failed while trying to read from this shadow copy on one of the volumes being backed up. Please check in the event logs for any relevant errors.
The backup failed, The media is write protected (0x80070013).”
On the other hand, you will see the following error message in Windows Update:
“There were some problems installing updates, but we’ll try again later. If you keep seeing this and want to search the web or contact the support for information, this may help: (0x80070013).”
There are several suggestions you can check out to fix the error depending on where you encountered it. If you encountered it while running Windows Updates, then you can try to reset the Windows Update components or run the Windows Update Troubleshooter. And if you got the error when running System Restore, you can try to run a System File Checker scan or the DISM tool as well as the CHKDSK utility. Lastly, if you got this error when running the Windows Backup service, you can try to check its status in the Services Manager.
Error 0x80070013 in Windows Updates:
Option 1 – Try to reset the Windows Update components
- Open Command Prompt with admin privileges.
- After that, type each one of the following commands and hit Enter after you key in one after the other.
- net stop wuauserv
- net stop cryptsvc
- net stop bits
- net stop msiserver
Note: The commands you entered will stop the Windows Update components such as Windows Update service, Cryptographic services, BITS, and MSI Installer.
- After disabling WU components, you need to rename both the SoftwareDistribution and Catroot2 folders. To do that, type each one of the following commands below, and don’t forget to hit Enter after you type one command after the other.
- ren C:/Windows/SoftwareDistribution/SoftwareDistribution.old
- ren C:/Windows/System32/catroot2/Catroot2.old
- Next, restart the services you’ve stopped by entering another series of commands. Don’t forget to hit Enter after you key in one command after the other.
- net start wuauserv
- net start cryptsvc
- net start bits
- net start msiserver
- Close Command Prompt and reboot your PC.
Option 2 – Run the Windows Update Troubleshooter
You might also want to run the Windows Update Troubleshooter as it could also help in fixing error 0x80070013. To run it, go to Settings and then select Troubleshoot from the options. From there, click on Windows Update and then click the “Run the troubleshooter” button. After that, follow the next on-screen instructions and you should be good to go.
Error 0x80070013 in System Restore:
Option 3 – Try to run both Systems File Checker scan and DISM tool
Running the System File Checker scan as well as the DISM tool can help you resolve error 0x80070013 while performing System Restore. Refer to these steps to do so.
- Open the Command Prompt with admin privileges.
- After opening Command Prompt, execute this command to run a System File Checker scan: sfc /scannow
- Once the scan is completed, restart your computer and then see if the error is now fixed. If not, you can run the DISM tool.
- Open Command Prompt with admin privileges again.
- Then type in the following commands and make sure to hit Enter right after you type each one of them in order to properly run the DISM tool:
- Dism /Online /Cleanup-Image /CheckHealth
- Dism /Online /Cleanup-Image /ScanHealth
- Dism /Online /Cleanup-image /Restorehealth
- Do not close the window if the process takes a while as it will probably take a few minutes to finish.
Option 4 – Run the CHKDSK utility
- In the Windows Search box, type “command prompt” and from the search results, right-click on Command Prompt and select “Run as administrator”.
- After opening Command Prompt, type this command and tap Enter: chkdsk <Partition Letter>: /f /r /x /b
- The command you entered will start to check for errors and fix them automatically. Else, it will throw an error message saying, “Chkdsk cannot run because the volume is in use by another process. Would you like the schedule this volume to be checked the next time the system restarts? (Y/N)”.
- Tap the Y key to schedule Disk Check the next time your computer restarts.
Error 0x80070013 in Windows Backup:
Option 5 – Try checking the status of the Windows Backup Service
- First, you need to tap the Win + R keys on your keyboard to open the Run dialog box.
- Next, type “services.msc” in the field and click OK or tap Enter to open the Windows Services Manager.
- After that, you will see a list of services and from there, look for the Windows Backup Service and double click on it to open its Properties.
- Then check if its Startup type is set to Disabled. If it is, then change it to “Manual”. Note that this service is essential as it provides backup and restores capabilities.
- Now click on the Apply and OK buttons to save the changes made and then restart your computer. Check if the error is now gone.
Read More
OEM Partition, also known as System Reserved Partition, is placed by the OEM to help users recover their computers or bring back the original state of the computer when it was bought. If you’ve observed that a part of your hard drive says “Healthy (OEM partition)” in the Disk Management and it occupies space in GBs, then this means that it’s normal and there’s nothing to worry about except that part of the storage space is not available and even when you right-click on it, the only thing it displays is the Help menu. Thus, in this guide, you will be guided on how you can merge as well as delete an OEM partition in your Windows 10 computer.
Since the Disk Management tool in Windows won’t let you merge or delete the OEM partition, you can just use the built-in command-line tool known as Diskpart. Note that you have to be extra careful when you run the commands as it could mess your computer up and before you proceed with the instructions provided below, make sure that you create a System Restore point first. Once you have that covered, follow the instructions below.
Step 1: Tap the Win + R keys to open the Run dialog box and type “cmd” in the field and tap Enter to open the Command Prompt.
Step 2: Next, execute this command to launch the Diskpart tool: diskpart
Step 3: Execute this second command to view the list of the disks in your computer: list disk
Step 4: Now select the disk you want to manage by executing this command: select disk x
Note: In the command above, replace “x” with the letter of your disk.
Step 5: After that, execute this command to display all the volumes or partitions: list partition
Step 6: Now execute this command to select the partition you want to delete: select partition x
Note: You have to replace “x” with the partition you want to delete.
Step 7: Once done, execute this command to delete the selected partition: delete partition override
Step 8: Afterwards, execute this command to merge the OEM partition with the adjoining value: Extend
Note: if you only want to merge part of the partition, you need to use this command “extend [size=<size>]”. For instance, you want to extend its size by 5GB, then you need to type “Extend size=5000”. The size you set is the size you select from the OEM partition. This will extend the selected volume by size in MB or megabytes.
Read More
Copyright © 2023, ErrorTools. All Rights Reserved
Trademark: Microsoft Windows logos are registered trademarks of Microsoft. Disclaimer: ErrorTools.com is not affiliated with Microsoft, nor claims direct affiliation.
The information on this page is provided for information purposes only.
Did you also encounter the nagging Error 0x8024001e in Windows 10? The code is meant for WU_E_SERVICE_STOP. The issue mostly occurs during the installation of Windows Update moreover, downloading apps from Microsoft Store.
The main cause of this error is the damaged files in Windows Update store or undefined path of Temporary folder of Internet Explorer. Furthermore, the presence of faulty system files and the component store can also lead to the 0x8024001e in Windows 10. So, in this article, we will discuss some workarounds that will help you to bypass this issue and continue the updates.
Fix: Error 0x8024001e Windows 10
Run Windows 10 Update Troubleshooter
Step-1: Open Windows Settings app by pressing the Win + I hotkey. Choose Update & Security category from the main interface of the application,
Step-2: Click Troubleshoot on the left pane of the following page.
Step-3: Switch to the corresponding right pane and locate Windows Update. Select it and click Run the troubleshooter button (see screenshot).
Step-4: Wait for the troubleshooter to detect and repair the damaged files.
Once the damaged or corrupted files of Windows Update store are repaired, you will not come across Error 0x8024001e Windows 10.
Reset Windows Update store
In most cases, the presence of damage files in Windows Update store is the possible cause behind the occurrence of Error 0x8024001e in Windows 10. So, the best workaround is to reset Windows Update store.
- First of all, open Run dialog box and to do so, press Win + R shortcut combination.
- Here, type CMD on the text field and press Ctrl + Shift + Enter hotkey altogether. This will prompt UAC on the PC screen, click Yes.
See Open Command Prompt as Admin From Run Dialog.
- Type in or copy/paste the below-given commands and hit Enter at the end of each syntax.
net stop wuauserv
rename c:\windows\SoftwareDistribution softwaredistribution.old
net start wuauserv
Note – In case, the operating system refuses to terminate Windows Update services, restart Windows 10 PC and after startup, repeat the above steps once more.
Internet Explorer Temporary Folder
Experts are also with a view that update problems, download issues, and troublesome apps are often caused by an undefined path to Internet Explorer temporary folder.
- Go to Cortana search, type Internet Options and hit Enter.
- Be on the General tab of Internet Properties. Moving ahead, make a click the Settings button under Browsing history category (see snapshot).
- In the Temporary Internet Files tab, check the current location as shown in the below screenshot. Here, it is important that the path should not point to some other drive. However, in case, if the location is not correct, open Internet Properties again.
- Switch to the Advanced tab and click the Reset button.
Once you assign the correct the path, reboot Windows and check for the Error 0x8024001e Windows 10.
Restart Windows 10
If you encounter Error 0x8024001e during an app update, you need to simply execute a complete reboot. For many users, a complete reboot is enough to get rid of this update error.
Use System File Checker
Another possible solution is to first detect and repair the faulty system files in Windows.
- Launch Cortana, type “CMD” and right-click on the Command Prompt (Desktop app) result. Select Run as administrator from the list of options.
- Upon the UAC prompt, hit Yes.
- Type in the given command and hit Enter to initiate the scan for problematic system files.
sfc / scannow
Wait until the scan is complete. If any corrupt or faulty files are found, the tool will make an attempt to repair them.
SFC /Scannow, DISM.Exe, CHKDSK Windows 10.
Check Windows Component Store Integrity
Sometimes Error 0x8024001e Windows 10 also occurs due to the broken packages in the Windows component store. In such cases, the DISM command is used to check as well as repair those Windows component store integrity.
- Get access to the administrative Command Prompt using any of your preferred methods.
- Type in the following command to check the component storage for damage. This command will take several minutes but will not repair anything.
Dism /online /cleanup-image /ScanHealth
- Next, you need to check for the damage of Component Store. It checks registry entries and reports if it succeeds in finding any damages. Moreover, also tells you whether those damaged components can be repaired.
Dism /online /cleanup-image /CheckHealth
- Moving ahead, give an attempt to fix the broken packages with the following command.
Dism online /cleanup-image /RestoreHealth
After executing the commands, check for the error.
Run Windows Store Apps Troubleshooter
If you face Error 0x8024001e Windows 10 while updating any Store application, then you need to troubleshoot the Store apps.
- Get access to the built-in Settings application by pressing Win logo + I shortcut keys and click Update & Security category.
- Choose Troubleshoot section on the left sidebar.
- Move to the right side and find out Windows Store Apps. Select it and click Run the troubleshooter button.
- Wait for the scan to get complete and then check for the above-mentioned error. Hopefully, you will be able to update the Store applications again without any errors.
Reset Microsoft Store Cache
On the taskbar search field, type the following command and hit Enter. This will instantly execute the command and reset Windows Store cache.
wsreset.exe
Uninstall and Re-install the Problematic App
If you are still facing Error 0x8024001e Windows 10 and is unable to update applications from Microsoft Store, then simply uninstall and reinstall the same.
- Right-click on Start and choose Apps and Features from the Win+X menu.
- On the right pane of the following page, locate and select the problematic app. Click Uninstall.
- After you successfully uninstall the app, launch Microsoft Store and download the app again.
Hopefully, the above-mentioned workarounds will help you to bypass Error 0x8024001e Windows 10 and resume Store and system updates normally.
That’s it!!!
Are you struggling with an Update Error Code 0x8024001E when upgrading Windows to its next available Build version? If yes, then follow our nine working solutions that might help you to overcome this issue in no time.
This error typically occurs due to the presence of corrupt DLL files, missing or damaged registry entries, or because of malware infection. Apart from these usual reasons, this issue might also occur when you download and install a broken or incomplete patch update on your Windows PC.

To fix this, make sure to first remove any third-party antivirus (if exists any). Next, boot into Safe Mode and try the below workarounds one after another. Safe Mode ensures no new types of error codes appear in the meantime.
Solutions List
- Check Network Connectivity
- Update Device Drivers
- ResetWinsock
- Run SFC/ DISM
- Restart Windows Update Services
- Delete SoftwareDistribution and Catroot2 Contents
- Run Startup Repair
- Use System Restore Points
- Clean Install Windows
1] Check Network Connectivity
Downloading upgrade files requires a good internet connection. If not, this might miss some of the key files that result in an error code 0x8024001e. In case you find any trouble with the Network, make sure to reset your network.
2] Restart the Computer
Rebooting Windows often solves several network-related bugs and errors. To shut down your PC properly, you may use the following steps –
- Minimize all of the current windows and press Alt+F4.
- When the Shutdown Window prompts, hit OK.

3] Update Device Drivers
The presence of corrupt or outdated device drivers may also result in similar errors. What you can do is open the device manager and check whether your computer has any obsolete device drivers that require updates. Here’s how to do this –
- Press WinKey+R to start the Run dialog.
- Type “
devmgmt.msc” at the void and hit Enter to launch Device Manager. - Click “>” left of the Network Adapters to view the drivers it includes.
- Right-click on each one of the drivers listed inside and select “Update driver“.

- Choose “Search for drivers online” on the succeeding window.
- Next, follow the on-screen instructions to complete the remaining steps.
- Once over, Restart Windows so that the changes made above come into effect.
Now, check whether you still encounter the 0x8024001e error or not. If yes, then try the below workarounds –
4] Reset Winsock
If you still receiving the error, try resetting the Winsock. Here are the essential steps to work upon –
- First of all, open Command Prompt as Administrator.
- On the elevated console, copy/paste the below code and hit Enter –
netsh winsock reset
- Wait for the Command Prompt to reset the Winsock.
- Once done successfully, Restart the computer to see the effects.
5] Run SFC/ DISM
Sometimes the update error 0x8024001e occurs because of missing or damaged system files or Windows images. To fix this, you must run SFC and DISM codes separately. Here’s the tutorial –
- Jointly press “Win+S” to open the Search UI.
- Type “cmd” in the text field, right-click on the top result and select “Run as Administrator“.
- Now, copy/paste
sfc/ scannownear the blinking cursor and press the Enter key.

- This usually takes 15-20 minutes to scan and repair corrupt system files. In certain cases, this might take even more time, so wait accordingly.
- Once over, execute the below code to fix any error inside the Windows Image.
DISM /Online /Cleanup-Image /Restorehealth

- This process again might take a long time, so be patient and don’t end in the ongoing process. Otherwise, some other system errors occur.
6] Restart Windows Update Service
At times, Microsoft Update automatically stops by itself. If that’s the case, this will stop any update services as well thus causing the 0x8024001e error to occur in the first place. You may check whether this indeed is the case or not. In case the Update service is found stopped, restart it back and the bug resolves immediately. Here’s how to proceed –
- Right-click on the Win icon and hit “Run“.
- Type “
services.msc” inside and click OK to start the Services window. - Scroll down to Windows Update in the list of services, right-click on it, and hit Start.

Note: If this is already running, better stop this first then re-enable it.
- Restart the computer to incorporate the above changes.
- Now, check whether the error still exists or has vanished.
7] Delete SoftwareDistribution and Catroot2 Contents
The Update Error 0x8024001e may occur even while the Update service is running in the background. This is due to some corruption inside the SoftwareDistribution or Catroot2 folders. To get rid of this error, you must clear all of the contents inside both these folders. Here’s how to perform this task –
Note: Make sure to stop the Windows Update service before following the below steps. Just do exactly as discussed in the above method and choose “Stop” instead of “Start”.
- After stopping the Update service on the Services window, navigate to the following path –
C:\Windows\SoftwareDistribution
- Press Ctrl+A to select all items, right-click anywhere and choose “Delete“.
- Do the same for the Catroot2 folder. You may locate this browsing at the below address –
C:\Windows\System32\catroot2
- After deleting the contents successfully, go back to the Services window.
- Do the right-click on Windows Update service and hit “Start“.
- Now, Restart the computer so that the changes performed come into effect from the next login.
8] Run Startup Repair
A corrupt entry inside the Registry may also result in the 0x8024001e error. In order to fix this, you should use the Automatic Repair tool and this will automatically find and fix the corrupt entries. Here’s how to proceed –
- Press Win+I to launch the Settings UI.
- Select Update & Security thereafter Recovery on the left column.
- Jump to the adjacent right and click “Restart now” under the Automatic Repair section.
- When the PC reboots, click
Troubleshoot > Startup Repair.

- This will restart the computer. If there appears a prompt asking to select the account, choose the Administrator one.
That’s it, the automatic repair will search for any corrupt entries inside the registry and repair them (if found).
9] Use System Restore Points
If you have previously created any restore points in the past, try using them. If not, skip to the last workaround. Here’s how to use the restore points on Windows 10 Machine.
What if the error 0x8007025D is still occurring?
Hopefully, the error 0x8007025D must have been resolved by now. However, if it does appear again, you are left with only two options now and they are “Reset this PC” or “Clean Installation of Windows“. Choose whichever method suits you the most.
That’s it, I hope the above set of solutions indeed helps to fix the 0x8024001E error on your Windows PC.
If you’re trying to update your Windows 10 or Windows 11 PC, but can’t because
of the frustrating «0x8024001e» error then you’re in the right place.
This common problem, which sometimes shows up as a simple ‘Error encountered’
message or with the code «0x8024001e» in the Windows Store, can stop your
system updates and application installations from proceeding. You might see it
as a failed update notification, leaving you stuck. In this article, we will
guide you through understanding what causes this error. We will provide
several effective methods to resolve the code 0x8024001e microsoft store issue
and get your system back on track. So let’s get started!
- How to Recover Data when Error Code 0x8024001e Appears?HOT
- Way 1: Use Windows Troubleshooter
- Way 2: Reset Windows Store’s Cache
- Way 3: Rename the Software Distribution Folder
- Way 4: Relaunch Microsoft Update
- Way 5: Reset Windows Update Components
Part 1: What Cause Error Code 0x8024001e?
Now, before we get into the solutions, let’s first understand what makes
error code 0x8024001e occur. Preventing it in the future will be easier if
you know the root cause. Here are some common culprits behind this
frustrating issue:
-
Damaged System Files: The error occurs when vital system files are
missing or corrupt usually due to improper shutdowns or incomplete
installations. -
Old Operating System: If you run an old version of Windows, and
there is an update for the new version, the conflict may result in
0x8024001e error code. -
Network Issues: This error could occur if you have a poor or
unstable internet connection which can mess up the update process. -
Registry Problems: Corrupted registry keys, sometimes caused by
faulty software installations, can interfere with Windows Update. -
Malware Infections: The error is triggered by viruses or malware
damaging system files and stopping updates.
Note:
If you try to fix these issues yourself, you might accidentally make
things worse or lose data. If you see this error, it’s best to stop using
the device and use a professional recovery tool like
4DDiG Data Recovery first.
Part 2: How to Recover Data when Error Code 0x8024001e Appears?
When dealing with the troublesome 0x8024001e error, data loss can be a real
concern. Fixes for this Windows Update issue sometimes involve system
changes that, if unsuccessful, can lead to lost files.
4DDiG Data Recovery
comes in handy at this point.
It’s specifically designed to recover data after system errors and update
problems, like those linked to 0x8024001e. In case you lost some data as a
result of this error, or it made your system unstable and you lost data,
4DDiG will scan your drives to locate and restore
deleted files.
This robust recovery is built precisely for scenarios where Windows Update
just went wrong, and an essential tool when faced with the 0x8024001e error.
-
Recovery from Crashed PC: This feature helps you to retrieve data
if your PC does not boot after 0x8024001e causes system instability. -
Support for Various File Systems: Can handle NTFS, FAT and exFAT so
it is compatible with most Windows systems affected by update errors. -
Preview Before Recovery: This allows you to verify the correct
files before recovery, which is helpful when dealing with potential file
corruption. -
Advanced Scanning Algorithms: Locates lost files effectively from
system errors or update disruption.
Here’s how you can use 4DDiG to recover data lost after encountering error
0x8024001e:
-
Select the Affected Location
Download and launch 4DDiG.
Choose the disk where you lost data due to the 0x8024001e error. Click
«Start» to initiate the scan. -
Scan for Lost Files
4DDiG will thoroughly scan the chosen
location. You can pause or stop if you find your desired files. Use
filters to narrow your search if needed. -
Preview and Recover Data
Once the scan is complete, preview
the recoverable files. Select what you need, click «Recover,» and
choose a safe location (not the original disk) to save them.
Part 3: How to Fix Error Code 0x8024001e?
With your data secured, it’s time to address the root of the problem. Let’s
explore some effective methods to resolve error code 0x8024001e and get your
Windows updates back on track.
Way 1: Use Windows Troubleshooter
If you have issues with Windows, you can use the built in troubleshooters
that will automatically diagnose and fix common problems. Start with the
Windows Update Troubleshooter if you get error 0x8024001e. It’s intended to
find the problems in Windows update components.
Here’s how to use it:
-
First, you need to open your settings. Press the Windows key on your
keyboard and click the «Settings» gear icon. In the Settings
menu, find and select «Update & Security.» -
From the options presented, choose «Troubleshoot.» Then, click on
«Additional troubleshooters.» This will open a list of available
troubleshooters. -
Scroll down and find «Windows Update» then click «Run the troubleshooter«. Follow the on screen instructions that appear. The troubleshooter
will scan for problems. -
Restart your computer and check windows update again. This tool can
resolve update-related errors effectively.
Way 2: Reset Windows Store’s Cache
A full or corrupted Windows Store cache may sometimes interfere with updates
and lead to 0x8024001e error sometimes. Often resetting the cache can solve
this. Clearing the cache resolves the problems with application installation
or update.
Here’s how to do it:
-
Press the Windows key on your keyboard. Then type «wsreset» into
the search bar. You’ll see «wsreset» appear as a search result. -
Right-click on «wsreset» and select «Run as administrator.» A command prompt window may briefly appear and disappear. This
action will reset the Windows Store’s cache. -
Restart your computer. After restarting, try running Windows Update
again to see if the error is resolved. This is the simple process to
reset the windows store cache.
Way 3: Rename the Software Distribution Folder
The Software Distribution folder stores temporary files related to Windows
Updates. If you’re having issues with corrupted or incomplete update files,
then this can be resolved by renaming this folder. It helps in making
Windows to recreate a fresh folder.
Here’s how to do it:
-
Open the «Run» dialog box by pressing the
Windows key + R simultaneously. Type «services.msc» and
press Enter. This will open the Services window. -
Scroll down and find «Windows Update» in the list of services.
Right-click on it and select «Stop.» This temporarily disables
the Windows Update service. -
Open File Explorer and navigate to «C:\Windows.» Find the
«SoftwareDistribution» folder. Right-click on it and select
«Rename.» Rename it to «SoftwareDistribution.old» or
something similar. -
Go back to the Services window (from Step 1). Find «Windows Update,» right-click on it, and select «Start.» This restarts the
Windows Update service with the renamed folder. Now check for updates.
Way 4: Relaunch Microsoft Update
Sometimes, simply restarting the Microsoft Update service can resolve
underlying issues causing the 0x8024001e error. This process can help to
refresh the service. It ensures that the update process starts cleanly.
Here’s how to do it:
-
Open the «Run» dialog box by pressing the
Windows key + R simultaneously. Type «services.msc» into
the box and press Enter. This will open the Services window. -
Scroll down the list and find the «Windows Update» service.
Right-click on it. If the service is already running, select
«Restart.» -
If the service is not running, select «Start.» Wait for the
process to complete. This will relaunch the Windows Update service. -
After that, try running Windows Update again. This can often resolve
temporary glitches causing the error code.
Way 5: Reset Windows Update Components
If 0x8024001e error is caused by more in depth issues with the Windows
Update components, it may be fixed by resetting them. It involves stopping
of related services, renaming of key folders and restart of services.
Corrupted update components can prevent successful updates.
Here’s how to do it:
-
Open the Windows search bar, type «cmd,» right-click on «Command Prompt,» and select «Run as administrator.» This opens the Command
Prompt with administrative privileges. -
Stop the necessary services by typing the following commands into the
Command Prompt, pressing Enter after each one:“net stop wuauserv”
“net stop cryptSvc”
“net stop bits”
“net stop msiserver”
-
Rename the SoftwareDistribution and Catroot2 folders by typing these
commands, pressing Enter after each:ren %systemroot%\SoftwareDistribution SoftwareDistribution.bak
ren %systemroot%\system32\catroot2 catroot2.bak
-
Restart the services you stopped in Step 2 by typing these commands,
pressing Enter after each one:“net start wuauserv”
“net start cryptSvc”
“net start bits”
“net start msiserver”
-
Close the Command Prompt and restart your computer. After restarting,
try running Windows Update again.
Part 4: Frequently Asked Questions
Q 1: What is the error code 0x80070570 in Excel?
Ans: Error code 0x80070570 in Excel means a file is corrupt or
incomplete. It usually occurs when trying to open or save a damaged file.
Q 2: Where is the Windows Store apps troubleshooter?
Ans: Windows Store apps troubleshooter is available in the Settings
menu. Head over to Update & Security > Troubleshoot and pick Windows
Store Apps.
Q 3: How do I reset a Windows Update error?
Ans: You can use the Windows Update Troubleshooter to reset a Windows
Update error. It automatically detects and fixes common update problems.
Q 4: How do I recover a failed Windows Update?
Ans: If Windows update fails, you can run the Windows Update
Troubleshooter to recover a failed Windows Update. If that doesn’t work, try
manually resetting the Windows Update components.
Final Words
If you get error code 0x8024001e while trying to update your Windows system,
you’ve hit a frustrating roadblock. In this article, we have provided
several ways you can use to solve this error. If you face data loss during
the fixes above, 4DDiG Windows Data Recovery can help you to recover
your precious files. Don’t let update errors compromise your data or system
stability.
William Bollson (senior editor)
William Bollson, the editor-in-chief of 4DDiG, devotes to providing the best solutions for Windows and Mac related issues, including data recovery, repair, error fixes.