
Windows Update is a great service developed by Microsoft that lets you update the service pack and the patches for the operating system on a regular basis. But it also can’t be denied that users often encounter error codes while updating their Windows devices. Today in this blog post we are going to explain a similar type of common error that is known as Update Error 0x80240017.
This error usually occurs after a failed update performed by Windows Update. It can also appear if you install a third-party tool and in return, your system files get corrupted or damaged. If you’re currently facing this particular problem, the methods below might help you to deal with it.
Solution for Windows Update Error 0x80240017
To fix Windows Update Error 0x80240017, follow the below steps –
Solutions List
- Run Windows Update Troubleshooter
- Reset Windows Update Components
- Run SFC and DISM Tools
- Manually Install Pending Windows updates
- Reset your PC
1] Run Windows Update Troubleshooter
Windows 10 Update errors are a common problem that sometimes occurs temporarily. Therefore we suggest you run the Update troubleshooter and check if your Windows version is capable of fixing it automatically. Here is a quick guide that will help you to run the Windows Update Troubleshooter –
- Click on the Start button and select the Settings (gear icon) option.
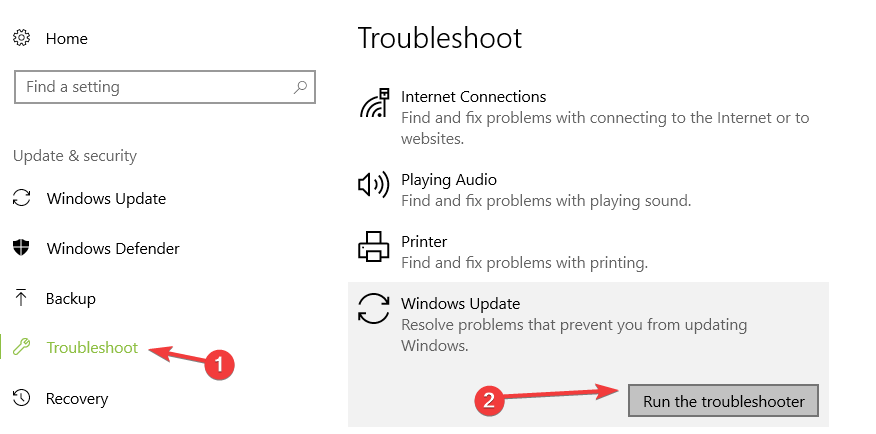
- Select the Update & Security category > Troubleshoot tab.
- Switch to the right pane and select “Additional troubleshooters“.
- Next, go to the “Get up and running” section, and locate Windows Update.
- Once you find it, select it and then hit Run the troubleshooter.

- This will start scanning to detect any problem in your device.
- Once it completes the process, follow the on-screen instructions to finish the steps.
- Now restart your computer and check if the problem still exists.
If you are getting this error code on Windows 11, you may find the Windows update troubleshooter’s link at the following path –
Win + I > System > Troubleshoot > Other troubleshooters > Windows update > Run.
2] Reset Windows Update Components
If the problem is not solved, try to reset Windows Update components manually. This method is known to have a higher degree of success in fixing the Update error code. So, let’s give it a try.
- Right-click on the Start menu and select the Run option from the menu list.
- In the dialog box, type “cmd” and press Ctrl+Shift+Enter to open the elevated Command Prompt.
- At this time, UAC prompts on the screen, tap Yes to give your consent.
- Now type the following codes one after another and press Enter after each one.
 net stop wuauserv
 net stop cryptSvc
 net stop bits
 net stop msiserver
- Doing so will execute the above command and as a result, it stops certain basic services.
- Next, rename the SoftwareDistribution and Catroot2 folders using the below two codes –
Ren C:\Windows\SoftwareDistribution SoftwareDistribution.old
Ren C:\Windows\System32\catroot2 Catroot2.old
- Now you need to restart the services that you stopped earlier. To do that, type the following codes and hit Enter separately –
net start wuauserv
net start cryptSvc
net start bits
net start msiserver
- Here you need to restart your Windows to apply the changes.
- Once your device starts up, go to Settings > Update & Security > Windows Update.
- From here, move to the right pane and Check for Updates.
- If there you find any pending updates then download and install them.
In case resetting Windows components didn’t resolve the problem, then move down to the next potential method.
3] Run SFC and DISM Tools
If some system files get damaged or corrupted, this may be the reason for update issues and errors. Thanks to the System File Checker and DISM tool using which you may quickly get out of this problem. These tools will scan your system and detect the corrupted files that will be replaced or repaired after executing some commands. Here is how to do it:
- Go to your taskbar, then right-click on the Start button.
- Choose Run from the menu list.
- Type “cmd” in the text area and then press Ctrl + Shift + Enter shortcut key.
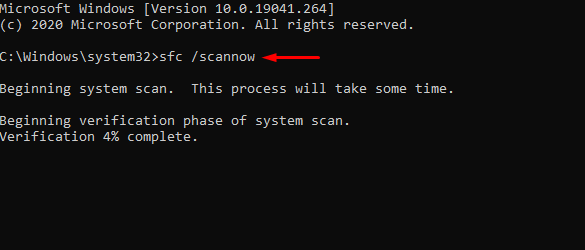
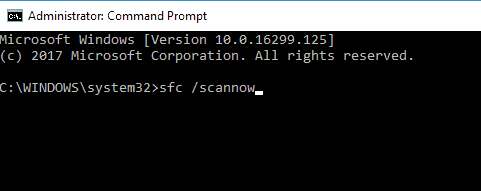
- In the elevated command prompt, type “
sfc /scannow” and then hit Enter. It will scan all protected system files.
- Once it completes, close the command prompt window and restart your PC.
Now try to download and install the updates to see if the update error is fixed now. If you’re still seeing the error code 0x80240017, then run the DISM tool so that it will replace the corrupted system files.
It requires an internet connection to download healthy files from the internet. So, make sure your internet connection is working properly, and then execute the below codes on the elevated command prompt.
DISM /Online /Cleanup-Image /ScanHealthNote
DISM.exe /Online /Cleanup-image /RestorehealthNote
Now hit enter to complete the process. After that, close the window > restart your computer, and see if the error still persists.
4] Manually Install Pending Windows updates
Resetting update components should resolve errors of any kind. However, if you are still struggling to update your operating system, you may get the pending standalone package from Microsoft Update Catalog. After downloading the setup file, double-click on it to begin its installation.
If you don’t know how to work on this aspect, read this tutorial.
5] Reset your PC
If none of the above methods help you resolve this issue then our last resort is to reset your Windows device. This will remove all the applications you have installed while retaining all the data intact. Therefore I would recommend you backup your important files and folders before you begin the process. In case you created it already then start the procedure by following the below steps –
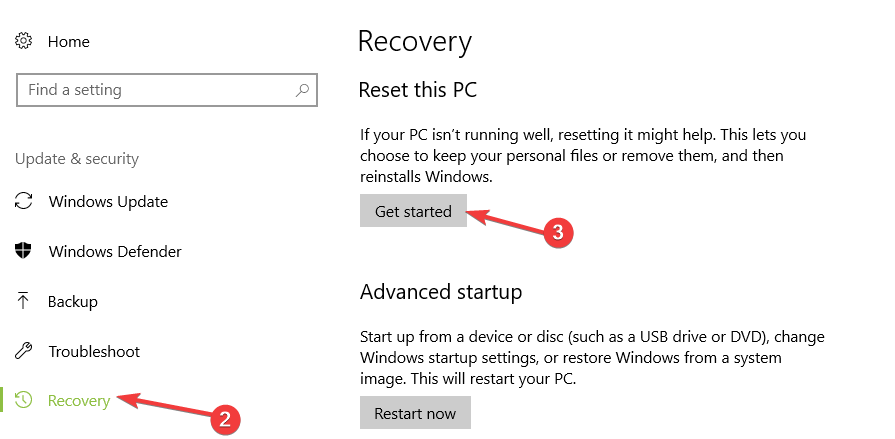
- Right-click on the Start menu and select Settings > Update & Security.
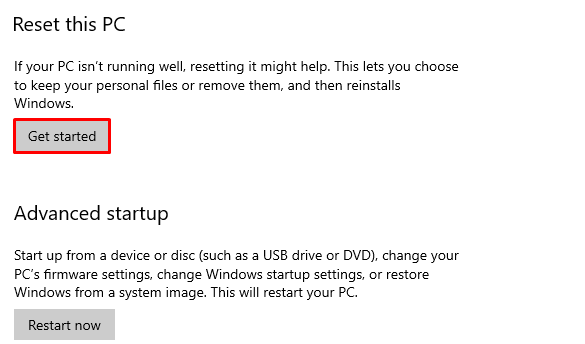
- Select the Recovery feature and move to the right pane of the screen.
- Under Reset this PC, click on the Get started button.
- Then follow the on-screen instructions to finish the Reset process.
- Once it completes, restart your Windows 10 device.
- Check again if this method fixed the problem.
That’s it, I hope this article helps you to fix the Update Error 0x80240017. If you have any queries or suggestions, let us know in the comment section.
Table of contents
- What Causes the 0x80240017 Error?
- Solution 1: Running the Windows Update Troubleshooter
- Solution 2: Resetting the Components of Windows Update
- Solution 3: Running the System File Checker
- Solution 4: Updating your Drivers
- Option 1: Via the built-in Device Manager in your PC
- Option 2: Going to the manufacturer’s website to get the latest drivers
- Option 3: Automating the process with the help of Auslogics Driver Updater
In most cases, updates are useful in fixing bugs and introducing new features. However, they are still vulnerable to errors and other issues.
You probably found this blog post because you wanted to know how to fix the Windows Update Error 0x80240017. Well, you’re in luck because we have several solutions for you. By the time you’re done reading this article, you will have an in-depth knowledge of what causes the 0x80240017 error. You will also be able to get rid of the problem without much effort.
What Causes the 0x80240017 Error?
So, you might ask, “Why do I get the Error 0x80240017 in Windows 10?” There are several reasons why this error code shows up. For one, you might have recently installed a third-party application or a Windows update which damaged the system files. It is possible that the installation was incomplete or that there were applications that were improperly deleted. Regardless of the cause of the problem, our solutions will allow you to fix the Windows Update Error 0x80240017.
Solution 1: Running the Windows Update Troubleshooter
One of the great things about Windows 10 is that it contains built-in troubleshooters for common issues people may encounter while using the OS. Since the Error 0x80240017 generally has something to do with Windows Update, the first solution you can try is running its troubleshooter. Here are the steps:
- On your keyboard, press
Windows Key+I. Doing this should open the Settings app. - Select Update & Security.
- Go to the left-pane menu, then click Troubleshoot.
- Now, go to the right pane and select Windows Update.
- Click the Run the Troubleshooter button.
- Wait for the troubleshooter to detect the existing issues on your computer. Follow the on-screen instructions to complete the repair process.
- Restart your PC, then try installing the updates again to see if the Error 0x80240017 is gone.
Solution 2: Resetting the Components of Windows Update
Windows Update is supposed to run automatically and discreetly in the background. If the Error 0x80240017 is keeping it from downloading and installing updates successfully, you can try resetting its components. To do that, you need to follow the instructions below:
- Go to your taskbar, then click the Search icon.
- Type
Command Promptinside the search box. - Right-click Command Prompt from the results, then select Run as Administrator.
- Run these commands at once:
net stop wuauserv
net stop cryptSvc
net stop bits
net stop msiserver
ren C:\Windows\SoftwareDistribution SoftwareDistribution.old
ren C:\Windows\System32\catroot2 catroot2.old
net start wuauserv
net start cryptSvc
net start bits
net start msiserver
pause
- Wait for the process to complete, then close Command Prompt.
- Try running Windows Update again, then check if the error is gone.
Solution 3: Running the System File Checker
As we’ve mentioned, the Error 0x80240017 shows up due to missing, damaged, or corrupted system files. In this case, running the System File Checker (SFC) will allow you to resolve the issue. An SFC scan should be able to detect and repair system-related issues. You can perform one by following the steps below:
- Go to your taskbar, then right-click the Windows icon.
- Select Command Prompt (Admin) or Windows PowerShell (Admin) from the options.
- Now, run the following command:
sfc /scannow
- Once the scan and repair processes are complete, close Command Prompt or Windows PowerShell.
- Restart your PC.
- Download and install the updates again to see if the Error 80240017 is gone.
Fix this issue quickly
You can try using a safe and totally free tool developed by the Auslogics team of experts.
A few simple steps to troubleshoot the issue:
Download the tiny Auslogics TroubleShooter tool.
Run the application (no installation is needed).
The app will check for the issue mentioned in the article. When the scan is done, check that this is the issue you were looking to solve and click ‘Apply now’ to apply the recommended fix.
You can use the app to troubleshoot other malfunctions for free by simply typing in a brief description of the issue your PC is experiencing. Or you can scan your PC for performance issues using the My Scanner tab.
Solution 4: Updating your Drivers
If there are outdated or missing drivers in your computer, Windows Update will not run successfully. As such, we recommend updating your drivers. There are three ways to do this:
- Via the built-in Device Manager in your PC
- Going to the manufacturer’s website to get the latest drivers
- Automating the process with the help of Auslogics Driver Updater.
Option 1: Via the built-in Device Manager in your PC
- Click the Search icon on your taskbar.
- In the search box, type
Device Manager, then pressEnter. - Expand the contents of the first category.
- Right-click the first device, then select Update Driver. Perform this step for all the devices under the category.
- Make sure that you update all the drivers under all the categories.
Option 2: Going to the manufacturer’s website to get the latest drivers
Even if you’ve updated all your drivers via the Device Manager, your system can still miss an update or two. Therefore, you need to go to the manufacturer’s website to get the latest version of the drivers. Keep in mind that you must do this for all the devices installed in your PC. Moreover, you need to ensure that you get the versions that are compatible with your system. Otherwise, you might end up with system instability issues.
Option 3: Automating the process with the help of Auslogics Driver Updater
As you can see, manually updating your drivers can be risky and time-consuming. Thankfully, there is an easier and more reliable option. You can use Auslogics Driver Updater to fix all your driver-related issues at once. After activating this tool, you simply need to click a button and it will automatically recognize your operating system version and processor type. After that, Auslogics Driver Updater will look for the latest manufacturer-recommended drivers for your computer. There is no need to worry about making mistakes and exerting too much effort because Auslogics Driver Updater will make the process more convenient.
Which of these solutions is the easiest to follow?
Join the discussion below and share your answer!
It is very frustrating to encounter the error code 0x80240017 when you try to update your Windows. But luckily, there are multiple feasible and efficient methods in this post to fix this error. You can also find other update errors and solutions from the MiniTool website.
As you know, Windows 10 has become the most popular operating system now, and the Windows Update feature is very helpful to fix bugs and bring in new features. Nevertheless, there are still some errors that will occur when you updating your operating system.
One of the Windows Update errors is the 0x80240017 error. But you don’t need to worry about it because there are multiple workable methods to fix the error in this post.
Causes of the 0x80240017 Error
Before you begin to fix the 0x80240017 error, you’d better know the causes of the Windows 10 update error 0x80240017. I have listed some causes below:
- Incomplete Windows update installation.
- Damaged or wrong registry entries.
- Virus attack or malware.
- The installation of third-party application or Windows updates that corrupt the system files.
- Important system files missing.
- Improperly uninstallation of applications or hardware.
- Outdated drivers.
Actually, the 0x80240017 error not only occurs when you update your operating system but also occurs when you try to install or update applications in Windows 10 and Windows 8/8.1.
But fortunately, you can also try these methods mentioned in this post to fix the error: run the Windows Update Troubleshooter, scan your computer and run the SFC tool, and if none of the methods works, you can also try to perform a clean installation of Windows.
So how to fix the Windows Update error 0x80240017? Keep reading, then you can find the detailed instructions.
Note: You should make sure that you have a stable Internet connection when performing these methods. But if there is something wrong with your Internet connection, then you can find solutions from this post – 11 Tips to Troubleshoot Internet Connection Problems Win 10.
Method 1: Run Windows Update Troubleshooter
To begin with, running Windows Update Troubleshooter is the easiest and fastest method to fix the Windows 10 error 0x80240017. Windows Update Troubleshooter is a built-in feature designed to fix Windows update errors for common users.
Now you can follow the instructions step by step below to run Windows Update Troubleshooter:
Step 1: Click Start and then click Settings.
Step 2: Choose Update & Security and then select Troubleshoot in the left panel.
Step 3: Click Windows Update under the Get up and running section in the right panel and then click Run the troubleshooter.
Step 4: Wait for the scanning process to detect the existing problems and then click Apply this fix.
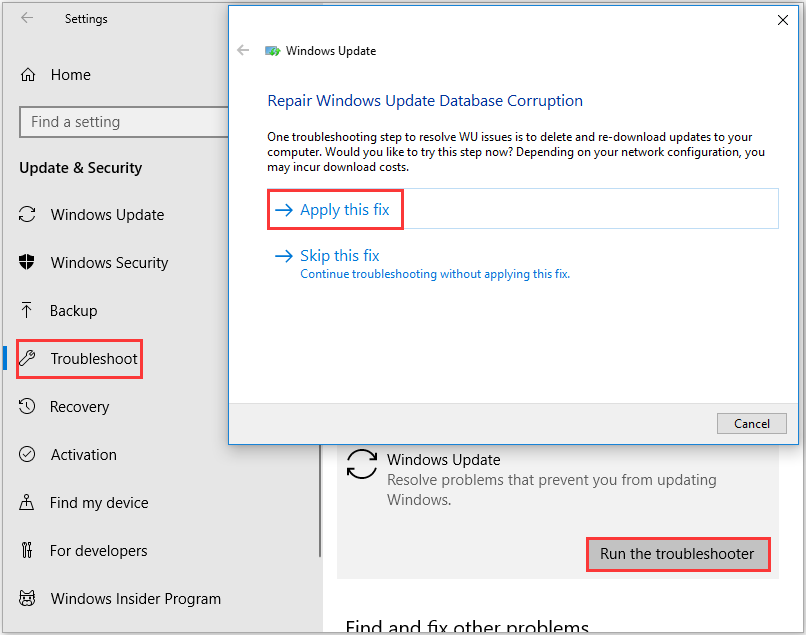
Step 5: Follow the instructions showing on the screen to finish the repair process.
Step 6: Relaunch your computer and then check if the error 0x80240017 Windows 10 still exists.
If this method cannot fix the error, then you can try the next methods.
Method 2: Scan Virus on Your Computer
When you use your computer, it is common to meet virus attacks or malware. So if your operating system is attacked by virus or infected by malware, then the 0x80240017 error may occur.
Therefore, you need to scan your computer to check if there is any virus or malware on your computer and then remove them. There are a number of antivirus programs, and now I use the built-in antivirus tool – Windows Defender to scan your computer. Follow the steps below:
Step 1: Open Settings and then choose Update & Security.
Step 2: Go to the Windows Security section and then click Virus & threat protection under Protection areas.
Step 3: Click Scan options and then check Full scan in the newly pop-out window. Click Scan now.
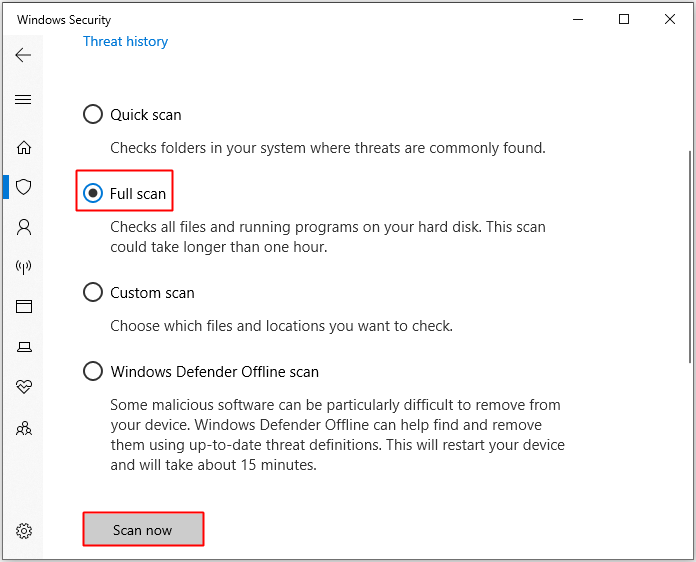
Step 4: Wait for the process to finish, then it will show whether there is any virus or malware. If there is, use Windows Defender to fix it. If there isn’t, then you should try the following methods.
Method 3: Update Your Hardware Drivers
Sometimes, if your hardware drivers are outdated, then 0x800703f1 error will appear when you are updating your system. Therefore, you should update the hardware drivers to fix the error code 0x80240017.
You can perform the method by following the detailed steps below:
Step 1: Press the Win key and the X key at the same time to choose Device Manager.
Step 2: Expand Disk drives in the list and then right-click the drivers to choose Update driver.
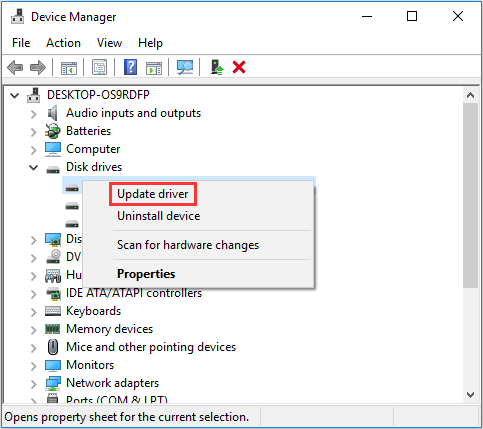
Step 3: Click Search automatically for updated driver software.
Step 4: Follow the prompts showing on the screen to finish updating the driver.
Step 5: Reboot your system and then check if the error is gone.
If this method still cannot solve the problem, then the following methods may help you.
If your system files are missing, damaged or corrupted, then many errors related to your system will occur. So when 0x80240017 error appears, you can run SFC and DISM tools to repair the corrupted system files.
Run SFC Tool
System File Checker (SFC) is also a built-in feature in Windows. You can perform an SFC scan to detect and repair system-related errors. Follow the way to run an SFC scan in Windows 10:
Step 1: Type cmd in the search box and then right-click the best match one to choose Run as administrator. Click Yes.
Step 2: Type sfc /scannow in the Command Prompt window and then press the Enter key.
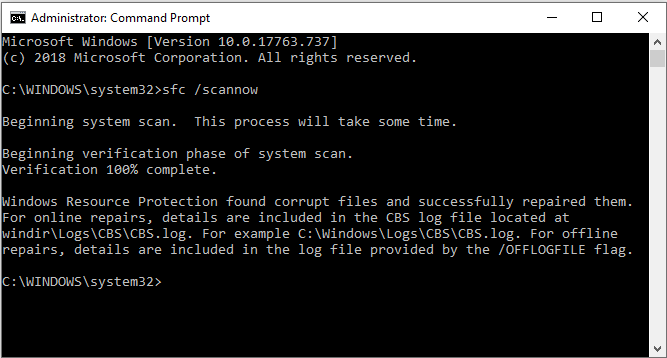
Step 3: Wait for the process to complete and then exit Command Prompt. Keep in mind that you should never interrupt it, or that other serious problems may appear.
Step 4: Reboot your PC and then see whether the error is fixed.
Tip: Sometimes you may find that the SFC tool isn’t working, then you can find solutions to fix the error from this post – Quickly Fix – SFC Scannow Not Working (Focus on 2 Cases).
Run DISM Tool
If you find that the 0x80240017 error appears again after the SFC scan, then you can proceed with the DISM (Development Image Servicing and Management) tool. When you run the DISM tool, then a Windows Update component can download healthy files from the Internet .
Now follow the steps to run the DISM tool to fix the error:
Step 1: Open Command Prompt as administrator.
Step 2: Type DISM.exe /Online /Cleanup-image /Scanhealth in the Command Prompt window, then press the Enter key.
Step 3: Type DISM.exe /Online /Cleanup-Image / Restorehealth, and then press the Enter key.
Step 4: After the process has completed, then close the Command Prompt.
Step 5: Relaunch your Windows and then see if the error still persists.
Method 5: Reset the Components of Windows Update
If the 0x80240017 error appears, you can try to reset Windows Update components manually. And this method can fix the 0x80240017 error successfully in a high degree.
Here is the way to reset Windows Update components:
Step 1: Open Command Prompt as an administrator.
Step 2: Type the following commands in the Command Prompt window and press Enter after every command.
net stop wuauserv
net stop cryptSvc
net stop bits
net stop msiserver
ren C:WindowsSoftwareDistribution SoftwareDistribution.old
ren C:WindowsSystem32catroot2 catroot2.old
net start wuauserv
net start cryptSvc
net start bits
net start msiserver
pause
Step 3: Wait for the process to complete and then close Command Prompt.
Step 4: Restart your computer and then see if the error still exists.
If you keep meeting this error, then you’d better try the last method.
Method 6: Reinstall Windows 10
If all the methods above fail to fix the 0x80240017 error, then the last method you can try is to reinstall your operating system.
But you should know that you will lose most files and all the installed programs if you reinstall Windows 10, thus, it is highly recommended to back up your important files and folders to avoid losing data.
Back up Your Important Files Before Reinstalling Your Operating System
Then how to back up your files and folders safely and quickly? Speaking of this, I highly suggest that you should use MiniTool ShadowMaker, which is a piece of useful and professional backup and restore software.
You can use this software to back up files and folders, disks and partitions and even the system. So after backing up, when there is something wrong with the original one, then you can use the Restore feature to restore it.
What’s more, you can use the Clone Disk feature to make a bootable external hard drive. And one more powerful feature of MiniTool ShadowMaker is the Sync feature, which allows you to sync files and folders to other locations.
Another reason why you should have a try to use MiniTool ShadowMaker is that you can use it for free for 30 days. So why don’t you try it?
MiniTool ShadowMaker TrialClick to Download100%Clean & Safe
The detailed instructions to back up files using MiniTool ShadowMaker are shown below:
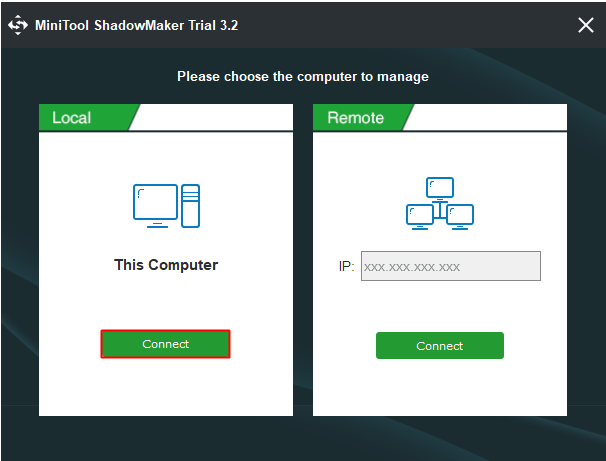
Step 1: Install and launch MiniTool ShadowMaker, then click Keep Trial.
Step 2: Choose Connect in This Computer to enter the main interface.
Note: You can manage a remote computer unless you know the remote computer’s IP address and the computers are on the same LAN.
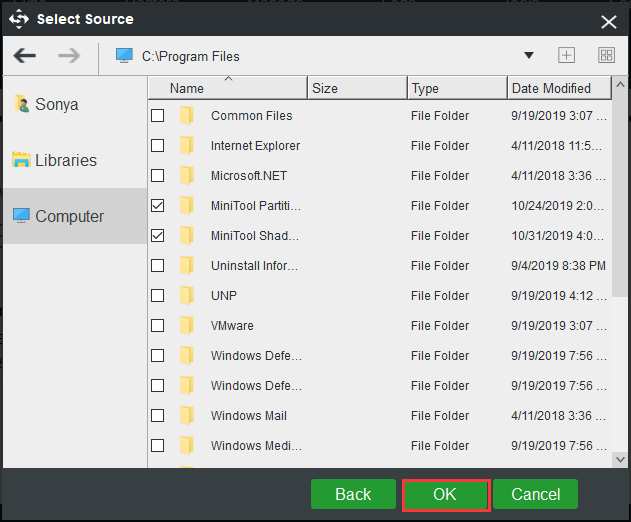
Step 3: Go to the Backup page. Click Source and then choose Files and folder.
Note: In default, MiniTool ShadowMaker backs up the operating system and chooses the destination.
Step 4: Select all the files and folders that you need and then click OK.
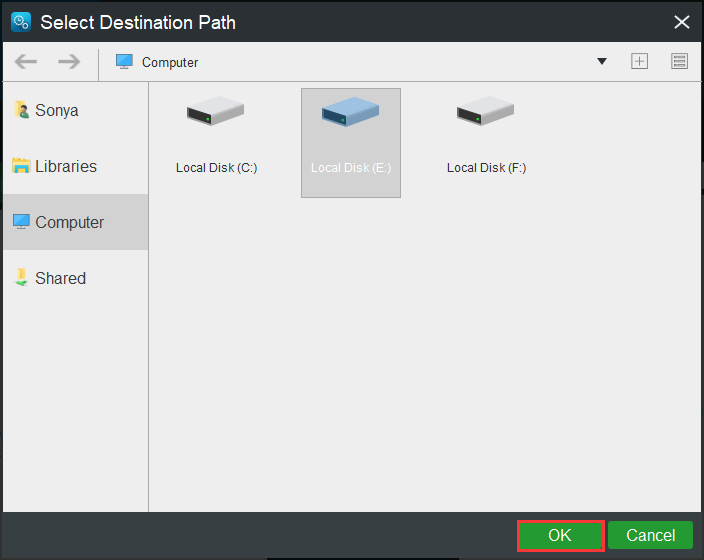
Step 5: Click Destination to choose where you want to save the backup image and then click OK.
Note: You can save your backup image to four different locations: Administrator, Libraries, Computer, and Shared. And it is not recommended to save the backup image to the C drive.
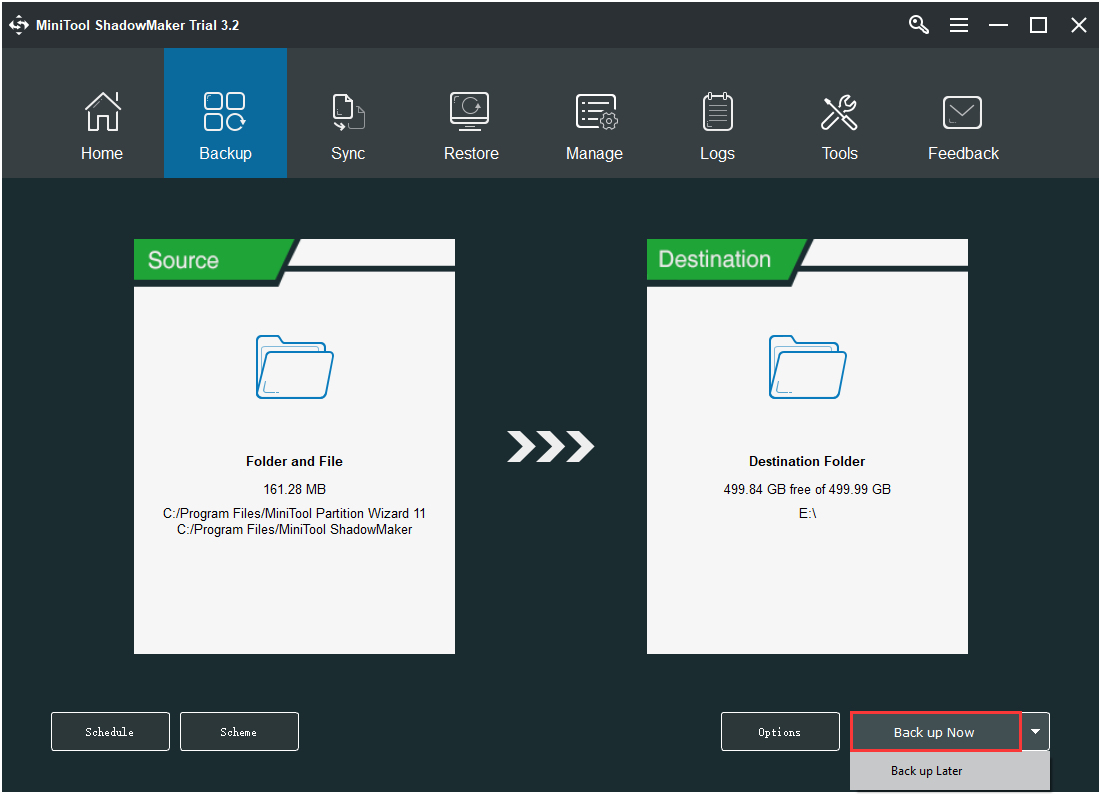
Step 6: After you have chosen the backup source and destination, then click Back up Now to start to back up files and folders.
Tip: You need to start the task on the Manage page if you click Back up Later.
Step 7: Wait for MiniTool ShadowMaker to finish backing up files and folders.
Note: MiniTool ShadowMaker also allows you to transfer your operating system from one computer to another, so if you want to get the detailed information, then click it to read.
Reinstall Windows 10
Now you can begin to reinstall your operating system without CD/USB after you have backed up all the important data. Now follow the steps below:
Step 1: Download the Media Creation Tool from Microsoft on your computer and then download the Windows 10 ISO file.
Step 2: Mount the ISO file.
Step 3: Follow the instructions to reinstall Windows 10.
If you want to know the detailed instructions of reinstalling Windows 10, then you can read this post – How to Reinstall Windows 10 without CD/USB Easily (3 Skills).
After reinstalling your operating system, I believe that you have fixed the 0x80240017 error.
From this post, I have finally found the method to fix the 0x80240017 error. This post is really helpful to me.Click to Tweet
Final Words
After reading this post, you may have known what causes the Windows update error 0x80270017. In addition, this post lists several fabulous and useful methods to fix it. If you encounter this error, try these solutions.
If you find any better method or have any confusion about the methods, leave a comment or send us an email to [email protected].
Readers help support Windows Report. We may get a commission if you buy through our links.
Read our disclosure page to find out how can you help Windows Report sustain the editorial team. Read more
One of the most common issues that might occur while updating Windows’s built-in apps and programs is the 0x80240017 error code.
Read this article to find out how to fix it and get your updates up and running.
What causes the error 0x80240017?
The error code 0x80240017 usually appears due to the fact that your system has changed after you installed a third-party application.
It can also occur because something has changed in the registry after a reboot and you do not have the required system permissions.
This troubleshooting guide will show you what solutions you can use to fix this error once and for all.
How can I fix the Windows Update error 0x80240017?
1. Clear and reset the Microsoft Store cache
- Reboot your operating system.
- To start Windows 10, log in with your administrator account if you haven’t already.
- Go to your Desktop tile and hold the Windows and R buttons at the same time.
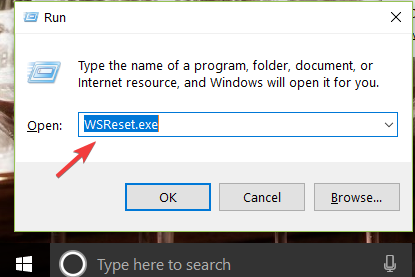
- Now you have the Run window in front of you.
- In the Run dialog box, enter the WSReset.exe command.

- Press the Enter key on the keyboard.
- Reboot your operating system once more and log in again with your administrator account.
- Check if the error persists.
2. Run the built-in Windows Update Troubleshooter
- Go to Search > type settings > double click on the first result.
- Go to Update & Security > select Troubleshoot.
- Now in the Troubleshooting window, locate the Windows Update Troubleshooter.
- Select the Windows Update troubleshooter and run it.

- Now a scanning process will begin and it will tell you if any issues have been found and fixed.
- Follow the on-screen instructions to finish the troubleshooting steps.
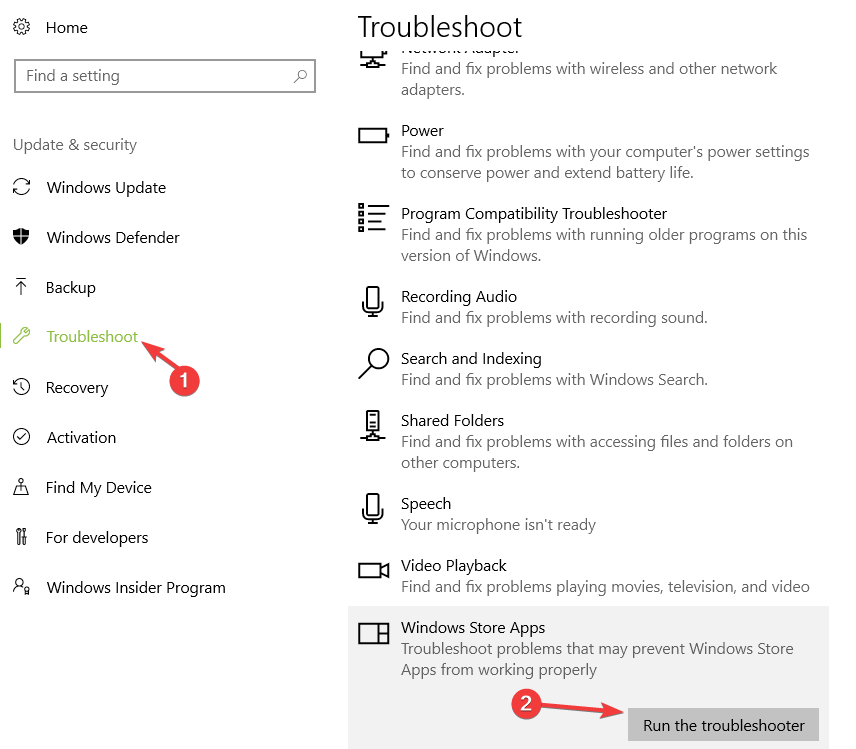
- Scroll down and run the Microsoft Store Apps troubleshooter as well (follow the same steps listed above).

- Reboot your Windows 10 device.
- When the device starts, check if you still get error code 0x80240017 while trying to update your apps and programs.
3. Take full control over File Explorer and the WindowsApps folder
- Reboot your Windows 10 device and log in with your administrator account.
- Open the C:/ partition or wherever partition you have installed your Windows 10 OS on.
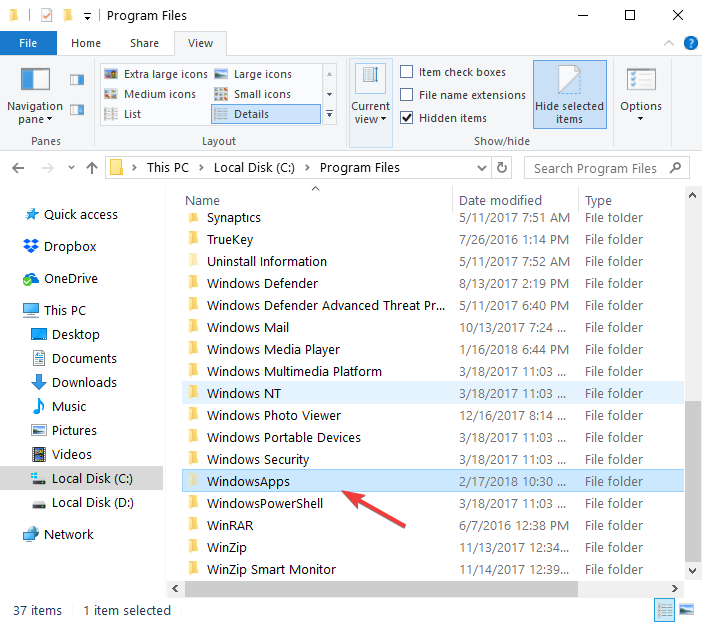
- Double click to open the Program Files folder.
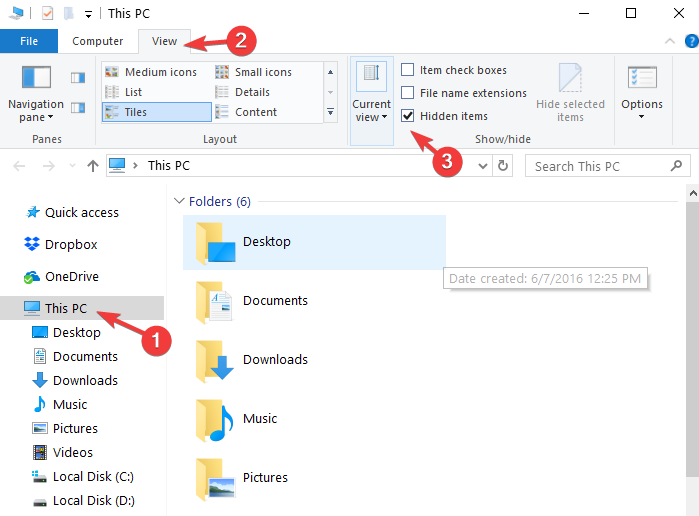
- Select the View tab situated on the upper side of the File Explorer.
- From the list that appears, check the box next to Hidden items under the Show/hide topic.

- Now in the Program Files folder, locate the WindowsApps folder.
- Select the WindowsApps folder.

- Select the Properties feature you have on the menu that appears.
- Go to the Security tab situated in the upper side of the Properties window.
- Select the Advanced button.
- Double click on the username you use.
- Make sure that the Type field is set to Allow and This Folder, subfolders and files.
- Check the box next to Full Control.
- Left-click or tap on the OK button.
- Open the C: partition once more.
- Double click on the Users folder to open it.
- Double click on your username to open the folder.
- Double click to open the AppData folder.
- Double click to open the Local folder.
- Now, within the Local folder, search for the WindowsApps folder.
- Right-click on the WindowsApps folder.
- Left-click or tap on the Properties feature.
- Left-click or tap again on the Security tab.
- Left-click or tap on the Advanced button.
- Now you will need to set the permissions for this folder as you did for the one above.
- Left-click or tap on the Apply button again.
- Left-click or tap on the OK button > close all the windows you opened so far.
- Reboot your Windows 10 PC.
- After the device starts, check again to see if you still get the error 0x80240017.4.
4. Run SFC scan
If certain system files got corrupted or deleted, this may trigger update issues and errors. Fortunately, you can quickly fix this problem by running a System File Checker scan.
This tool will quickly scan your system and identify missing or corrupted files which will then replace. Here are the steps to follow:
- Go to Start > type cmd > right click on the first result > Run Command Prompt as administrator.
- Type the sfc /scannow command and hit Enter.

- Wait until the process completes and then restart your computer > check if this workaround solved your problem
5. Reinstall the Microsoft Store app
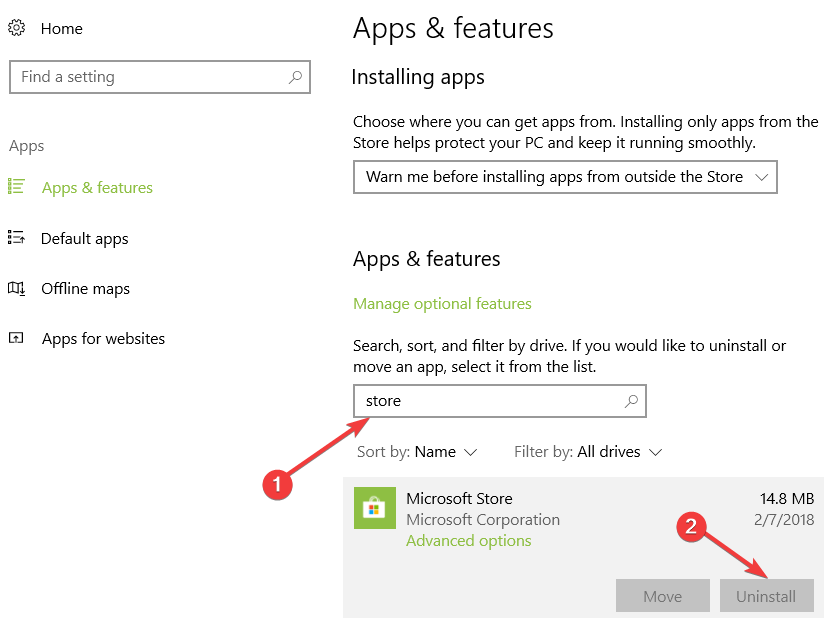
Sometimes, the Microsoft Store itself is the culprit for all the issues and errors that you’re experiencing. In this case, the quickest solution is to simply uninstall the Microsoft Store app.
- First of all, log out of the app.
- Then, navigate to Start > go to Apps & features > type store in the search box.
- Select the Windows Store app > click on Uninstall.

- Restart your PC.
- Reinstall the Microsoft Store app> log in and try to install the latest app updates to see if the issue persists.
6. Scan your computer
If the error persists, try running a full system scan. Viruses, malware and other types of cyber threats could also trigger error 0x80240017 when you try to update your apps.
If you haven’t installed a reliable antivirus solution on your computer yet, check out this list of the best antivirus tools that you can use on your Windows 10 machine.
Install the one that suits your needs best, and run a full system scan.
7. Reset your PC
Note: It is recommended that you back up your files and folders before attempting the steps below
- Go to Settings > Update & Security.
- Select the Recovery feature.
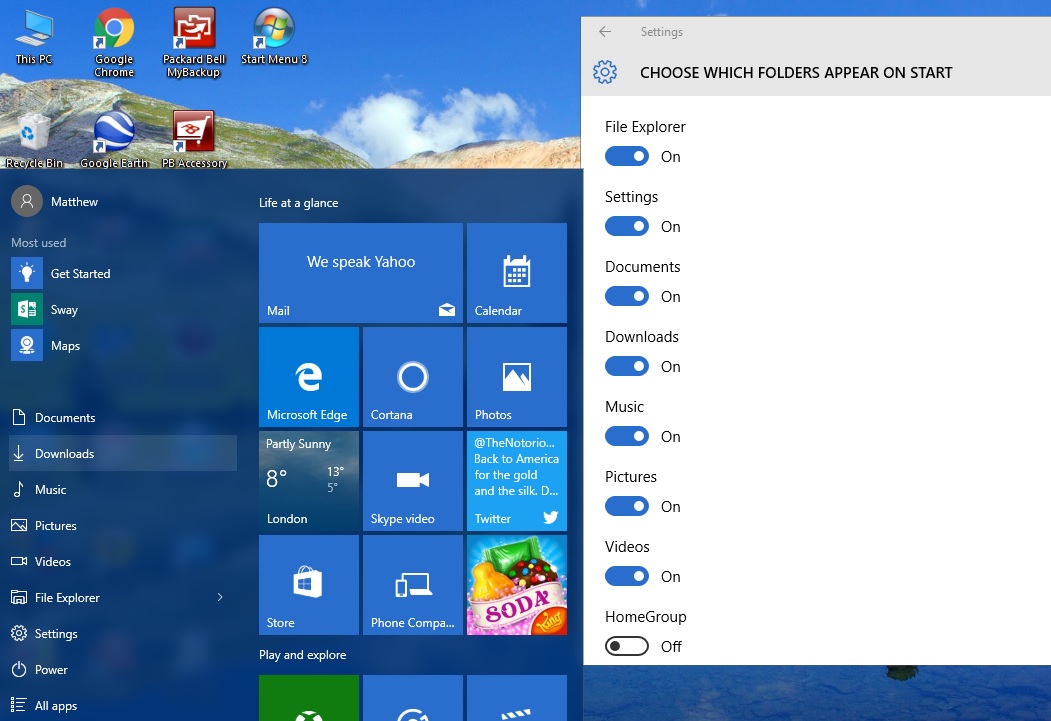
- You will have there an option named Refresh your PC without affecting your files and under it, you will need to select the Get Started button.

- Now follow the on-screen instructions finish the Reset process.
- Reboot your Windows 10 device.
- Check again to see if error 0x80240017 has been fixed.
- Microsoft says a “really bad” bug halted Windows 11 25H2 rollout to Canary channel
- Windows 11 is getting new Start menu, Notepad upgrades, and more
- Windows 11 KB5055653 Beta improves HDR and Windows Update
- Windows 11 KB5055651 Dev introduces Dolby Vision, improved HDR & more
8. Reinstall the OS
If the methods above did not work, then I would suggest you backup your important files and folders that you have in your Windows 10 directory and perform a complete reinstall of the operating system.
If necessary, check out this guide on how to fix Windows can’t automatically find new drivers.
That’s it, we hope these methods fixed error 0x80240017 on Windows 10 when you try to use the update feature.
If you do have additional questions related to this subject, you can list them in the comments section below. We will get back to you as soon as possible.
Ivan Jenic
Windows Hardware Expert
Passionate about all elements related to Windows and combined with his innate curiosity, Ivan has delved deep into understanding this operating system, with a specialization in drivers and driver troubleshooting.
When he’s not tackling diverse driver-related problems, Ivan enjoys watching good movies and spending time hiking with his family and friends.
Self-updating software seems like sorcery to those of us old enough to remember when updating your operating system meant at best a day spent watching progress bars creep across screens, hair-pulling and weeping at worst. The modern ability of operating systems to continually patch themselves is little short of miraculous. However, no process is perfect, and even an extensively tested updater like the Windows Update software has its issues.
One error that has sometimes popped up during a Windows Update session is Error 0x80240017. This error comes up during Windows Update and stops the process dead in its tracks. Fortunately, this error is relatively easy to fix, although one of the methods does involve a bit of typing in the command prompt.
There are three basic approaches to handle error 0x80240017 in Windows 10 if it pops up during an update.
Method One: Use the Windows Update Troubleshooter
The troubleshooters in Windows 10 are actually pretty good and are so much better than in previous versions. This is also the least intrusive fix for error 0x80240017 so is a logical place to begin.
- Type ‘troubleshooting’ into the Search Windows (Cortana) box.
- Select ‘View all’ in the left pane of the new window.
- Select Windows Update
- Click Next and allow the troubleshooter to work its magic.
Once complete, the Windows Update Troubleshooter will either tell you it couldn’t find anything wrong or that it fixed the issue. If it’s the latter, retest Windows Update. If it found nothing, move on to the next fix.
Method Two: Reset the Windows Update component
Resetting the Windows Update component wipes the slate clean and should cause Windows to begin the update process again. It will check what updates it has, what updates it needs and download and install as needed.
Here’s how to reset Windows Update.
Open a Command Prompt as an administrator and type or paste the following commands. Press Enter after each command.
- net stop wuauserv
- net stop cryptSvc
- net stop bits
- net stop msiserver
- ren C:\Windows\SoftwareDistribution SoftwareDistribution.old
- ren C:\Windows\System32\catroot2 Catroot2.old
- net start wuauserv
- net start cryptSvc
- net start bits
- net start msiserver
Once finished, reboot your computer for changes to take effect. Once back up and running, retest Windows Update to see if the error reoccurs.
Method Three: Reset the Background Intelligent Transfer Service
Windows 10 Background Intelligent Transfer Service is what downloads and manages the updates. By resetting and manually deleting any files it has downloaded, we force the update to retry and hopefully work this time.
Open a Command Prompt as an administrator and type or paste the following commands. Press Enter after each command.
- net stop wuauserv
- net stop bits
Keep the Command Prompt window open for now. Then navigate to C:\Windows\SoftwareDistribution and delete the contents of the folder.
Go back to the Command Prompt windows and type or paste the following, pressing enter after each command.
- net start wuauserv
- net start bits
Retry Windows Update to see if it works.
Do you have any other techniques for fixing this error? If you do, share them with us in the comments below!
How To Delete All History on YouTube
Read Next