
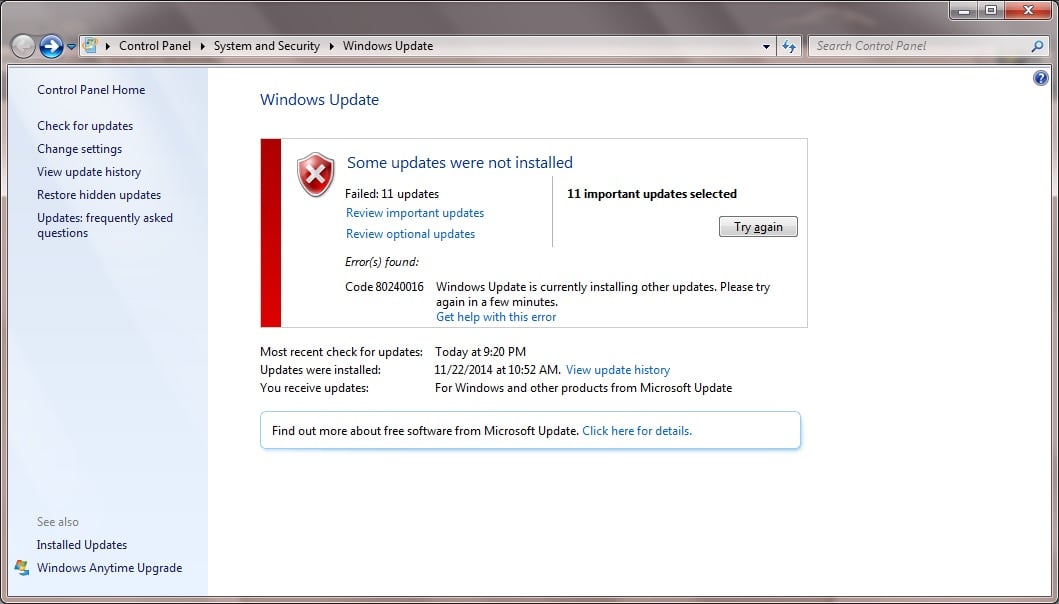
В сегодняшнем материале мы будем рассматривать очередную ошибку, возникающую во время обновления операционной системы от компании Майкрософт — 80240016. Ни для кого не секрет, что различные версии ОС Windows просто таки наполнены всевозможными багами, ошибками и проблемами. Чтобы избавляться от них, разработчики не сидят на месте — и выпускают огромное количество обновлений. Однако, что остается делать простому пользователю, когда даже во время обновления системы тот сталкивается с ошибкой, в нашем случае, 80240016?
Что же, есть несколько методов, которыми потенциально можно от нее избавиться, и мы их рассмотрим в этом статье. Итак, стоит заметить, что ошибка 80240016 представляет собой крайне старый код, который успешно кочует с одной версии ОС Windows в другую. Увидеть его можно в Windows 7, Windows 8 и даже Windows 10. На более новых системах код может дополняться «0x», но сути это не меняет.
Причины: какие они для кода ошибки 80240016? На этот вопрос крайне затруднительно ответить. В принципе, можно попытаться выстроить список из потенциальных причин, способных вызвать ошибку 80240016. Давайте же посмотрим на него:
- проблемы с сетевым подключением на компьютере;
- повреждение системных файлов, участвующих в процессе обновления;
- повреждение компонентов Центра обновления Windows;
- приостановка работы служб Центра обновления Windows;
- установочные файлы предыдущих обновлений вступили в конфликт с установочными файлами нового обновления;
- антивирус или брандмауэр, как сторонние, так и системные вариации, заблокировали процесс загрузки файлов обновления либо их самих уже в системе.
Помимо вышеуказанного списка, могут существовать и другие причины. Хорошо, мы в должной мере ознакомились с ошибкой 80240016, так что теперь пора посмотреть, что можно сделать, чтобы та исчезла из вашей системы. Нижеуказанные методы — выполняйте в том порядке, в каком вам удобнее, так как это не имеет значения.
Как исправить ошибку 80240016 на Windows 7/8/10
Убедитесь, что ваше сетевое подключение в порядке
Первое, на что вам следует обратить внимание — это состояние вашего Интернет-подключения. Разумеется, для загрузки последних обновления Windows вам потребуется иметь доступ в Интернет. Читая эти строки, вы наверняка задаетесь вопросом: ну я ведь как-то перешел на эту ссылку, так причем тут доступ к Интернету? Дело в том, что ошибки подобной 80240016 могут также возникать и по причине нестабильного сетевого соединения, т.е. в один момент — доступ есть, а в другой — его нет. Проверьте, присутствует ли у вас стабильный доступ в Интернет. Если же оказалось, что с сетевым подключением и правда не все в порядке — вы нашли источник проблемы.
Проверка службы Центра обновления
Если служба Центра обновления была деактивирована или приостановлена, по какой-то причине, то это вполне могло вызвать ошибку 80240016. Сделать такую пакость могло много чего: стороннее программное обеспечение, баг в операционной системе, вирус и прочее. Тем не менее вы запросто можете проверить состояние этой службы в соответствующем компоненте вашей системы. Итак, чтобы выполнить проверку и запуск службы Центра обновления, вам потребуется сделать следующее:
- нажмите комбинацию клавиш Windows+R;
- впишите команду services.msc;
- нажмите Enter;
- найдите в списке службу «Центр обновления Windows»;
- кликните по ней дважды левой кнопкой мыши;
Перед вами откроется окно с состоянием указанной службы. Хорошенько осмотритесь и убедитесь, что та работает. Если вы заметили, что в строке состояния указано об остановке службы — нажмите на кнопку «Запустить». Далее выставьте в строке типа запуска опцию «Автоматически» и сохраните изменения в параметрах службы. Перезапустите свой компьютер и попробуйте запустить процесс обновления системы повторно. Если служба была деактивирована — это разрешит проблему.
Восстановление поврежденных системных файлов
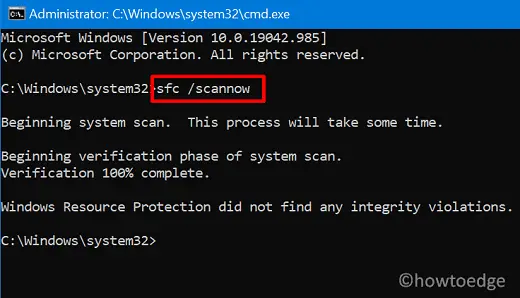
Ок, давайте теперь убедимся с вами, что ошибка 80240016 не возникла по вине поврежденных системных файлов. В вашей системе встроена одна небольшая утилита под названием System File Check, которая как раз таки может просканировать системные файлы и восстановить их. Впрочем, последнее сделать она будет только тогда, когда это возможно, что, зачастую, представляется возможным. Итак, чтобы запустить утилиту System File Check, вам нужно выполнить следующие шаги:
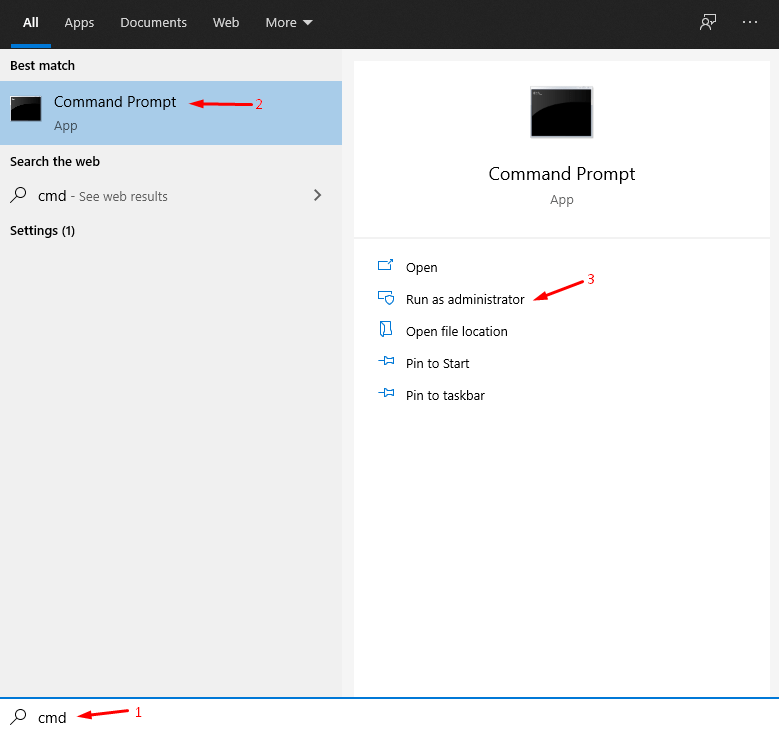
- нажмите Windows+X;
- выберите пункт «Командная строка(администратор)»;
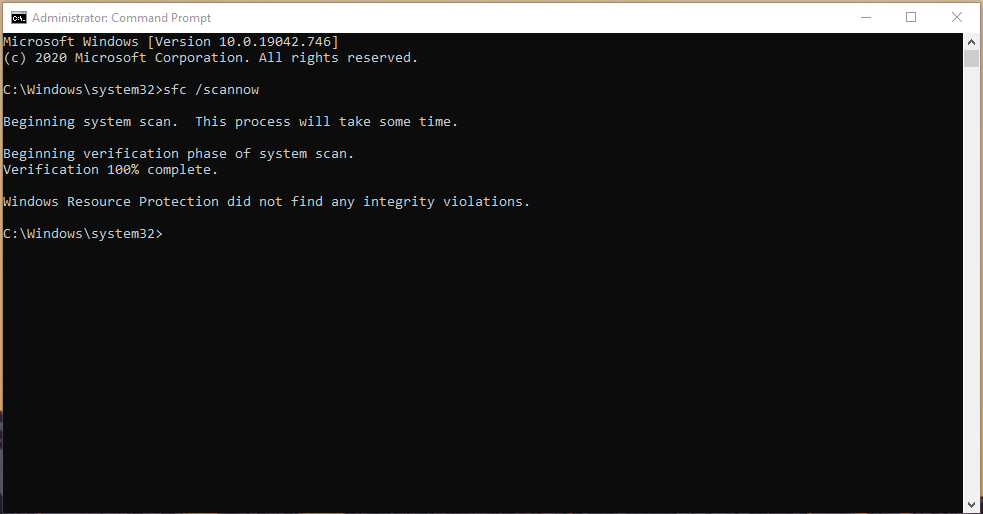
- впишите команду sfc /scannow;
- нажмите Enter;
Как только вы нажмите на Enter, в окошке Командной строки запустится процесс сканирования системных файлов. Это может занять какое-то время — наберитесь терпения. После окончания сканирования системных файлов в том же окошке перед вами появятся результаты. Если в них будет указано, что были обнаружены и исправлены повреждения — перезапустите свой компьютер и проверьте, была ли устранена ошибка 80240016.
Отключение антивируса и брандмауэра
Следующей нашим способом станет отключение антивируса и брандмауэра. Несмотря на полезнейший функционал, которое предоставляет своим пользователям это программное обеспечение, оно может также и вызывать определенные проблемы. Например, сторонний антивирус мог заблокировать загруженные файлы устанавливаемого обновления, вследствие чего и возникла ошибка 80240016. Что же касается брандмауэра — он мог заблокировать сетевое подключение к серверам Майкрософт, на которых как раз находятся установочные файлы загружаемых обновлений.
Итак, чтобы проверить причастность этого ПО, вам нужно попросту отключить антивирус, а затем посмотреть, исчезнет ли проблема. Отключить сторонний антивирус можно по разному, например, через значок в панели уведомлений. Однако, со сторонним ПО вам так или иначе придется разбираться самостоятельно. Возможно, вам даже понадобится удалить антивирус со своего компьютера. Что же касается брандмауэра — мы можем показать вам, если вы пользуетесь системным ПО.
Чтобы отключить Брандмауэр Windows, сделайте следующее:
- нажмите Windows+R;
- впишите control;
- нажмите на Enter;
- откройте элемент «Брандмауэр Защитника Windows»;
- нажмите на ссылку «Включение и отключение брандмауэра Защитника Windows»;
- поставьте галочки напротив отключения общественной и локальной сети;
- сохраните изменения в параметрах Брандмауэра Windows.
Как только антивирус и брадмауэр перестанут функционировать, попробуйте запустить обновление Windows и посмотрите, была ли устранена ошибка 80240016.
Восстановление компонентов Центра обновления
Давайте попробуем кое-что более серьезное — сброс компонентов Центра обновления Windows. Возможно, какие-то компоненты были повреждены либо изменены, что и вызвало оговариваемую проблему. Чтобы выполнить сброс компонентов, вам нужно сделать следующее:
- нажмите Windows+X;
- выберите «Командная строка(администратор)»;
- впишите следующий набор команд:
- net stop bits
- net stop wuauserv
- net stop appidsvc
- net stop cryptsvc
- Del «%ALLUSERSPROFILE%\Application
- Data\Microsoft\Network\Downloader\qmgr*.dat»
- Ren %systemroot%\SoftwareDistribution SoftwareDistribution.bak
- Ren %systemroot%\system32\catroot2 catroot2.bak
- del /f /s /q %windir%\windowsupdate.log
- sc.exe sdset bits D:(A;;CCLCSWRPWPDTLOCRRC;;;SY) (A;;CCDCLCSWRPWPDTLOCRSDRCWDWO;;;BA) (A;;CCLCSWLOCRRC;;;AU) (A;;CCLCSWRPWPDTLOCRRC;;;PU)
- sc.exe sdset wuauserv D:(A;;CCLCSWRPWPDTLOCRRC;;;SY) (A;;CCDCLCSWRPWPDTLOCRSDRCWDWO;;;BA) (A;;CCLCSWLOCRRC;;;AU) (A;;CCLCSWRPWPDTLOCRRC;;;PU)
- cd /d %windir%\system32
- regsvr32.exe /U /s vbscript.dll
- regsvr32.exe /U /s mshtml.dll
- regsvr32.exe /U /s msjava.dll
- regsvr32.exe /U /s msxml.dll
- regsvr32.exe /U /s actxprxy.dll
- regsvr32.exe /U /s shdocvw.dll
- regsvr32.exe /U /s Mssip32.dll
- regsvr32.exe /U /s wintrust.dll
- regsvr32.exe /U /s initpki.dll
- regsvr32.exe /U /s dssenh.dll
- regsvr32.exe /U /s rsaenh.dll
- regsvr32.exe /U /s gpkcsp.dll
- regsvr32.exe /U /s sccbase.dll
- regsvr32.exe /U /s slbcsp.dll
- regsvr32.exe /U /s cryptdlg.dll
- regsvr32.exe /U /s Urlmon.dll
- regsvr32.exe /U /s Oleaut32.dll
- regsvr32.exe /U /s msxml2.dll
- regsvr32.exe /U /s Browseui.dll
- regsvr32.exe /U /s shell32.dll
- regsvr32.exe /U /s atl.dll
- regsvr32.exe /U /s jscript.dll
- regsvr32.exe /U /s msxml3.dll
- regsvr32.exe /U /s softpub.dll
- regsvr32.exe /U /s wuapi.dll
- regsvr32.exe /U /s wuaueng.dll
- regsvr32.exe /U /s wuaueng1.dll
- regsvr32.exe /U /s wucltui.dll
- regsvr32.exe /U /s wups.dll
- regsvr32.exe /U /s wups2.dll
- regsvr32.exe /U /s wuweb.dll
- regsvr32.exe /U /s scrrun.dll
- regsvr32.exe /U /s msxml6.dll
- regsvr32.exe /U /s ole32.dll
- regsvr32.exe /U /s qmgr.dll
- regsvr32.exe /U /s qmgrprxy.dll
- regsvr32.exe /U /s wucltux.dll
- regsvr32.exe /U /s muweb.dll
- regsvr32.exe /U /s wuwebv.dll
- regsvr32.exe /s vbscript.dll
- regsvr32.exe /s mshtml.dll
- regsvr32.exe /s msjava.dll
- regsvr32.exe /s msxml.dll
- regsvr32.exe /s actxprxy.dll
- regsvr32.exe /s shdocvw.dll
- regsvr32.exe /s Mssip32.dll
- regsvr32.exe /s wintrust.dll
- regsvr32.exe /s initpki.dll
- regsvr32.exe /s dssenh.dll
- regsvr32.exe /s rsaenh.dll
- regsvr32.exe /s gpkcsp.dll
- regsvr32.exe /s sccbase.dll
- regsvr32.exe /s slbcsp.dll
- regsvr32.exe /s cryptdlg.dll
- regsvr32.exe /s Urlmon.dll
- regsvr32.exe /s Oleaut32.dll
- regsvr32.exe /s msxml2.dll
- regsvr32.exe /s Browseui.dll
- regsvr32.exe /s shell32.dll
- regsvr32.exe /s Mssip32.dll
- regsvr32.exe /s atl.dll
- regsvr32.exe /s jscript.dll
- regsvr32.exe /s msxml3.dll
- regsvr32.exe /s softpub.dll
- regsvr32.exe /s wuapi.dll
- regsvr32.exe /s wuaueng.dll
- regsvr32.exe /s wuaueng1.dll
- regsvr32.exe /s wucltui.dll
- regsvr32.exe /s wups.dll
- regsvr32.exe /s wups2.dll
- regsvr32.exe /s wuweb.dll
- regsvr32.exe /s scrrun.dll
- regsvr32.exe /s msxml6.dll
- regsvr32.exe /s ole32.dll
- regsvr32.exe /s qmgr.dll
- regsvr32.exe /s qmgrprxy.dll
- regsvr32.exe /s wucltux.dll
- regsvr32.exe /s muweb.dll
- regsvr32.exe /s wuwebv.dll
- netsh winsock reset
- netsh winhttp reset proxy
- net start bits
- net start wuauserv
- net start appidsvc
- net start cryptsvc
Перезагрузите свой компьютер, а затем проверьте, была ли устранена ошибка 80240016.
- Check your internet connection and make sure it is stable and strong enough to support the update process.
- Use the Windows Update troubleshooter to identify and fix any update issues automatically.
- Run SFC and DISM scans to repair corrupted system files that may cause the error.
This update-related issue prevents your device from downloading and upgrading to its latest available OS Build version.
How to solve Update Error Code 0x80240016
To get rid of Error Code 0x80240016 in Windows 10, try the following:
1. Troubleshoot Windows Update
Run Windows Update Troubleshooter is the perfect tool if you are not able to update Windows. This will find and repair the underlying causes behind the 0x80240016 error. Even if it doesn’t solve the persisting problem, it will guide ways to overcome the issue at hand. Here’s how the process goes –
- First of all, navigate to the path below –
Settings (Win + I) > Update & Security
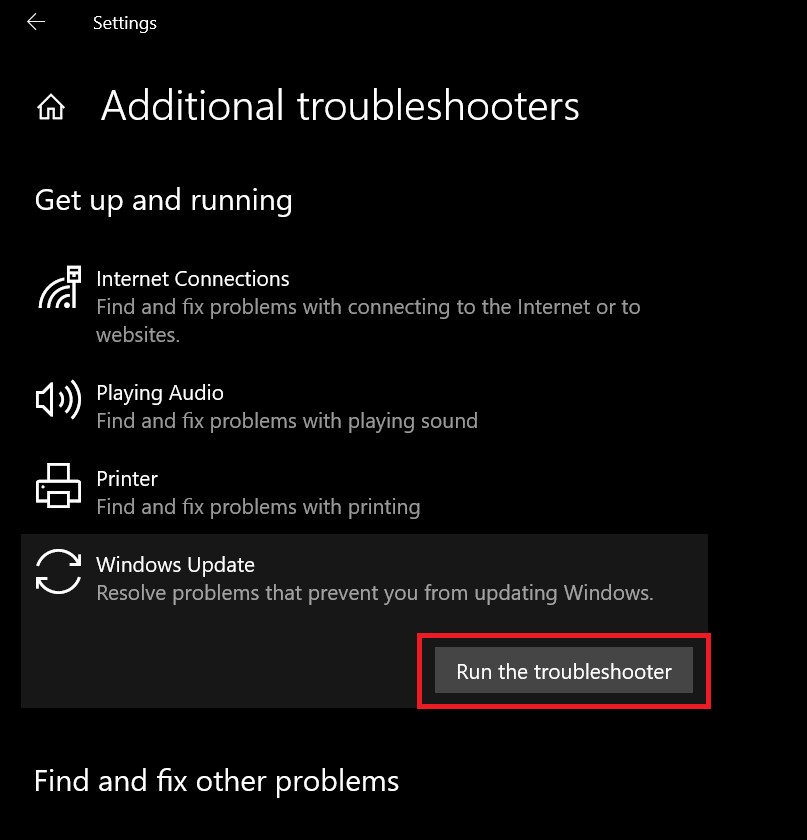
- Select Troubleshoot > Additional troubleshooters.
- Under Windows Update, click Run the troubleshooter.

- Next, follow the on-screen instructions to complete the remaining steps.
When you complete troubleshooting your PC, see if it indeed resolves the error code 0x80240016.
2. Fix System File or Windows Image Corruption
The presence of corrupted system files may stop your computer from getting updates. To ensure this is not the case, you should perform an SFC scan. Follow these steps to check your system files for possible corruption –
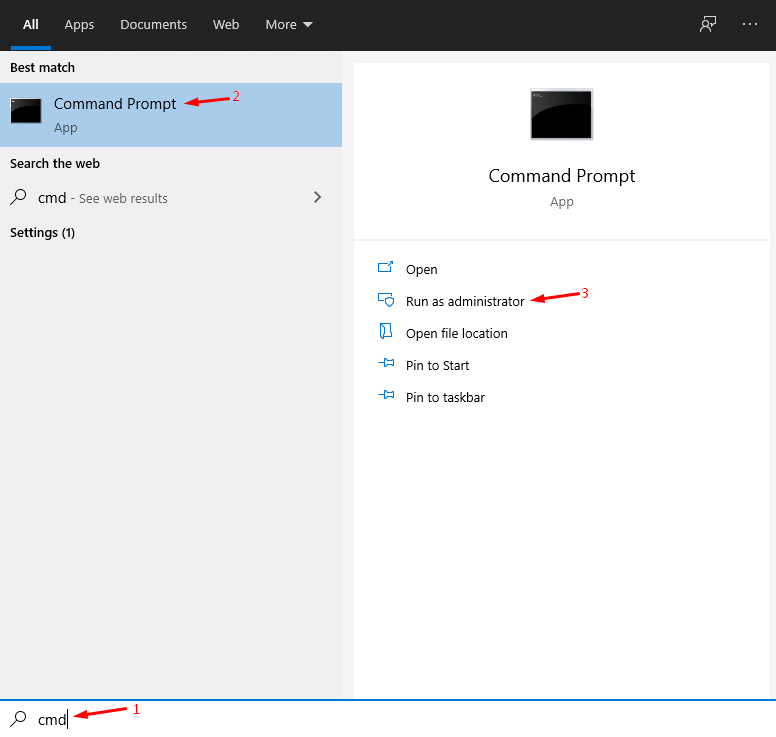
- Open Command Prompt as an Administrator.
- When the UAC window comes into the display, hit Yes.
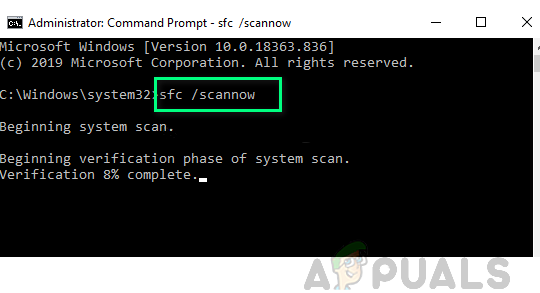
- Type
sfc/scannowand press Enter.
- This whole process might take 15-20 minutes, so wait patiently.
- Once this is over, restart your PC.
Sometimes, a corrupted Windows Image may also prevent your device from being upgraded. To check if this indeed is the case or not, you may take the help of the DISM tool. Here’s how to perform a Windows Image check for possible issues –
- Press Win + R to start the Run dialog.
- Type cmd, and press Ctrl + Shift + Enter.
- Hit Yes on the User Account Control window.
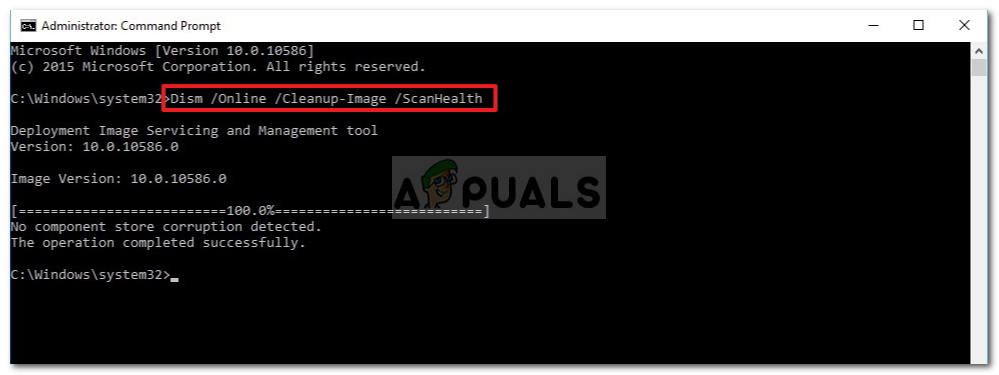
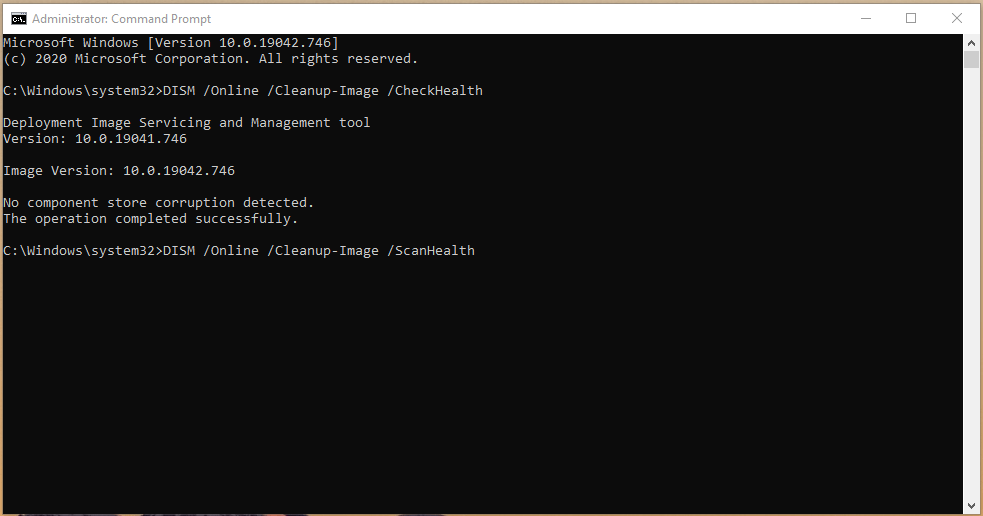
- In the Command Prompt window, type the following and press Enter –
DISM /Online /Cleanup-Image /RestoreHealth
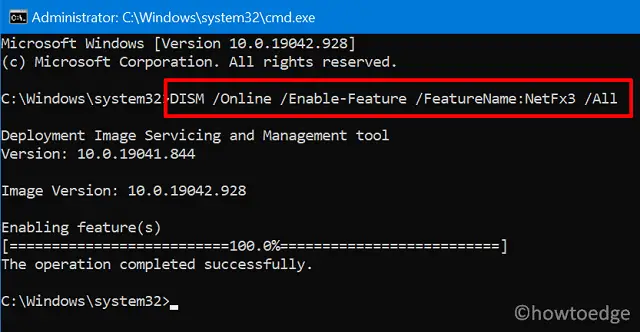
Wait for this code to finish restoring your PC health. When it does, there won’t be any problem related to Windows Image. Check if this helps to get rid of the 0x80240016 bug on your device.
3. Clear Update Folders
Sometimes, such errors occur not because of some update-related issues but due to accumulated files inside the Update Cache folders. So, check and purge these folders to avoid any problems. Here’s how to do it –
First of all, you need to find the folders that may start update-related issues on Windows 10. There are basically two such folders and you may locate them at the following paths –
- SoftwareDistribution – C:\Windows
- Catroot2 – C:\Windows\System32

Visit the above paths separately and look for the above-mentioned cache folders in the search bar. When found, you have two options: delete them entirely or change their names to FolderName.old. Whichever option you choose, make sure to stop the update services beforehand to avoid any further issues. Here are the codes you must run on an elevated Command Prompt (Admin) to stop essential services.
net stop bits
net stop wuauserv
net stop cryptsvc
After you are done with renaming the cache folders, make sure to execute these commands to restart the services that you have stopped earlier –
net start bits
net start wuauserv
net start cryptsvc
Now that you have reset the updated components, check if the problem has been resolved or is still occurring on your PC.
4. Manually update Windows 10
Update errors are sometimes difficult to resolve. If you, too, are experiencing problems resolving an update error code, you may install the buggy update manually as well. Whenever Microsoft releases a security or optional update, it also uploads a standalone package corresponding to that particular update. You may find the executable in the Update Catalog. If you don’t know how to proceed, read this guide on how to manually install Windows 10 updates.
5. Use System Restore Points
If you created a restore point on your PC some time ago, you might use this backup to restore your device. Here’s how to use a system restore point on Windows 10.
If you haven’t created a backup of your personal files or folders, you don’t have any option other than clean installing Windows 10.
Some users are encountering the 0x80240016 whenever they need to install a critical, cumulative, or feature update on their Windows 10 computer. This issue is reported to occur with a variety of different KB updates.

As it turns out, there are several different underlying causes that might be causing this Windows Update. Here’s a list of potential culprits that might be preventing you from installing a pending Windows Update:
- Common WU glitch – If you’re dealing with a fairly common glitch that Microsoft is already aware of, you should start by deploying the Windows Update Troubleshooter and applying the recommended fix.
- Badly cached WU data – Another fairly common cause that might trigger this error is a situation in which a cluster of badly cached data is preventing new update signatures from installing. In this case, you should be able to fix the issue by resetting every Windows update component from an elevated Command Prompt.
- System file corruption – Under certain circumstances, you might be dealing with some type of system corruption that ends up affecting the Windows Update component. If this scenario is applicable, you can use SFC and DISM scans to identify and fix the corruption problems that are blocking the update.
- Overprotective firewall – As it turns out, Windows Firewall will sometimes interfere with the installation of a security WU update. In this case, you will need to disable the real-time protection of the firewall while the update gets installed, if you don’t want to wait for the security check to be finished in the first place.
Now that you are familiar with every situation that might be triggering the 0x80240016 error code, here’s a list of methods that other affected users have successfully used to get to the bottom of this issue:
1. Running the Windows Update Troubleshooter
Before you go into more advanced repair strategies capable of resolving the Windows Update problem you’re dealing with, start this troubleshooting guide by checking if Windows 10 is capable of resolving the issue automatically.
By default, Windows 10 includes a lot of built-in repair strategies capable of resolving the majority of failures to install a pending Windows 10 update – This is not guaranteed to work, but it’s a good starting point.
Some users that we’re facing this issue have managed to resolve the problem and install the pending update by running the Windows Update troubleshooter and applying the recommended fix that pops up at the end of the scan.
Note: This troubleshooter contains dozens of repair strategies that will be applied automatically if some type of inconsistency is found. If the scan finds a viable repair strategy, the utility will automatically recommend a viable fix that you can apply with a simple click.
Follow the instructions below to deploy the Windows Update troubleshooter to resolve the 0x80240016 error code on Windows 10:
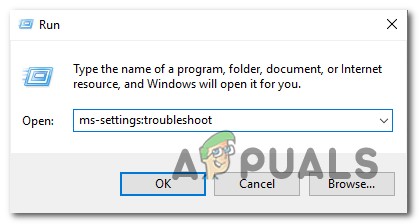
- Open up a Run dialog box by pressing Windows key + R. Next, inside the text box, type “ms-settings-troubleshoot” and press Enter to open up the Troubleshooting tab of the Settings app.

Opening up the WU Troubleshooter - Inside the Troubleshooting tab, go to the right section of the Settings screen then move down to the Get up and running section and click on Windows Update.
- From the next menu of the Windows Update troubleshooter, then click on Run the troubleshooter from the newly appeared context menu.

Opening the Windows Update troubleshooter - After you do this, the tool will automatically begin to scan your system of any inconsistencies. Wait patiently until the initial scan is complete.

Running the WU troubleshooter Note: The Troubleshooter will then go to work and determine whether any of the repair strategies included with it are a match for the WU problem that’s currently affecting your PC.
- After a viable repair strategy is found, you will be presented with a new window in which you can click on Apply this fix to apply the recommended fix.

Applying the recommended fix Note: Keep in mind that depending on the fix that the troubleshooter recommends, you might need to follow a series of additional manual instructions.
- After the fix is applied, restart your computer and see if the issue is resolved once the next startup is complete.


If the error code 0x80240016 is still occurring when you attempt to install the pending update or the Windows Update troubleshooter didn’t find a viable repair strategy, move down to the next fix directly below.
2. Resetting every Windows Update Component
In case the built-in troubleshooter that you deployed above didn’t work for you, it’s likely that you’re seeing the 0x80240016 Windows Update error due to an update component inconsistency (especially if you’re seeing this error with every update that you attempt to install).
In the vast majority of cases, you will see the 0x80240016 error due to the fact that the updating component is somehow stuck in a limbo state (neither opened nor closed). If this scenario is applicable, you should be able to fix the problem swiftly by resetting Windows Update.
Follow the instructions below to reset every Windows Update component from an elevated CMD prompt.
- Start by pressing Windows key + R to open up a Run dialog box. Inside the text box, type ‘cmd’ and press Ctrl + Shift + Enter to open up an elevated Command Prompt window.

Opening an elevated CMD prompt Note: Once you’re inside the UAC (User Account Control), click Yes to grant admin access.
- Inside an elevated CMD window, type the following commands in any order and press Enter after each one:
net stop wuauserv
net stop cryptSvc
net stop bits
net stop msiserver
Note: This set of commands will stop all the relevant Windows Update services from running: BITS service, Cryptographic service, MSI Installer service, Windows update service (main).
- After you manage to stop every relevant service, run the following commands in order to clear and rename two vital WU folders (SoftwareDistribution and Catroot2):
ren C:\Windows\SoftwareDistribution SoftwareDistribution.old
ren C:\Windows\System32\catroot2 Catroot2.old
Note: These two folders (SoftwareDistribution and Catroot) are the two main folders responsible for holding and maintaining Windows Update files. You can’t really delete them conventionally so the best way to ensure that they don’t have any corrupted files that might contribute to this error is to rename them in order to force your OS to create new and healthy equivalents.
- Once the two folders have been renamed, run the following commands in order to re-enable the services that you previously disabled (at step 2):
net start wuauserv
net start cryptSvc
net start bits
net start msiserver
- Once every relevant service has been restarted, repeat the WU action that was previously triggering the 0x80240016 error and see if the problem is now fixed.

If the same error code is still occurring while attempting to install a pending Windows Update, move down to the next potential fix below.
3. Deploying SFC and DISM scans
If refreshing every Windows Update component from the CMD window didn’t fix the issue, you should also consider that some kind of system file corruption is causing this particular Windows Update error.
In this case, you should proceed by running a couple of scans with two built-in utilities – System File Checker (SFC) and Deployment Image Servicing and Management(DISM).
Note: Even though SFC and DISM share some similarities, we recommend that you run both scans in quick succession in order to improve your chance of fixing the corrupted system files.
The ideal place to start is with a simple SFC scan.
Important: After you initiate this procedure, it’s very important to NOT close the CMD window even if the utility looks like it froze. Wait patiently until the process is complete because interrupting the operation might cause logical errors on your HDD/SSD.
Note: This tool is entirely local and will not require you to be actively connected to the internet.
Once the SFC scan is completed successfully, reboot your computer and see if the issue is fixed once the next computer startup is complete by attempting to install the Feature Update once again.
I the same error is still occurring, deploy a DISM scan and follow the on-screen prompts to complete the operation.
Note: DISM uses a sub-component of Windows Update to download healthy equivalents aimed at replacing the corrupted system files. Because of this, you need to make sure that you have reliable Internet before initiating this operation.
Once the DISM scan has been completed successfully, restart your computer once again and see if the 0x80240016 error is now fixed.
4. Turn of Windows Firewall Temporarily
As it turns out, certain security Windows Updates will refuse to install if Windows Firewall is currently performing a background security check.
Normally, you should eventually be able to install the pending update if you’re patient enough to allow the background check to finish.
But if you are impatient, you should be able to install the pending Windows Update right away by force-stopping Windows Firewall and disabling the real-time protection until the installation of the update is complete.
Follow the instructions below to temporarily disable Windows Defender in order to allow the security WU update to install:
- Press Windows key + R to open up a Run dialog box. Next, type ‘windowsdefender’ in the text box and press Enter to open up the Windows Security menu.
Accessing Windows Defender - After you’re inside the WIndows Security menu, click on the Virus & threat protection tab, then go ahead and click on the Manage settings hyperlink (under Virus & Threat protection settings).

Accessing the Virus and Threat protection screen - At the next screen, disable the toggle associated with Firewall & Network protection.

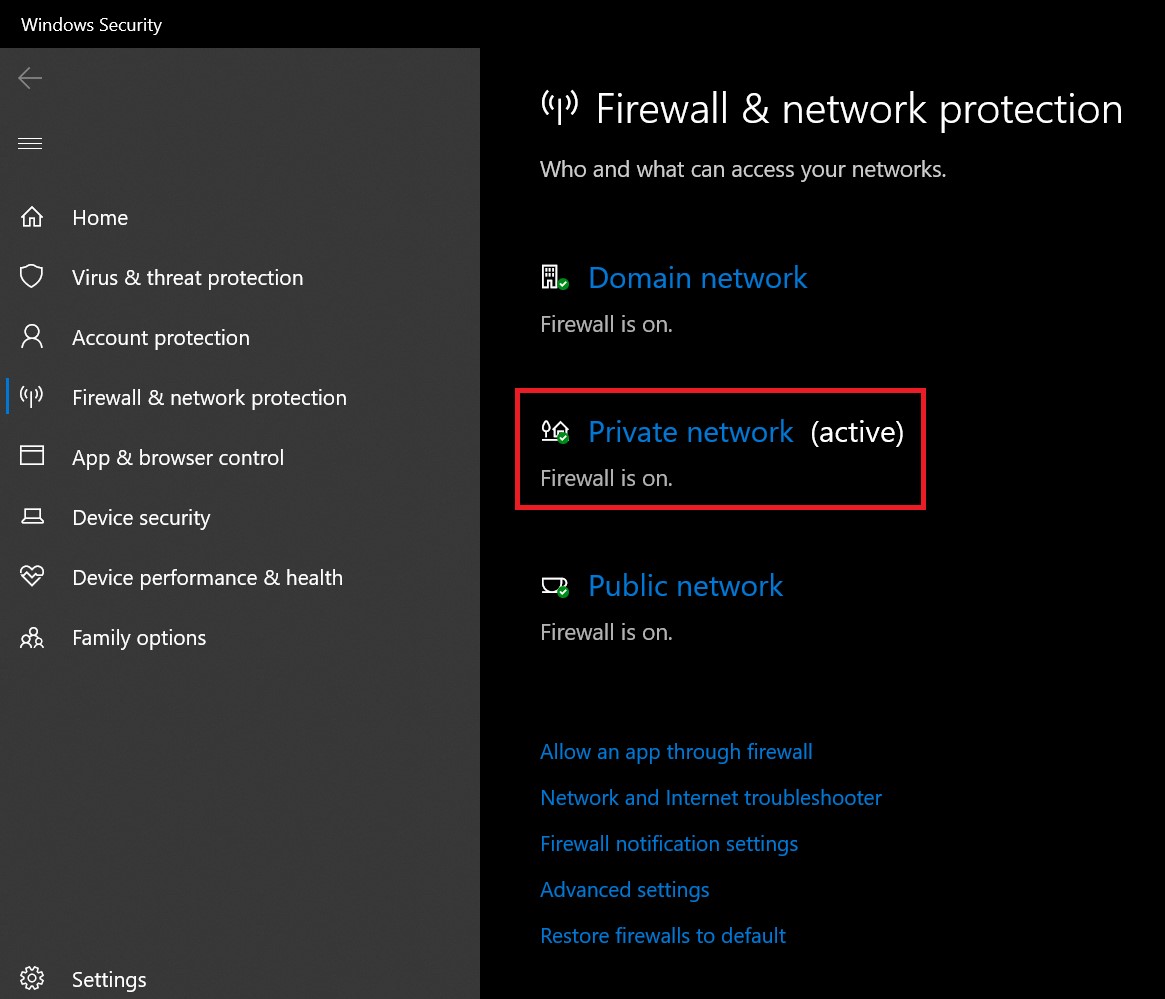
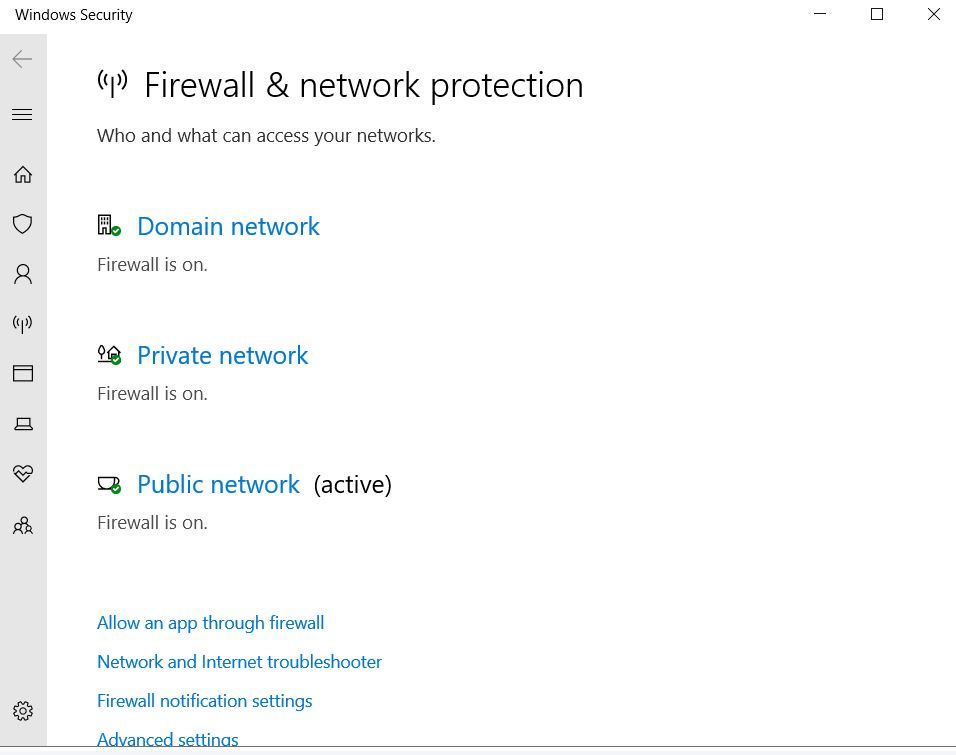
Disabling the Firewall - Go all the way back to the first Windows Security window, then click on Firewall & Network Protection.
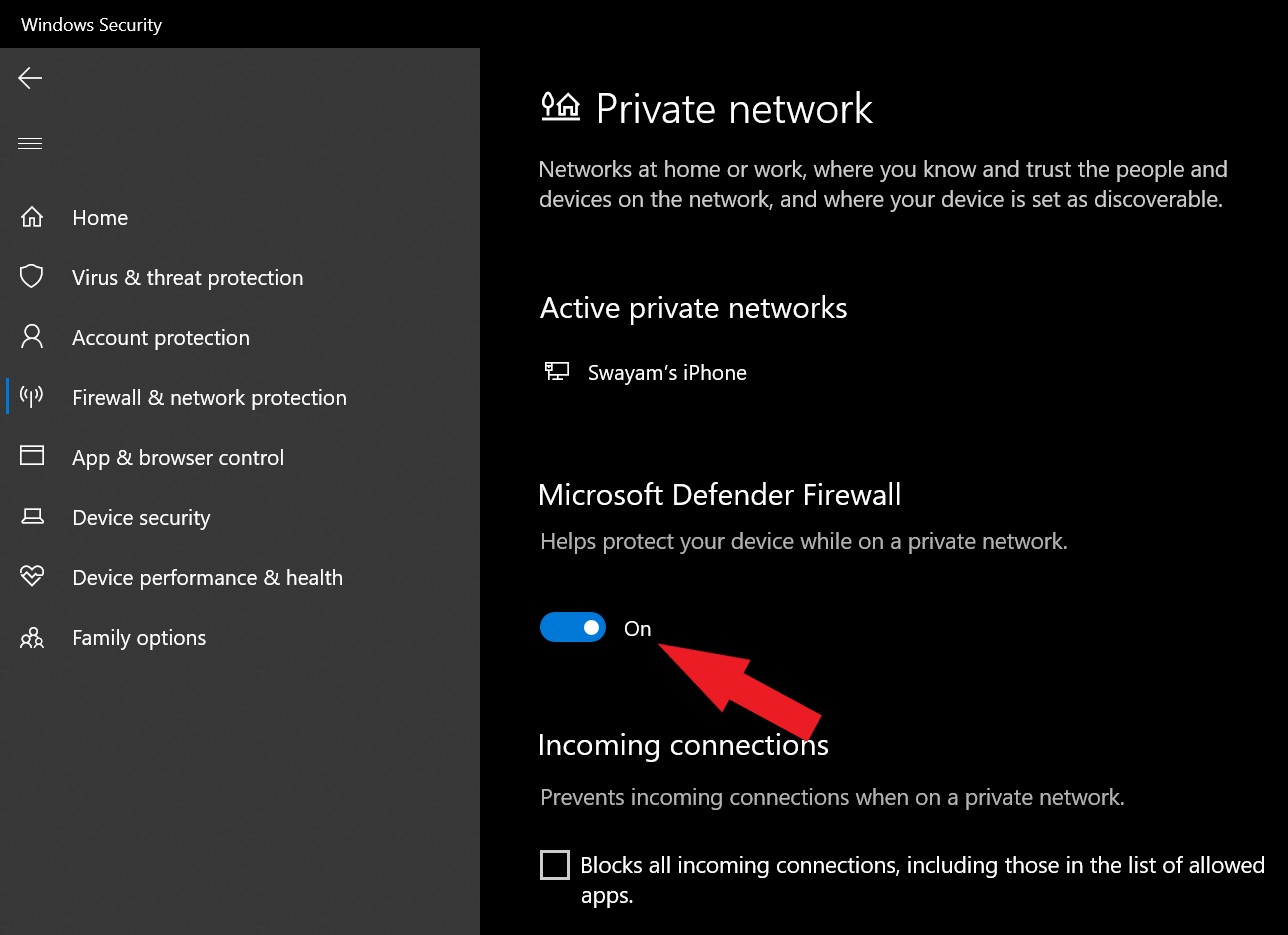
- Once you get to the next screen, click on the network that is currently active, then disable the toggle associated with Windows Defender firewall.

Disabling the Windows Defender Firewall - After you do this, restart your computer repeat the installation of the pending update to see if the issue is now fixed.


Kamil Anwar
Kamil is a certified MCITP, CCNA (W), CCNA (S) and a former British Computer Society Member with over 9 years of experience Configuring, Deploying and Managing Switches, Firewalls and Domain Controllers also an old-school still active on FreeNode.
Facing Error Code 0x80240016 When Updating Windows 10? Here is the Guide Providing Solution to Fix Windows Update Error on your PC.
Are you coming across the Windows 10 Error 0x80240016 when you try to install a cumulative software update on your PC.? Then in this guide, I will explain to you the possible reasons why you encounter this particular error. Also, I have put up some really easy troubleshooting methods to fix the problem.
Often bugs in the current operating system may cause this error to show out of nowhere while trying to install a new update. There can also be corrupt system files that may go unnoticed by the users causing the Windows 10 Error 0x80240016. Though not a concrete reason for this error, having virus-infected files or folders on the PC may also lead to this error. Let’s check out some more reasons for this Windows 10 error that restricts you from installing a fresh software update.
Possible Reasons for Windows Error 0x80240016
- Corrupted Cached data in the memory is stalling the installation of a new Windows update causing the Error 0x80240016. So, the possible solution is to clear the cached data and it may require resetting the Windows Update component.
- Another culprit for the update installation error could be the Windows Firewall. Its algorithms may find a software update malicious even if the latter is not. Normally, the firewall is designed to prevent executable files of unknown origin from running on a PC regardless of whether it carries any malware or not.
You have to make sure that before installing the update it should bypass the firewall. This can be possible by deactivating firewall protection for a short duration till the update installation finishes.
Various ways to Fix Windows 10 Error 0x80240016
Now that we know about the problem, it’s time to solve that for good. So, here are some of the most effective tips that will help your WIndows 10 recover from the Error 0x80240016.
Taking Help of Windows Troubleshooter
Windows has integrated some tools within the operating system that will automatically scan for problems and fix them as well. It may not work perfectly all the time to fix a certain issue but most of the time it does for several users.
Here go the steps.
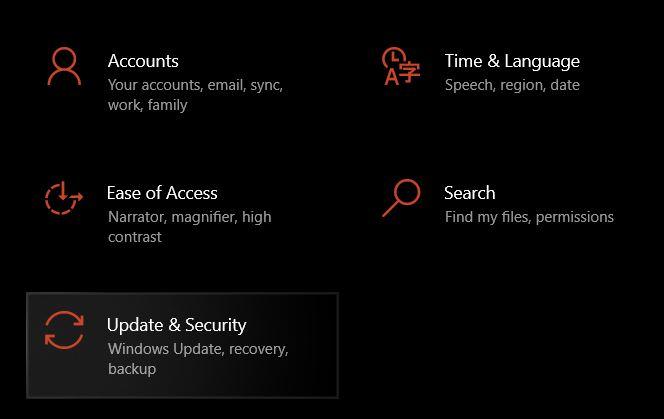
- Press Windows + I button to access the Settings.
- Click on Update & Security.

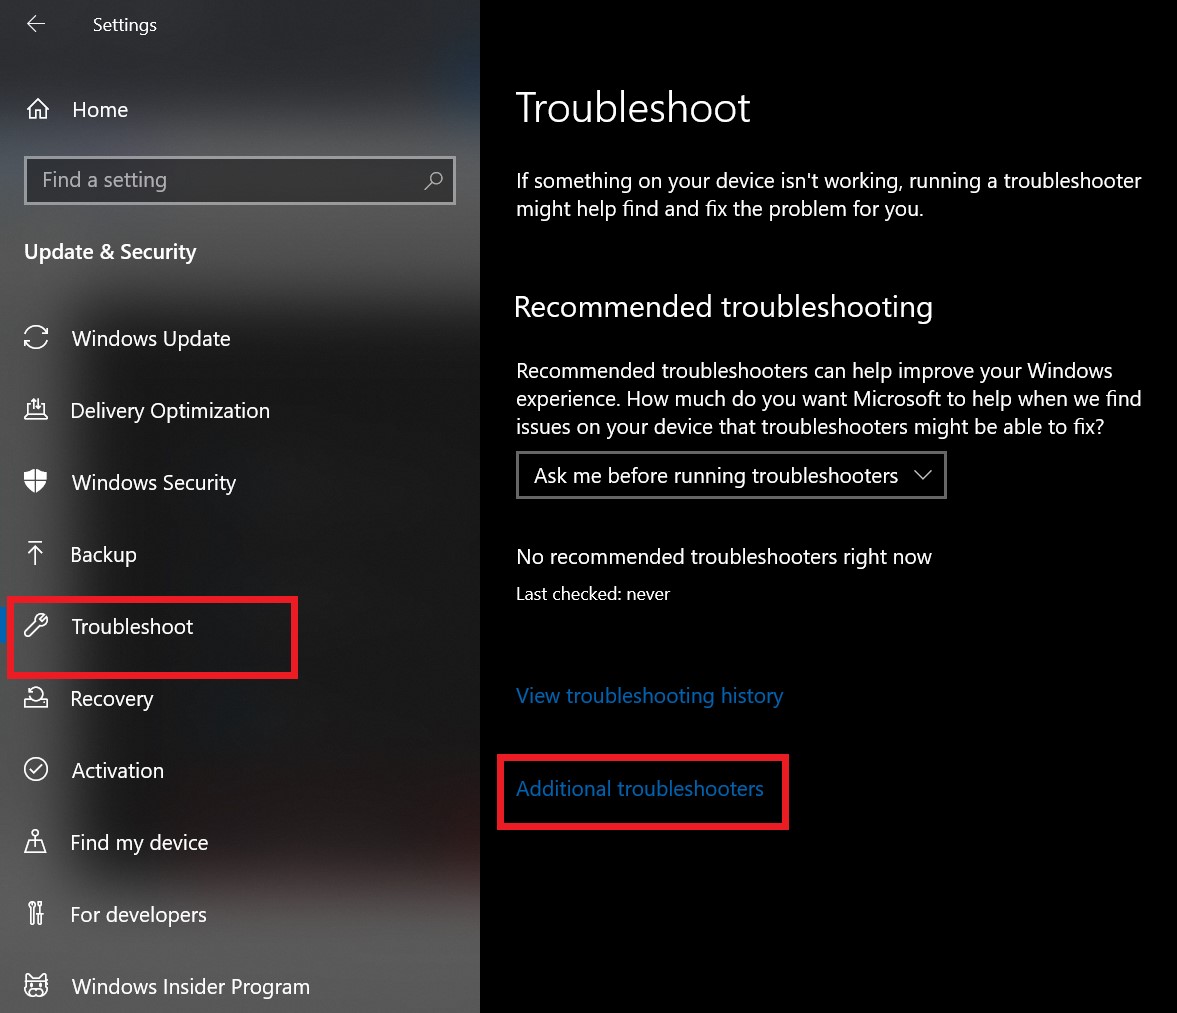
- On the left-hand panel navigate to Troubleshoot and click on it.
- On the same screen, you can see an option, Additional troubleshooters. Click it

- You will redirect to the next page that says Get up and running.
- Under that click on Windows Update.
- As you perform the previous step, a new option Run the Troubleshooter will be visible. Click on it.

- Now, wait as Windows will start scanning the system for possible problems.
- If at all a problem is discovered, a pop-up screen will show up prompting you with two options Apply This Fix and Skip this Fix.
- To fix the Windows 10 Error 0x80240016 click on Apply This Fix and the OS will take some more time to fix up the problem.
After the repair finishes, reboot your PC and now try to reinstall the pending update. Most of the time, the Windows Update Troubleshooter may not be able to fix the problem. Worry not for there are other troubleshooting that you can try. Let’s move to the second one.
Scan for Corrupt System Files
As mentioned earlier, there are chances that your PC may have corrupt system files that are not allowing the Windows OS to install any new software update. So, you have to start by performing a scan for corrupt system files.
To do that you have to use the Command Prompt. Check out the steps below. There is no requirement to have an active connection to the internet to execute this particular troubleshooting.
- Open Command Prompt by directly typing cmd in the search box Type Here to Search.

- Type sfc/scannow and press enter

- Now, the scan will take a long time. So, have some patience and wait for it to finish.
- You may feel like the computer is stuck but do not press anything and don’t turn the PC off. Just wait.
- After the scanning finishes, reboot the PC.
- Go to Settings and try to install the update. I should now get installed without any hassle.
Perform DISM Scan
There is also another scan called Deployment Image Servicing and Management Scan DISM that you can use. This program will replace the corrupt files from the PC. It is similar to the SFC scan except you need to switch on your internet to allow the DISM to download correct system files.
- Open the command prompt from the search box by typing cmd

- Type Dism /Online /Cleanup-Image /ScanHealth

- Press Enter
Disable Windows Firewall To Allow the Installation
Usually, Windows Firewall keeps running every time. It keeps checking for all those executable files that run on the Windows OS. So, maybe due to certain technical snags it may often block any program that tries to run on the system.
Usually, the Firewall checks the programs and allows them but it may consume some time. So, the Windows 10 Error 0x80240016 may also show up due to this.
If any of the above troubleshooting methods did not work to solve the update installation issue, then you can try to temporarily disable the Windows Firewall. Often that fixes the error where it involves executables.
- Press Windows + I to open the Settings page
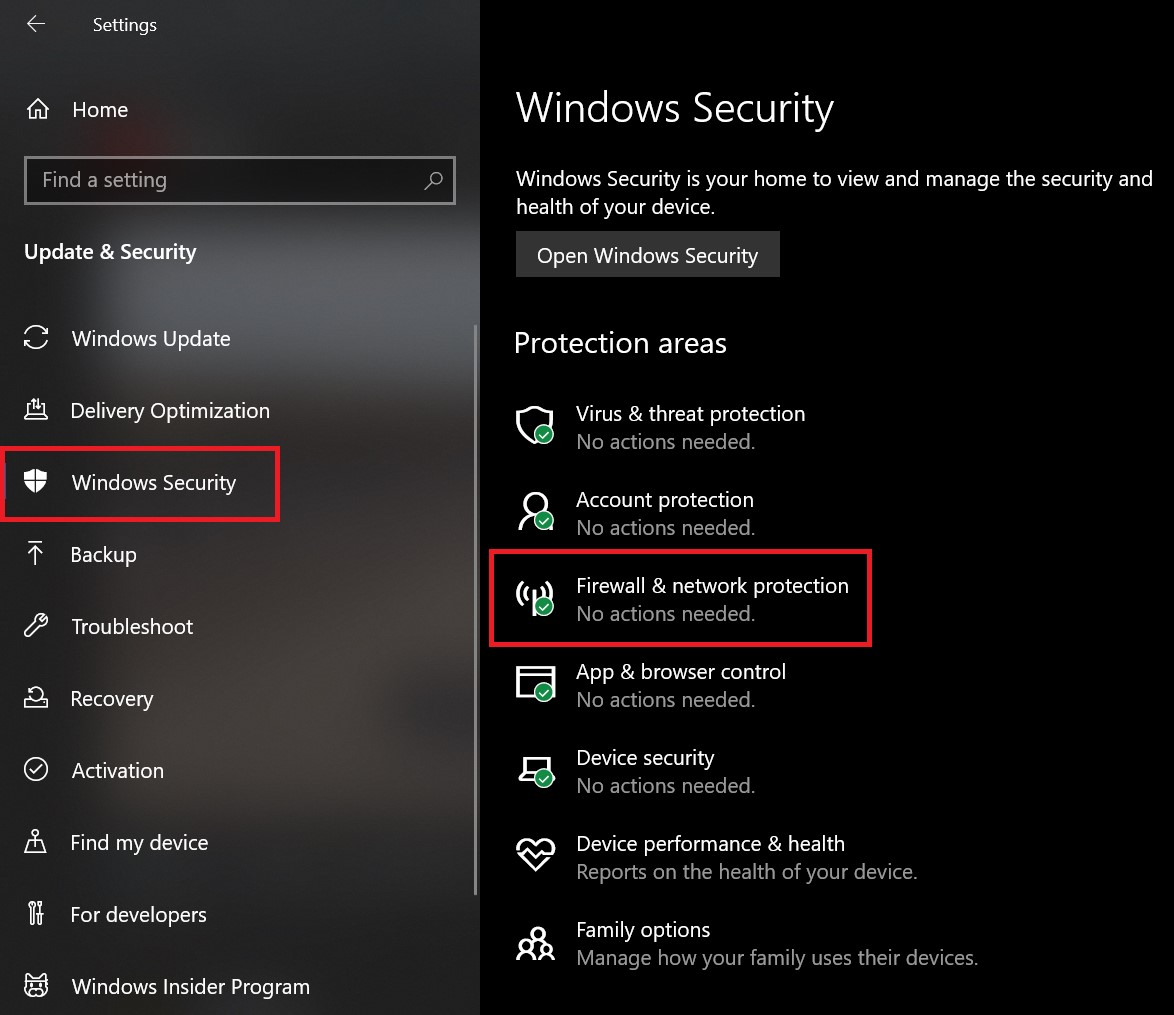
- Then click on Update & Security
- From the left-hand side click on Windows Security.
- On the same page click on Firewall and network protection.

- Click on Private Network.

- The Microsoft Defender Firewall will be set to On by default.
- Simply click on the toggle to switch it off.

- Confirm your action by clicking on Yes from the pop-up dialog box that will appear.
After following any one or all of these troubleshooting methods you should be able to fix the Windows 10 error 0x80240016 and install the pending software update.
If you’ve any thoughts on 4 Easy Ways To Fix Windows Update Error 0x80240016, then feel free to drop in below comment box. Also, please subscribe to our DigitBin YouTube channel for videos tutorials. Cheers!
Updated May 2025: Stop error messages and fix your computer problem with this tool. Get it now at this link
- Download and install the software.
- It will scan your computer for problems.
- The tool will then fix the issues that were found.
Error Code 0x80242000 is one of the most common errors encountered by PC users. This error usually appears while trying to install or uninstall programs. If you encounter this error, follow our step-by-step instructions to fix it.
Step 1: Restart Your Computer
Restarting your computer will clear out temporary files and free up space. Click Next and choose Create a restore point. Then click Next again and name the restore point. Finally, click Finish.
Step 2: Repair Disk Permissions
If you receive an error code 0x80240200, you might want to repair disk permissions. To do this, open Command Prompt window and type the following command: chkdsk /f c:.
Step 3: Check For Hardware Problems
Sometimes, the problem lies within the hard drive itself. If you notice that your hard drive is making unusual noises, check whether the hard drive is damaged. You can use third-party software such as HDD Regenerator to scan your hard drive and recover lost data.
Possible Causes of Error on Windows 0x80240016
Windows Error Code 80240016 occurs due to corruption in the system files. This error can occur due to several reasons like virus attack, improper shutdown of computer, hardware failure etc. If you are getting the above mentioned error while installing software or updating windows operating system, it is recommended to reset the Windows Update Service. You can do this easily by following the steps given below.
Steps To Fix Windows Error 0x8024020A
1. Open Command Prompt window.
2. Type the command “net stop wuauserv”. Press Enter key to confirm.
3. Now type “wuauserv /resetreboot”. Press Enter key to restart the WUAServer service.
4. Click on Change Settings button.
5. Select Automatically download and install updates under Automatic Updates tab.
Taking Help of Windows Troubleshooter
The Windows 10 Error Code 0xf0000001 appears during installation or while upgrading Windows 10. This error codes indicate that there is a problem in the registry. You can use the following methods to resolve it.
1. Click Start button, type regedit into the Search box and press Enter.
2. In Registry Editor, navigate to HKEY_LOCAL_MACHINE\SOFTWARE\Microsoft\Windows NT\CurrentVersion\Winlogon\Shell.
3. If you see the value named Shell, delete it.
4. Name the key shell.
5. Select Empty from the drop down menu.
Scan for Corrupt System Files
A lot of people don’t know how important scanning for corrupt system files is before installing any software update, especially Windows 10 updates. If you’re one of those people, here’s what you need to do.
The process is simple and easy. Just download the free program called CCleaner. Run it once, select “System,” then choose “Check.” You’ll see a list of items that are checked. Select everything except “Windows Update” and press OK. Then run CCleaner again and check “Windows Update.” This ensures that no corrupted files remain on your computer.
If you encounter problems while running CCleaner, try downloading another copy. Some people report that Microsoft Store apps won’t work properly without CCleaner installed.
Perform DISM Scan
There are two scans available for Microsoft Windows 10:
1. The DISM scan – This allows you to check whether there are any issues with the operating system itself. If it finds anything wrong, it will tell you what needs to be done to repair the issue.
2. The System Image Recovery scan – This gives you access to a tool that lets you restore the operating system to a previous state. This is useful if something goes wrong during the installation process.
You don’t need to install any software before running the DISM scanner. Simply run the command “dism /online /cleanup-image /restorehealth”.
Updated: May 2025
We highly recommend that you use this tool for your error. Furthermore, this tool detects and removes common computer errors, protects you from loss of files, malware, and hardware failures, and optimizes your device for maximum performance. This software will help you fix your PC problems and prevent others from happening again:
- Step 1 : Install PC Repair & Optimizer Tool (Windows 11, 10, 8, 7, XP, Vista).
- Step 2 : Click Start Scan to find out what issues are causing PC problems.
- Step 3 : Click on Repair All to correct all issues.
Turn off the Windows Firewall to let the installation go through.
Windows 10 provides many security features to protect users against malware attacks, but it doesn’t always work perfectly. If you want to install a program without having to open up your computer to potential threats, you’ll need to disable the Windows Firewall. Here are some steps to do it on Windows 7/8/10.
1. Open Command Prompt
2. Type “netsh advfirewall show allprofiles state”
3. Find the profile name that matches your current network connection type. For example, if you’re connecting via WiFi, find the profile named “WiFi”.
4. Right click on the profile name and select Properties.
5. Select the “Internet Protocol Version 4 (TCP/IPv4)” tab.
6. Set the value of “Allow TCP traffic on ports 80, 443, 3389, and 5900” to “Disabled”.
RECOMMENATION: Click here for help with Windows errors.
Frequently Asked Questions
Can I stop Windows from updating or put it off?
You can skip Windows 10 updates if you want to. You will need to be running Windows 10 10240 or a later version. You can’t skip updates if you’re using Windows 7 or 8.1.
Does Microsoft check how safe its software is before giving away free updates?
Yes! Every day, they look for security holes in their software. If they find any, they take care of them right away.