Все способы:
- Способ 1: Запуск средства устранения неполадок
- Способ 2: Очистка кеша обновлений
- Способ 3: Восстановление системных файлов
- Способ 4: Отключение антивируса
- Вопросы и ответы: 3
Ошибка с кодом 0x800f0984 может возникнуть при установке накопительных обновлений Windows 10, основной ее причиной является повреждение кеша обновления. Также она может быть вызвана конфликтом в работе программного обеспечения.
Способ 1: Запуск средства устранения неполадок
Столкнувшись с ошибкой 0x800f0984, попробуйте для начала воспользоваться встроенным в операционную систему «Средством устранения неполадок», в частности, неполадок работы «Центра обновления».
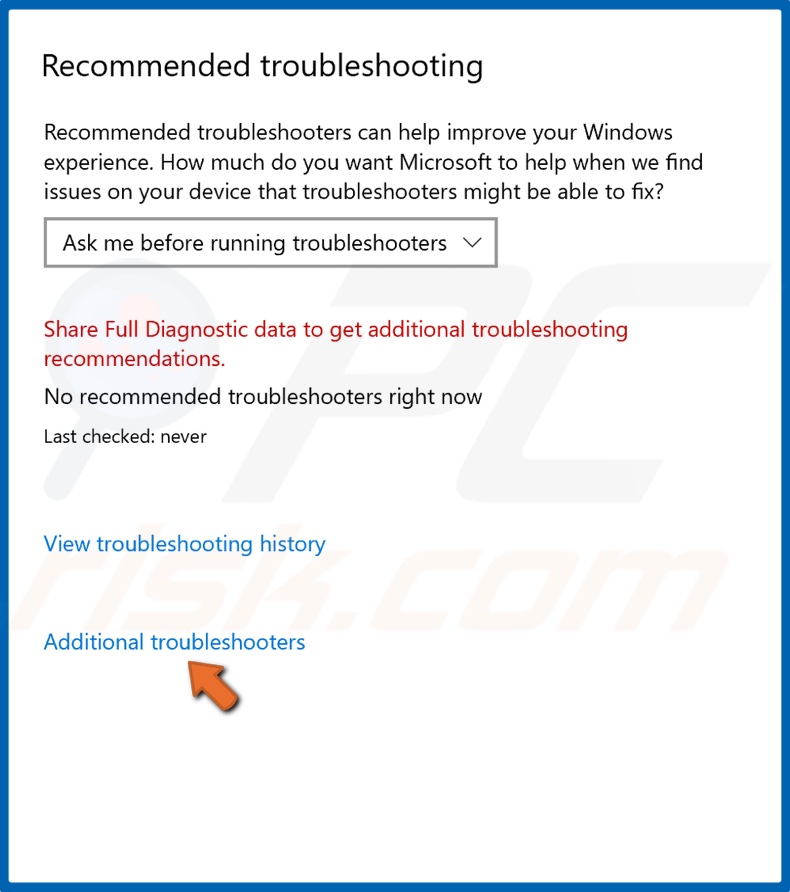
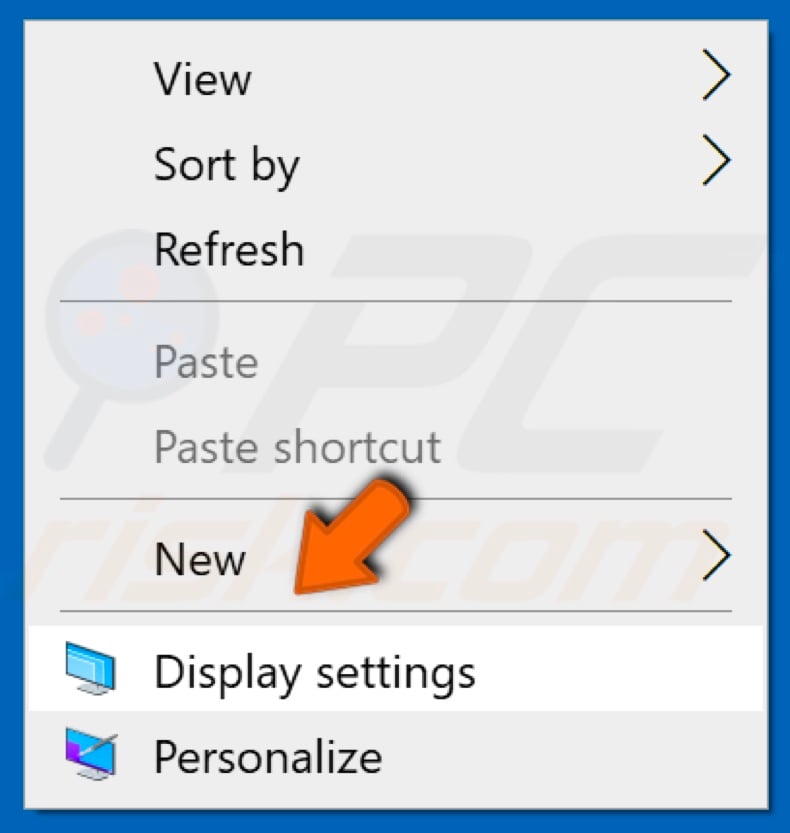
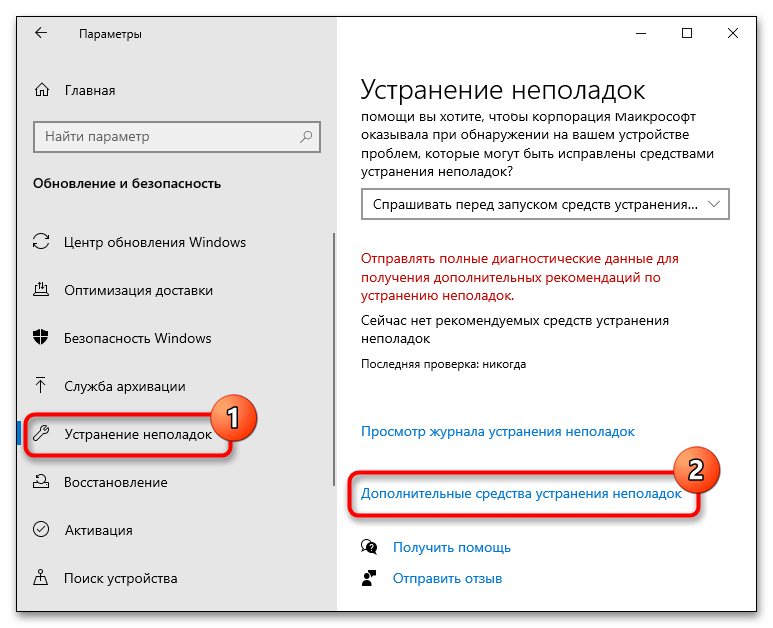
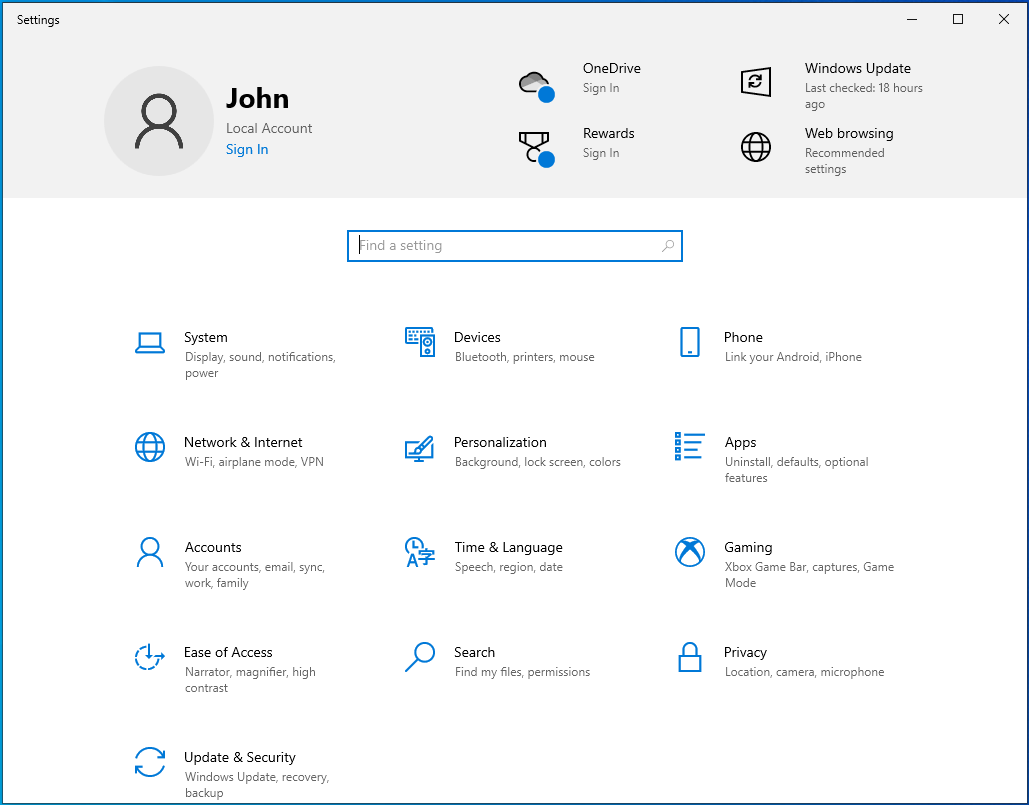
- Откройте приложение «Параметры», зайдите в раздел «Обновление и безопасность» → «Устранение неполадок» и нажмите ссылку «Дополнительные средства устранения неполадок».
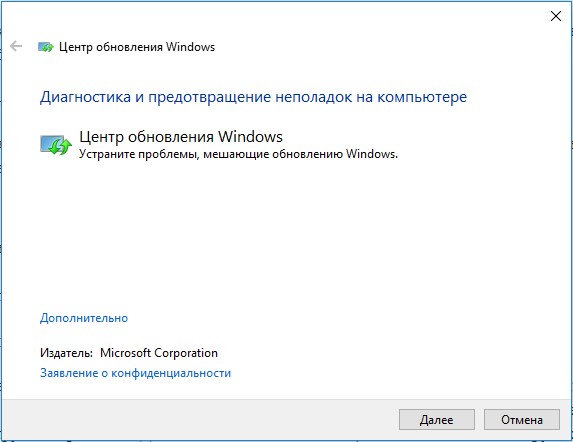
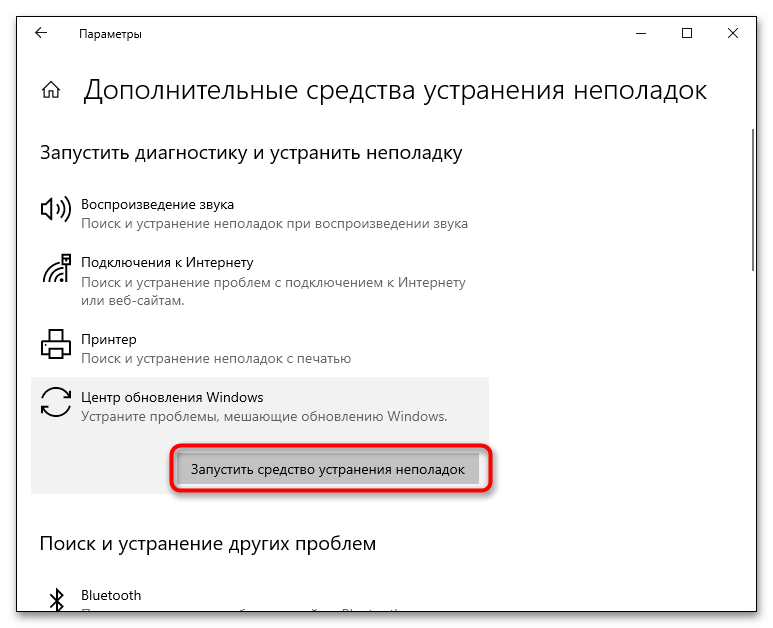
- Откроется окно со списком модулей исправления, выберите в нем модуль «Центр обновления Windows» и нажмите кнопку запуска инструмента.
- Будет запущена служебная утилита, которая проверит работу «Центра обновления» и постарается устранить причины сбоя в автоматическом режиме.
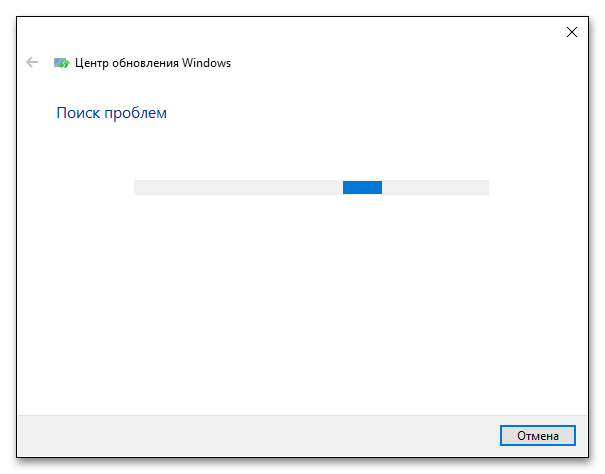
Если ошибки найдены не будут или предложенное утилитой решение не даст положительного результата, переходите к следующему решению.
Способ 2: Очистка кеша обновлений
Решение эффективно, если причиной ошибки стало повреждение загруженных в кеш файлов обновлений. Выполнить такую очистку можно как средствами самой операционной системы, так и с помощью сторонних утилит. Здесь будет рассмотрен первый вариант.
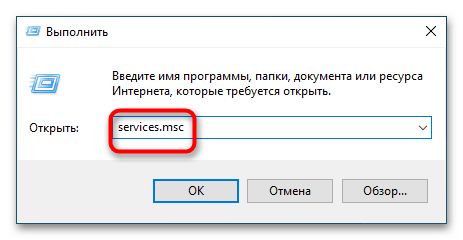
- Вызовите нажатием Win + R диалоговое окошко быстрого выполнения команд, введите в него команду
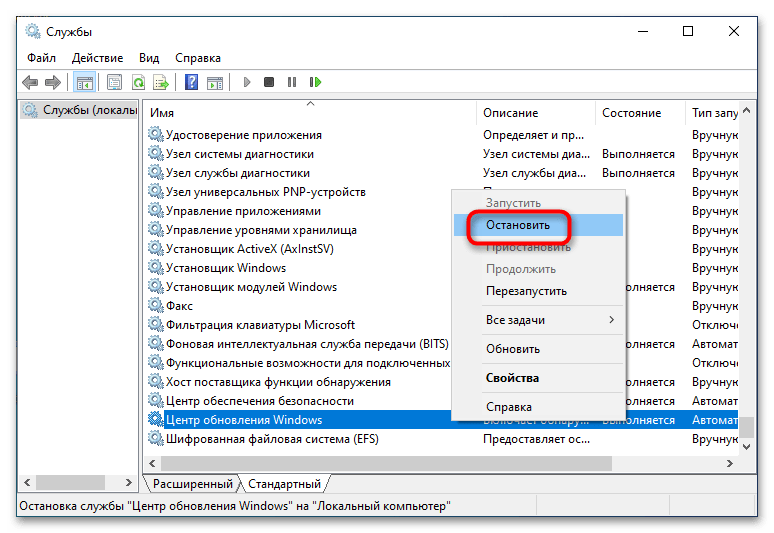
services.mscи нажмите клавишу Enter. - Откроется окно оснастки управления службами, найдите в нем службу с названием «Центр обновлений Windows», нажмите по ней правой кнопкой мыши и выберите в контекстном меню опцию «Остановить».
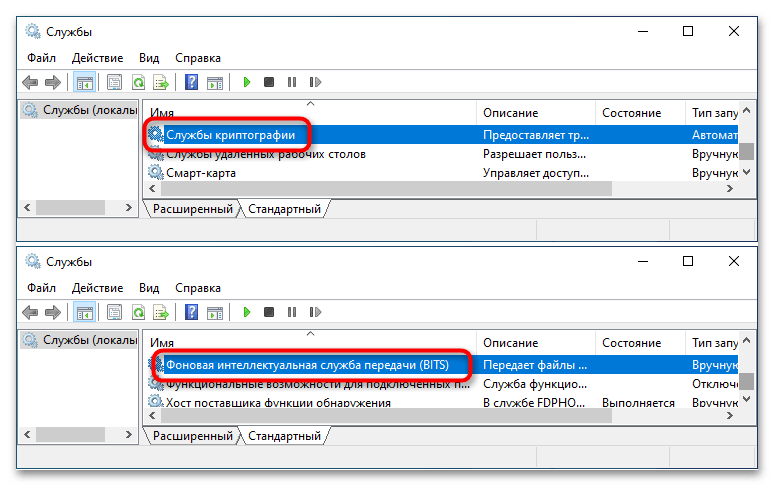
- Точно так же найдите службы «Службы криптографии» и «Фоновая интеллектуальная передача» и остановите их.
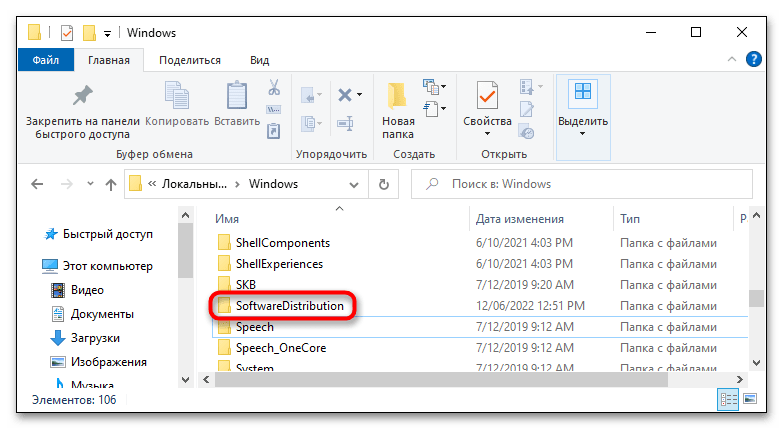
- Перейдите в расположение
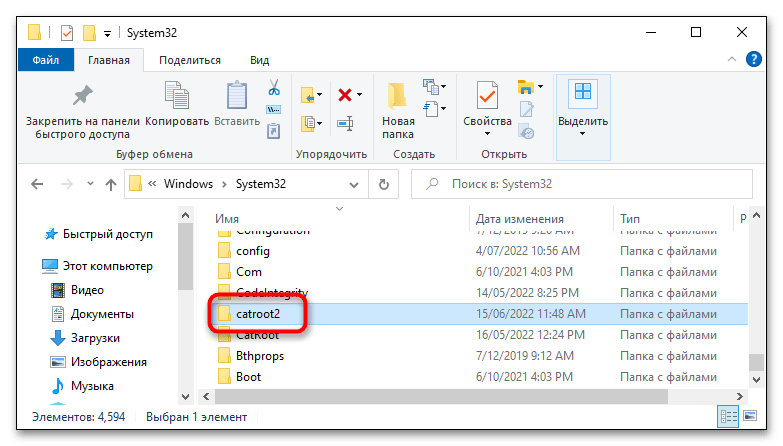
C:\Windowsи удалите либо переименуйте директорию «SoftwareDistribution». - Затем зайдите в папку
C:\Windows\System32и удалите или переименуйте папку «catroot2».
Удалив временное содержимое каталогов, вернитесь в окно управления службами и запустите ранее остановленные службы. После того как Windows 10 повторно скачает пакеты, попробуйте выполнить обновление в обычном режиме.
Способ 3: Восстановление системных файлов
Поскольку причиной ошибки 0x800f0984 может быть повреждение отвечающих за процедуру обновления системных файлов, следует проверить систему на предмет таких повреждений.
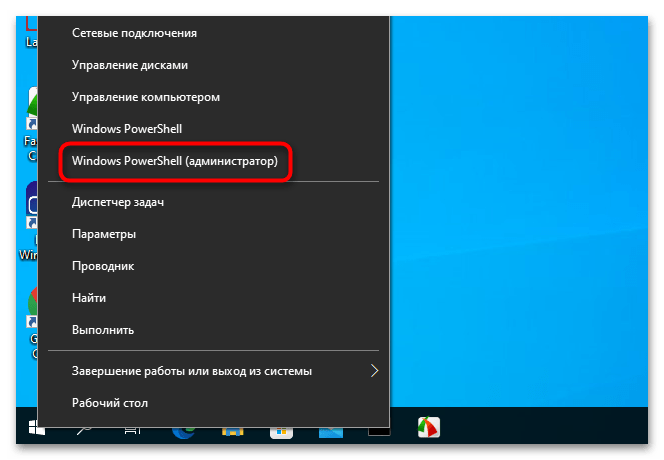
- Запустите от имени администратора «Командную строку» или «Windows PowerShell» любым удобным вам способом, например из контекстного меню кнопки «Пуск».
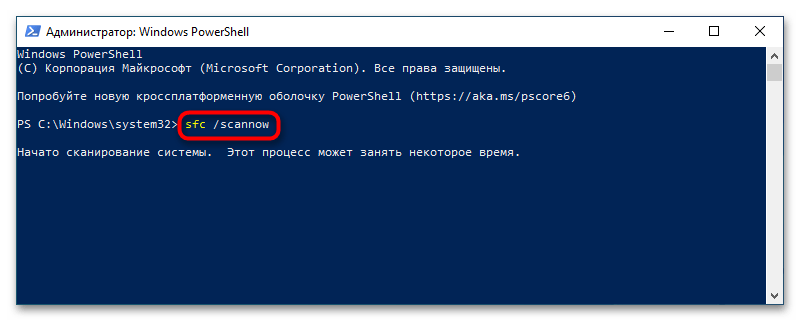
- Выполните в консоли
sfc /scannowи дождитесь завершения процедуры сканирования.
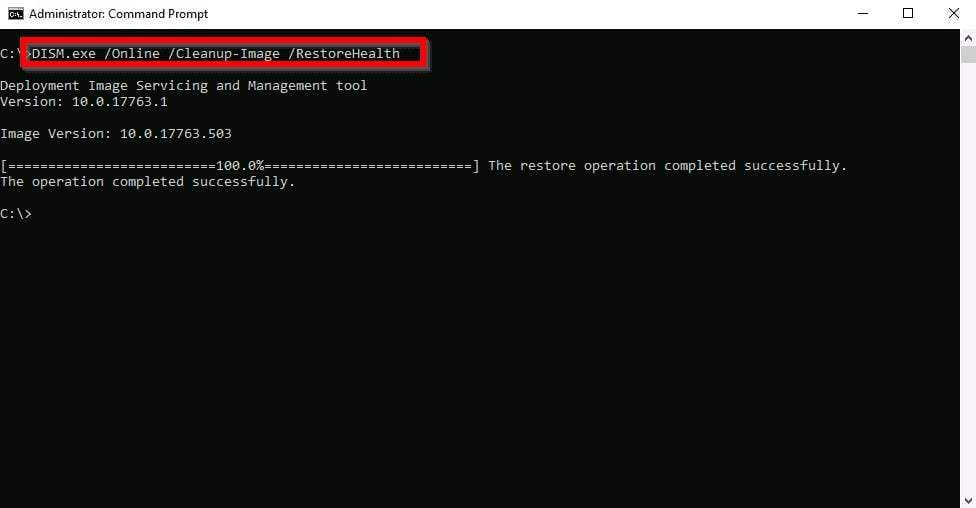
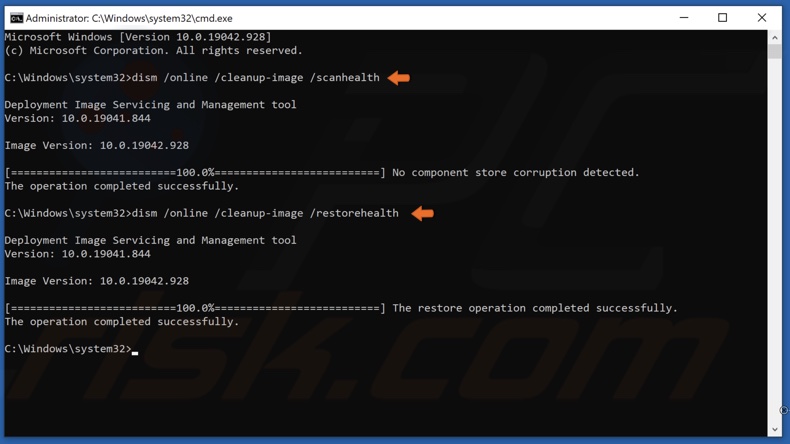
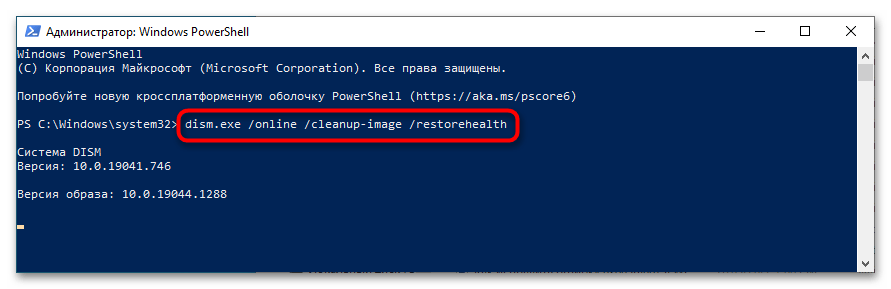
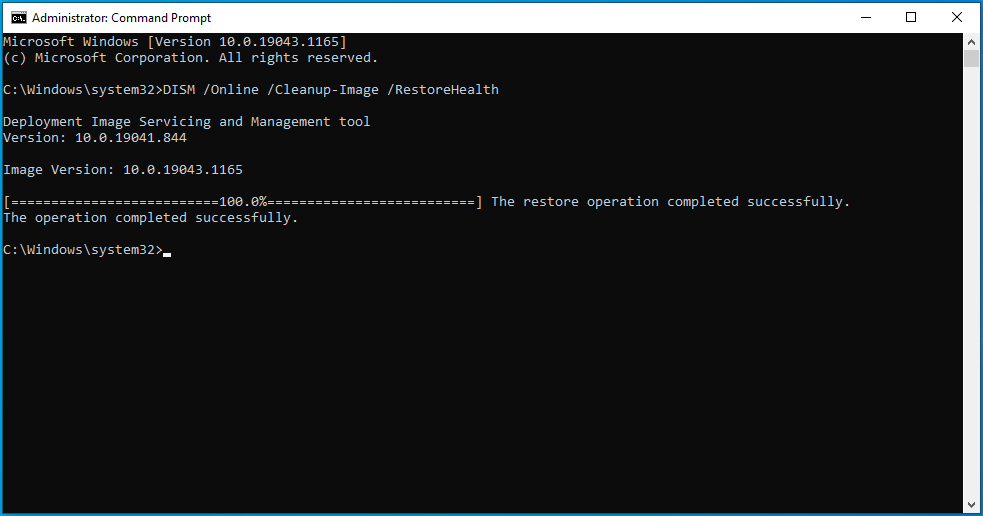
В случае обнаружения утилитой повреждений или отсутствия важных для работы Windows 10 файлов последние будут восстановлены из встроенного хранилища компонентов. Если указанная команда вернет ошибку, нужно будет восстановить само хранилище компонентов, выполнив команду dism.exe /online /cleanup-image /restorehealth. После этого можно снова попробовать выполнить команду sfc /scannow.
Способ 4: Отключение антивируса
Данное решение является дополнительным, оно исключает влияние сторонних программ для обеспечения безопасности на процесс обновления операционной системы. Если вы используете антивирус, брандмауэр или антишпион от стороннего разработчика, отключите эти программы на время обновления. Также рекомендуется отключить другие приложения, изменяющие конфигурацию интернет-соединения.
Читайте также: Отключение антивируса
Наша группа в TelegramПолезные советы и помощь
Microsoft Windows developers work hard relentlessly in order to deliver a more efficient and improved and errorless version to us. Generally, the releases work fine but sometimes you might encounter updates fail to install and you get stuck. The error message might be something like “PSFX_E_MATCHING_BINARY_MISSING (Matching component directory exists but binary missing). Error 0x800f0984”
This issue comes under the Corruption errors document of Microsoft that occurs mainly when system files are damaged. Such messes arise due to some conflict between the Windows internal and external components and demands DISM tool for the fix. If the method is unable to rectify, you can download the same update file directly from the Microsoft update catalog for manual installation. Furthermore, you can try performing a clean boot, SFC scan, and as a last resort, a windows reset.
Update error 0x800f0984
Here is how to fix Update error 0x800f0984 in Windows 11 or 10 –
1] Run Inbox Deployment Image Servicing and Management (DISM) tool
DISM is a built-in utility for Windows from the tech giant efficient to service and mount Windows images before starting the deployment. Further, the tool is capable to capture, split, and otherwise manage .wim files. Error 0x800f0984 might occur due to malfunction in the Windows image so run the Deployment Image Servicing and Management using the below steps –
- Click search icon present in the taskbar.
- Write – cmd.
- Press the – Ctrl + Shift + Enter.
- When a User Account Control shows up, click – Yes.
- Type in the following command line and hit Enter –
DISM /online /cleanup-image /Restorehealth
After the process ends close the command prompt, restart your PC and try reinstalling the windows updates and check if the error 0x800f0984 still comes up.
2] Install Cumulative Windows Updates Manually
Microsoft update catalog is a storehouse of the updates rolled out from time to time for Windows and other components. When you encounter failed to install issue you have an alternative of doing it manually after taking from this site. So with the error 0x800f0984, download the MSU file from the catalog and install it manually after you encounter this issue.
- Open a web browser.
- Navigate to the official update catalog page.
- Click on the search bar and insert the KB number you wish to download.
- Select the – Search.
- Choose the update that goes with your PC configuration.
- Click the – Download.
- Go to the the directory where system saves downloaded items.
- Double-click the setup file you got.
- For appearing User Account Control, select – Yes.
- Follow the on-screen instructions to allow the installation process
3] Use Windows Update Troubleshooter
Windows inbuilt troubleshooter comes quite handy to fix some basic issues in PC and before you take any harsh measures you must always give it a try. Apart from running a series of scans, the utility executes three necessary actions to resolve this update error. First of all, the tool will clear update cache stored in memory, secondly, rename software distribution folder, and lastly, restart Windows update. Utilize the Windows update troubleshooter by following step by step guidelines –
For Windows 10
- Press the – Windows + S.
- Type in – troubleshoot.
- Hit the – Enter.
- From the right-pane, click – Additional troubleshooters.
- Select – Windows update.
- Click – Run the troubleshooter.
- If the troubleshooter comes up with an automatic fix, click – Apply this fix.
- Otherwise, do what the utility suggests.
- Close the troubleshooter and thereafter reboot Windows 10.
For Windows 11
- Press – Windows + I.
- Move to the right of appearing Settings page.
- Scroll down and select – Troubleshoot.
- From next page, click – Other troubleshooters.
- Hit – Run set beside Windows update.
If there were some minor issues the troubleshooter would have diagnosed it and prompted you to apply the respective solutions for it. You can now go back and try installing the pending updates if the error still occurs try the other methods.
4] Reset Windows update component
Main reason for most of the Windows update errors is supposed to be broken update cache. This cache is the store where the update files congregate to help in the installation of cumulative patches and builds. Corruption in the folder may deregister the DLL associated with Windows update leading to failed Windows update problem. Reset of the cache will bring the folder to the default state and after then you will be able to install it successfully.
- Press the Windows key and type in – cmd.
- Hit the – Ctrl + Shift + Enter.
- When a User Account Control comes up, click – Yes.
- Copy and paste the following lines on the cmd and hit Enter after each –
Note – If the system fails to register a specific item, skip that one and move to the next.
net stop bits

net stop wuauserv

Del “%ALLUSERSPROFILE%\Application Data\Microsoft\Network\Downloader\qmgr*.dat”

cd /d %windir%\system32

regsvr32.exe atl.dll

regsvr32.exe urlmon.dll

regsvr32.exe mshtml.dll

regsvr32.exe shdocvw.dll

regsvr32.exe browseui.dll

regsvr32.exe jscript.dll

regsvr32.exe vbscript.dll

regsvr32.exe scrrun.dll

regsvr32.exe msxml.dll

regsvr32.exe msxml3.dll

regsvr32.exe msxml6.dll

regsvr32.exe actxprxy.dll

regsvr32.exe softpub.dll

regsvr32.exe wintrust.dll

regsvr32.exe dssenh.dll

regsvr32.exe rsaenh.dll

regsvr32.exe gpkcsp.dll

regsvr32.exe sccbase.dll

regsvr32.exe slbcsp.dll

regsvr32.exe cryptdlg.dll

regsvr32.exe oleaut32.dll

regsvr32.exe ole32.dll

regsvr32.exe shell32.dll

regsvr32.exe initpki.dll

regsvr32.exe wuapi.dll

regsvr32.exe wuaueng.dll

regsvr32.exe wuaueng1.dll

regsvr32.exe wucltui.dll

regsvr32.exe wups.dll

regsvr32.exe wups2.dll

regsvr32.exe wuweb.dll

regsvr32.exe qmgr.dll

regsvr32.exe qmgrprxy.dll

regsvr32.exe wucltux.dll

regsvr32.exe muweb.dll

regsvr32.exe wuwebv.dll

netsh winsock reset

net start bits

net start wuauserv
- Close the Command Prompt.
- Restart the PC and check if the update error still exists.
5] Check relevant Windows update services
Services in Windows OS provides you a way to run an exe file for a long time. This works automatically and continuously for all users to manage associates tasks on your computer. Same with Windows update service that automatically runs in the background and silently installs the updates. Furthermore, some other services such as BITS also help in this functionality. To install the update without having any error it is a prerequisite condition that the services are in running state and have automatic startup type. So follow the method and check as well as set the same –
- Click the search icon from the taskbar.
- Insert – services.
- Press – Enter.
- From Services window, double-click – Windows Update.
- Go to – Log on tab.
- Make sure the radio button of Local System account is selected.
- Uncheck the box set for Allow service to interact with desktop.
- Shift to General tab.
- Set the Startup type to Automatic or Manual.
- If not grayed out, click – Stop.
- To start the service again, hit – Start.
- Click Apply and then – OK.
- Repeat the same procedure for Background Intelligent Transfer Service, Event Log as well as, Remote Procedure Call (RPC).
6] Run SFC scan to fix Windows Error Code 0x800f0984
Sometimes such errors can also rise up due to a corrupted or a broken kernel file in the system and even reflect a missing binary. So a system file checker scan is necessary in order to repair the resources to resolve this update error 0x800f0984. SFC scan tool will look for the components to find the files if corrupted and replace the same with the cache. Follow the instructions –
- Press the – Windows + S.
- Type in – cmd.
- Select the – Run as administrator.
- To give your consent, click – Yes.
- Type in sfc /scannow and hit – Enter.
Wait till the command runs and the scan completes then reboot the device. After powering up, try installing the updates and check if the issue still persists.
7] Clean Boot Windows
Sometimes this error 0x800f0984 might occur because of some software conflicts on your PC. When you Perform a clean boot with all the services stopped this would remove all the persisting collisions most certainly fix the issue. Here’s how we can perform a clean boot –
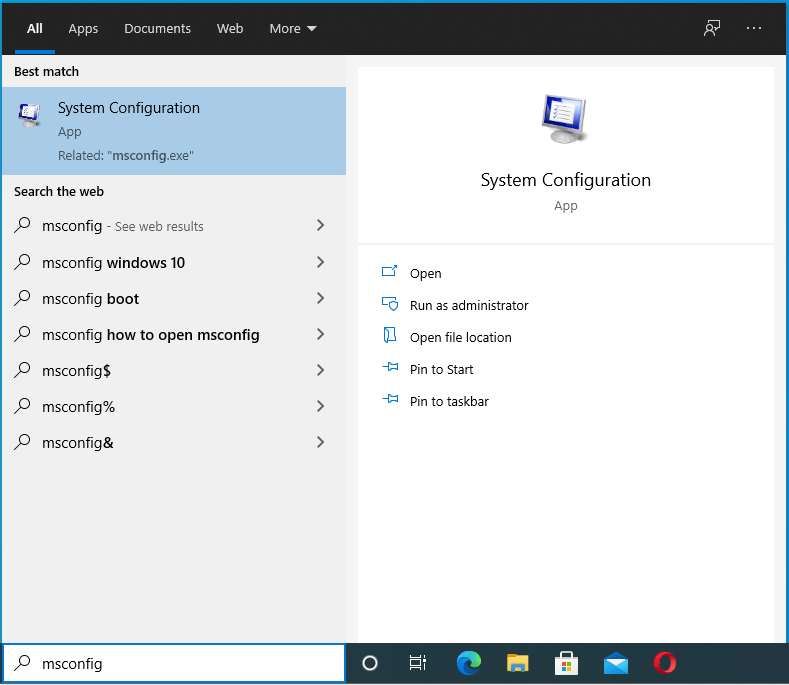
- Press the – Windows logo.
- Type in – msconfig.
- Hit the – Enter.
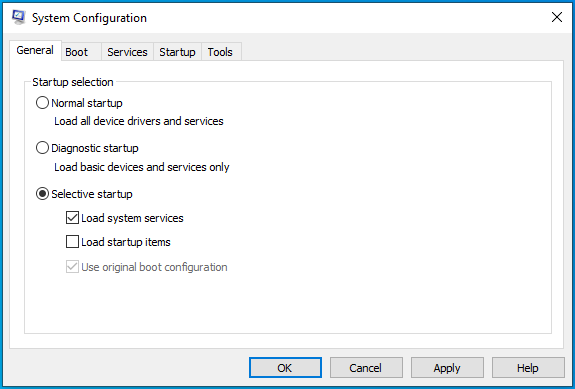
- Select the radio button present before Selective startup.
- Uncheck – Load startup items.
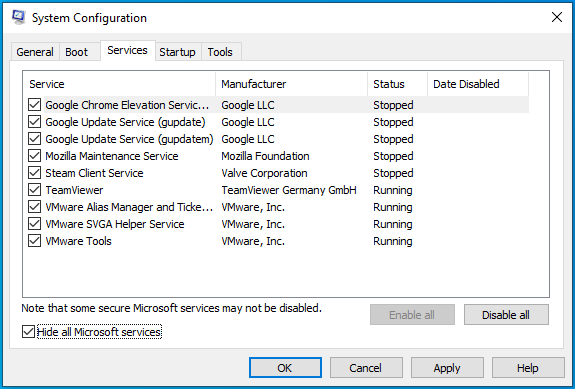
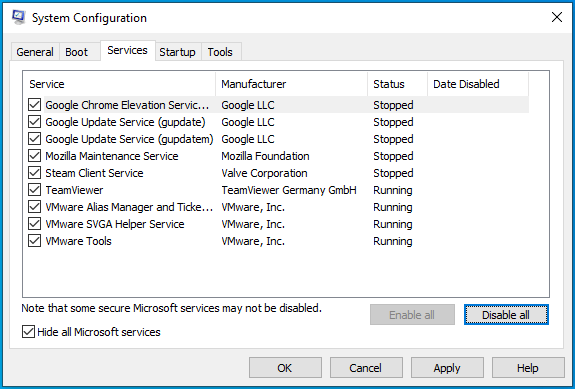
- Go to – Services tab
- Click the checkbox set for – Hide all Microsoft services.
- Select the – Disable all.
- Go to Startup tab.
- Click the – Open Task Manager.
- Right-click on each program listed there and select – Disable.
- Close Task Manager and go back to the System Configuration window.
- Click Apply first and then OK.
- Select the – Restart now.
How to Clean Start Windows 10 PC
8] Try Cloud Reset to solve Windows Error 0x800f0984
Microsoft added a modern feature using which you can reset your Windows device from taking the files Cloud. After using this function you have the minimum chance to find any error while installing Windows 11 or 10. So do according to the below guidelines –
- Click – Start button.
- Type – reset.
- Hit – Enter.
- From the right-pane, click – Get started or Reset PC.
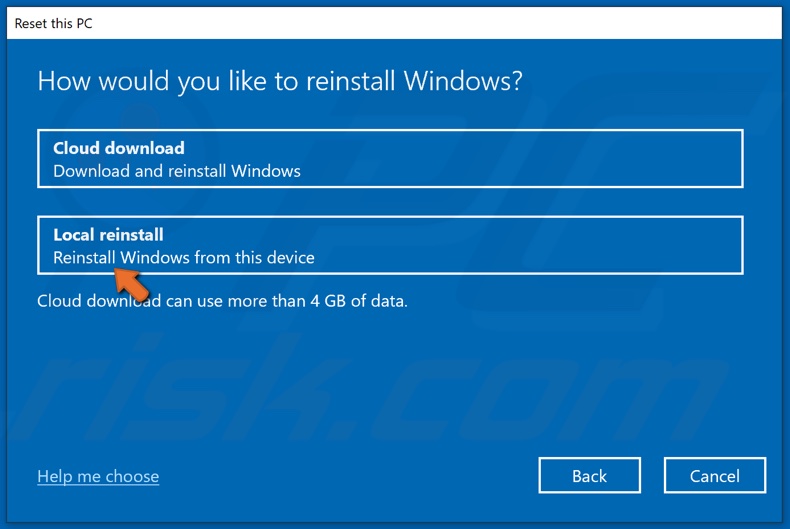
- Choose – Keep my files.
- From the next window, select – Cloud download.
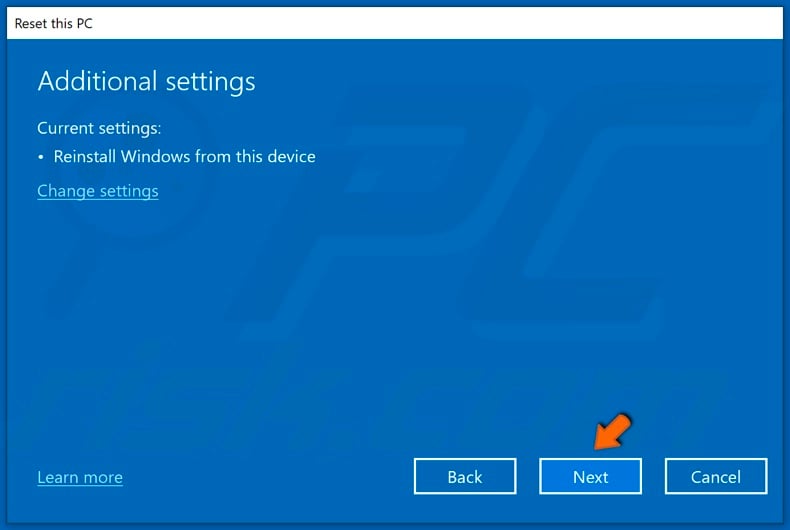
- Lastly, click – Reset.
See the ways in detail – How To Reset This PC Via Cloud Download in Windows 10.
9] Go back to an earlier restore point
If all of the above solutions don’t seem to help you then your last resort is to restore your PC to an earlier point in time when your system was working sound and good. Resetting your PC doesn’t harm your personal files it just alters the c drive and uninstalls all those programs and applications installed within this period of time.
Here’s how you can reset your PC in few simple steps –
- Press – Windows + S.
- Insert – reset.
- Move to the right of the appearing page.
- Hit – Get Started.
- Select – Keep my files.
- Follow the on screen instructions and finally click on – Reset.
- Your PC will now be restored to an earlier restore point
10] Perform Clean install to fix Windows update 0x800f0984
Suppose you have tried all the methods to fix Update error 0x800f0984 in Windows OS and didn’t find any relief then lastly you can perform clean install. This process will install the OS from scratch where there will be no space for any issues remain. Moreover, the clean install will include the update showing the error code.
- Navigate to – Microsoft website.
- Click – Download tool now.
- Double-click the downloaded setup file.
- When a UAC arrives, hit – Yes.
- Once the setup window is ready, click – Accept.
- Select the radio button allocated for – Create installation media (USB flash drive, DVD, or ISO file) for another PC.
- Hit – Next.
- Check the Language, Edition, and Architecture and make sure they are correct.
- After that, click – Next.
- Click the radio button set beside ISO file.
- Hit – Next.
- Choose a location where you want to save the file.
- Click – Save.
- In the end, hit – Finish.
- Visit the directory where you saved the file.
- Double-click the downloaded item to start the installation process.
- Comply with on-screen guidelines to finish.
You can also find the ways here – How to Install Windows 10 2009 October 2020 update.
Methods list
1] Run Inbox Deployment Image Servicing and Management (DISM) tool
2] Install Cumulative Windows Updates Manually
3] Use Windows Update Troubleshooter
4] Reset Windows update component
5] Check relevant Windows update services
6] Run SFC scan
7] Clean Boot Windows
8] Try Cloud Reset
9] Go back to an earlier restore point
10] Perform Clean install
That’s all!!
Table of contents
- What Is the Windows 10 Error Code 0x800f0984?
- How to Get Rid of the Error Code 0x800f0984 When Updating Windows 10
- Fix 1: Use the Windows Update Troubleshooter
- Fix 2: Run the DISM and SFC Tools
- Fix 3: Perform a Clean Boot
- Fix 4: Delete the Contents of the SoftwareDistribution Folder
- Fix 5: Perform a System Restore
- Fix 6: Remove the Problematic Windows Update
- Fix 7: Reset Your PC
- Optimize Your PC’s Performance
Are you looking for information on how to resolve the Windows 10 Update error code 0x800f0984? We are here to help.
Many Windows users are running into this Windows Update error, which is preventing them from accessing their systems. According to several users, the Windows Update error 0x800f0984 occurred after installing the recent KB5001330 update for Windows 10 version 20H2 and 2004. It’s the same error users encountered when trying to install Windows 10 Cumulative Update KB5000842.
The KB5001330 update was a mandatory download intended to patch the problems caused by the previous update, including the long-running problems with printers. In this article, we’ll show you how to fix the Windows 10 Update error code 0x800f0984.
What Is the Windows 10 Error Code 0x800f0984?
The Windows Update service simplifies the entire process of updating your Windows PC. Usually, the updating process is automatic, meaning Windows automatically downloads and installs any available updates to your PC. These updates improve certain functionalities and security features to protect your computer from threats.
The Windows Update error code 0x800f0984 occurs when trying to install updates. The error code means “PSFX_E_MATCHING_BINARY_MISSING (Matching component directory exists but binary missing)”.
Some users on Reddit were furious when their update process got stuck at 20%, then again at 73%, then at 100%, and then finally failed.
So, what’s causing the Windows Update error code 0x800f0984? Well, if the Windows Update service fails to function correctly, you’ll likely run into issues trying to install updates. Additionally, the error code 0x800f0984 could be a result of corrupted system files. This may occur due to software conflicts.
In other cases, your antivirus program could be blocking the files from getting installed on your computer. If so, try temporarily disabling your antivirus software and check if the updates go through.
The good news is that there are fixes that you can apply to resolve the Windows 10 Update error code 0x800f0984.
How to Get Rid of the Error Code 0x800f0984 When Updating Windows 10
Fix 1: Use the Windows Update Troubleshooter
Windows machines come with in-built troubleshooters that help to detect problems and fix them automatically. The Windows Update troubleshooter will scan for and repair any update-related issues on your computer.
Here’s how to use the troubleshooter:
- Open your Settings app (
Win + I).
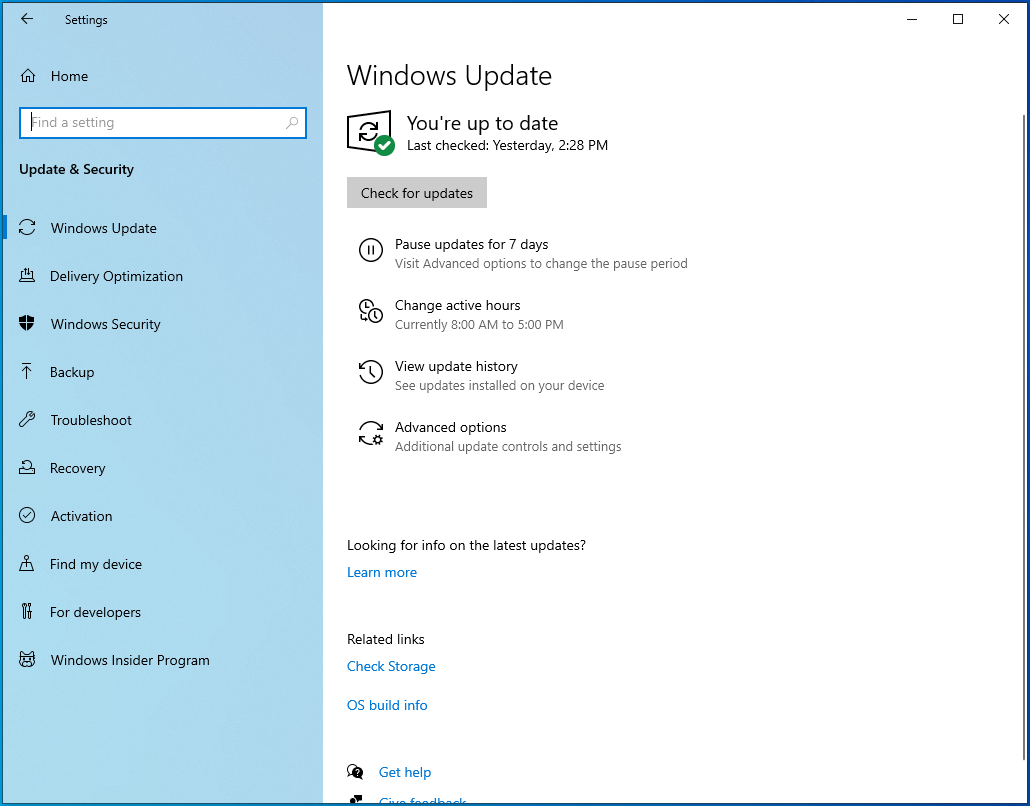
- Go to Update & Security.
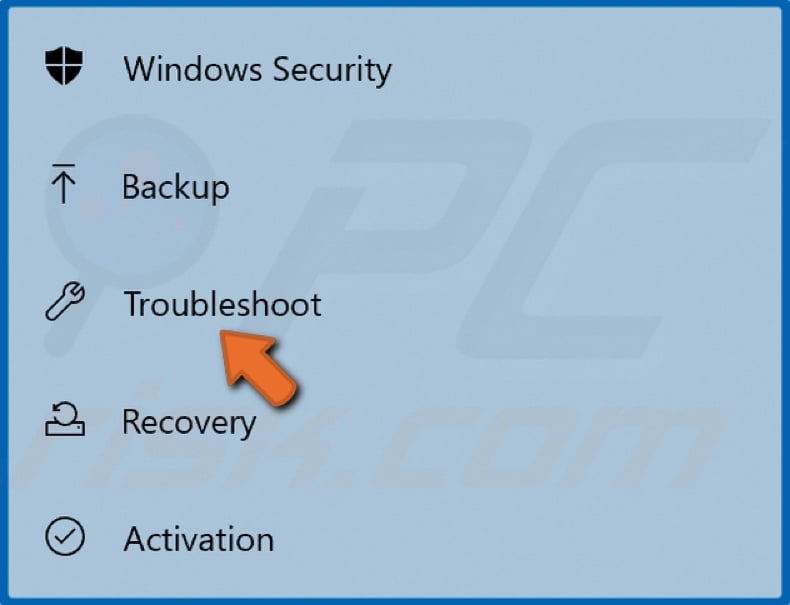
- Select Troubleshoot.
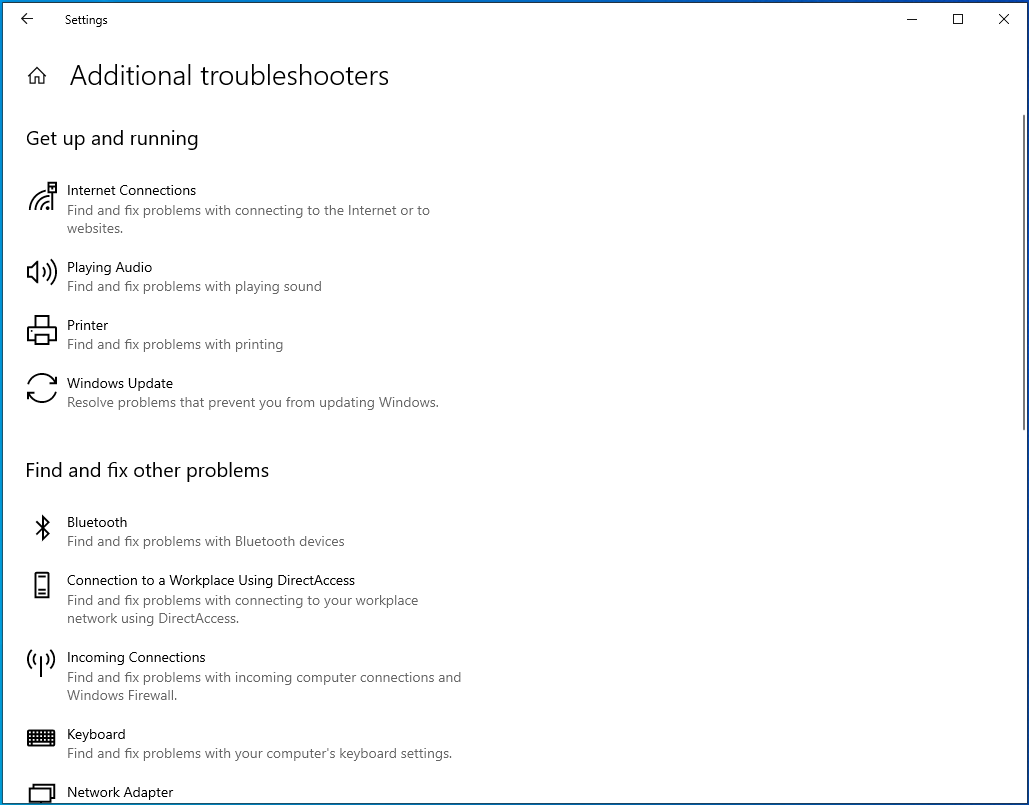
- Navigate to the “Additional troubleshooters” link on the right sidebar and select it.
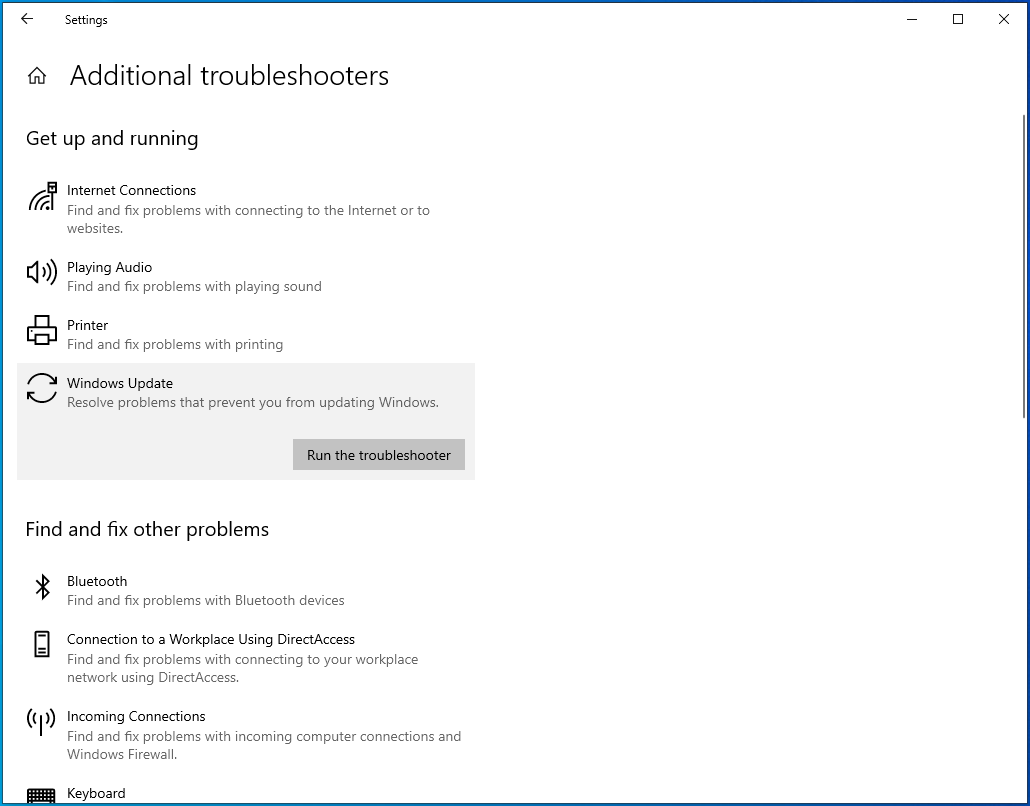
- On the next page, find the “Windows Update” option, left-click on it once, and click on “Run the troubleshooter”.
- Follow the on-screen instructions to try and resolve the Windows Update error code 0x800f0984.
- Let the process run uninterrupted, and restart your PC once it completes.

Fix 2: Run the DISM and SFC Tools
The DISM (Deployment Image Servicing and Management) tool is a Windows built-in utility that helps to repair and replace corrupt Windows images. The SFC (System File Checker) tool, on the other hand, is a Windows utility that scans and restores corrupted Windows system files. These tools come in handy when faced with various PC problems, like failed Windows updates.
We’ll start by running an SFC scan to resolve any corruption in the system files. Here’s how to run SFC:
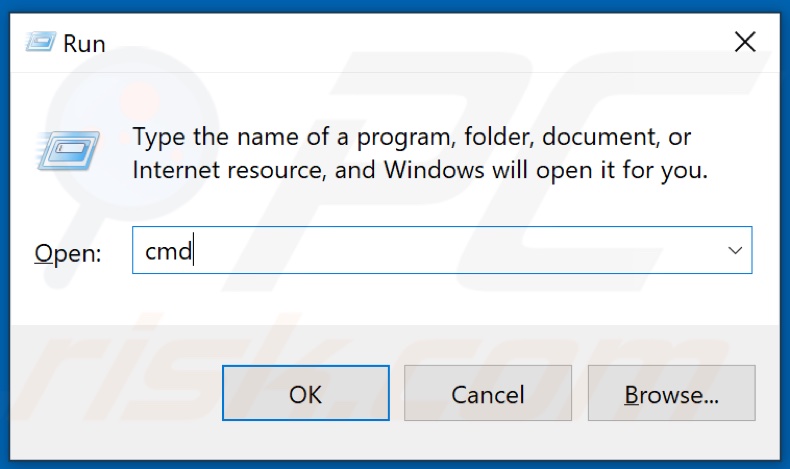
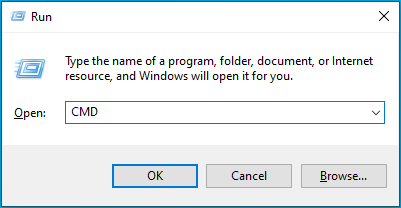
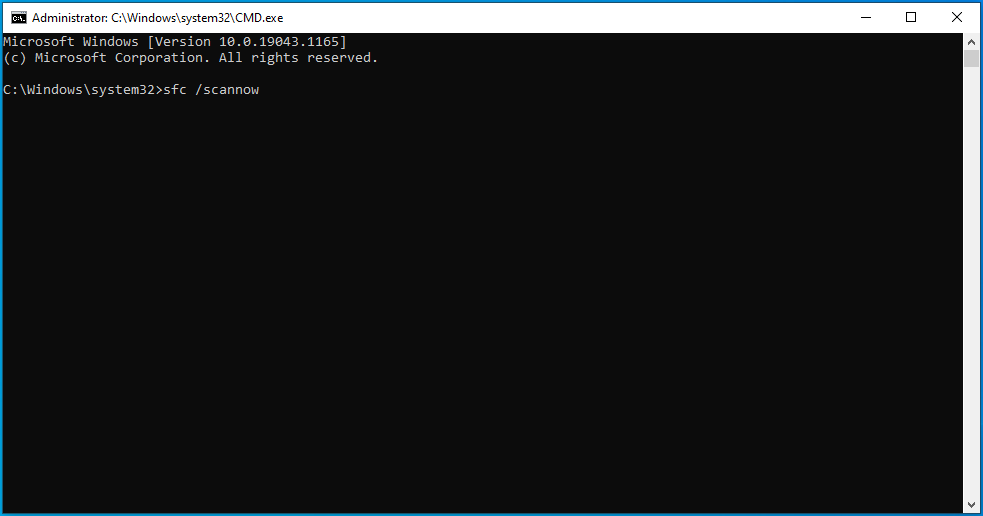
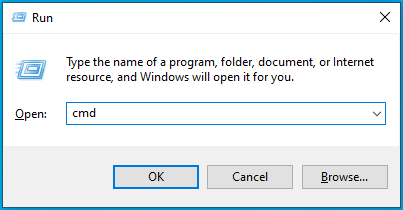
- Launch an elevated command prompt. To do that, press the
Win + Rkeyboard shortcut, typeCMDinto the “Run” dialog box, and press theCtrl + Shift + Enterkeyboard shortcut.
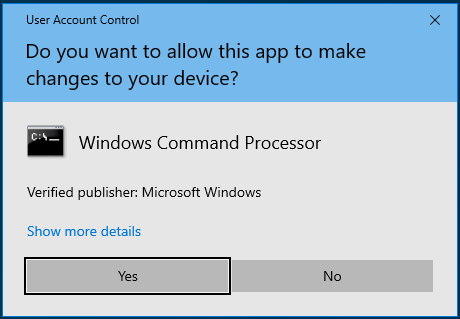
- Click “Yes” if you get a UAC prompt.
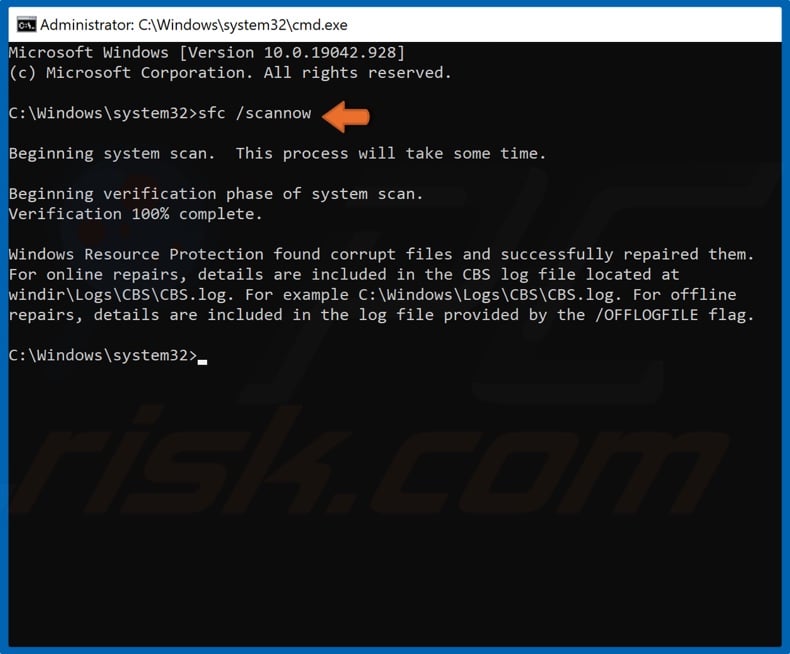
- Once the “Administrator Command Prompt” window comes up, type or paste the command
sfc /scannowand pressEnter.
- The SFC tool will run for a while, attempting to fix corrupted system files by replacing them with good copies.
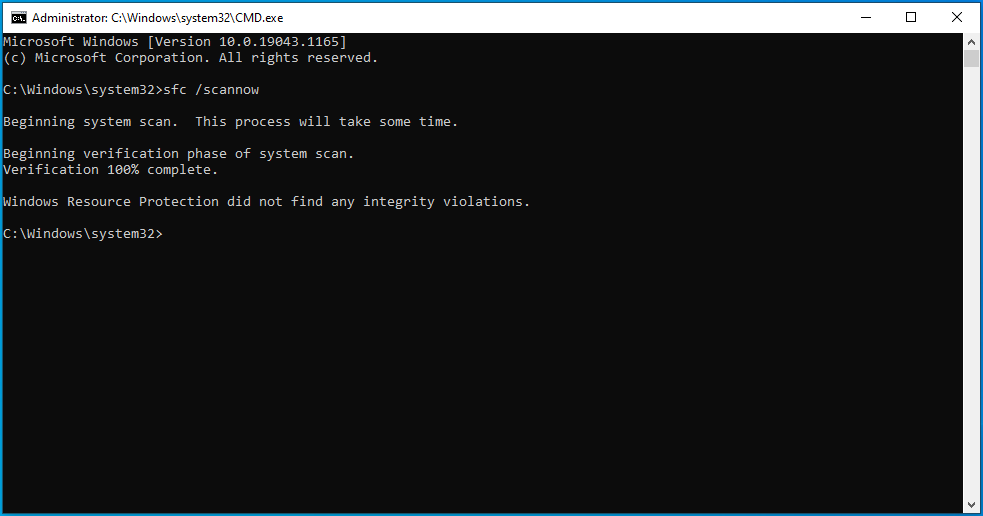
Once the process completes successfully, restart your computer and check if the issue has been resolved.
If you run into the “Windows Resource Protection could not start the repair service” error message, the Windows Modules Installer service could be disabled. To check this and enable it if need be, follow the instructions below:
- Press the
Windows logoon your keyboard, typeServices, and hitEnter. - In the “Services” window, locate the Windows Modules Installer service and double-click on it.
- Under “Startup type”, set it to “Manual” and click on Apply > OK.
- Now, go back to the command prompt and execute the
sfc / scannowcommand.
If the SFC tool doesn’t find any errors, try repairing Windows 10 image files using the DISM tool. Here’s the procedure:
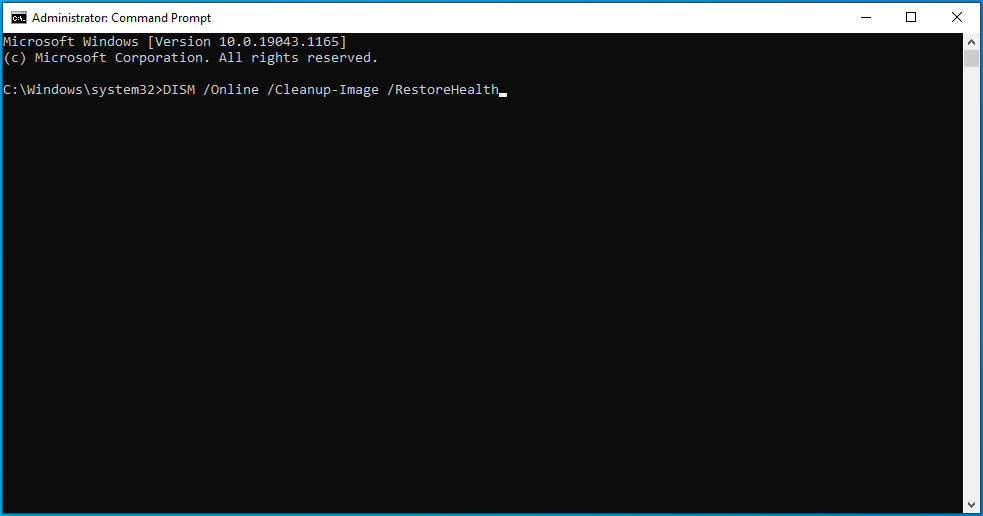
- Open an elevated command prompt as outlined above and execute the following command:
DISM/ Online/ Cleanup-Image/ RestoreHealth.
- This process may take a while depending on the level of corruption. Therefore, wait patiently while the tool is repairing corrupt Windows image files.
- After it’s done, restart your computer and try installing Windows updates.
Fix 3: Perform a Clean Boot
Performing a clean boot makes it easier to identify if there are any software conflicts on your PC. If no errors occur in this state, then it means the issue is caused by external factors. In a clean boot environment, your PC starts with a minimal set of drivers and startup programs. This may help get rid of software conflicts that may occur when you install a third-party application in Windows.
To perform a clean boot, follow these instructions:
- Press the
Windows logoon your keyboard, typemsconfiginto the Windows Search box, and hitEnterto launch System Configuration.
- Under the “General” tab, uncheck the “Load startup items” box, but leave the “Load system services” and “Use original boot configuration” options checked.
- Go to the “Services” tab and click on the “Hide all Microsoft services” checkbox.
- Click the “Disable all” button. This disables all non-Microsoft services.
- Next, under the “Startup” tab, click on “Open Task Manager” and disable all items set to start up when you boot the computer. Once you’re done, exit the Task Manager and go back to the System Configuration window.
- Click on Apply > OK and restart your PC.
If all goes well, then one of your third-party applications is to blame for the Windows Update error code 0x800f0984. To find the culprit, enable the applications one by one and restart your PC every time you do so.
Once you find the culprit, consider removing it from your machine or leave it disabled. To go back to the normal Windows environment, simply undo the changes you performed while following the steps from the list above.
Download Auslogics BoostSpeed
Your one-stop PC maintenance and optimization tool, this program will clean, speed up, repair and tweak your system to ensure maximum speed and efficiency.
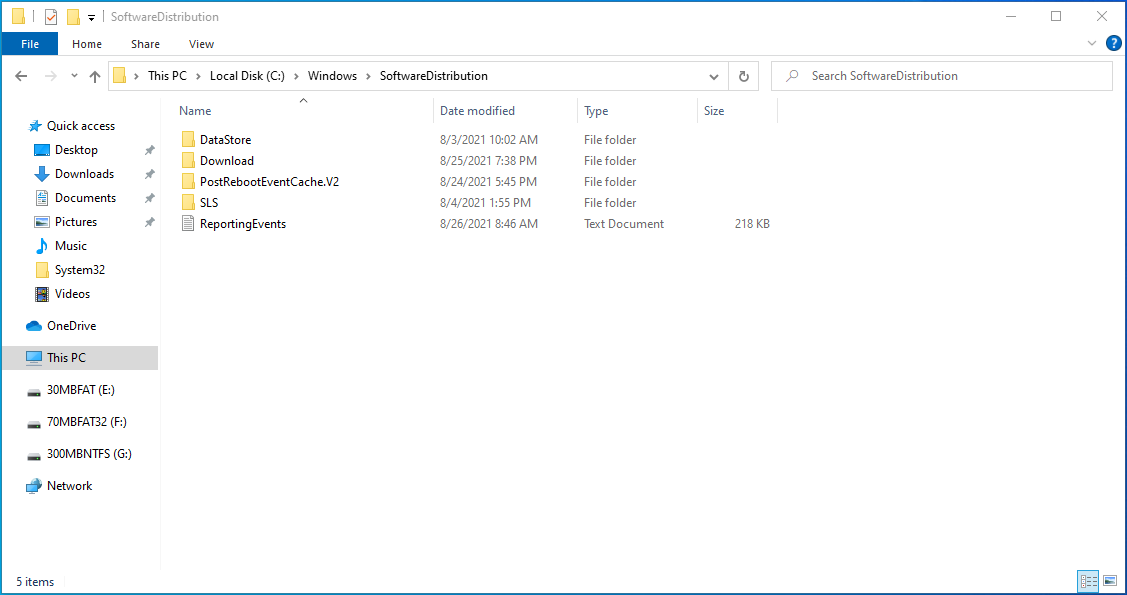
Fix 4: Delete the Contents of the SoftwareDistribution Folder
The SoftwareDistribution folder is where Windows Update files are temporarily stored. These files are needed to install new updates that keep your device secure and the latest improvements.
The folder is maintained by the Windows Update Agent (WUAgent) and normally shouldn’t be deleted. However, when faced with issues while trying to install Windows updates, clearing this folder may be the best option.
Windows will redownload all the required files or recreate the folder and redownload all the necessary components. If you don’t want to clear the folder and simply want to test if its contents are preventing the updates from being applied, you can rename it using the following steps:
- Run an elevated command prompt. To do that, press the
Win + Rshortcut, typecmdinto the text box, and press theCtrl + Shift + Entercombination.
- Click “Yes” if you get a UAC prompt.
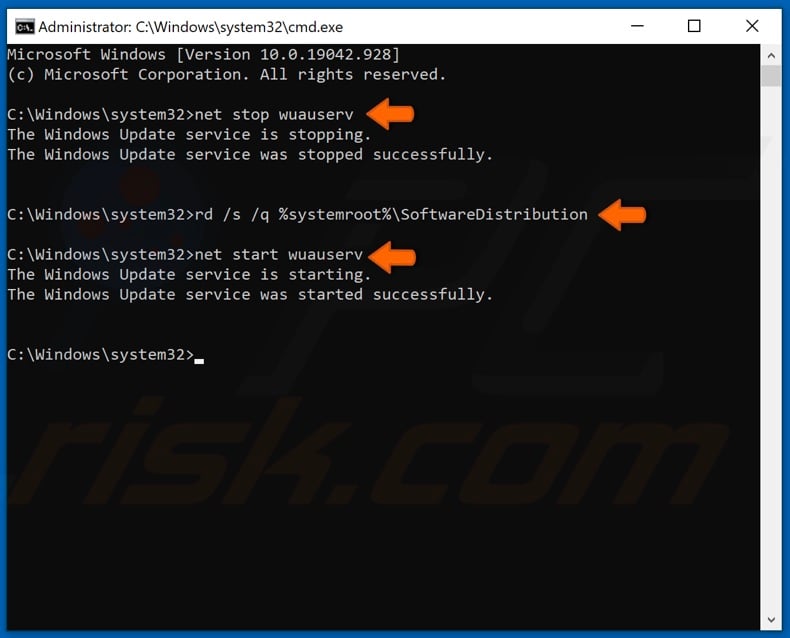
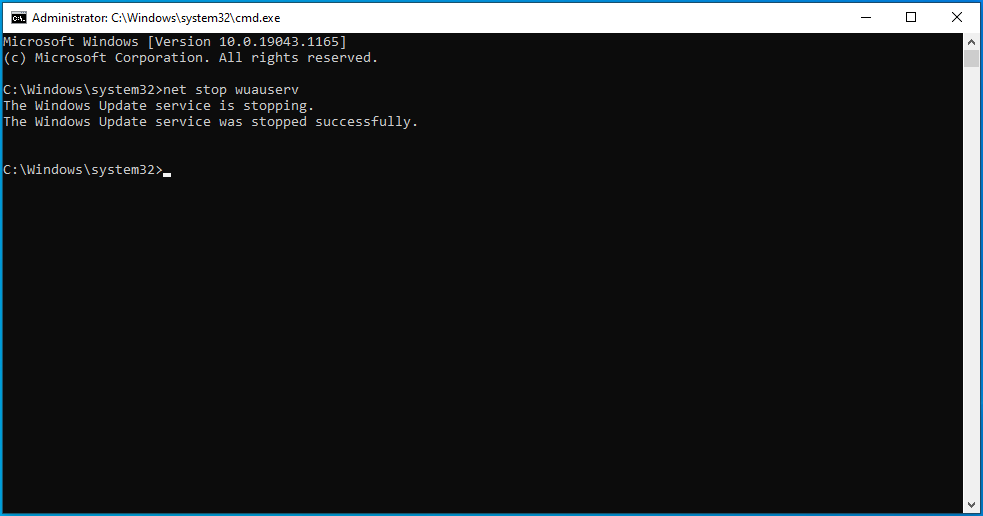
- In the Command Prompt window with administrator rights, type the command
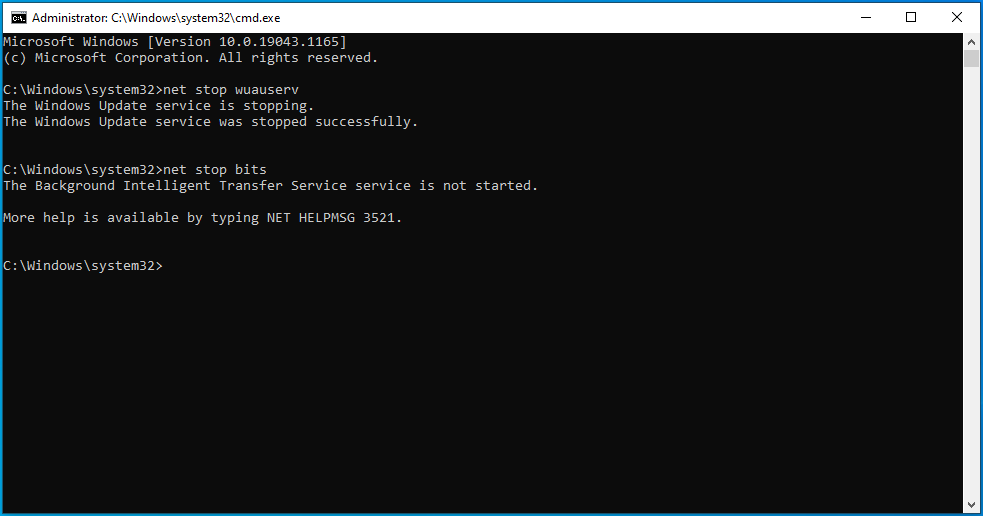
net stop wuauservand pressEnter. This will stop the Windows Update service.
- Next, you’ll need to stop the Background Intelligent Transfer Service by executing the command:
net stop bits.
- Now, enter the command
rename %windir%\SoftwareDistribution SoftwareDistribution.bakto rename the folder. If the command doesn’t go through the first time, repeat Steps 3 and 4 above and try renaming the folder again. - If you manage to rename the folder, restart the services you stopped earlier. To do that, execute the following commands one after the other:
-
net start wuauserv
-
net start bits
-
Renaming the SoftwareDistribution folder will trigger Windows to recreate it and redownload all the required components. If you see that the Windows Update error code 0x800f0984 is triggered by that, the best course of action is to clear the SoftwareDistribution folder.
Here are the steps:
- Press the
Windows logokey and search forCommand Prompt. Be sure to run it as an administrator. - In the elevated command prompt window, type or paste the following commands one after the other and press
Enterafter each action:-
net stop wuauserv
-
net stop bits
-
- Next, open File Explorer by pressing the
Win + Eshortcut and navigate to the C:\Windows\SoftwareDistribution\ folder. Alternatively, open the “Run” window using theWin + Rkeyboard shortcut, type or paste the path C:\Windows\SoftwareDistribution\ and press “OK”.
- In this folder, select all the contents using the
Ctrl + Ashortcut and hit theDeletekey. If you run into problems deleting the items, restart your PC and try again. - Once done, launch the Command Prompt with elevated rights as shown above and execute the following commands one after the other:
-
net start wuauserv
-
net start bits
-
Once you finish applying these steps, Windows will reconfigure the folder and redownload all the necessary components.
Fix 5: Perform a System Restore
The System Restore feature is useful in situations where you run into PC errors but can’t find the source of the problem. You see, your Windows system creates system restore points periodically, and this can come in handy when trying to resolve PC issues.
System Restore takes your computer back to a state before the error first occurred. For this step to be successful, it’s crucial to recall when you first encountered the error.
To perform a system restore, follow these guidelines:
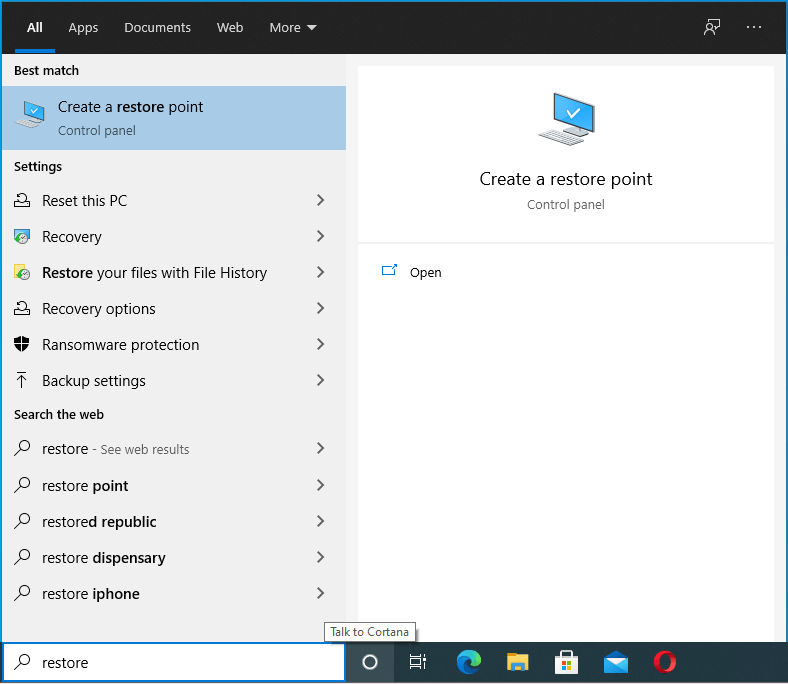
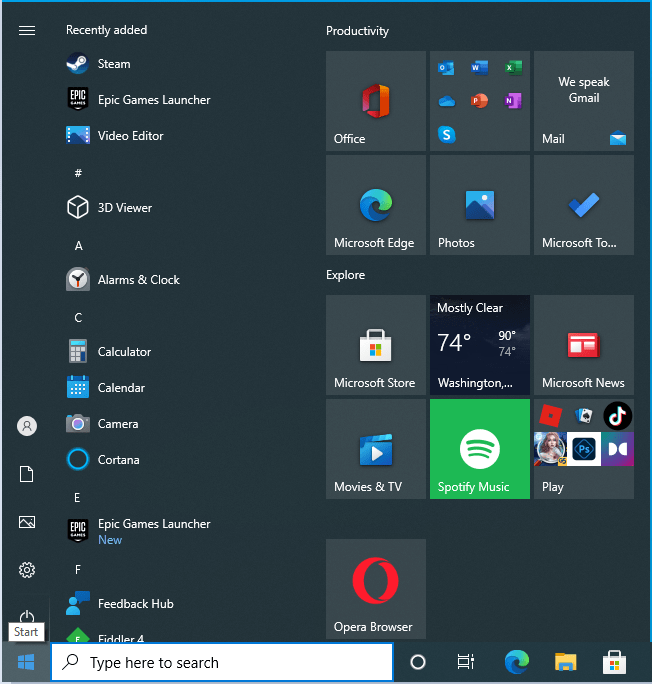
- Go to your “Start” menu, type
Restoreand select “Create a restore point”.
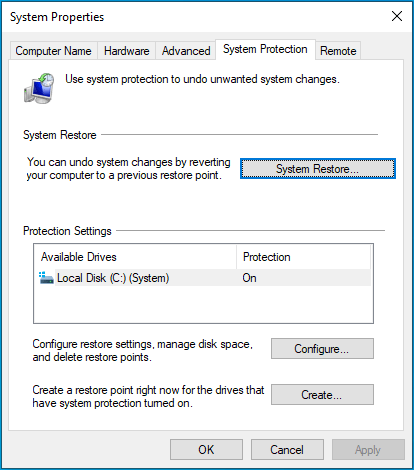
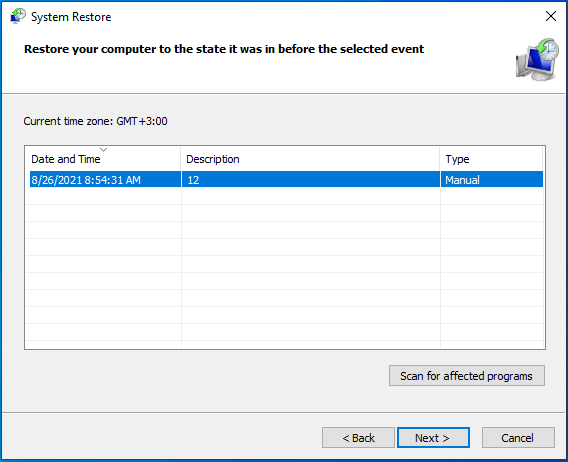
- Click on the “System Restore” button and then select “Next”.
- Find the most appropriate restore point from the list. If you can’t find the relevant restore point, click on the “Show more restore points” option.
- Once you find the restore point you need, select it and click on “Next”.
- Confirm everything on the next page, and if satisfied with the selection you made, click on the “Finish” button.

Keep in mind that for your system to be restored, your PC will need to restart. So, be sure to save all your work before proceeding. Restoring the system should get rid of the error code 0x800f0984 when updating Windows 10.
Fix 6: Remove the Problematic Windows Update
As noted, users encountered the Windows Update error code 0x800f0984 after installing the KB5001330 update. You can try uninstalling it to check if the error goes away.
Here’s how:
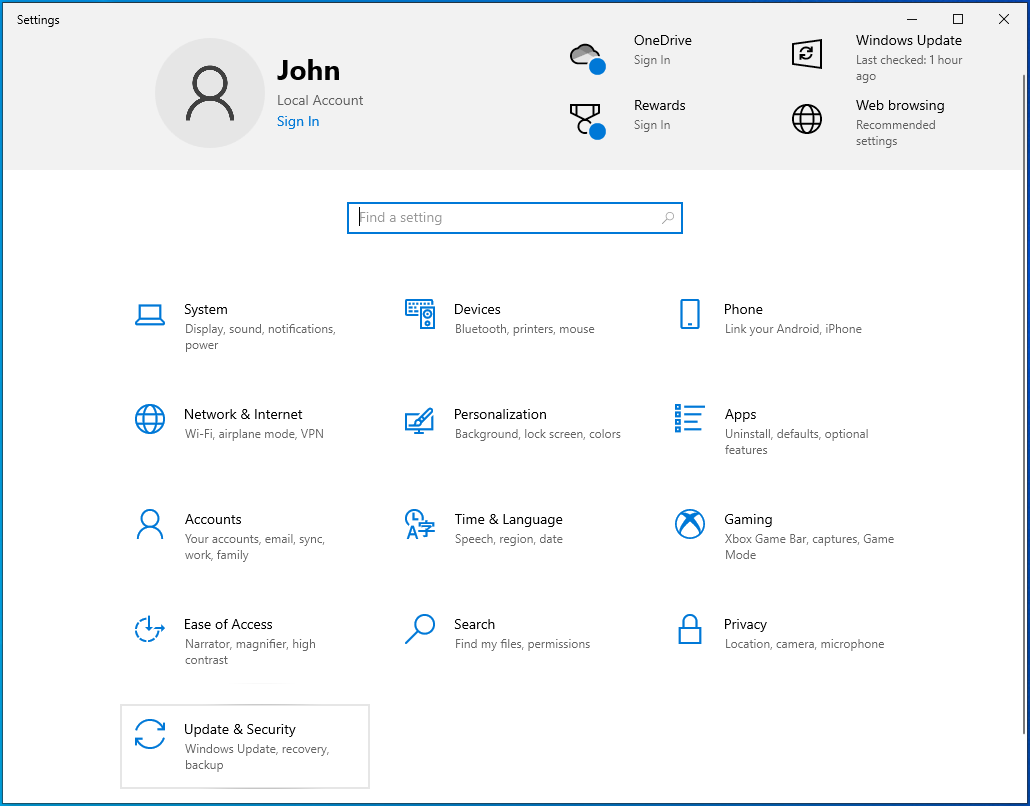
- Press the
Win + Ikeyboard shortcut.
- Open Update & Security > Windows Update.
Картинка с сайта: www.auslogics.com
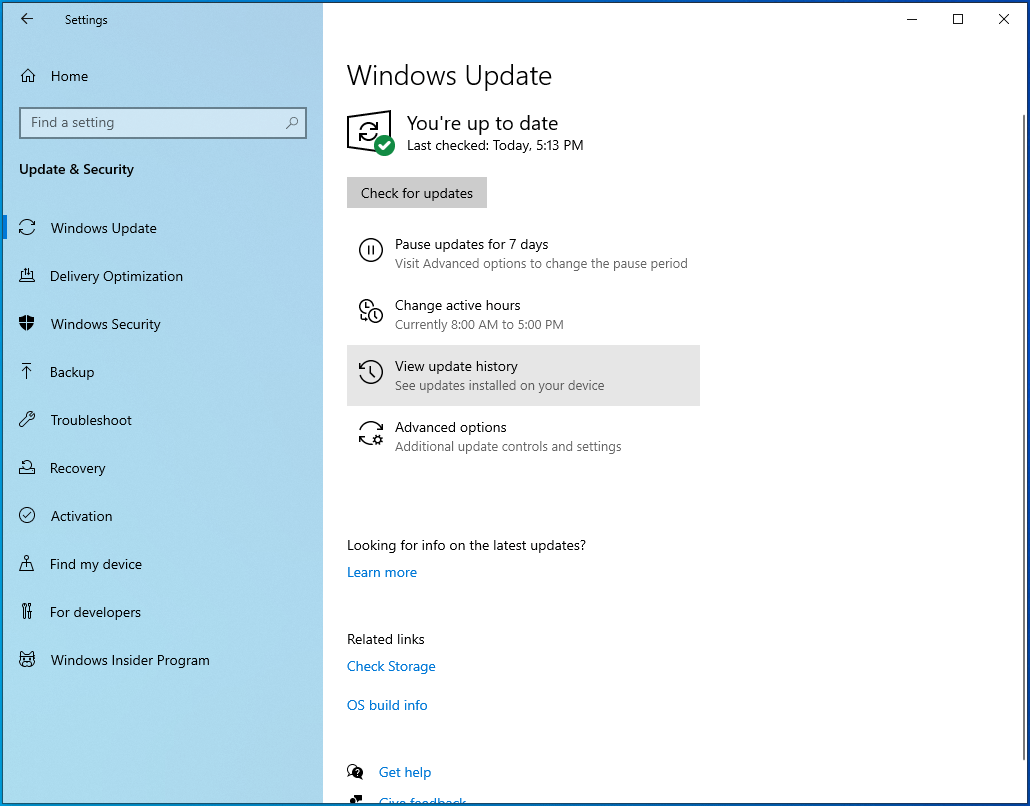
If it’s the update that triggered the system malfunction, then removing it should fix the problem.
Fix 7: Reset Your PC
If nothing seems to work, you can choose to reset your PC. What this process does is reinstall Windows, giving your machine a new breath of life. You can reset your PC via several methods, the easiest one being from “Settings”.
Here is how to proceed:
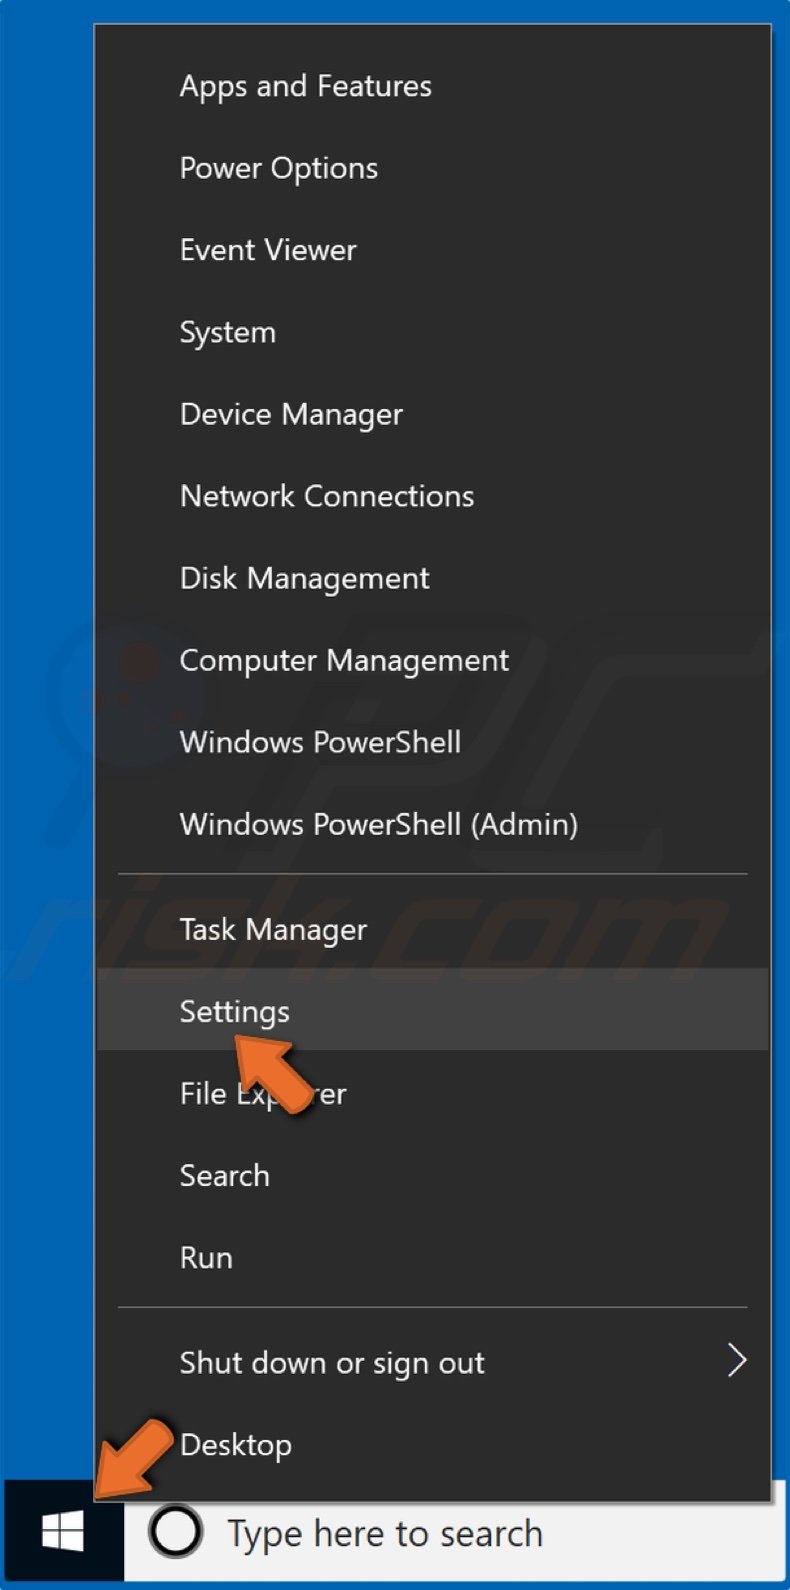
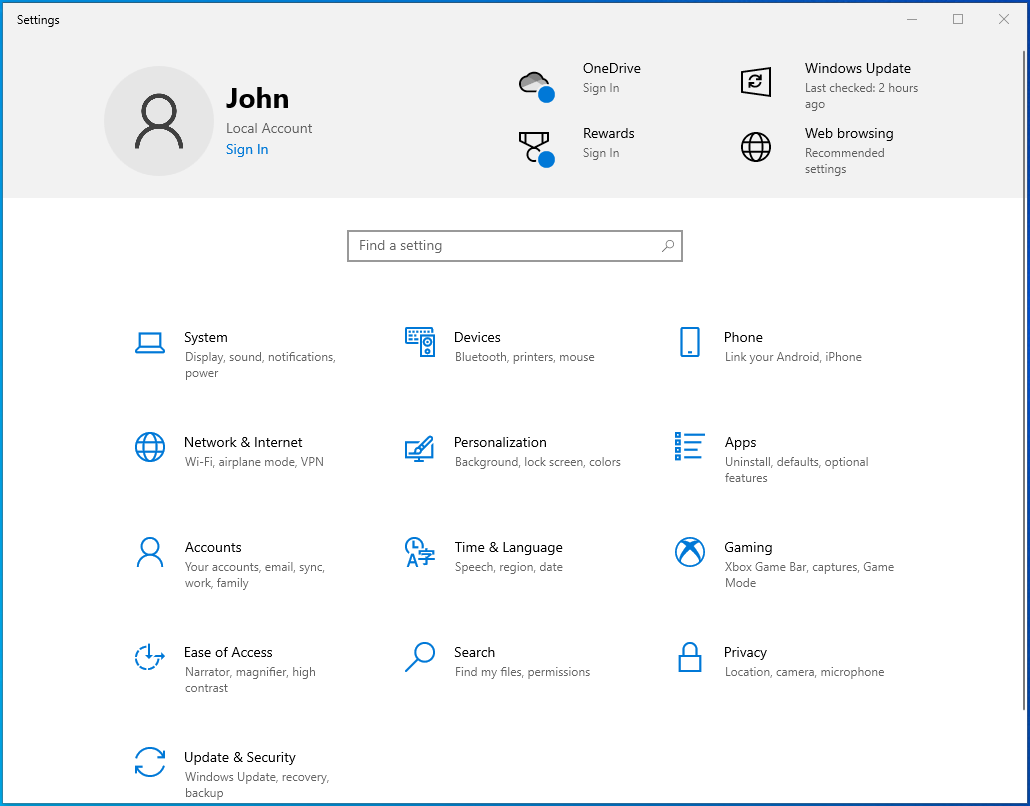
- Go to “Start”.
- Click on the gear icon to launch the “Settings” app.
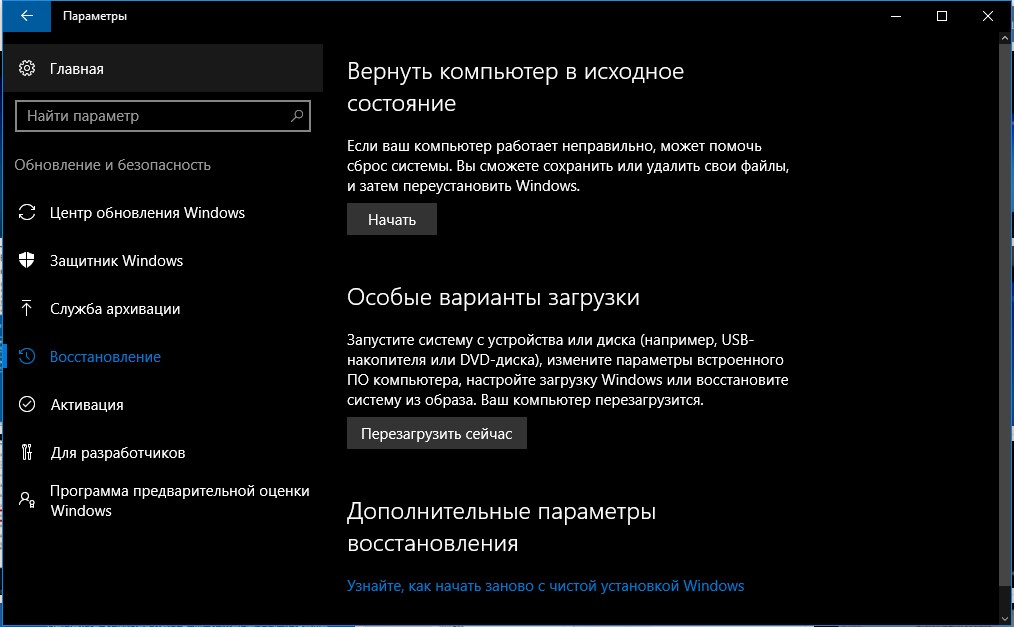
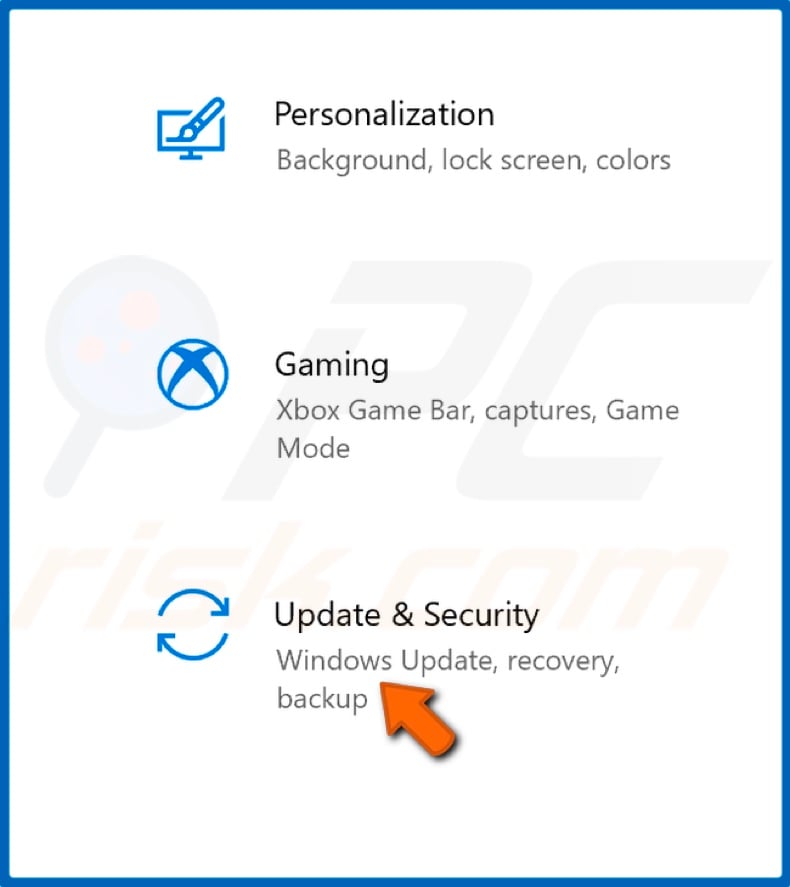
- Select Update & Security.
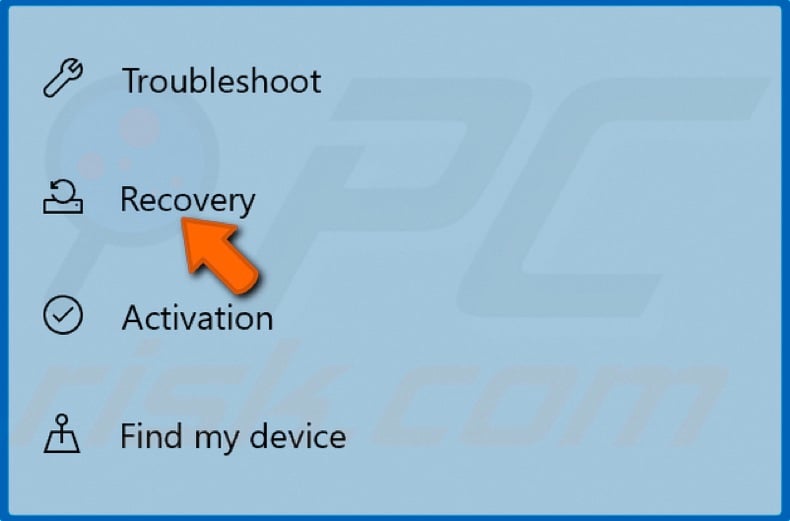
- Navigate to Recovery.
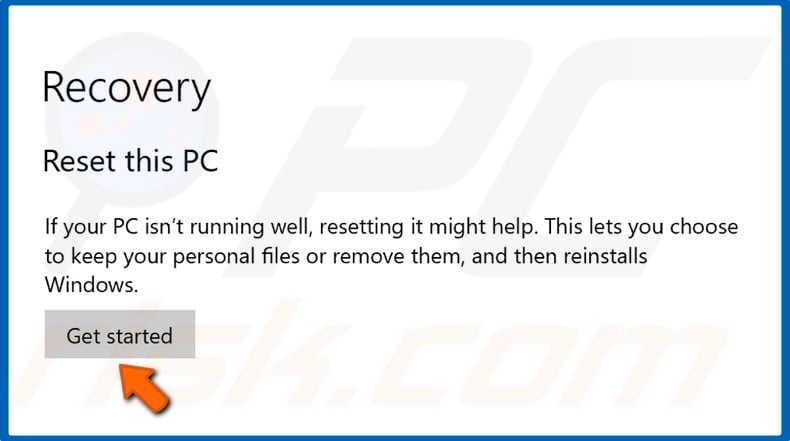
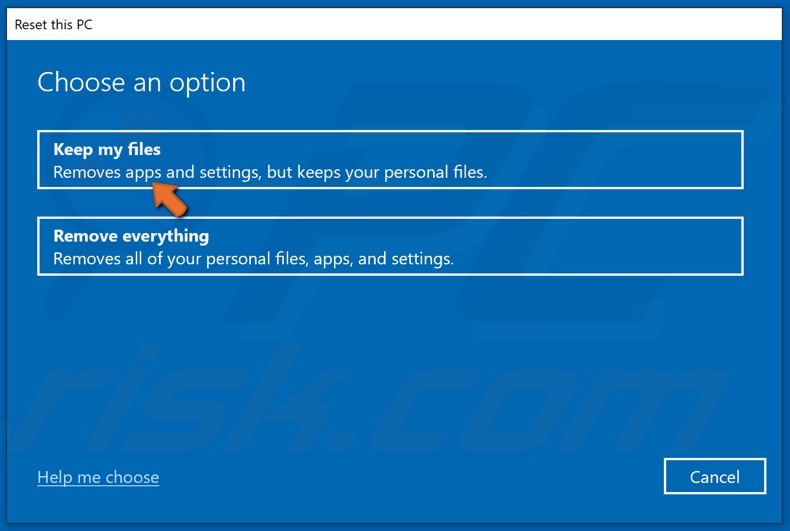
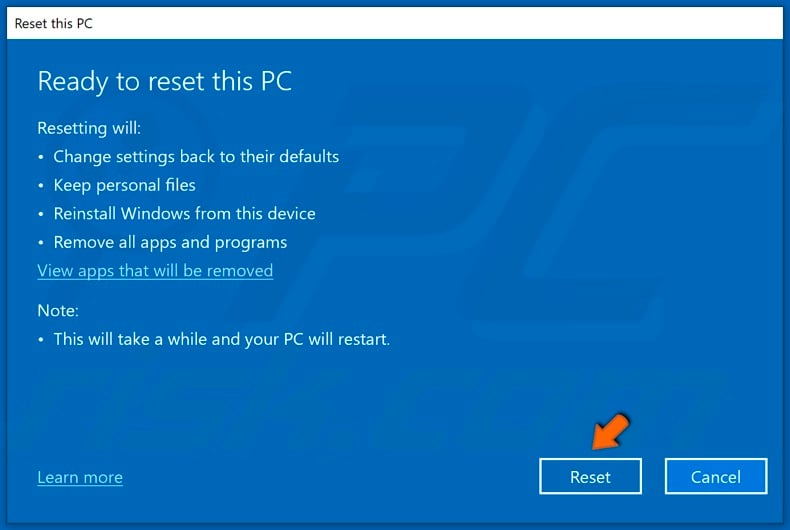
- “Reset this PC” should be the first option. Click on the “Get started” button and select one of the options presented to you. If you choose to keep your files, Windows will be reinstalled, but your files will remain intact. All the apps and drivers you installed will be removed, and the configured settings will be reset to the factory defaults. If you choose to remove everything, Windows will be reinstalled, and everything else, including your personal files, apps, drivers, and settings, will be removed.

If you can’t get to your desktop, follow the instructions below:
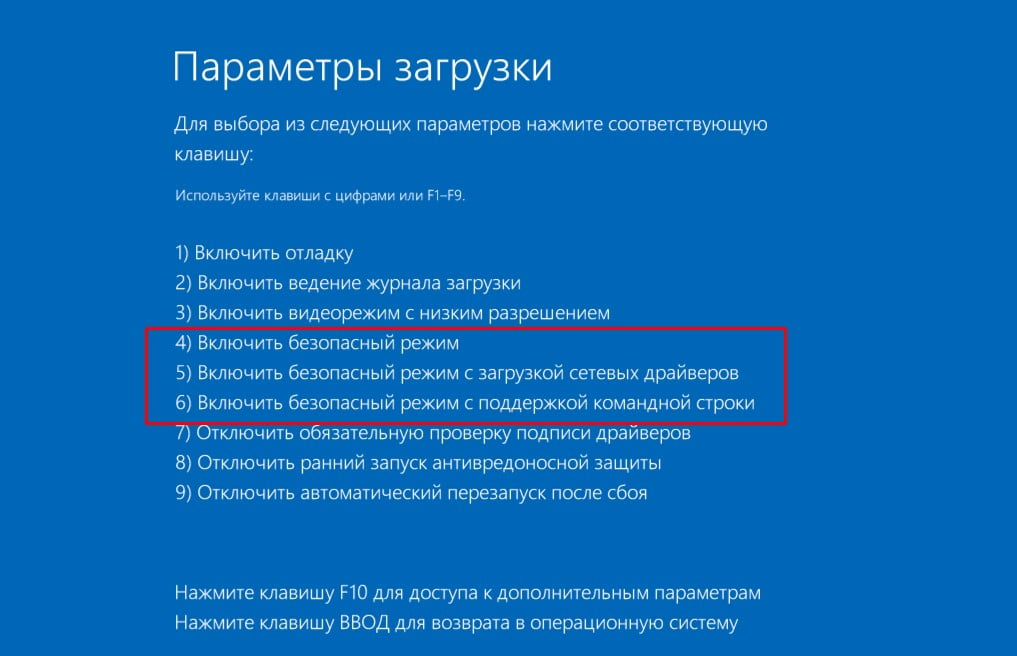
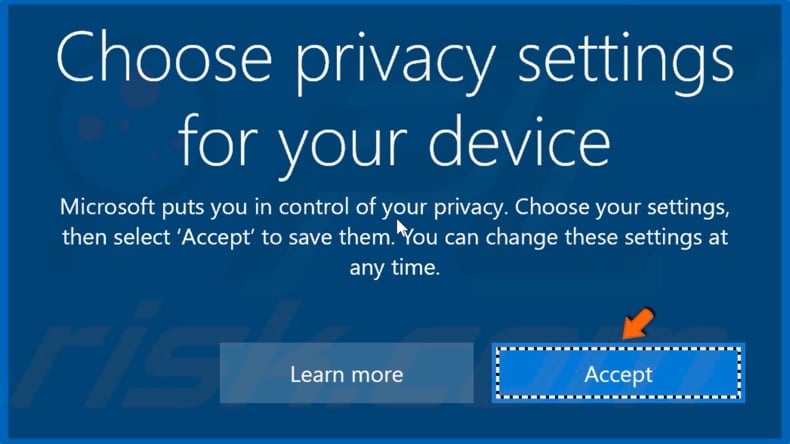
- Restart your PC. If the PC is stuck or frozen on the update screen, hold down the power button to force it to shut down and then power it up. On the sign-in screen, press the
Shift keywhile you click on the “Power” button. Your PC will restart into WinRE (Windows Recovery Environment). - On the “Choose an options” page, click on Troubleshoot > Reset this PC, and choose one of the options in Step 2 above.
Resetting your PC should fix the Windows 10 Update error code 0x800f0984, and all the updates should install without any further issues.
Optimize Your PC’s Performance
At the end of the day, it’s advisable to keep your PC optimized. The thing is, every time you do something on your PC, whether it’s installing a program, using Word, or deleting applications, you leave behind a trail of files. These junk PC files accumulate over time and may start affecting your system.
Since it’s not easy to track all these changes and delete the files each time you use your computer, we recommend taking advantage of a PC optimization tool like Auslogics BoostSpeed. Not only does the program clean junk files, but it also scans the entire system, tweaking your settings to enhance system performance.
Download Auslogics BoostSpeed
Your one-stop PC maintenance and optimization tool, this program will clean, speed up, repair and tweak your system to ensure maximum speed and efficiency.
BoostSpeed gives you access to a variety of useful features that help boost your Windows PC. Among them are tools to clean your registry, remove unnecessary applications, defragment your drives, get rid of file duplicates, tweak internet settings, and delete traces of your activity to protect your privacy.
The entire process is automated, meaning with a single click of a button, the tool performs all the hard work for you. To ensure continuous smooth performance, there is an option to schedule automatic system maintenance at a frequency of your choosing. This will keep your Windows system slim, clean, and always functioning at peak levels. Don’t let slow PC performance slow you down – speed up your PC with Auslogics BoostSpeed.