

-
Microsoft Support & Malware Removal
-
Windows Update
You should upgrade or use an alternative browser.
[SOLVED] DISM restorehealth Error 0x800f0906 The source files could not be downloaded.
-
Thread starter
Thread starterKeyC0de
-
Start date
Start date
- Joined
- Oct 22, 2020
- Posts
- 63
-
-
#1
I’ve read the instructions from this post and I’ve performed all the steps.
I have problems with sfc and dism. sfc /scannow detects corrupted files but is unable to fix them. I have entered various combinations of dism commands to no avail. Like those:
Dism /Online /Cleanup-Image /RestoreHealth
DISM /Online /Cleanup-Image /RestoreHealth /Source:c:\path\to\os\dir\sources\install.wim:1 /LimitAccess
Dism reports the error:
Error: 0x800f0906
The source files could not be downloaded.
Use the «source» option to specify the location of the files that are required t
o restore the feature. For more information on specifying a source location, see
Configure a Windows Repair Source.
The DISM log file can be found at C:\Windows\Logs\DISM\dism.log
I have run sfcfix.txt but it failed. I have uploaded the log as an attachment to this post.
I have uploaded my cbs.7z file on dropbox here.
I’ve been having this issue for months now where we experienced a power failure. Also, I believe it is linked to other minor issues that tend to occur every so often on my system. Any help will be appreciated. Thanks.
Attachments
-
SFCFix.txt
SleepyDude
Windows Update Moderator, Security Analyst
- Joined
- Dec 20, 2013
- Posts
- 3,062
- Location
-
Portugal
-
-
#2
Install Update using Dism
- Please download KB4056895 save the file to c:\windows\temp
- change the name of the update file to a smaller name Windows8.1-KB4056895-x64.msu
(keep the extension .msu in the end of the file name in case its visible if not ignore that) - open the Command Prompt as Administrator, instructions for Windows 8.x
- type or Copy & Paste the following commands line by line:
cd /d c:\windows\temp
expand Windows8.1-KB4056895-x64.msu -f:* C:\windows\temp
DISM.exe /Online /Add-Package /PackagePath:C:\windows\temp\Windows8.1-KB4056895-x64.cab
- You should receive the message:
The operation completed successfully.
Restart Windows to complete this operation.
Do you want to restart the computer now (Y/N)? - Make sure to allow the computer to restart if prompted.
If you receive any other message:
- Right-click on the Command Prompt window and click Select All, this will invert all of the colors by selecting the text, now press enter. All of this text is now copied.
- Paste (Ctrl+V) it into your next post please.
Note: If DISM fails please attach the CBS.log
- Joined
- Oct 22, 2020
- Posts
- 63
-
-
#3
The operation completed successfully.
Here’s the log:
C:\Windows\system32>cd /d c:\windows\temp
c:\Windows\Temp>expand Windows8.1-KB4056895-x64.msu -f:* C:\windows\temp
Microsoft (R) File Expansion Utility Version 6.3.9600.17415
Copyright (c) Microsoft Corporation. All rights reserved.
Adding C:\windows\temp\WSUSSCAN.cab to Extraction Queue
Adding C:\windows\temp\Windows8.1-KB4056895-x64.cab to Extraction Queue
Adding C:\windows\temp\Windows8.1-KB4056895-x64-pkgProperties.txt to Extraction
Queue
Adding C:\windows\temp\Windows8.1-KB4056895-x64.xml to Extraction Queue
Expanding Files ….
Expanding Files Complete …
4 files total.
c:\Windows\Temp>DISM.exe /Online /Add-Package /PackagePath:C:\windows\temp\Windo
ws8.1-KB4056895-x64.cab
Deployment Image Servicing and Management tool
Version: 6.3.9600.19408
Image Version: 6.3.9600.19397
Processing 1 of 1 — Adding package Package_for_RollupFix~31bf3856ad364e35~amd64~
~9600.18894.1.5
[==========================100.0%========================= ]
The operation completed successfully.
c:\Windows\Temp>
No prompt for restart.
Should I restart now?
And what do I do next?
By the way all this started because I wanted to fix one particularly annoying issue I had, which is that my thumbnails stopped working (they look just like those: Windows Explorer is not showing thumbnails and icons — Microsoft Community ). I concluded it must be a registry corruption after the blackout. Not too much else seems to be affected thankfully..
Last edited:
SleepyDude
Windows Update Moderator, Security Analyst
- Joined
- Dec 20, 2013
- Posts
- 3,062
- Location
-
Portugal
-
-
#4
In that case no need to restart.
DISM scan
- Please open up a Command Prompt Window as a Administrator, instructions for Windows 8.x.
- Inside the command prompt window type or Copy & Paste the following command:
Dism /Online /Cleanup-Image /RestoreHealthNote: This may take some time to finish. Let me know if the process reaches 100% or not and any error reported
- Locate the log c:\Windows\logs\cbs\CBS.log copy the file to the Desktop, Zip it and attach to your post.
Note: If the file is too big to attach please upload it to a service like Dropbox, Google Drive, OneDrive or upload to SendSpace and just provide the link for the file here.
- Joined
- Oct 22, 2020
- Posts
- 63
-
-
#5
Here’s the complete log:
Microsoft Windows [Version 6.3.9600]
(c) 2013 Microsoft Corporation. All rights reserved.
Clink v0.4.9 [git:2fd2c2] Copyright (c) 2012-2016 Martin Ridgers
Clink
C:\Windows\system32>Dism /Online /Cleanup-Image /RestoreHealth
Deployment Image Servicing and Management tool
Version: 6.3.9600.19408
Image Version: 6.3.9600.19397
[==========================100.0%==========================]
Error: 0x800f0906
The source files could not be downloaded.
Use the «source» option to specify the location of the files that are required t
o restore the feature. For more information on specifying a source location, see
Configure a Windows Repair Source.
The DISM log file can be found at C:\Windows\Logs\DISM\dism.log
C:\Windows\system32>
Here’s the dropbox link for the CBS.7z archive: CBS.7z
SleepyDude
Windows Update Moderator, Security Analyst
- Joined
- Dec 20, 2013
- Posts
- 3,062
- Location
-
Portugal
-
-
#6
SFCFix Script
Attachments
-
SFCScript.txt
- Joined
- Oct 22, 2020
- Posts
- 63
-
-
#7
SFCFix version 3.0.2.1 by niemiro.
Start time: 2020-11-23 19:24:29.709
Microsoft Windows 8.1 Update 3 — amd64
Using .txt script file at C:\Users\Nikos\Desktop\SFCScript.txt [0]
Trace::
Successfully traced component wow64_microsoft-windows-ie-htmlediting_31bf3856ad364e35_11.0.9600.18500_none_5625b28a5ad11bd0.
Package_305_for_KB3192392~31bf3856ad364e35~amd64~~6.3.1.4.3192392-494_neutral_GDR5
Successfully traced component wow64_microsoft-windows-ie-behaviors_31bf3856ad364e35_11.0.9600.18500_none_4ac04dd2097a3124.
Package_305_for_KB3192392~31bf3856ad364e35~amd64~~6.3.1.4.3192392-494_neutral_GDR5
Successfully traced component wow64_microsoft-windows-ie-htmlediting_31bf3856ad364e35_11.0.9600.18538_none_5627fd285acf34dd.
Package_293_for_KB3205400~31bf3856ad364e35~amd64~~6.3.1.2.3205400-547_neutral_GDR4
Successfully traced component wow64_microsoft-windows-ie-behaviors_31bf3856ad364e35_11.0.9600.18538_none_4ac2987009784a31.
Package_293_for_KB3205400~31bf3856ad364e35~amd64~~6.3.1.2.3205400-547_neutral_GDR4
Successfully traced component amd64_microsoft-windows-scripting-jscript_31bf3856ad364e35_11.0.9600.19230_none_86ab79efda14e147.
Package_176_for_KB4483187~31bf3856ad364e35~amd64~~6.3.1.1.4483187-440_neutral_GDR5
Trace:: directive completed successfully.
Successfully processed all directives.
SFCFix version 3.0.2.1 by niemiro has completed.
Currently storing 0 datablocks.
Finish time: 2020-11-23 19:24:30.819
Script hash: Bf4IuYN0vQ6ZzxV8vXtExyMsR5P19POooeoFV1LeUls=
———————-EOF————————
SleepyDude
Windows Update Moderator, Security Analyst
- Joined
- Dec 20, 2013
- Posts
- 3,062
- Location
-
Portugal
-
-
#8
SFCFix Script
!!! WARNING !!! The following fix is only relevant for this system and no other, applying this fix on another computer will not work and most likely will cause problems…
- Joined
- Oct 22, 2020
- Posts
- 63
-
-
#9
SFCFix version 3.0.2.1 by niemiro.
Start time: 2020-11-23 19:45:10.388
Microsoft Windows 8.1 Update 3 — amd64
Using .zip script file at C:\Users\Nikos\Desktop\KeyC0de.zip [0]
PowerCopy::
Successfully took permissions for file or folder C:\Windows\WinSxS\wow64_microsoft-windows-ie-htmlediting_31bf3856ad364e35_11.0.9600.18894_none_560dea405ae1ba36
Successfully took permissions for file or folder C:\Windows\WinSxS\wow64_microsoft-windows-ie-htmlediting_31bf3856ad364e35_11.0.9600.18639_none_561d16745ad76a6f
Successfully took permissions for file or folder C:\Windows\WinSxS\wow64_microsoft-windows-ie-htmlediting_31bf3856ad364e35_11.0.9600.18538_none_5627fd285acf34dd
Successfully took permissions for file or folder C:\Windows\WinSxS\wow64_microsoft-windows-ie-htmlediting_31bf3856ad364e35_11.0.9600.18500_none_5625b28a5ad11bd0
Successfully took permissions for file or folder C:\Windows\WinSxS\wow64_microsoft-windows-ie-directxtransforms_31bf3856ad364e35_11.0.9600.18895_none_a5ab39209921214a
Successfully took permissions for file or folder C:\Windows\WinSxS\wow64_microsoft-windows-ie-datacontrol_31bf3856ad364e35_11.0.9600.18894_none_21ec29c3b7a699e6
Successfully took permissions for file or folder C:\Windows\WinSxS\wow64_microsoft-windows-ie-behaviors_31bf3856ad364e35_11.0.9600.18895_none_4aa86ec0098ae92b
Successfully took permissions for file or folder C:\Windows\WinSxS\wow64_microsoft-windows-ie-behaviors_31bf3856ad364e35_11.0.9600.18639_none_4ab7b1bc09807fc3
Successfully took permissions for file or folder C:\Windows\WinSxS\wow64_microsoft-windows-ie-behaviors_31bf3856ad364e35_11.0.9600.18538_none_4ac2987009784a31
Successfully took permissions for file or folder C:\Windows\WinSxS\wow64_microsoft-windows-ie-behaviors_31bf3856ad364e35_11.0.9600.18500_none_4ac04dd2097a3124
Successfully took permissions for file or folder C:\Windows\WinSxS\wow64_microsoft-windows-i..tup-ie-ieui-windows_31bf3856ad364e35_6.3.9600.18895_none_859382f45b006fb5
Successfully took permissions for file or folder C:\Windows\WinSxS\wow64_microsoft-windows-i..mlconverter-enduser_31bf3856ad364e35_6.3.9600.18895_none_4fdb5c67c62fb153
Successfully took permissions for file or folder C:\Windows\WinSxS\amd64_microsoft-windows-wow64_31bf3856ad364e35_6.3.9600.18895_none_58da3460ab4d928a
Successfully took permissions for file or folder C:\Windows\WinSxS\amd64_microsoft-windows-wmi-krnlprov-provider_31bf3856ad364e35_6.3.9600.18895_none_d4653056c9154e7b
Successfully took permissions for file or folder C:\Windows\WinSxS\amd64_microsoft-windows-win32k_31bf3856ad364e35_6.3.9600.18878_none_a9c086c76e723ea4
Successfully took permissions for file or folder C:\Windows\WinSxS\amd64_microsoft-windows-scripting-vbscript_31bf3856ad364e35_11.0.9600.19204_none_4c2238aa10daa802
Successfully took permissions for file or folder C:\Windows\WinSxS\amd64_microsoft-windows-scripting-vbscript_31bf3856ad364e35_11.0.9600.18895_none_4bea430e11035031
Successfully took permissions for file or folder C:\Windows\WinSxS\amd64_microsoft-windows-scripting-jscript_31bf3856ad364e35_11.0.9600.19230_none_86ab79efda14e147
Successfully took permissions for file or folder C:\Windows\WinSxS\amd64_microsoft-windows-scripting-jscript_31bf3856ad364e35_11.0.9600.18895_none_86702855da40a3f5
Successfully took permissions for file or folder C:\Windows\WinSxS\amd64_microsoft-windows-scripting-jscript9_31bf3856ad364e35_11.0.9600.19204_none_47f1c20aa0a51b6f
Successfully took permissions for file or folder C:\Windows\WinSxS\amd64_microsoft-windows-scripting-jscript9_31bf3856ad364e35_11.0.9600.18895_none_47b9cc6ea0cdc39e
Successfully took permissions for file or folder C:\Windows\WinSxS\amd64_microsoft-windows-scripting-jscript9_31bf3856ad364e35_11.0.9600.18639_none_47c90f6aa0c35a36
Successfully copied file C:\Users\Nikos\AppData\Local\niemiro\Archive\WinSxS\wow64_microsoft-windows-ie-htmlediting_31bf3856ad364e35_11.0.9600.18894_none_560dea405ae1ba36\mshtmled.dll to C:\Windows\WinSxS\wow64_microsoft-windows-ie-htmlediting_31bf3856ad364e35_11.0.9600.18894_none_560dea405ae1ba36\mshtmled.dll.
Successfully copied file C:\Users\Nikos\AppData\Local\niemiro\Archive\WinSxS\wow64_microsoft-windows-ie-htmlediting_31bf3856ad364e35_11.0.9600.18639_none_561d16745ad76a6f\mshtmled.dll to C:\Windows\WinSxS\wow64_microsoft-windows-ie-htmlediting_31bf3856ad364e35_11.0.9600.18639_none_561d16745ad76a6f\mshtmled.dll.
Successfully copied file C:\Users\Nikos\AppData\Local\niemiro\Archive\WinSxS\wow64_microsoft-windows-ie-htmlediting_31bf3856ad364e35_11.0.9600.18538_none_5627fd285acf34dd\mshtmled.dll to C:\Windows\WinSxS\wow64_microsoft-windows-ie-htmlediting_31bf3856ad364e35_11.0.9600.18538_none_5627fd285acf34dd\mshtmled.dll.
Successfully copied file C:\Users\Nikos\AppData\Local\niemiro\Archive\WinSxS\wow64_microsoft-windows-ie-htmlediting_31bf3856ad364e35_11.0.9600.18500_none_5625b28a5ad11bd0\mshtmled.dll to C:\Windows\WinSxS\wow64_microsoft-windows-ie-htmlediting_31bf3856ad364e35_11.0.9600.18500_none_5625b28a5ad11bd0\mshtmled.dll.
Successfully copied file C:\Users\Nikos\AppData\Local\niemiro\Archive\WinSxS\wow64_microsoft-windows-ie-directxtransforms_31bf3856ad364e35_11.0.9600.18895_none_a5ab39209921214a\dxtmsft.dll to C:\Windows\WinSxS\wow64_microsoft-windows-ie-directxtransforms_31bf3856ad364e35_11.0.9600.18895_none_a5ab39209921214a\dxtmsft.dll.
Successfully copied file C:\Users\Nikos\AppData\Local\niemiro\Archive\WinSxS\wow64_microsoft-windows-ie-directxtransforms_31bf3856ad364e35_11.0.9600.18895_none_a5ab39209921214a\dxtrans.dll to C:\Windows\WinSxS\wow64_microsoft-windows-ie-directxtransforms_31bf3856ad364e35_11.0.9600.18895_none_a5ab39209921214a\dxtrans.dll.
Successfully copied file C:\Users\Nikos\AppData\Local\niemiro\Archive\WinSxS\wow64_microsoft-windows-ie-datacontrol_31bf3856ad364e35_11.0.9600.18894_none_21ec29c3b7a699e6\tdc.ocx to C:\Windows\WinSxS\wow64_microsoft-windows-ie-datacontrol_31bf3856ad364e35_11.0.9600.18894_none_21ec29c3b7a699e6\tdc.ocx.
Successfully copied file C:\Users\Nikos\AppData\Local\niemiro\Archive\WinSxS\wow64_microsoft-windows-ie-behaviors_31bf3856ad364e35_11.0.9600.18895_none_4aa86ec0098ae92b\iepeers.dll to C:\Windows\WinSxS\wow64_microsoft-windows-ie-behaviors_31bf3856ad364e35_11.0.9600.18895_none_4aa86ec0098ae92b\iepeers.dll.
Successfully copied file C:\Users\Nikos\AppData\Local\niemiro\Archive\WinSxS\wow64_microsoft-windows-ie-behaviors_31bf3856ad364e35_11.0.9600.18639_none_4ab7b1bc09807fc3\iepeers.dll to C:\Windows\WinSxS\wow64_microsoft-windows-ie-behaviors_31bf3856ad364e35_11.0.9600.18639_none_4ab7b1bc09807fc3\iepeers.dll.
Successfully copied file C:\Users\Nikos\AppData\Local\niemiro\Archive\WinSxS\wow64_microsoft-windows-ie-behaviors_31bf3856ad364e35_11.0.9600.18538_none_4ac2987009784a31\iepeers.dll to C:\Windows\WinSxS\wow64_microsoft-windows-ie-behaviors_31bf3856ad364e35_11.0.9600.18538_none_4ac2987009784a31\iepeers.dll.
Successfully copied file C:\Users\Nikos\AppData\Local\niemiro\Archive\WinSxS\wow64_microsoft-windows-ie-behaviors_31bf3856ad364e35_11.0.9600.18500_none_4ac04dd2097a3124\iepeers.dll to C:\Windows\WinSxS\wow64_microsoft-windows-ie-behaviors_31bf3856ad364e35_11.0.9600.18500_none_4ac04dd2097a3124\iepeers.dll.
Successfully copied file C:\Users\Nikos\AppData\Local\niemiro\Archive\WinSxS\wow64_microsoft-windows-i..tup-ie-ieui-windows_31bf3856ad364e35_6.3.9600.18895_none_859382f45b006fb5\ieui.dll to C:\Windows\WinSxS\wow64_microsoft-windows-i..tup-ie-ieui-windows_31bf3856ad364e35_6.3.9600.18895_none_859382f45b006fb5\ieui.dll.
Successfully copied file C:\Users\Nikos\AppData\Local\niemiro\Archive\WinSxS\wow64_microsoft-windows-i..mlconverter-enduser_31bf3856ad364e35_6.3.9600.18895_none_4fdb5c67c62fb153\html.iec to C:\Windows\WinSxS\wow64_microsoft-windows-i..mlconverter-enduser_31bf3856ad364e35_6.3.9600.18895_none_4fdb5c67c62fb153\html.iec.
Successfully copied file C:\Users\Nikos\AppData\Local\niemiro\Archive\WinSxS\amd64_microsoft-windows-wow64_31bf3856ad364e35_6.3.9600.18895_none_58da3460ab4d928a\ntvdm64.dll to C:\Windows\WinSxS\amd64_microsoft-windows-wow64_31bf3856ad364e35_6.3.9600.18895_none_58da3460ab4d928a\ntvdm64.dll.
Successfully copied file C:\Users\Nikos\AppData\Local\niemiro\Archive\WinSxS\amd64_microsoft-windows-wow64_31bf3856ad364e35_6.3.9600.18895_none_58da3460ab4d928a\wow64cpu.dll to C:\Windows\WinSxS\amd64_microsoft-windows-wow64_31bf3856ad364e35_6.3.9600.18895_none_58da3460ab4d928a\wow64cpu.dll.
Successfully copied file C:\Users\Nikos\AppData\Local\niemiro\Archive\WinSxS\amd64_microsoft-windows-wmi-krnlprov-provider_31bf3856ad364e35_6.3.9600.18895_none_d4653056c9154e7b\krnlprov.dll to C:\Windows\WinSxS\amd64_microsoft-windows-wmi-krnlprov-provider_31bf3856ad364e35_6.3.9600.18895_none_d4653056c9154e7b\krnlprov.dll.
Successfully copied file C:\Users\Nikos\AppData\Local\niemiro\Archive\WinSxS\amd64_microsoft-windows-wmi-krnlprov-provider_31bf3856ad364e35_6.3.9600.18895_none_d4653056c9154e7b\krnlprov.mof to C:\Windows\WinSxS\amd64_microsoft-windows-wmi-krnlprov-provider_31bf3856ad364e35_6.3.9600.18895_none_d4653056c9154e7b\krnlprov.mof.
Successfully copied file C:\Users\Nikos\AppData\Local\niemiro\Archive\WinSxS\amd64_microsoft-windows-win32k_31bf3856ad364e35_6.3.9600.18878_none_a9c086c76e723ea4\win32k.ptxml to C:\Windows\WinSxS\amd64_microsoft-windows-win32k_31bf3856ad364e35_6.3.9600.18878_none_a9c086c76e723ea4\win32k.ptxml.
Successfully copied file C:\Users\Nikos\AppData\Local\niemiro\Archive\WinSxS\amd64_microsoft-windows-win32k_31bf3856ad364e35_6.3.9600.18878_none_a9c086c76e723ea4\win32k.sys to C:\Windows\WinSxS\amd64_microsoft-windows-win32k_31bf3856ad364e35_6.3.9600.18878_none_a9c086c76e723ea4\win32k.sys.
Successfully copied file C:\Users\Nikos\AppData\Local\niemiro\Archive\WinSxS\amd64_microsoft-windows-scripting-vbscript_31bf3856ad364e35_11.0.9600.19204_none_4c2238aa10daa802\vbscript.dll to C:\Windows\WinSxS\amd64_microsoft-windows-scripting-vbscript_31bf3856ad364e35_11.0.9600.19204_none_4c2238aa10daa802\vbscript.dll.
Successfully copied file C:\Users\Nikos\AppData\Local\niemiro\Archive\WinSxS\amd64_microsoft-windows-scripting-vbscript_31bf3856ad364e35_11.0.9600.18895_none_4bea430e11035031\vbscript.dll to C:\Windows\WinSxS\amd64_microsoft-windows-scripting-vbscript_31bf3856ad364e35_11.0.9600.18895_none_4bea430e11035031\vbscript.dll.
Successfully copied file C:\Users\Nikos\AppData\Local\niemiro\Archive\WinSxS\amd64_microsoft-windows-scripting-jscript_31bf3856ad364e35_11.0.9600.19230_none_86ab79efda14e147\jscript.dll to C:\Windows\WinSxS\amd64_microsoft-windows-scripting-jscript_31bf3856ad364e35_11.0.9600.19230_none_86ab79efda14e147\jscript.dll.
Successfully copied file C:\Users\Nikos\AppData\Local\niemiro\Archive\WinSxS\amd64_microsoft-windows-scripting-jscript_31bf3856ad364e35_11.0.9600.18895_none_86702855da40a3f5\jscript.dll to C:\Windows\WinSxS\amd64_microsoft-windows-scripting-jscript_31bf3856ad364e35_11.0.9600.18895_none_86702855da40a3f5\jscript.dll.
Successfully copied file C:\Users\Nikos\AppData\Local\niemiro\Archive\WinSxS\amd64_microsoft-windows-scripting-jscript9_31bf3856ad364e35_11.0.9600.19204_none_47f1c20aa0a51b6f\jscript9.dll to C:\Windows\WinSxS\amd64_microsoft-windows-scripting-jscript9_31bf3856ad364e35_11.0.9600.19204_none_47f1c20aa0a51b6f\jscript9.dll.
Successfully copied file C:\Users\Nikos\AppData\Local\niemiro\Archive\WinSxS\amd64_microsoft-windows-scripting-jscript9_31bf3856ad364e35_11.0.9600.18895_none_47b9cc6ea0cdc39e\jscript9.dll to C:\Windows\WinSxS\amd64_microsoft-windows-scripting-jscript9_31bf3856ad364e35_11.0.9600.18895_none_47b9cc6ea0cdc39e\jscript9.dll.
Successfully copied file C:\Users\Nikos\AppData\Local\niemiro\Archive\WinSxS\amd64_microsoft-windows-scripting-jscript9_31bf3856ad364e35_11.0.9600.18895_none_47b9cc6ea0cdc39e\jscript9diag.dll to C:\Windows\WinSxS\amd64_microsoft-windows-scripting-jscript9_31bf3856ad364e35_11.0.9600.18895_none_47b9cc6ea0cdc39e\jscript9diag.dll.
Successfully copied file C:\Users\Nikos\AppData\Local\niemiro\Archive\WinSxS\amd64_microsoft-windows-scripting-jscript9_31bf3856ad364e35_11.0.9600.18639_none_47c90f6aa0c35a36\jscript9diag.dll to C:\Windows\WinSxS\amd64_microsoft-windows-scripting-jscript9_31bf3856ad364e35_11.0.9600.18639_none_47c90f6aa0c35a36\jscript9diag.dll.
Successfully restored ownership for C:\Windows\WinSxS\wow64_microsoft-windows-ie-htmlediting_31bf3856ad364e35_11.0.9600.18894_none_560dea405ae1ba36
Successfully restored permissions on C:\Windows\WinSxS\wow64_microsoft-windows-ie-htmlediting_31bf3856ad364e35_11.0.9600.18894_none_560dea405ae1ba36
Successfully restored ownership for C:\Windows\WinSxS\wow64_microsoft-windows-ie-htmlediting_31bf3856ad364e35_11.0.9600.18639_none_561d16745ad76a6f
Successfully restored permissions on C:\Windows\WinSxS\wow64_microsoft-windows-ie-htmlediting_31bf3856ad364e35_11.0.9600.18639_none_561d16745ad76a6f
Successfully restored ownership for C:\Windows\WinSxS\wow64_microsoft-windows-ie-htmlediting_31bf3856ad364e35_11.0.9600.18538_none_5627fd285acf34dd
Successfully restored permissions on C:\Windows\WinSxS\wow64_microsoft-windows-ie-htmlediting_31bf3856ad364e35_11.0.9600.18538_none_5627fd285acf34dd
Successfully restored ownership for C:\Windows\WinSxS\wow64_microsoft-windows-ie-htmlediting_31bf3856ad364e35_11.0.9600.18500_none_5625b28a5ad11bd0
Successfully restored permissions on C:\Windows\WinSxS\wow64_microsoft-windows-ie-htmlediting_31bf3856ad364e35_11.0.9600.18500_none_5625b28a5ad11bd0
Successfully restored ownership for C:\Windows\WinSxS\wow64_microsoft-windows-ie-directxtransforms_31bf3856ad364e35_11.0.9600.18895_none_a5ab39209921214a
Successfully restored permissions on C:\Windows\WinSxS\wow64_microsoft-windows-ie-directxtransforms_31bf3856ad364e35_11.0.9600.18895_none_a5ab39209921214a
Successfully restored ownership for C:\Windows\WinSxS\wow64_microsoft-windows-ie-datacontrol_31bf3856ad364e35_11.0.9600.18894_none_21ec29c3b7a699e6
Successfully restored permissions on C:\Windows\WinSxS\wow64_microsoft-windows-ie-datacontrol_31bf3856ad364e35_11.0.9600.18894_none_21ec29c3b7a699e6
Successfully restored ownership for C:\Windows\WinSxS\wow64_microsoft-windows-ie-behaviors_31bf3856ad364e35_11.0.9600.18895_none_4aa86ec0098ae92b
Successfully restored permissions on C:\Windows\WinSxS\wow64_microsoft-windows-ie-behaviors_31bf3856ad364e35_11.0.9600.18895_none_4aa86ec0098ae92b
Successfully restored ownership for C:\Windows\WinSxS\wow64_microsoft-windows-ie-behaviors_31bf3856ad364e35_11.0.9600.18639_none_4ab7b1bc09807fc3
Successfully restored permissions on C:\Windows\WinSxS\wow64_microsoft-windows-ie-behaviors_31bf3856ad364e35_11.0.9600.18639_none_4ab7b1bc09807fc3
Successfully restored ownership for C:\Windows\WinSxS\wow64_microsoft-windows-ie-behaviors_31bf3856ad364e35_11.0.9600.18538_none_4ac2987009784a31
Successfully restored permissions on C:\Windows\WinSxS\wow64_microsoft-windows-ie-behaviors_31bf3856ad364e35_11.0.9600.18538_none_4ac2987009784a31
Successfully restored ownership for C:\Windows\WinSxS\wow64_microsoft-windows-ie-behaviors_31bf3856ad364e35_11.0.9600.18500_none_4ac04dd2097a3124
Successfully restored permissions on C:\Windows\WinSxS\wow64_microsoft-windows-ie-behaviors_31bf3856ad364e35_11.0.9600.18500_none_4ac04dd2097a3124
Successfully restored ownership for C:\Windows\WinSxS\wow64_microsoft-windows-i..tup-ie-ieui-windows_31bf3856ad364e35_6.3.9600.18895_none_859382f45b006fb5
Successfully restored permissions on C:\Windows\WinSxS\wow64_microsoft-windows-i..tup-ie-ieui-windows_31bf3856ad364e35_6.3.9600.18895_none_859382f45b006fb5
Successfully restored ownership for C:\Windows\WinSxS\wow64_microsoft-windows-i..mlconverter-enduser_31bf3856ad364e35_6.3.9600.18895_none_4fdb5c67c62fb153
Successfully restored permissions on C:\Windows\WinSxS\wow64_microsoft-windows-i..mlconverter-enduser_31bf3856ad364e35_6.3.9600.18895_none_4fdb5c67c62fb153
Successfully restored ownership for C:\Windows\WinSxS\amd64_microsoft-windows-wow64_31bf3856ad364e35_6.3.9600.18895_none_58da3460ab4d928a
Successfully restored permissions on C:\Windows\WinSxS\amd64_microsoft-windows-wow64_31bf3856ad364e35_6.3.9600.18895_none_58da3460ab4d928a
Successfully restored ownership for C:\Windows\WinSxS\amd64_microsoft-windows-wmi-krnlprov-provider_31bf3856ad364e35_6.3.9600.18895_none_d4653056c9154e7b
Successfully restored permissions on C:\Windows\WinSxS\amd64_microsoft-windows-wmi-krnlprov-provider_31bf3856ad364e35_6.3.9600.18895_none_d4653056c9154e7b
Successfully restored ownership for C:\Windows\WinSxS\amd64_microsoft-windows-win32k_31bf3856ad364e35_6.3.9600.18878_none_a9c086c76e723ea4
Successfully restored permissions on C:\Windows\WinSxS\amd64_microsoft-windows-win32k_31bf3856ad364e35_6.3.9600.18878_none_a9c086c76e723ea4
Successfully restored ownership for C:\Windows\WinSxS\amd64_microsoft-windows-scripting-vbscript_31bf3856ad364e35_11.0.9600.19204_none_4c2238aa10daa802
Successfully restored permissions on C:\Windows\WinSxS\amd64_microsoft-windows-scripting-vbscript_31bf3856ad364e35_11.0.9600.19204_none_4c2238aa10daa802
Successfully restored ownership for C:\Windows\WinSxS\amd64_microsoft-windows-scripting-vbscript_31bf3856ad364e35_11.0.9600.18895_none_4bea430e11035031
Successfully restored permissions on C:\Windows\WinSxS\amd64_microsoft-windows-scripting-vbscript_31bf3856ad364e35_11.0.9600.18895_none_4bea430e11035031
Successfully restored ownership for C:\Windows\WinSxS\amd64_microsoft-windows-scripting-jscript_31bf3856ad364e35_11.0.9600.19230_none_86ab79efda14e147
Successfully restored permissions on C:\Windows\WinSxS\amd64_microsoft-windows-scripting-jscript_31bf3856ad364e35_11.0.9600.19230_none_86ab79efda14e147
Successfully restored ownership for C:\Windows\WinSxS\amd64_microsoft-windows-scripting-jscript_31bf3856ad364e35_11.0.9600.18895_none_86702855da40a3f5
Successfully restored permissions on C:\Windows\WinSxS\amd64_microsoft-windows-scripting-jscript_31bf3856ad364e35_11.0.9600.18895_none_86702855da40a3f5
Successfully restored ownership for C:\Windows\WinSxS\amd64_microsoft-windows-scripting-jscript9_31bf3856ad364e35_11.0.9600.19204_none_47f1c20aa0a51b6f
Successfully restored permissions on C:\Windows\WinSxS\amd64_microsoft-windows-scripting-jscript9_31bf3856ad364e35_11.0.9600.19204_none_47f1c20aa0a51b6f
Successfully restored ownership for C:\Windows\WinSxS\amd64_microsoft-windows-scripting-jscript9_31bf3856ad364e35_11.0.9600.18895_none_47b9cc6ea0cdc39e
Successfully restored permissions on C:\Windows\WinSxS\amd64_microsoft-windows-scripting-jscript9_31bf3856ad364e35_11.0.9600.18895_none_47b9cc6ea0cdc39e
Successfully restored ownership for C:\Windows\WinSxS\amd64_microsoft-windows-scripting-jscript9_31bf3856ad364e35_11.0.9600.18639_none_47c90f6aa0c35a36
Successfully restored permissions on C:\Windows\WinSxS\amd64_microsoft-windows-scripting-jscript9_31bf3856ad364e35_11.0.9600.18639_none_47c90f6aa0c35a36
PowerCopy:: directive completed successfully.
Successfully processed all directives.
SFCFix version 3.0.2.1 by niemiro has completed.
Currently storing 22 datablocks.
Finish time: 2020-11-23 19:45:13.863
Script hash: 5XZ9Q1SofDQ1aEcJct1VhX9dFVIUq7Y5bG7z52F+MqY=
———————-EOF————————
SleepyDude
Windows Update Moderator, Security Analyst
- Joined
- Dec 20, 2013
- Posts
- 3,062
- Location
-
Portugal
-
-
#10
- Joined
- Oct 22, 2020
- Posts
- 63
-
-
#11
Microsoft Windows [Version 6.3.9600]
(c) 2013 Microsoft Corporation. All rights reserved.
Clink v0.4.9 [git:2fd2c2] Copyright (c) 2012-2016 Martin Ridgers
Clink
C:\Windows\system32>Dism /Online /Cleanup-Image /RestoreHealth
Deployment Image Servicing and Management tool
Version: 6.3.9600.19408
Image Version: 6.3.9600.19397
[==========================100.0%==========================]
The restore operation completed successfully. The component store corruption was
repaired.
The operation completed successfully.
C:\Windows\system32>
SleepyDude
Windows Update Moderator, Security Analyst
- Joined
- Dec 20, 2013
- Posts
- 3,062
- Location
-
Portugal
-
-
#12
SFC scan
- Please open up a Command Prompt Window as a Administrator, instructions for Windows 7 or Windows 8 and 8.1.
- Inside the command prompt window type or copy & Paste the following command:
sfc /scannow
Note: This may take some time to finish. If the result is not «No integrity violations found» or equivalent please do the following:
Export the CBS folder
- Open the folder C:\Windows\Logs
- Right-click on the CBS folder, and select Copy
- Go back to your Desktop, right-click on it, and select Paste. You should now see a copy of the CBS folder appear on your Desktop called CBS
- Right-click on this new folder, and navigate through Send to, and select Compressed (zipped) folder
- A new file, also called CBS (CBS.zip), but this time with a different icon, will be created
If the zip file is too large to upload to the forum please share the file using a service like Dropbox, Google Drive, OneDrive or upload to SendSpace and just provide the link for the file here.
- Joined
- Oct 22, 2020
- Posts
- 63
-
-
#13
SleepyDude
Windows Update Moderator, Security Analyst
- Joined
- Dec 20, 2013
- Posts
- 3,062
- Location
-
Portugal
-
-
#14
Execute the steps from post #12 also.
- Joined
- Oct 22, 2020
- Posts
- 63
-
-
#15
Microsoft Windows [Version 6.3.9600]
(c) 2013 Microsoft Corporation. All rights reserved.
Clink v0.4.9 [git:2fd2c2] Copyright (c) 2012-2016 Martin Ridgers
Clink
C:\Windows\system32>sfc /scannow
Beginning system scan. This process will take some time.
Beginning verification phase of system scan.
Verification 100% complete.
Windows Resource Protection found corrupt files but was unable to fix some
of them. Details are included in the CBS.Log windir\Logs\CBS\CBS.log. For
example C:\Windows\Logs\CBS\CBS.log. Note that logging is currently not
supported in offline servicing scenarios.
C:\Windows\system32>
I have also uploaded cbs.7z. here is the link: CBS.7z
- Joined
- Oct 22, 2020
- Posts
- 63
-
-
#16
SleepyDude
Windows Update Moderator, Security Analyst
- Joined
- Dec 20, 2013
- Posts
- 3,062
- Location
-
Portugal
-
-
#17
- Please download KB2934018 save the file to c:\windows\temp
- change the name of the update file to a smaller name Windows8.1-KB2934018-x64.msu
(keep the extension .msu in the end of the file name in case its visible if not ignore that) - open the Command Prompt as Administrator, instructions for Windows 8.x
- type or Copy & Paste the following commands line by line:
cd /d c:\windows\temp
expand Windows8.1-KB2934018-x64.msu -f:* C:\windows\temp
DISM.exe /Online /Add-Package /PackagePath:C:\windows\temp\Windows8.1-KB2934018-x64.cab - You should receive the message:
The operation completed successfully.
Restart Windows to complete this operation.
Do you want to restart the computer now (Y/N)? - Make sure to allow the computer to restart if prompted.
If you receive any other message:
- Right-click on the Command Prompt window and click Select All, this will invert all of the colors by selecting the text, now press enter. All of this text is now copied.
- Paste (Ctrl+V) it into your next post please.
Note: If DISM fails please attach the CBS.log
- Joined
- Oct 22, 2020
- Posts
- 63
-
-
#18
Microsoft Windows [Version 6.3.9600]
(c) 2013 Microsoft Corporation. All rights reserved.
Clink v0.4.9 [git:2fd2c2] Copyright (c) 2012-2016 Martin Ridgers
Clink
C:\Windows\system32>cd /d c:\windows\temp
c:\Windows\Temp>expand Windows8.1-KB2934018-x64.msu -f:* C:\windows\temp
Microsoft (R) File Expansion Utility Version 6.3.9600.17415
Copyright (c) Microsoft Corporation. All rights reserved.
Adding C:\windows\temp\WSUSSCAN.cab to Extraction Queue
Adding C:\windows\temp\Windows8.1-KB2934018-x64.cab to Extraction Queue
Adding C:\windows\temp\Windows8.1-KB2934018-x64-pkgProperties.txt to Extraction
Queue
Adding C:\windows\temp\Windows8.1-KB2934018-x64.xml to Extraction Queue
Expanding Files ….
Expanding Files Complete …
4 files total.
c:\Windows\Temp>DISM.exe /Online /Add-Package /PackagePath:C:\windows\temp\Windo
ws8.1-KB2934018-x64.cab
Deployment Image Servicing and Management tool
Version: 6.3.9600.19408
Image Version: 6.3.9600.19397
Processing 1 of 1 — Adding package Package_for_KB2934018~31bf3856ad364e35~amd64~
~6.3.1.5
[===========================99.9%========================= ]
The operation completed successfully.
c:\Windows\Temp>
- Joined
- Oct 22, 2020
- Posts
- 63
-
-
#19
SleepyDude
Windows Update Moderator, Security Analyst
- Joined
- Dec 20, 2013
- Posts
- 3,062
- Location
-
Portugal
-
-
#20

Run Dism /Online /Cleanup-Image /RestoreHealth and collect the CBS.log even if it completes.
Has Sysnative Forums helped you? Please consider donating to help us support the site!
-
Microsoft Support & Malware Removal
-
Windows Update
,
The DISM error 0x800f0906: Source files could not be downloaded, occurred on a Windows 10 based computer after running the «DISM /Online /Cleanup-Image /RestoreHealth» command.
The error message indicates that Windows cannot connect online to download the required files to repair the Windows 10 image, despite the fact that the system has already access to the Internet and to Microsoft servers without any problem.

DISM Error 0x800f0906 in details:
«C:\WINDOWS\system32>DISM /Online /Cleanup-Image /RestoreHealth
Deployment Image Servicing and Management tool
Version: 10.0.15063.0
Image Version: 10.0.15063.0
[==========================100.0%==========================]
Error: 0x800f0906
The source files could not be downloaded.
Use the «source» option to specify the location of the files that are required to restore the feature. For more information on specifying a source location, see http://go.microsoft.com/fwlink/?LinkId=243077.
The DISM log file can be found at C:\WINDOWS\Logs\DISM\dism.log«
This troubleshooting guide contains detailed instructions to fix the DISM Error 0x800f0906 in Windows 10/8/8.1
How to FiX DISM RestoreHealth Error 0x800f0906.
Method 1. Run DISM command again.
Method 2. Check your date and time settings.
Method 3. Run the Windows Update troubleshooter.
Method 4. Force Windows to re-create the Windows Update Store folder.
Other Methods to fix DISM /RestoreHealth Errors.
Method 1. Run DISM command again.
On a Windows 10 Home based computer, I realized that DISM fails with error 0x800f0906, at 100% of the Restore Health process. So, I decided to run «DISM /Online /Cleanup-Image /RestoreHealth» command again and fortunately the DISM problem «The source files could not be downloaded» disappeared.
So, before you continue to the rest methods, execute the «DISM /Online /Cleanup-Image /RestoreHealth» command once more, to verify if the DISM error 0x800f0906 persists.
Method 2. Check your date and time settings.
Ensure that your computer’s (or phone) date and time are correct. To do that
1. Simultaneously press the Windows + R keys to open run command box.
2. Type control panel and press Enter.
2. Change the View by: to Small icons.

3. Open Date and Time.

4. Press Change date and time.

4a. Set the current date/time/year and click OK.
5. Press the Change time zone button.

5a. Set your current Time Zone and press OK.
6. Choose the Internet Time tab and click the Change settings button.

6a. Check the Synchronize with an Internet time server checkbox & then choose a Time Server from the list (e.g. time.windows.com).
6b. When done, click Update Now.

6c. When the time is updated, press OK twice to close all open windows.
7. Restart your computer and run the «DISM /Online /Cleanup-Image /RestoreHealth» command again.
Method 3. Run the Windows Update troubleshooter.
1. Go to Start > Settings > Update & Security > Troubleshoot > Windows Update.

2. Choose Try troubleshooting as an administrator.

3. Press Next and follow the rest of the steps in the wizard to repair problems with Windows update.

4. When the repair is completed, Close the wizard.

5. Restart your computer and run the «DISM /Online /Cleanup-Image /RestoreHealth» command again.
Method 4. Force Windows to re-create the Windows Update Store folder.
The Windows Update Store folder (commonly known as «SoftwareDistribution» folder) is the location where Windows stores the downloaded updates.
-If the SoftwareDistribution folder becomes corrupted then it causes problems with Windows Update. So, one of the most efficient solutions to resolve problems with Windows Update is to recreate the SoftwareDistribution folder. To do that:
1. Simultaneously press the Windows + R keys to open run command box.
2. In run command box, type: services.msc and press Enter.

3. Right click on Windows Update service and select Stop.

4. Open Windows Explorer and navigate to C:\Windows folder.
5. Select and Delete the “SoftwareDistribution” folder.*
(Click Continue at «Folder Access Denied» window).
* Note: The next time the Windows Update run, a new empty SoftwareDistribution folder will be created automatically by Windows to store updates.

6. Restart your computer and run the «DISM /Online /Cleanup-Image /RestoreHealth» command again.
Other Methods to fix DISM /RestoreHealth Errors.
If you still face problems when running DISM, after applying the above mentioned methods, then proceed and try the instructions from the following articles:
- How to fix DISM Source Files Could not be Found error on Windows 10/8
- How to fix DISM 0x800f081f Error on Windows 10/8
That’s it! Let me know if this guide has helped you by leaving your comment about your experience. Please like and share this guide to help others.
If this article was useful for you, please consider supporting us by making a donation. Even $1 can a make a huge difference for us in our effort to continue to help others while keeping this site free:
- Author
- Recent Posts
Konstantinos is the founder and administrator of Wintips.org. Since 1995 he works and provides IT support as a computer and network expert to individuals and large companies. He is specialized in solving problems related to Windows or other Microsoft products (Windows Server, Office, Microsoft 365, etc.).
Readers help support Windows Report. We may get a commission if you buy through our links.
Read our disclosure page to find out how can you help Windows Report sustain the editorial team. Read more
Many users have reported error code 0x800f0906 when running the DISM command in an elevated Command Prompt. It makes it impossible to use the DISM command-line utility on your computer.
However, this guide will discuss fixing the 0x800f0906 DISM error on Windows PCs. Also, you can check our article for what to do if Command Prompt keeps crashing on Windows 11.
What causes the 0x800f0906 DISM error?
Several factors may be responsible for the DISM error on your computer. Some notable ones are:
- Windows updates issues – Running an outdated Windows operating system on your computer prevents it from installing patches and builds for fixing bugs liable to cause errors like 0x800f0906.
- Corrupt system files – When the essential system files are corrupted, it can make the system file responsible for the DISM (Deployment Image Servicing and Management) command-line utility inaccessible.
- Network-related issues – Because the DISM tool requires a stable network connection to run, it’s important that your connection is stable.
These factors may vary on different devices depending on the circumstances. Regardless, we’ll take you through basic steps for resolving the error and getting DISM to work again.
How can I fix the 0x800f0906 DISM error?
Before trying any advanced troubleshooting steps, observe the following preliminary checks:
- Restart your computer – Restarting the PC is the quickest way to fix temporary functionality issues and refresh its processes.
- Perform a clean boot – A clean boot will start your computer with minimal drivers and programs, allowing you to determine if a third-party program is interfering with the Windows installer.
- Remove recent updates – Uninstalling the recent Windows updates may help troubleshoot the issues causing the error when using the DISM command.
- Update Windows OS – Updating Windows helps fix the bugs causing issues with the DISM utility tool. Fix Windows not connecting to update service if the error occurs on your PC.
If you still can resolve the problem, proceed with the solutions below:
1. Run the SFC scan
- Left-click the Start button, type Command Prompt, and click the Run as administrator option.

- Click Yes on the User Account Control (UAC) prompt.
- Type the following and press Enter:
sfc /scannow
- Restart your PC and check if the error persists.


Running an SFC scan will detect and repair corrupt system files causing the errors. You can check our article on fixing SFC scannow not working on your PC.
As an alternative, we encourage anyone who experiences Windows issues to use an all-in-one repair tool for solving all the PC issues in no time.
2. Via the DISM fix commands
- Download the Windows Disk Image and create an Installation media.
- Press Windows + E keys to open File Explorer.
- Click the Downloads folder, locate the downloaded file, right-click on it, and select Mount.

- After mounting the ISO, a new drive in This PC section on your File Explorer.

- Get the drive name, left-click the Start button, type CMD, and click Run as administrator.
- Input the following command and press Enter:
DISM /Online /Cleanup-Image /RestoreHealth /source:WIM:X:\Sources\Install.wim:1 /LimitAccess
- The name of the file should replace X in the code above.
- Close the command prompt and restart your PC to take effect.


Users claim they could solve the error immediately by running the above codes. However, if not, you can also run the following code: DISM /Online /Cleanup-Image /StartComponentCleanup /ResetBase
- D3dx11_42.dll Not Found: How to Fix it
- Windows 11 Shutdown After Inactivity: 4 Ways to Stop it
- Windows Shuts Down Instead of Restarting: 4 Ways to Fix it
- Error no Ace Condition 804 (0x324): Fix it With 4 Steps
Alternatively, you may be interested in our comprehensive article about using DISM Commands to repair Windows PCs.
Likewise, we have a detailed overview of the diverse error codes that can accompany the DISM source files could not be found error.
Feel free to leave your suggestions or questions in the comments section.
Henderson Jayden Harper
Windows Software Expert
Passionate about technology, Crypto, software, Windows, and everything computer-related, he spends most of his time developing new skills and learning more about the tech world.
He also enjoys gaming, writing, walking his dog, and reading and learning about new cultures. He also enjoys spending private time connecting with nature.
Время на прочтение2 мин
Количество просмотров115K
Иногда случаются ситуации, когда пользователю Windows 8 необходимо установить .NET Framework 3.5 — чаще всего, это необходимо для обеспечения работоспособности некоторых, относительно старых, программ. В большинстве случаев все проходит без проблем. Однако, недавно возникла ситуация — данный фреймворк отказался устанавливаться на компьютер, находящийся в доменной сети AD с настроенным локальным сервером обновлений WSUS.
Описание проблемы
В обычном случае, установка вышеупомянутого фреймворка осуществляется силами ОС и, по сути, представляет из себя лишь включение компонента, отключенного по умолчанию.

После чего ОС подключается к серверу обновлений, скачивает необходимые файлы, и устанавливает компонент.
В ряде случаев ОС не может скачать нужные файлы, а именно:
- Отсутствует подключение к интернету;
- На сервере обновлений отсутствуют необходимые файлы.

Я столкнулся, как раз, со вторым случаем. Причем, Microsoft в этом случае советует отключить использование локального сервера обновлений WSUS, установить .NET Framework 3.5, после чего опять включить использование локального WSUS. В моем случае этот вариант был малоприемлем, так как для этого нужно было либо вывести ПК из домена, либо изменить групповую политику. Сконфигурировать WSUS должным образом мне не удалось, он скачивает обновления к .NET Framework 3.5 и версиям ниже, однако установка через него все равно не проходит.
Решение проблемы
Решением проблемы является установка вышеобозначенного компонента из локальных источников. Для начала необходимо определиться с локальным хранилищем пакетов. Вообще-то, оно находится на установочном диске Windows 8, в директории \sources\sxs, но, во-первых, не всегда под рукой есть диск (или iso), во-вторых, установка с первого же попавшегося диска почему-то не прошла, но прошла с другого. Чтобы избежать этих проблем, я подготовил архив со всеми необходимыми файлами. Итак приступим.
- Скачиваем архив с файлами, необходимыми для установки компонента: Sources.zip (102.5 MB)
- Распаковываем архив, для наглядности я распаковал его в корень диска C:\
- Запускаем командную строку с правами администратора
- Выполняем код, с учетом пути к распакованным файлам из архива:
DISM /Online /Enable-Feature /FeatureName:NetFx3 /All /LimitAccess /Source:C:\Sources\sxs
Это займет несколько минут, но в результате получаем успешный результат!

Этот способ можно также применять для установки .NET Framework 3.5 на компьютеры, ограниченные в подключении к интернету.
Update от 01.02.2019
Спустя годы ситуация изменилась, подробное обсуждение доступно на форуме Microsoft.
Теперь никаких локальных установок не нужно. Достаточно поставить одну галочку в GPO.
Computer Configuration > Administrative Templates > System, "Specify settings for optional component installation and component repair"
Или по-русски:
Конфигурация компьютера - Политики - Административные шаблоны - Система - Укажите параметры для установки необязательных компонентов и восстановления компонентов.
Галка "Скачайте содержимое для восстановления и дополнительные компоненты непосредственно из Центра обновлений Windows..."
Download Windows Speedup Tool to fix errors and make PC run faster
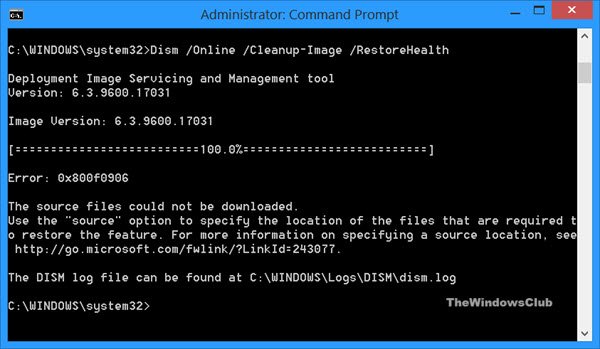
If while running the DISM Tool, you see DISM Error 0x800f0906, The source files could not be downloaded message, then this post will be able to help you. A few days back, we posted about the repairing of corrupted Windows Image using Deployment Imaging and Servicing Management (DISM) component repair tool. Today, when I was trying the method of our posted article on a computer, I received an error and thus was unable to completely repair a Windows Image.
Here are the details of the complete scenario which I faced after running the Windows Component tool:
DISM /Online /Cleanup-Image /RestoreHealth
Deployment Image Servicing and Management tool
Version: 6.2.9200.16384Image Version: 6.2.9200.16384
[==========================100.0%==========================]
Error: 0x800f0906
The source files could not be downloaded.
Use the “source” option to specify the location of the files that are required to restore the feature. For more information on specifying a source location, see http://go.microsoft.com/fwlink/?LinkId=243077.The DISM log file can be found at C:\Windows\Logs\DISM\dism.log
Repair Corrupt Windows Image
After doing some research about this error, I found that the following solution may work in this situation. You need to reset SoftwareDistribution and Catroot2 folders. The fix to the error goes like this:
1. Open administrative Command Prompt.
2. Copy the following commands one after the other into Command Prompt and hit Enter after every command:
net stop wuauserv
cd %systemroot%\SoftwareDistribution
ren Download Download.old
net start wuauserv
net stop bits
net start bits
net stop cryptsvc
cd %systemroot%\system32
ren catroot2 catroot2old
net start cryptsvc
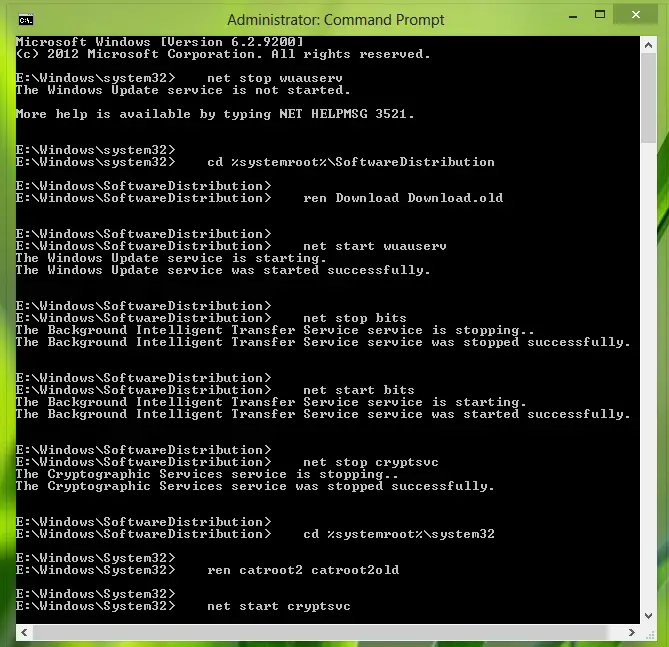
3. That’s it! Close the Command Prompt. Reboot and try to run the DISM /Online /Cleanup-Image /RestoreHealth again and this time, you won’t receive the error code.
Please follow the steps and if the issue persists, revert back and we will be glad to help you!
See these posts if you need more on such subjects:
- Fix DISM Errors 87, 112, 11, 50, 2, 3, 87,1726, 1393, 0x800f081f
- DISM fails in Windows 10, The source files could not be found error.
An Electrical Engineer by profession, Kapil is a Microsoft MVP and a Windows Insider MVP. Please read the entire post & the comments first & create a system restore point before making any changes to your system.