
Среди прочих частых ошибок при обновлении Windows 11 или Windows 10 через Центр обновления — ошибка 0x80073701 «С установкой обновлений возникли некоторые проблемы». Обычно этот код ошибки появляется при установке накопительных обновлений.
Далее в инструкции подробно о том, как исправить рассматриваемую ошибку и дополнительная информация, которая может быть полезной.
Простые способы решения проблемы

Сначала быстрые, не затратные по времени и часто срабатывающие способы исправить ошибку 0x80073701. Прежде всего, метод решения, предлагаемый на официальном сайте Майкрософт:
- Запустите командную строку от имени администратора (как это сделать).
- Введите команду
dism /online /cleanup-image /startcomponentcleanup
нажмите Enter и дождитесь завершения выполнения команды (может занять продолжительное время).
- Закройте командную строку и перезагрузите компьютер.
После этого попробуйте установить проблемное обновление как обычно, через Центр обновлений Windows 11/10.
Ещё несколько простых вариантов:
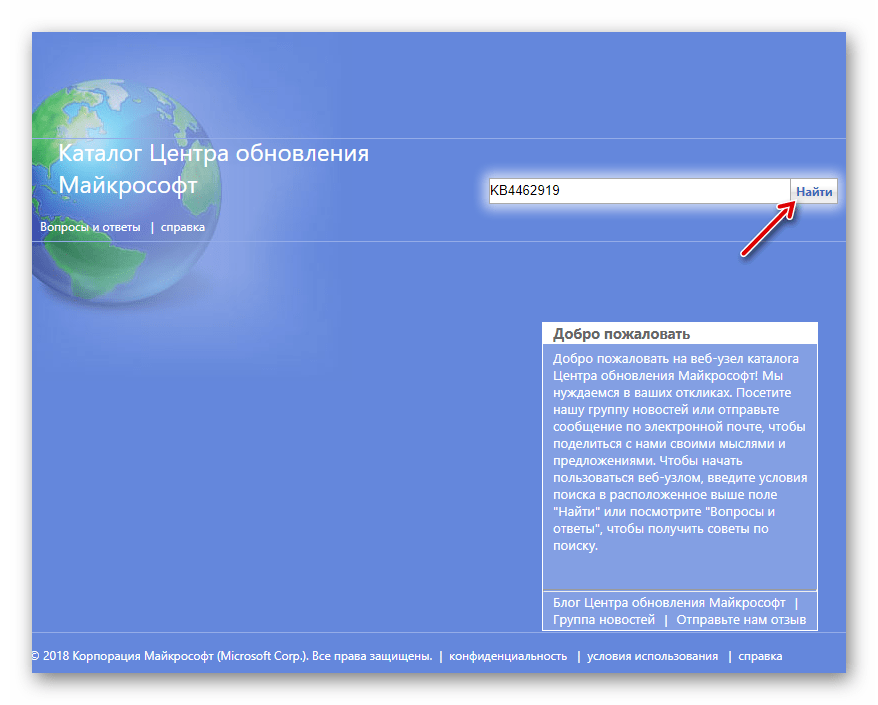
- Попробуйте найти и скачать проблемное обновление в каталоге обновлений Windows — в поиске введите KB-номер обновления, скачайте подходящий для вашей ОС файл и запустите его.

- Запустите командную строку от имени администратора и по порядку используйте следующие две команды
dism /online /cleanup-image /restorehealth
sfc /scannow
Если будут обнаружены и исправлены ошибки, попробуйте выполнить установку обновления после этого.

Удаление пакета обновления
Ошибка 0x80073701 может говорить о повреждении пакета обновления. Можно удалить его, затем скачать и установить через Центр обновления заново. Шаги для удаления будут следующими:
- Запустите командную строку от имени администратора и введите команду
DISM.EXE /online /get-packages
- Выделите и скопируйте полный идентификатор пакета, с установкой которого возникла проблема.
- Удалите его с помощью команды
DISM.EXE /online /remove-package /packagename:идентификатор_пакета
- Можно проделать то же самое и для других пакетов, которые находятся в ожидании установки.
- Закройте командную строку, попробуйте скачать и установить обновления снова.
Если приведённые выше методы не сработали, вы можете попробовать некоторые дополнительные варианты:
- При наличии стороннего антивируса попробуйте отключить его и проверить, изменит ли это ситуацию.
- Используйте раздел «Сброс кэша обновлений и его параметров» из инструкции Как очистить кэш обновлений Windows.
- Используйте утилиту Reset Windows Update Tool, подробнее в статье про исправление ошибок центра обновлений.
И, наконец, ещё один вариант — выполнить «Обновление на месте», причем лучше для этого взять образ уже обновленной Windows при его наличии.
Applies ToWindows 10, version 1809, all editions Windows 10, version 1903, all editions
Symptom
When trying to install updates from Windows Update you might receive «Updates Failed, There were problems installing some updates, but we’ll try again later» with one of the following errors:
-
0x80073701
-
0x800f0988
Workaround
First, you should try checking for updates again. If you need help, see Update Windows 10.
If you receive the same message and error on subsequent retries, try this workaround to mitigate the issue:
-
Select the start button and type cmd
-
Right click or long press on Command Prompt and select Run as administrator.
-
If you receive a User Access Control (UAC) dialog for Windows Command Processor stating, «Do you want to allow this app to make changes to your device?», select Yes.
-
Type or copy and paste the following command into the Command Prompt window:dism /online /cleanup-image /startcomponentcleanup
-
Wait for the command to complete.
-
Restart your device.
-
Try checking for updates again.
If you are still having issues, see Get help with Windows 10 upgrade and installation errors.
Need more help?
Want more options?
Explore subscription benefits, browse training courses, learn how to secure your device, and more.
Все способы:
- Способ 1: Средство устранения неполадок
- Способ 2: Отключение стороннего антивируса
- Способ 3: Установка обновлений вручную
- Способ 4: Проверка системных файлов
- Способ 5: Удаление пакета обновлений
- Способ 6: Сброс кеша апдейтов
- Вопросы и ответы: 0
Способ 1: Средство устранения неполадок
Как правило, ошибка обновления под кодом 0x80073701 возникает, когда какие-то сопутствующие файлы повреждены или вовсе отсутствуют. Также это может быть связано со сбоями в работе «Центра обновления Windows», поэтому сначала стоить проверить его на наличие ошибок с помощью предустановленного средства:
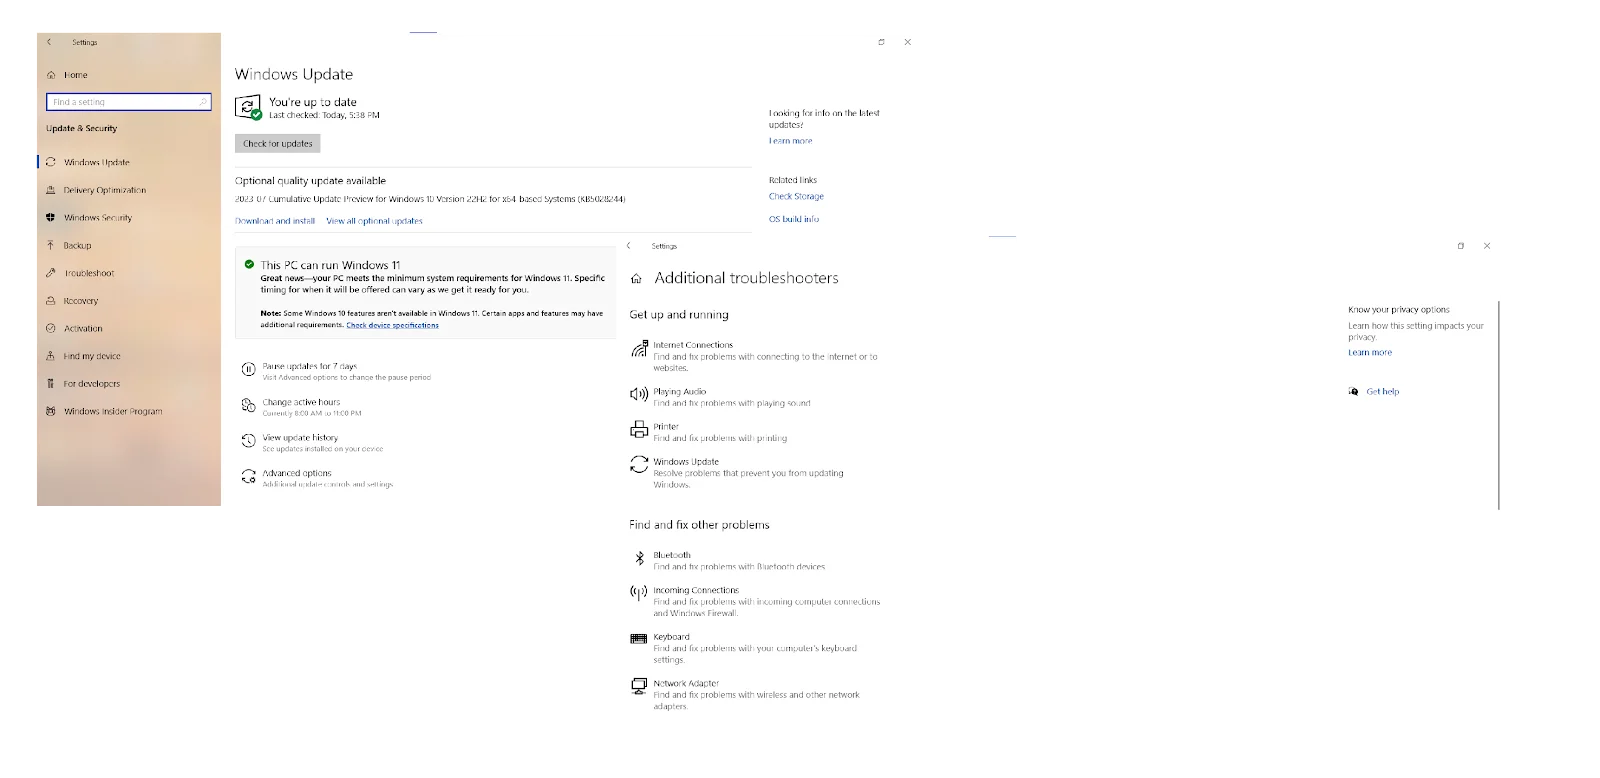
- Откройте главное меню, щелкнув по кнопке «Пуск», затем выберите запуск штатного приложения «Параметры».
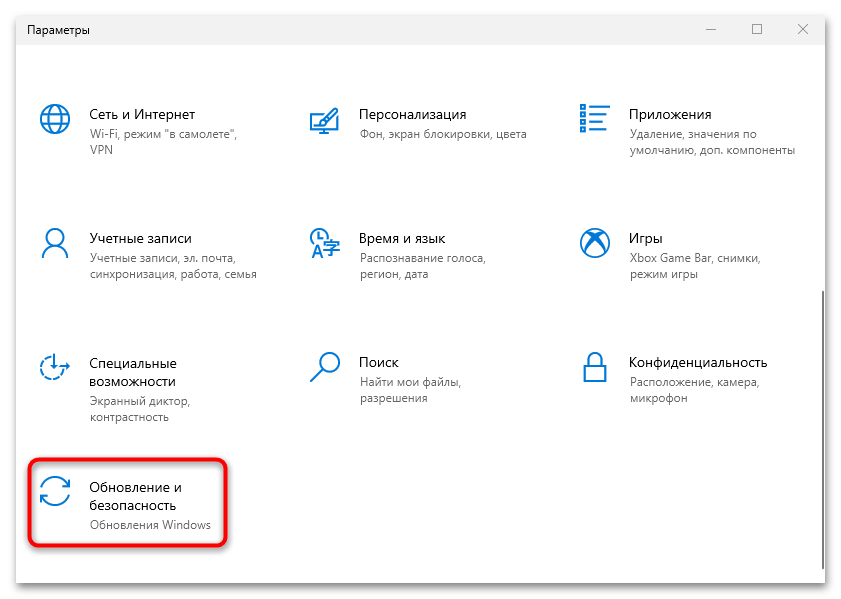
- Выберите раздел «Обновление и безопасность».
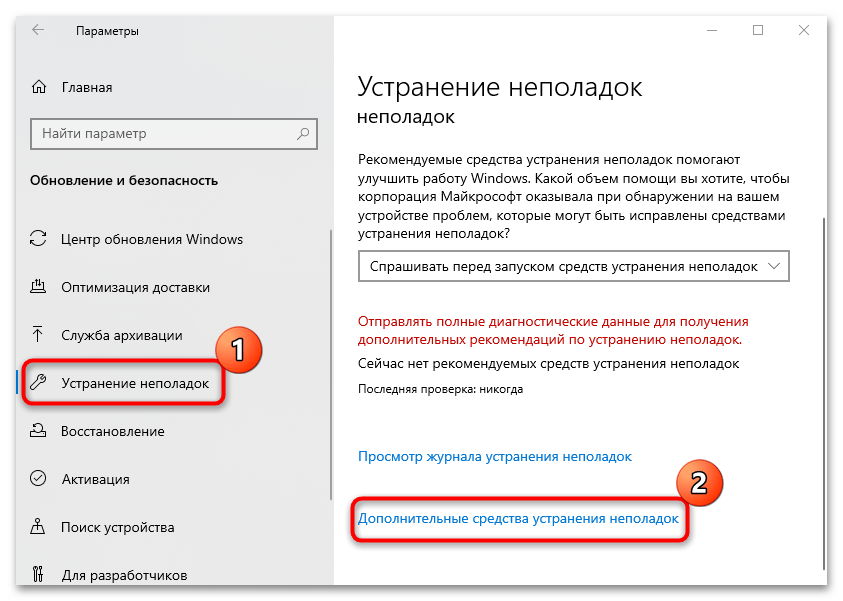
- Далее переключитесь на вкладку «Устранение неполадок» на левой панели, а в основной части окна кликните по строке «Дополнительные средства устранения неполадок».
- Щелкните по строке «Центр обновления Windows», затем запустите встроенное средство устранения неполадок.
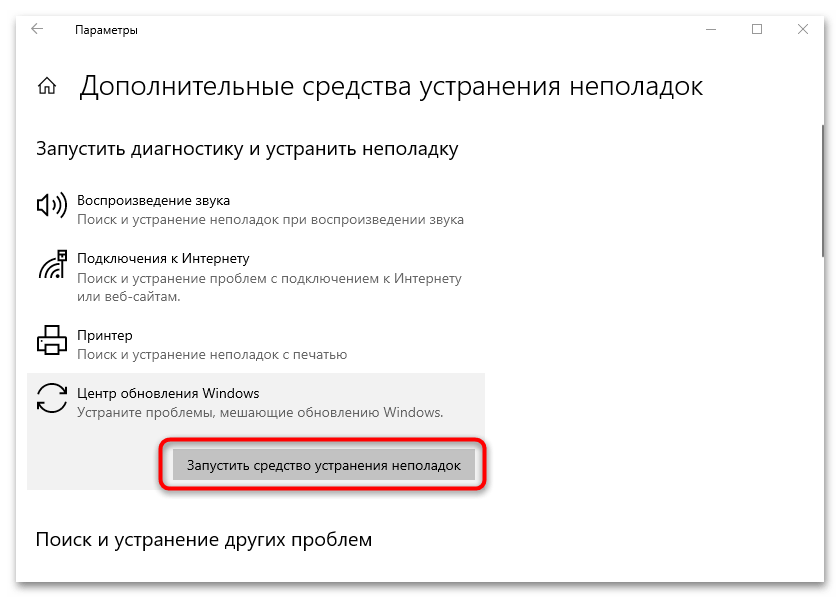
Начнется поиск возможных проблем, которые связаны с работой «Центра обновления». Если они будут найдены, средство предложит пути решения. По итогу станет доступен отчет об исправлениях и найденных ошибках.
Способ 2: Отключение стороннего антивируса
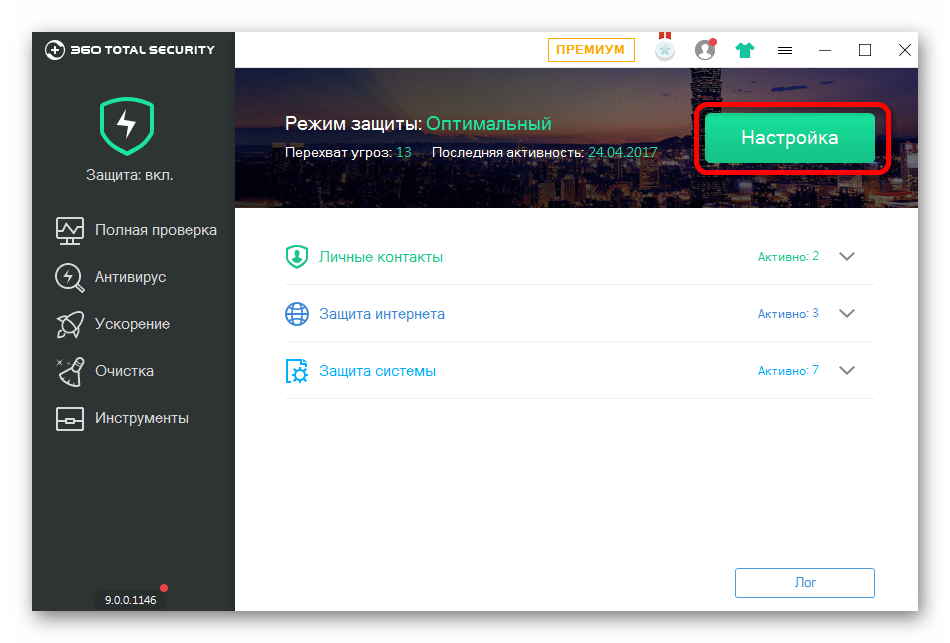
Случается, что скачивание или установку обновления блокирует антивирусная программа, которая инсталлирована в систему помимо встроенных средств защиты Windows 10. Действия, выполняемые при переходе ОС на новую версию, могут показаться подозрительными, отчего софт ограничивает их, препятствуя таким образом корректному обновлению. На время загрузки и инсталляции апдейта отключите сторонний антивирус. В нашем отдельном материале представлен алгоритм действий для наиболее популярных продуктов.
Подробнее: Отключение антивируса
Способ 3: Установка обновлений вручную
Как известно, за обновление операционной системы отвечает специальное программное обеспечение и соответствующие службы, связанные с ним. Если встроенное средство устранения неполадок не помогло исправить возможные сбои «Центра обновления Windows», стоит попробовать самостоятельно скачать проблемный апдейт с официального сайта компании Microsoft и инсталлировать его в систему в обход автоматических инструментов.
В некоторых ситуациях это помогает стабилизировать работу ОС, и в будущем рассматриваемая ошибка уже не появится. Но чаще всего рекомендация не является прямым решением рассматриваемой ошибки, хоть и позволяет обновить Windows. Про то, как вручную устанавливать обновления, читайте в отдельном нашем материале по ссылке ниже.
Подробнее: Устанавливаем обновления для Windows 10 вручную
Способ 4: Проверка системных файлов
Одним из решений является проверка системных файлов на целостность. Если они по каким-то причинам оказались повреждены, есть вероятность, что ошибка при обновлении возникает именно по этой причине. В Windows 10 встроены консольные утилиты, с помощью которых можно восстановить такие файлы и их хранилища, а об их правильном применении мы писали в другом материале.
Подробнее: Как проверить целостность системных файлов в Windows 10

Способ 5: Удаление пакета обновлений
Рассматриваемая ошибка может также говорить и о том, что пакет обновления поврежден, а это препятствует корректной установке. Поскольку его файлы все еще есть на локальном хранилище, вызывая тем самым конфликт ПО, сначала их нужно полностью удалить, после чего можно снова скачать через «Центр обновления Windows» и инсталлировать. Для полной очистки от поврежденных апдейтов нужно выполнить простую команду, но прежде понадобится узнать идентификатор обновления.
Читайте также: Просматриваем информацию об обновлениях в Windows 10
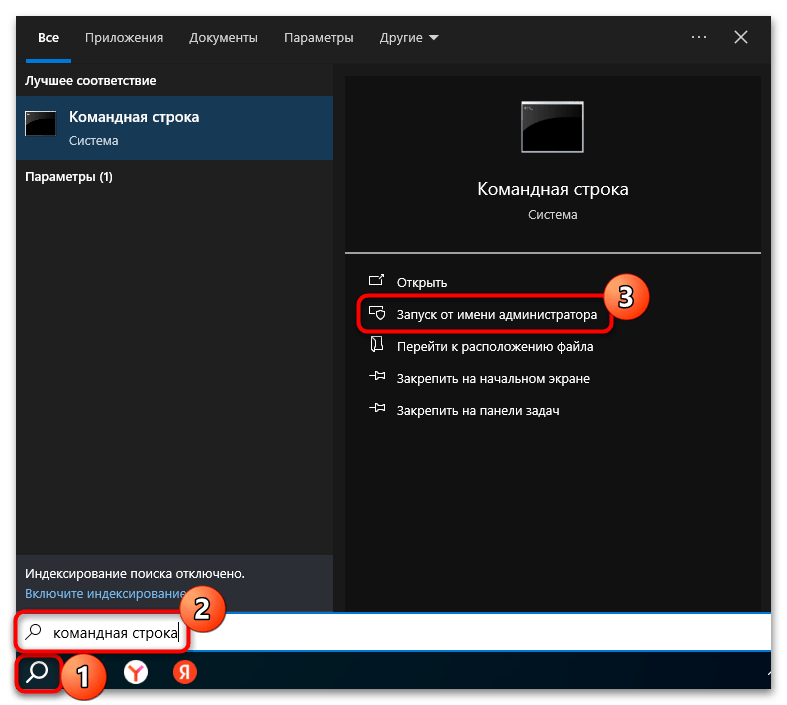
- Запустите консоль «Командная строка» от имени администратора – для этого подойдет строка системного поиска.
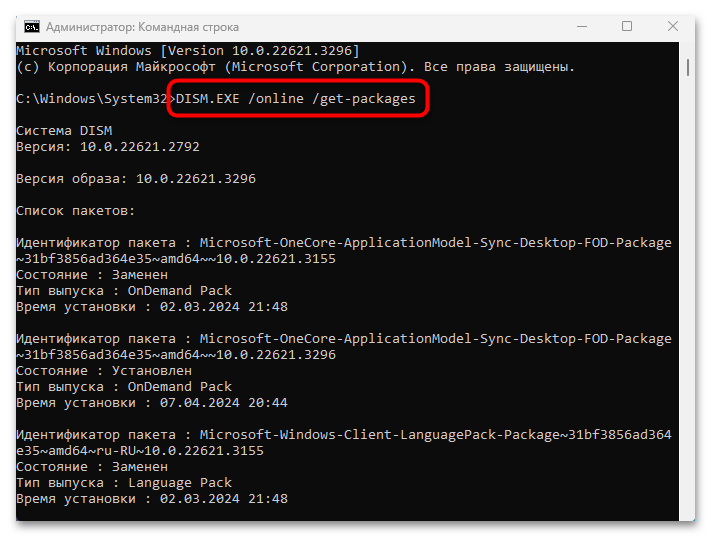
- Введите команду
DISM.EXE /online /get-packagesи нажмите на клавишу «Enter» для ее выполнения. Отобразится список обновлений с их идентификаторами. - Далее нужно выполнить команду
DISM.EXE /online /remove-package /packagename:идентификатор, где потребуется использовать идентификатор проблемного обновления. Нажмите на клавишу ввода для удаления программных компонентов.
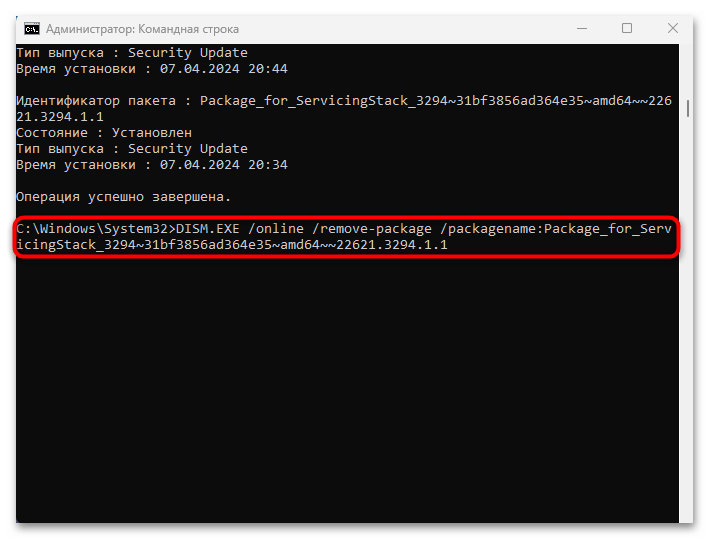
Можно проделать то же самое и с другими обновлениями, которые еще не установлены в систему, после чего перезагрузите компьютер и снова скачайте апдейты.
Способ 6: Сброс кеша апдейтов
Сброс кеша обновлений помогает исправить ошибки «Центра обновлений Windows». Процедура предполагает удаление папок с данными, которые хранятся на системном диске, так как они также могут вызывать конфликт при попытке обновить систему. Для выполнения способа нужно использовать несколько команд в консоли, тем самым остановив «Центр обновления Windows» и связанные с ним службы, затем непосредственно очистив кеш и вновь запустив системные компоненты.
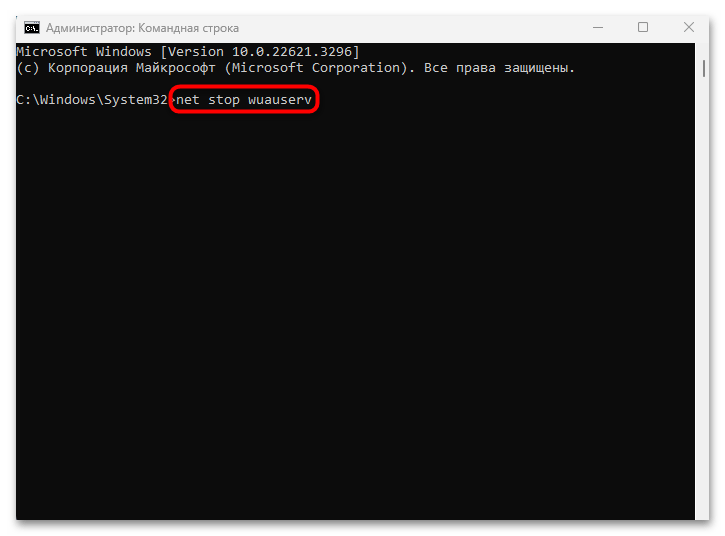
Вызовите «Командную строку» с правами администратора и поочередно выполните следующие команды:
net stop wuauserv

net stop cryptSvc

net stop bits

net stop msiserver

ren C:\Windows\System32\catroot2 catroot2.old

ren C:\Windows\SoftwareDistribution SoftwareDistribution.old

net start cryptSvc

net start bits

net start msiserver

net start wuauserv
После этого перезагрузите ПК и попробуйте запустить обновление еще раз. Если проблема исчезнет, папки с припиской «.old», адрес которых указан в командах, полностью удалите стандартным способом, чтобы те не занимали место на накопителе. Также ранее мы разбирали, как вручную удалить папки с кешем обновлений. При желании можете ознакомиться с этим руководством.
Подробнее: Удаление кеша обновлений в Windows 10
Наша группа в TelegramПолезные советы и помощь
Table of contents
- What Is ERROR_SXS_ASSEMBLY_MISSING on Windows 10?
- How to Fix Error 0x80073701 on Windows 10
- Fix 1: Run the Windows Update Troubleshooter
- Fix 2: Restart Windows Update services
- Fix 3: Find faulty system files and replace them
- Fix 4: Reset the Winsock component
- Fix 5: Flush your DNS cache
- Fix 6: Release and renew your IP address
- Fix 7: Reset your hosts file
- Fix 8: Reset Windows Update components
- Fix 9: Perform a clean boot
- Fix 10: Check Your PC for Malware
- Fix 11: Clean up your computer
- Fix 12: Troubleshoot your connection issues
- Fix 13: Disable your VPN
- Fix 14: Perform a system restore
- Fix 15: Run a checkup of your OS
- Conclusion
- FAQ
The 0x80073701 issue is one of those Windows Update errors that show up when the client app fails to download and install updates. It’s also known as ERROR_SXS_ASSEMBLY_MISSING in technical terms.
If you’ve been struggling with the install error – 0x80073701 , just keep reading.
In this article, you’ll find fixes that will show you how to get rid of it and complete your update.
What Is ERROR_SXS_ASSEMBLY_MISSING on Windows 10?
Windows update error 0x80073701 is an indication that the Windows Update client is unable to find some files.
While this could be the case, other underlying problems could be triggering the (0x80073701) issue, including:
- Malfunctioning Windows Update services or components
- Corrupt system files
- Application interference
- Network connection problems
- Malware
- VPN usage
You can get rid of the 0x80073701 glitch by fixing its root causes.
While each solution below will show you how to fix the Windows update error 0x80073701 , only the ones that resolve the particular issues that exist on your computer will work.
So, apply them one after the other until the install error – 0x80073701 disappears.
Related: [FIXED] Windows 10 Update Error 0x8000ffff
How to Fix Error 0x80073701 on Windows 10
The most popular Windows OS in the world, Windows 10 is, unfortunately, quite prone to update issues. Turning a blind eye on them is not recommended since it will leave your OS unstable and easy prey for malware.
Adding to that is the fact that the current version is Windows 10’s final feature update. We recommend that you fix the 0x80073701 error asap to keep your software up to date.
Fix 1: Run the Windows Update Troubleshooter
If you see a message like “ There were some problems installing updates”, chances are high that some of your update components are acting up. Your first step should be running the Windows Update troubleshooter .
The utility is designed to check for common issues that trigger update errors and perform routine activities, such as restarting Windows Update services and resolving app conflicts.
- Go to the Settings application by tapping
Windows key + I.You can also summon the app by right-clicking the Start button and clicking on Settings in the Power User menu. - Click on the Update & Security icon after the Settings window shows up. Navigate to Update & Security in Windows 10.
- After the Windows Update page shows up, go to the left side of the window and click on “Troubleshoot.”
- Click Additional troubleshooters on the Troubleshoot tab.
- Select Windows Update under Additional troubleshooters.
- Click Run the troubleshooter under Windows Update.
- Allow the tool to scan for problems. Once it’s done, it will show you the issues it found, if any, and allow you to apply the necessary fixes.
- After the process completes, restart your system and check whether the install error – 0x80073701 is resolved.
Related: How to fix Windows update error 0x80092004?
Fix 2: Restart Windows Update services
Windows Update services are responsible for delivering updates to your OS. They may encounter errors, such as 0x80073701 , 0x800f0986, or 0x80070026, become stuck, and prevent updates from being installed or downloaded.
Luckily, you can easily restart the Windows Update services on your PC:
- Press the
Windows key + Rkeyboard combo to open the Run dialog box. - Enter
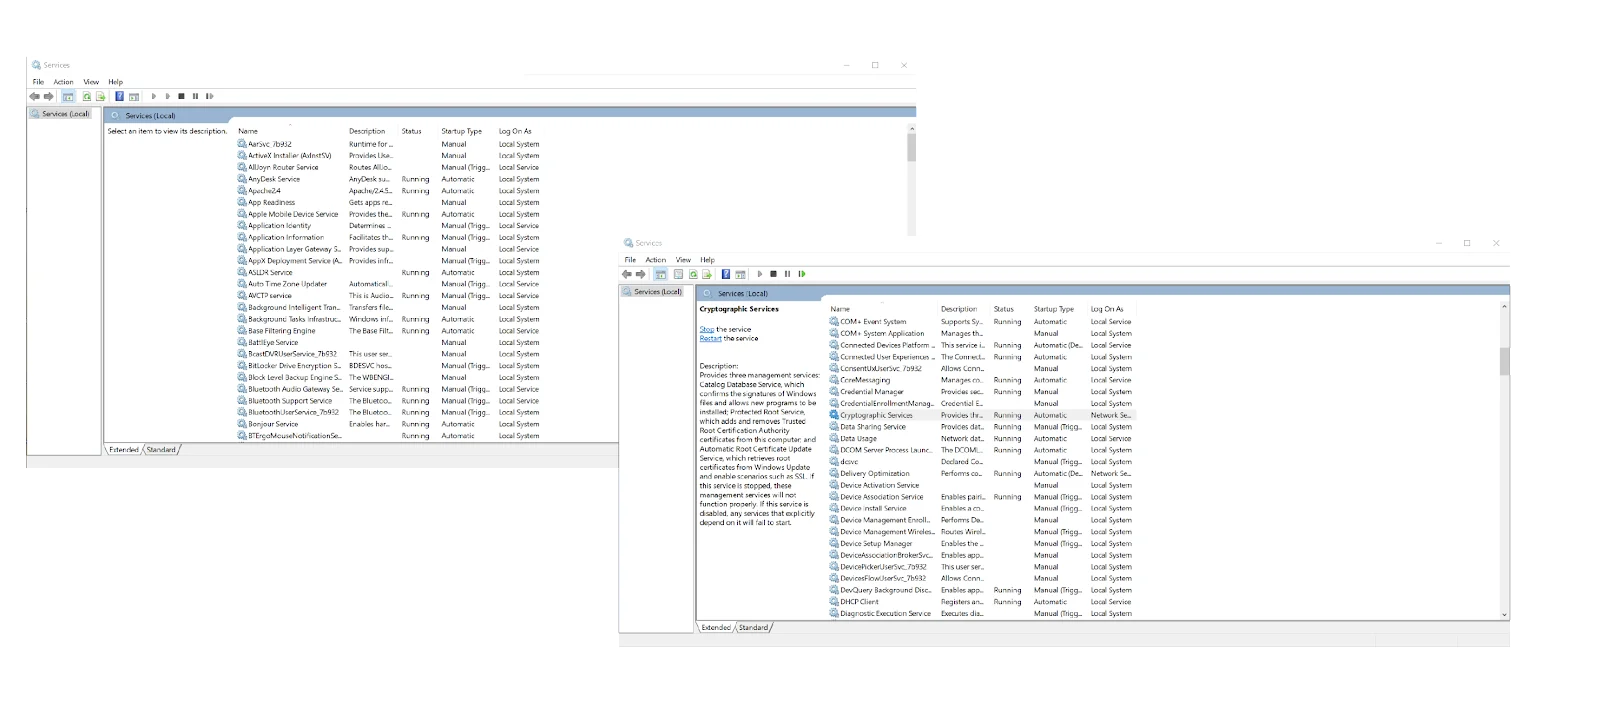
services.mscinto the Run box. - Press Enter to open the Services Manager.
- In the Services Manager, locate the following services:
Windows Update Service (wuauserv)
Background Intelligent Transfer Service (BITS)
Cryptographic Service (CryptSvc)
- Right-click on each service and select Restart from the context menu.
- After restarting all these services, check for updates to see if the error_sxs_assembly_missing issue has been resolved.
Related: How to get rid of the Windows Update Error 80246001?
Fix 3: Find faulty system files and replace them
You will keep running into the Windows update error 0x80073701 if there are missing or corrupt system files on your PC.
You’ll have to find the problematic files and replace them using the System File Checker (SFC) tool.
But before you run it, you have to provide the replacement files using the DISM (Deployment Image Servicing and Management) tool:
- On your taskbar, right-click the Start button and click on Run once the Quick Access menu appears. Or, press the Windows logo key + R combination to launch the program faster.
- After Run shows up, type CMD, and tap
Ctrl + Shift + Enter. - Select the Yes option once the User Account Control dialog window pops up and requests permission to run the Command Prompt as an administrator.
- You need healthy files for repairing the Windows image. Make sure you obtain them from a reliable source, such as Windows installation media in the form of a DVD or bootable USB.
- Insert or connect the DVD or bootable USB and run the following command:
DISM.exe /Online /Cleanup-Image /RestoreHealth /Source:C:\Source\Windows /LimitAccess
Note
C:\Source\Windows represents the path to the Windows folder on the repair source that you’re using. Replace it accordingly before entering the command.
- Allow the command to execute before you move on to the next step.
- After that, type
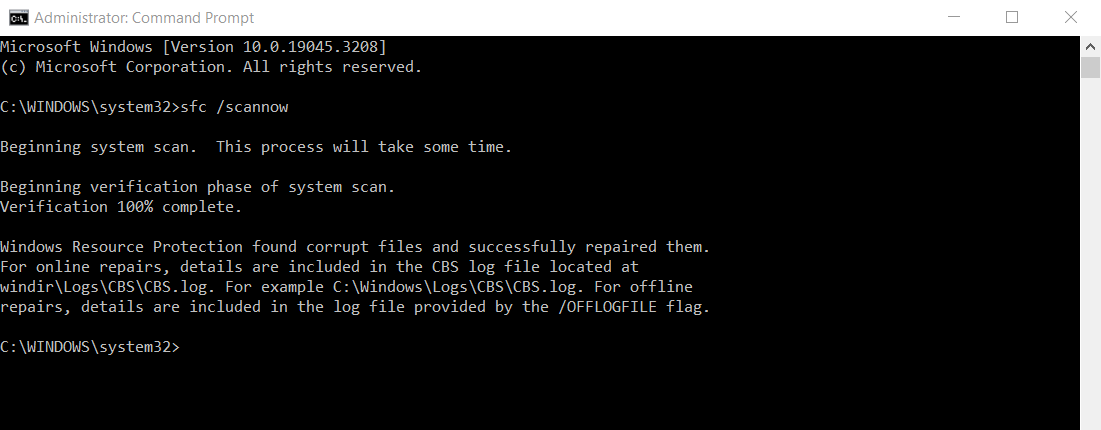
sfc /scannowinto the Command Prompt window and hit the Enter key.
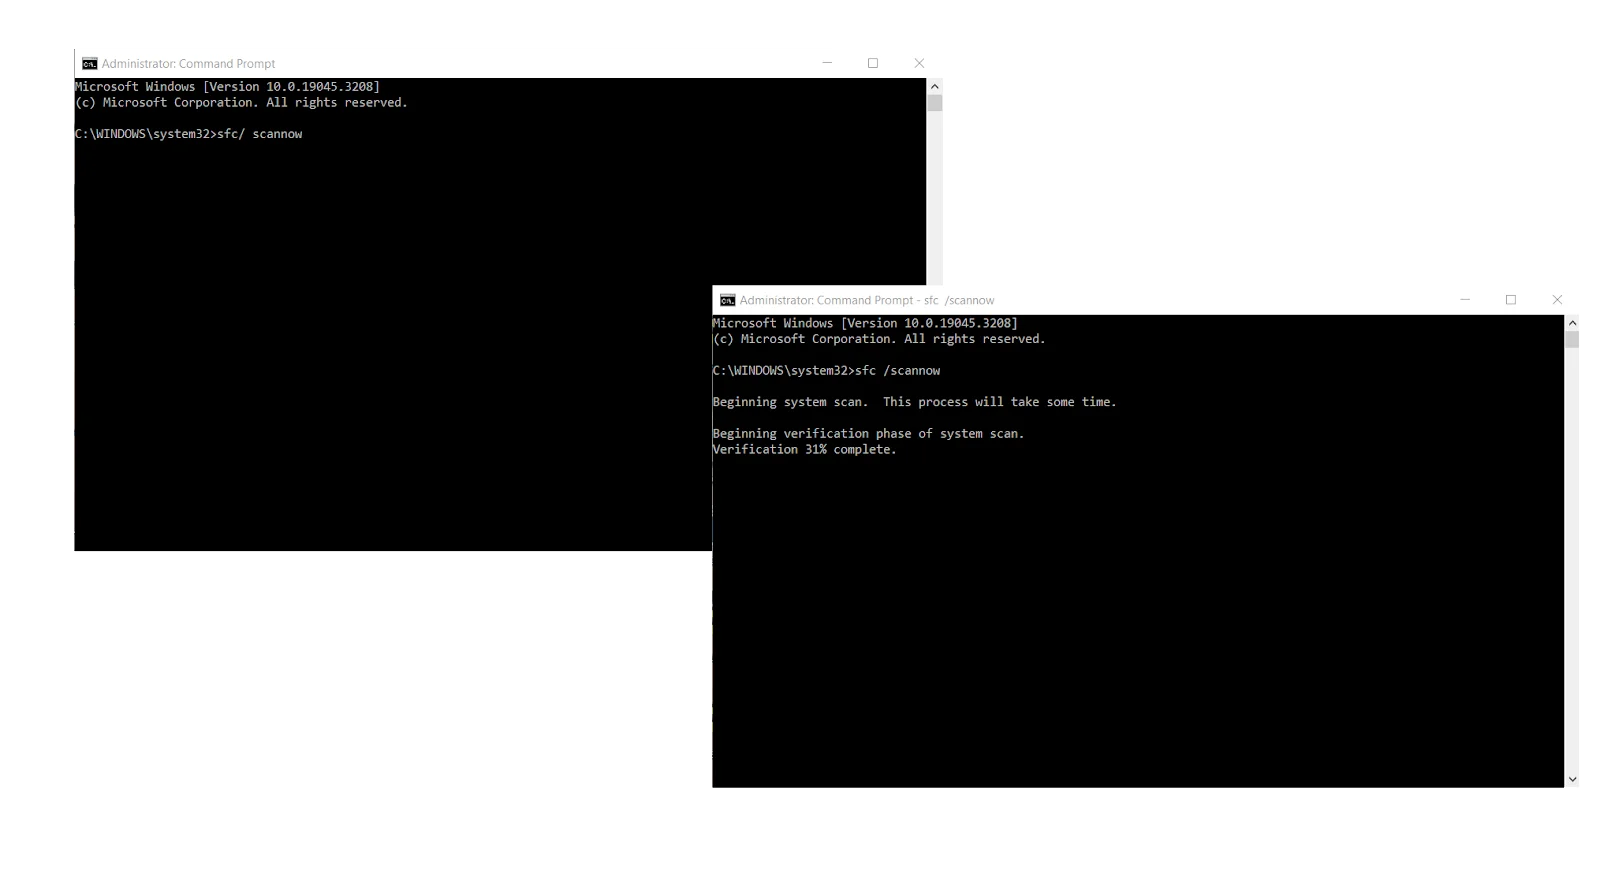
If you see a scan result that reads, “Windows Resource Protection found corrupt files and successfully repaired them,” restart your computer and check if the “ There were some problems installing updates” error (0x80073701) has been resolved.
Run System File Checker in Safe Mode
If you see a message that reads, “Windows Resource Protection could not perform the requested operation,” it means you have to run the System File Checker in Safe Mode to troubleshoot the install error – 0x80073701 :
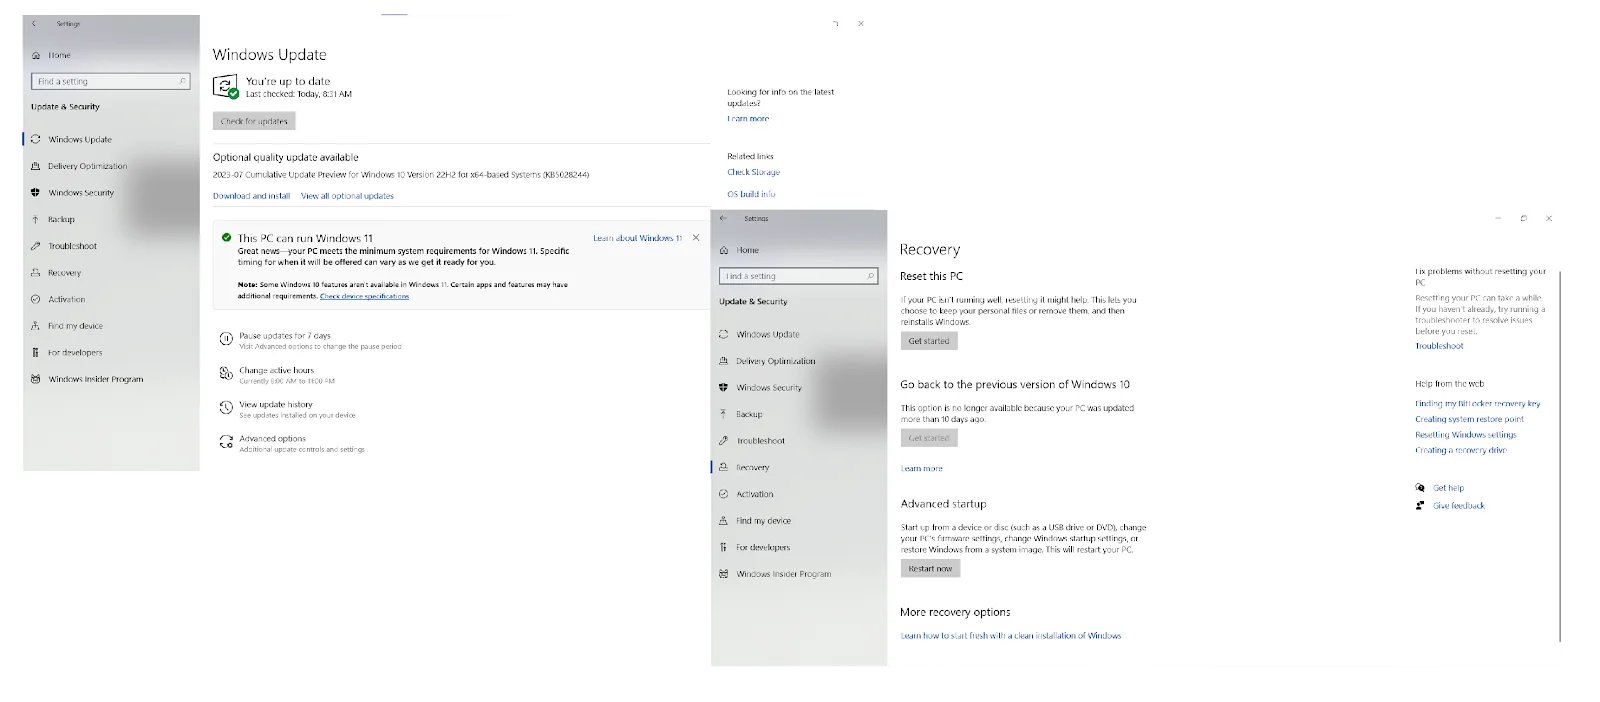
- Go to the Settings application by tapping
Windows + I. You can also summon the app by right-clicking the Start button and clicking on Settings in the Power User menu. - Click on the Update & Security icon after the Settings window shows up.
- After the Windows Update page shows up, go to the left side of the window and click on Recovery.
- Next, go to the Recovery page and select Restart Now under Advanced Startup.
- Windows will now restart your computer into the Advanced Startup environment.
- Click on the Troubleshoot tile on the “Choose an Option” screen.
- Select Advanced Options once the Troubleshoot page opens.
- After that, click on Startup Settings on the Advanced Options screen.
- Select Restart on the Startup Settings screen to reboot your computer.
- Once your PC restarts, choose the number beside Safe Mode to boot your system in Safe Mode.
- Now, run the System File Checker as we’ve shown you above.
Also Read: How to Get And Use Windows 10 Media Creation Tool
Fix 4: Reset the Winsock component
The Windows Update client might be showing the 0x80073701 error due to a connection problem caused by a faulty Winsock component.
The Winsock (Windows Socket) component is a dynamic link library file that holds network configurations that many apps depend on to connect to the internet.
Resetting the component is likely to fix the error_sxs_assembly_missing issue:
- Open the Search utility beside the Start button by pressing the
Windows + Skeyboard shortcut or clicking the magnifying glass icon in the taskbar. - Enter command into the search bar once it appears.
- After you see Command Prompt in the results, right-click it and click on Run as Administrator.
- Next, click on Yes after the User Account Control dialog window shows up and asks for permission.
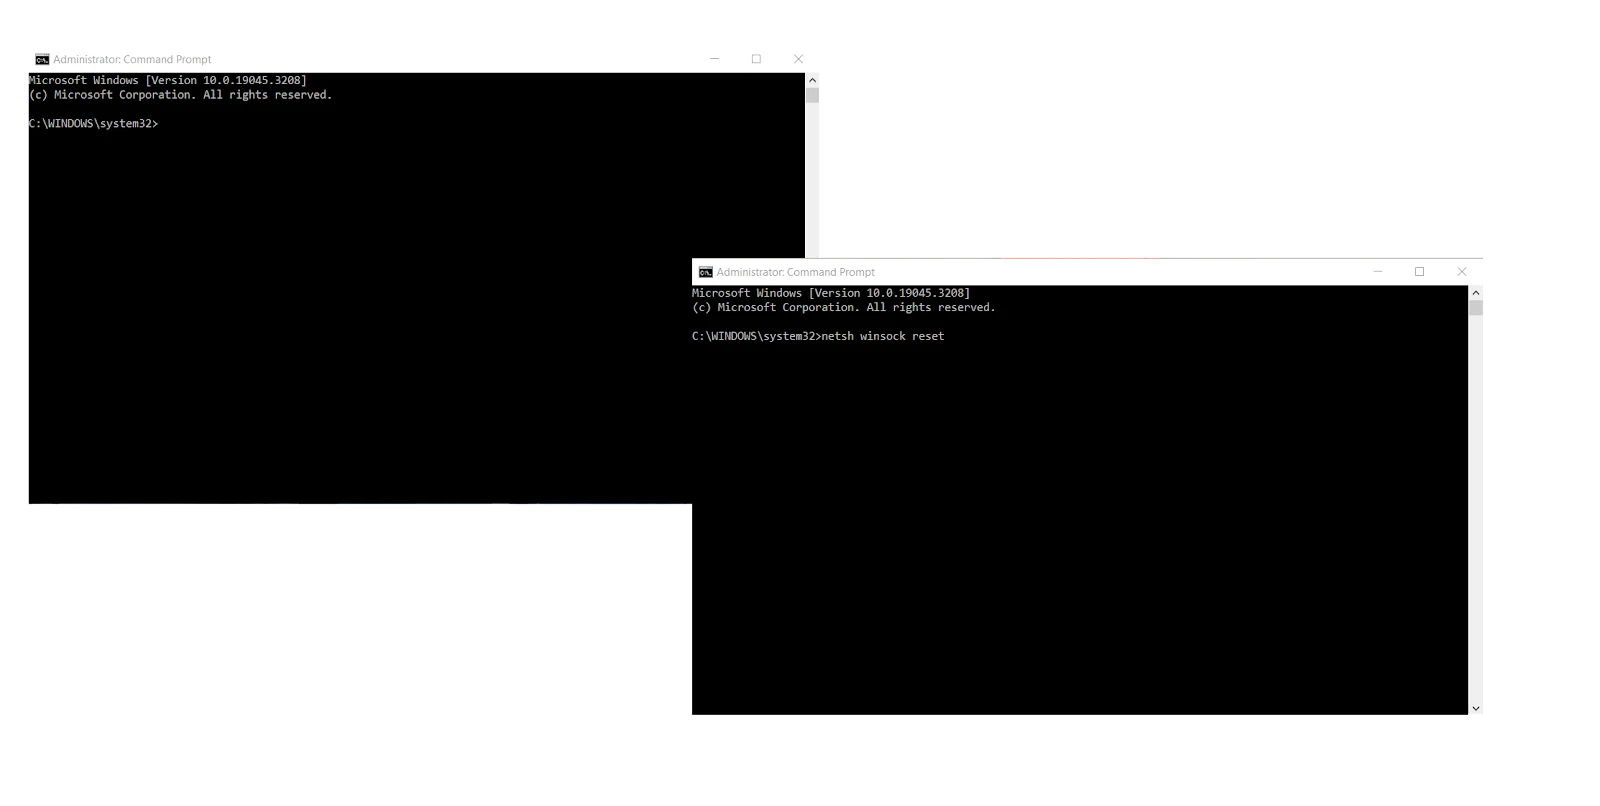
- After that, type the following line into the Command Prompt window and hit the Enter key:
netsh winsock reset - Windows will now clear the parameters in the Winsock component and reset the DLL file.
- Once the command executes successfully, reboot your PC and check for the error_sxs_assembly_missing (0x80073701) issue.
Fix 5: Flush your DNS cache
Instead of using a DNS server to resolve every website domain name, your computer saves the IP addresses and domain names of the websites you visit in a DNS cache.
This way, it can quickly look at the cache to match a domain name with its IP address. Unfortunately, your DNS cache can go haywire and trigger an issue like error 0x80073701 .
Here is how to flush it to fix the problem:
- Use the
Windows + Rkeyboard combo to open Run or right-click the Start button and select Run from the menu. - Once Run shows up, type CMD and press
Shift + Ctrl + Enter. - Select Yes on the UAC pop-up.
- When you see the Administrator: Command Prompt window, type this line into the black window and punch the Enter button:
ipconfig /flushdns - Wait for a message such as “Successfully flushed the DNS Resolver Cache”.
- Close the Command Prompt window and check if the install error – 0x80073701 has been fixed.
Download Auslogics Disk Defrag Ultimate
Get your drives optimized for top speed and maximum efficiency with this powerful program’s smart algorithms and boot-time defrag technology.
Fix 6: Release and renew your IP address
Error 0x80073701 in Windows 10 may result from an expired DHCP IP address. To get your system a new, working IP address, you have to release your current IP and request a new one:
- Use the
Windows + Rkeyboard combo to open Run or right-click the Start button and select Run from the menu. - Once Run shows up, type CMD and press Shift + Ctrl + Enter.
- Select the Yes option after the User Account Control menu pops up and requests permission to allow the Command Prompt to launch as an administrator.
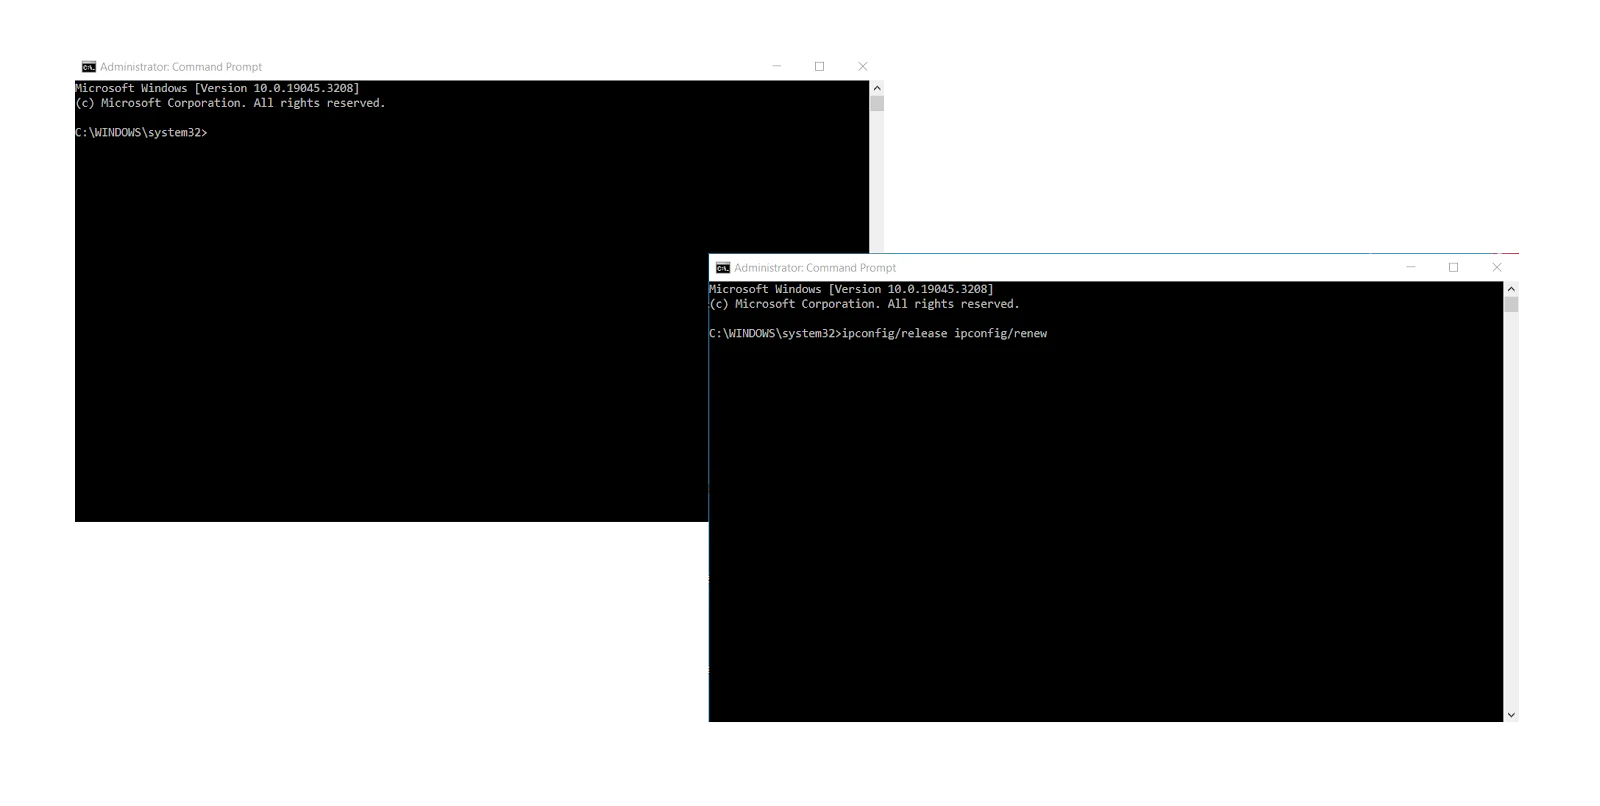
- When you see the Administrator: Command Prompt window, type these lines into the black window and punch the Enter button after entering each line:
ipconfig/release
ipconfig/renew
- After renewing your IP address, restart your PC and see if the Windows update error 0x80073701 has been resolved.
Fix 7: Reset your hosts file
Your Hosts file is a text file that helps match hostnames to their IP addresses. When the file becomes corrupt or contains the wrong parameters, it affects the computer’s network connection and can trigger the install error – 0x80073701.
In this case, resetting the file to its default state will resolve the network connection problem:
- Open the Windows search interface by clicking the magnifying glass icon in the taskbar or pressing Win + S.
- Type “notepad” after the search box appears.
- Click on Notepad in the search results.
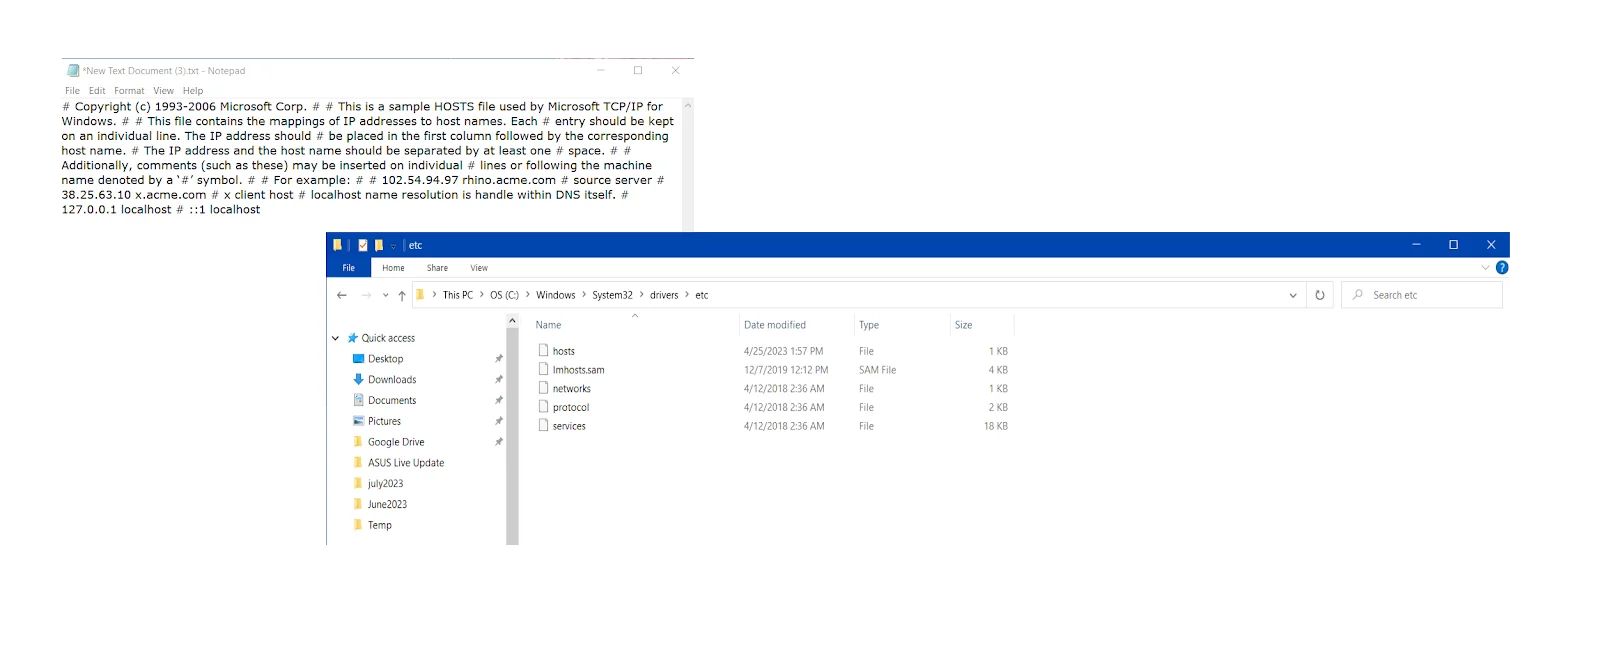
- Once Notepad shows up, copy and paste the following into the new text file:
# Copyright (c) 1993-2006 Microsoft Corp.
# # This is a sample HOSTS file used by Microsoft TCP/IP for Windows.
# # This file contains the mappings of IP addresses to host names. Each # entry should be kept on an individual line.
The IP address should # be placed in the first column followed by the corresponding host name.
# The IP address and the host name should be separated by at least one # space.
# # Additionally, comments (such as these) may be inserted on individual # lines or following the machine name denoted by a ‘#’ symbol.
# # For example: # # 102.54.94.97 rhino.acme.com # source server # 38.25.63.10 x.acme.com # x client host # localhost name resolution is handled within DNS itself. # 127.0.0.1 localhost # ::1 localhost
- Go to the File menu in the top-left corner of the Notepad window and click on Save As.
- Go to the File Name text box in the Save As dialog window and type hosts.
- Navigate to the desktop and click on the Save button.
- Next, press
Windows + Eto open a File Explorer window. - Once the window shows up, click on the address bar, copy and paste the following line, and tap the Enter button:
%WinDir%\System32\Drivers\Etc - Once you see the ETC folder, right-click on the Hosts file and select Rename. Change the name of the file to Hosts.old.
- Now, go to your desktop and copy the new Hosts file you created to the ETC folder.
- After that, check if the error_sxs_assembly_missing (0x80073701) issue has been fixed.
Fix 8: Reset Windows Update components
If you still can’t get rid of the Windows update error 0x80073701, consider resetting every update-related component. To automate the process, you can use a batch script:
- Press the
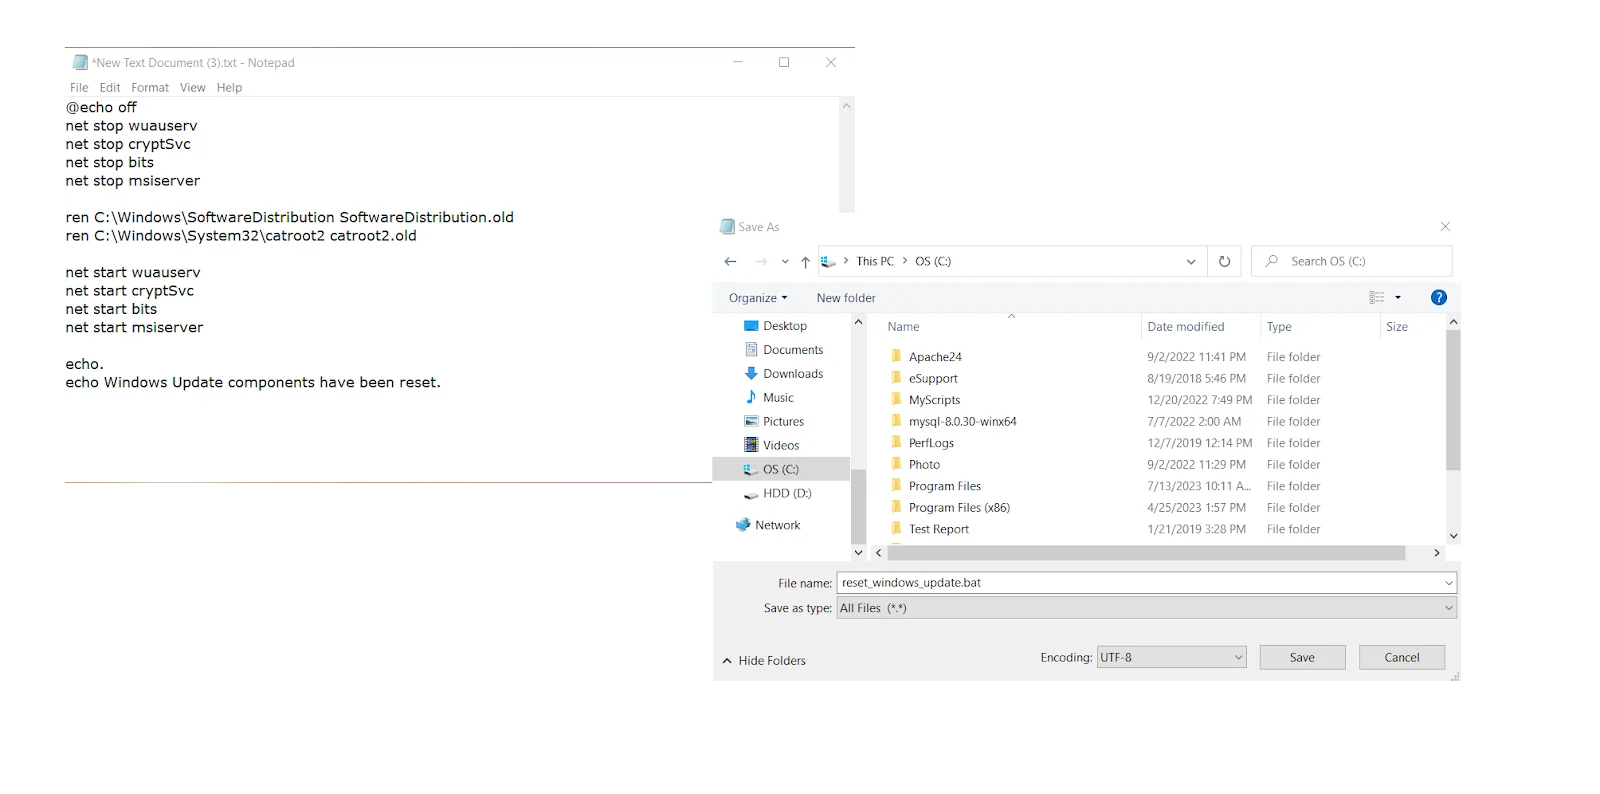
Windows key + Scombination, type in Notepad, and right-click on the Notepad app in the search results. Select the Run as administrator option to open Notepad with elevated rights. - Copy the following script and paste it into the Notepad window:
@echo off
net stop wuauserv
net stop cryptSvc
net stop bits
net stop msiserver
ren C:\Windows\SoftwareDistribution SoftwareDistribution.old
ren C:\Windows\System32\catroot2 catroot2.old
net start wuauserv
net start cryptSvc
net start bits
net start msiserver
echo.
echo Windows Update components have been reset.
- Click on File in the Notepad app’s menu and select Save As.
- Choose a location where to save the file.
- In the Save as type menu, select the All Files option. Name the file and add the .bat extension, like “reset_windows_update.bat.”
- Click the Save option.
- Locate the .bat file, right-click on it, and select Run as administrator. If required, click on Yes to enable the script to make changes to your system.
- The script will stop your Windows Update services, rename the SoftwareDistribution and catroot2 folders, and then restart the services.
- Wait a few minutes until the process is over. The Command Prompt will close automatically.
- Restart your computer to apply the changes and check if the 0x80073701 glitch has been eliminated.
Fix 9: Perform a clean boot
A third-party application could be forcing the Windows Update client to produce the install error – 0x80073701 . You can put an end to the issue by stopping that application by performing a clean boot in Windows 10.
When you start your system in a clean boot environment, you prevent startup applications from running on your PC.
After doing that , check whether the 0x80073701 issue shows up.
Fix 10: Check Your PC for Malware
With more than 450,000 new pieces of malware and potentially unwanted applications detected daily, every PC in the world is at risk of getting infected. If the error_sxs_assembly_missing issue persists, chances are malware might be at play in your case – especially if you work in the education sector .
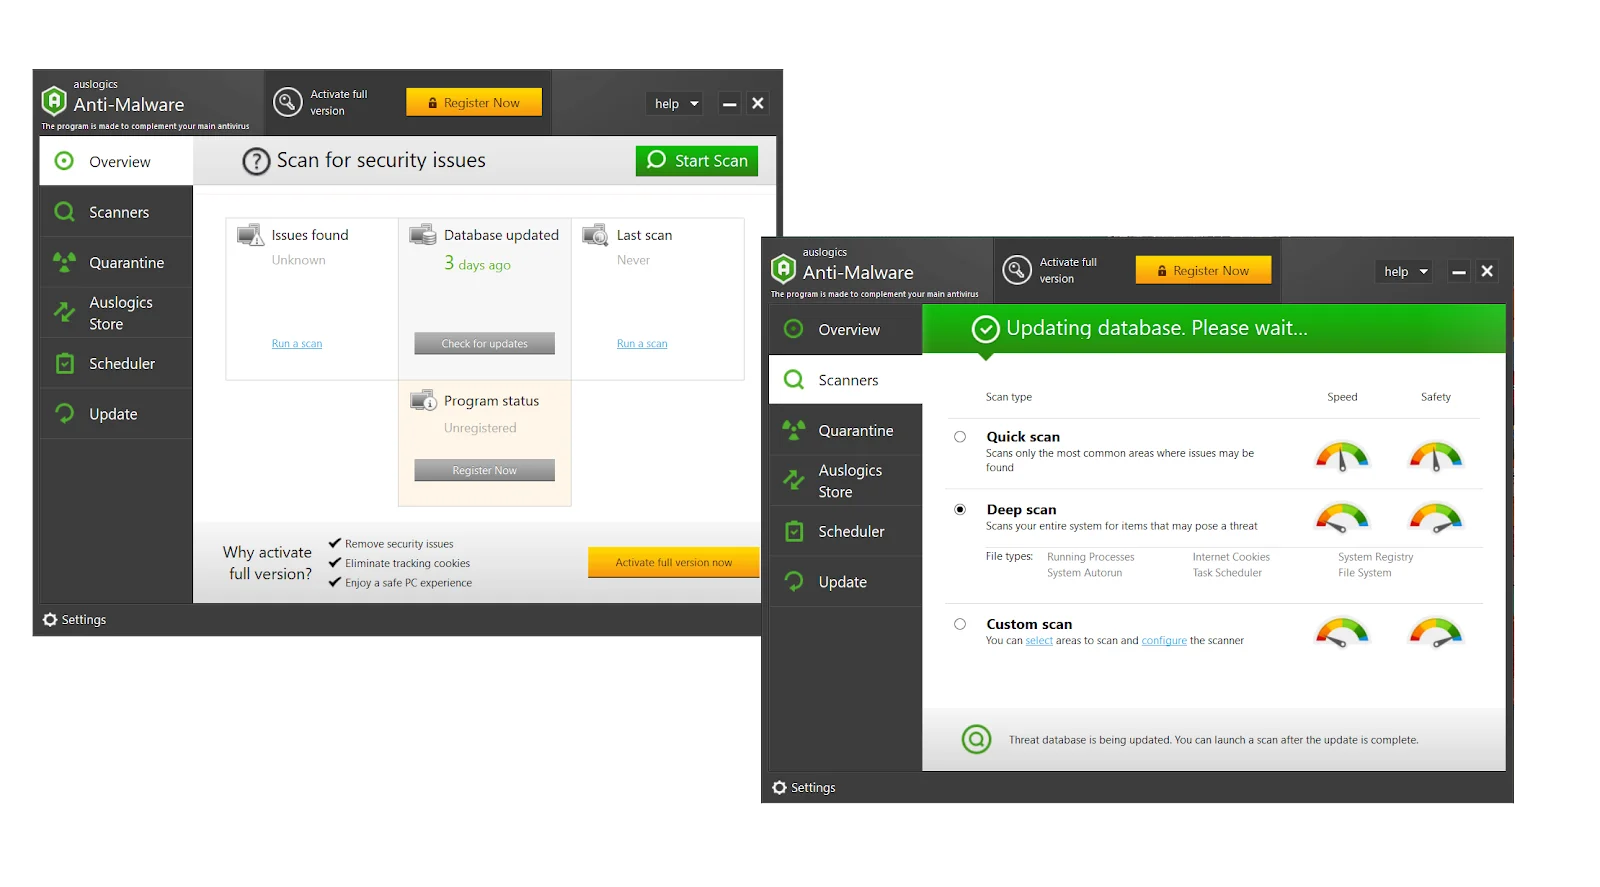
There are several w ays to remove malware from Windows. One of them is by using Auslogics Anti-Malware:
- Download the Auslogics Anti-Malware app on your Windows PC and install it using the instructions in the installation wizard.
- Wait a few minutes until the tool’s anti-malware database is updated with the latest malware definitions.
- Navigate to the Scanners tab and open it.
- Select the type of scan you would like to run. We recommend performing a deep scan to check all the components of your system.
- Once the scan is done, quarantine or eliminate the threats detected by the tool.
- After doing that, check if you can install updates without facing the 0x80073701 issue.
Download Auslogics Anti-Malware
Detects malware, spyware and viruses, then safely removes them from your PC to help keep it as secure as possible. The program is made to complement your main antivirus.
Related: Auslogics Anti-Malware: Features and Reviews
Fix 11: Clean up your computer
A PC cluttered with unnecessary or out-of-date files and apps is likely to experience update issues, including the install error – 0x80073701 . To make sure your updates can install properly, get rid of unnecessary files and programs.
Don’t forget to delete temporary Internet files and remove duplicate files. You can also try running the Windows Update Cleanup and Windows Disk Cleanup features.
Related: How to Get More Storage on PC – Clean Up Your PC to Run Faster
Fix 12: Troubleshoot your connection issues
To get rid of the Windows update error 0x80073701 , you may need to troubleshoot network connection problems on Windows 10.
Make sure your Wi-Fi connection is on (if you are using a wireless connection): Settings -> Network & Internet -> Wi-Fi. Another option is to run the Internet Connections troubleshooter:
- Open the Settings app and select the Update & Security option.
- Go to the Troubleshoot section and click on Additional troubleshooters.
- Select the Internet Connections option and click the Run the troubleshooter button.
- After running the troubleshooter, check if error 0x80073701 has been eliminated.
Related: Windows 10 Won’t Connect to Wi-Fi Automatically [Fixed]
Fix 13: Disable your VPN
There are many benefits to using a VPN, so it’s no wonder VPN usage steadily increases – mostly because people want to protect their personal data.
Unfortunately, using a VPN is not always a smooth ride: it can trigger various issues, including Wi-Fi not working with a VPN, Error Code 609, and the 0x80073701 issue.
You may need to temporarily disable your VPN to help your updates install properly.
Related: How to Choose VPN: Best Free VPN for Windows 10 PC
Fix 14: Perform a system restore
If all your efforts have been to no avail, meaning the Windows update error 0x80073701 keeps bothering you, performing a system restore may be your best bet. It will help you fix issues and undo updates and changes triggering error_sxs_assembly_missing (0x80073701). Here is how to restore your Windows OS to a previous state:
- Press the
Windows key + Scombination on your keyboard and type System Restore into the search bar. - Locate the Create a restore point option and select it.
- Switch to the System Protection tab in the System Properties window.
- Click on the System Restore button.
- Click Next to see available restore points.
- Choose the restore point you want to use (choose a date before the 0x80073701 issue started).
- Confirm your restore point selection by clicking Next and then clicking Finish.
- Click Yes to start the system restore process.
- Your PC will restart and begin the restore process. It may take some time, so be patient and let it run uninterrupted.
- After the restore is complete and Windows boots up, check if the install error – 0x80073701 is no longer present.
Related: How to fix the System Restore error 0x8007045b in Windows 10
Fix 15: Run a checkup of your OS
To eliminate a persistent problem like the error 0x80073701, you may need to run a complete checkup of your entire system, scanning every nook and cranny for potential culprits.
Doing that manually will take plenty of time and effort, so we recommend you to automate the process.
For instance, a tool like Auslogics BoostSpeed identifies causes of system or application problems and easily eliminates them:
- Download the BoostSpeed tool and install it on your Windows computer.
- On the My Dashboard window, click on the large blue Scan button.
- Wait while Auslogics BoostSpeed is checking your PC for issues.
- Once the scan is over, click on the Resolve All button.
As soon as Auslogics BoostSpeed is done fixing your problems, restart your PC and check if the Windows update error 0x80073701 has been resolved.
Conclusion
The install error – 0x80073701is a persistent problem that prevents users from receiving and installing updates. From faulty Windows Update components and poor connectivity to malware and file corruption, there are various factors that can trigger this issue.
You can fix it by ensuring your system is free from malware, junk, and software conflicts and its components are in top shape.
FAQ
How to run the Windows Update Troubleshooter?
The Windows Update troubleshooter is a helpful tool for fixing update-related issues, including the Windows update error 0x80073701. Here is how to run the Windows Update troubleshooter in Windows 10:
- Open Settings, go to Update & Security and opt for Troubleshoot.
- Click on the Additional troubleshooters link, scroll down and select Windows Update.
- Click the Run the troubleshooter button.
Why did Windows Updates fail to install?
If there were some problems installing updates, the fault may lie with one or more of these factors:
- Malfunctioning Windows Update components
- Corrupt system files
- Third-party software conflicts
- Internet connection issues
- Malware
- PC junk
- VPN usage
How to stop Windows 10 updates?
There is no way to disable automatic updates in Windows 10 permanently. However, you can temporarily pause updates in Windows 10 Pro and Enterprise:
- Go to Settings, click Update & Security and select the Windows Update option.
- Under Update settings, select Advanced options.
- In the Pause updates section, open the drop-down menu.
- Select for how long you want to pause updates (up to 35 days).
- Windows updates will resume automatically after this period.
If you are a Win 10 user, you can set your connection to metered to postpone some updates:
- Launch the Settings, opt for Network & Internet, and go to Wi-Fi or Ethernet, depending on your connection type.
- Click on your network, scroll down and enable the ‘Set as metered connection’ option.
- When Windows treats your connection as metered, it delays some updates.
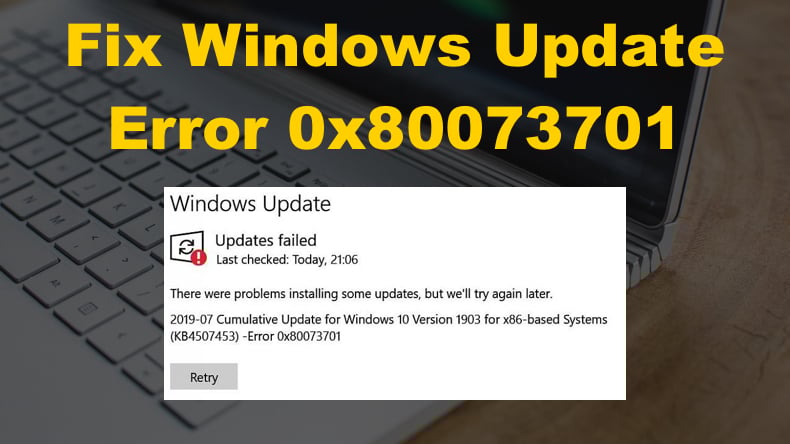
Getting Error 0x80073701 When Updating Windows 10? Here Are 5 Ways You Can Fix That
Error 0x80073701 is ERROR_SXS_ASSEMBLY_MISSING, which means that some system files are missing, causing the update to fail. If you’re looking for ways to fix this error, see the guides below.
One of the oldest cases of users getting error 0x80073701 was way back in 2016 with 2016-10 Cumulative Update for Windows 10 Version 1607 (KB3197954 and KB3200970.) But, that won’t be the last time users encounter this error. Many users got this error when installing the 2016-12 Cumulative Update for Windows 10 Version 1607 (KB3206632).
Many users experienced error 0x80073701 back in 2019 when Microsoft released the 2019-07 Cumulative Update for Windows 10 Version 1903 (KB4507453). Then, in 2020 there were reports of users getting error 0x80073701 when trying to install 2020-03 Cumulative Update for Windows 10 Version 1909 (KB4541335).
However, it wasn’t the end of error 0x80073701 coming up. Many users still encounter 0x80073701 as it occurs due to missing system files. System files can become corrupted or deleted due to various reasons.
The good news is that you can fix error 0x80073701. Windows 10 has various built-in tools you can use to resolve the underlying issue causing error 0x80073701.
Video Guide on How to Fix Windows Update Error 0x80073701
Table of Contents:
- Introduction
- Solution 1. Run Windows Update Troubleshooter
- Solution 2. Flush the SoftwareDistribution Folder
- Solution 3. Perform a System File Checker (SFC) Scan
- Solution 4. Perform a Deployment Image Servicing and Management (DISM) scan
- Solution 5. Reset Windows Update Components
- Video Guide on How to Fix Windows Update Error 0x80073701
Download Computer Malware Repair Tool
It is recommended to run a free scan with Combo Cleaner — a tool to detect viruses and malware on your device. You will need to purchase the full version to remove infections. Free trial available. Combo Cleaner is owned and operated by Rcs Lt, the parent company of PCRisk.com read more.
Solution 1. Run Windows Update Troubleshooter
Errors such as 0x80073701 can be solved using the built-in Windows Update Troubleshooter. Windows Update Troubleshooter is designed to troubleshoot Windows Update bugs. As such, it’s an effective tool when trying to fix errors such as error 0x8007370.
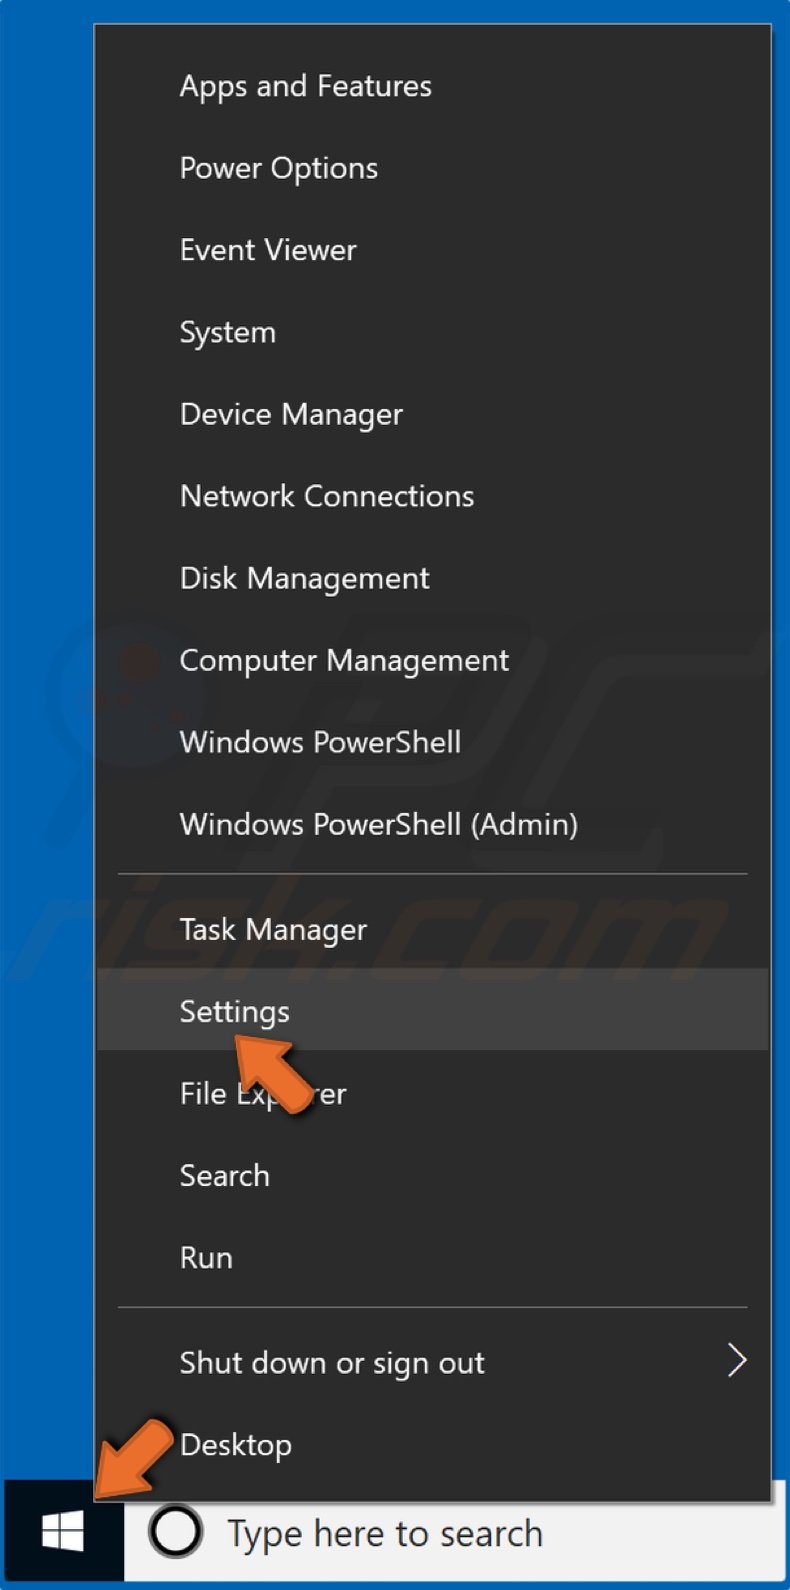
1. Right-click the Start button and click Settings.
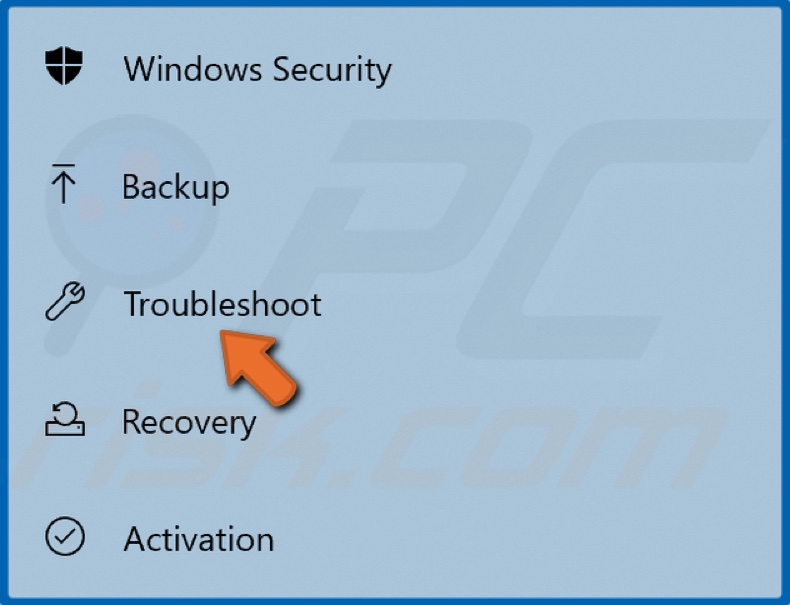
2. In the left pane, select Troubleshoot.
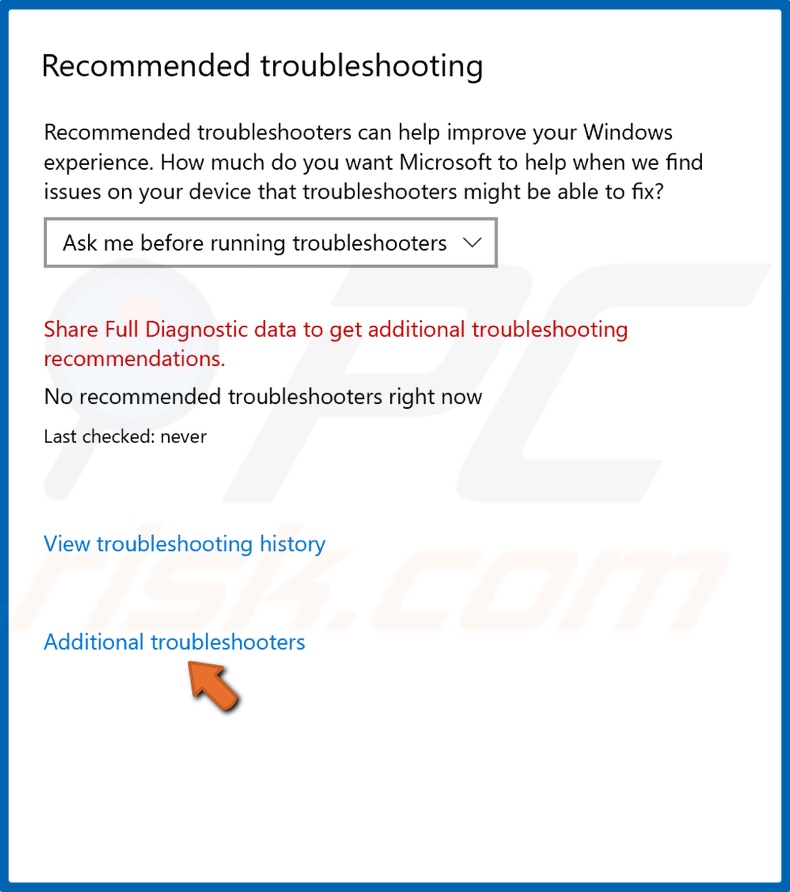
3. Then, in the right pane, click Additional troubleshooters.
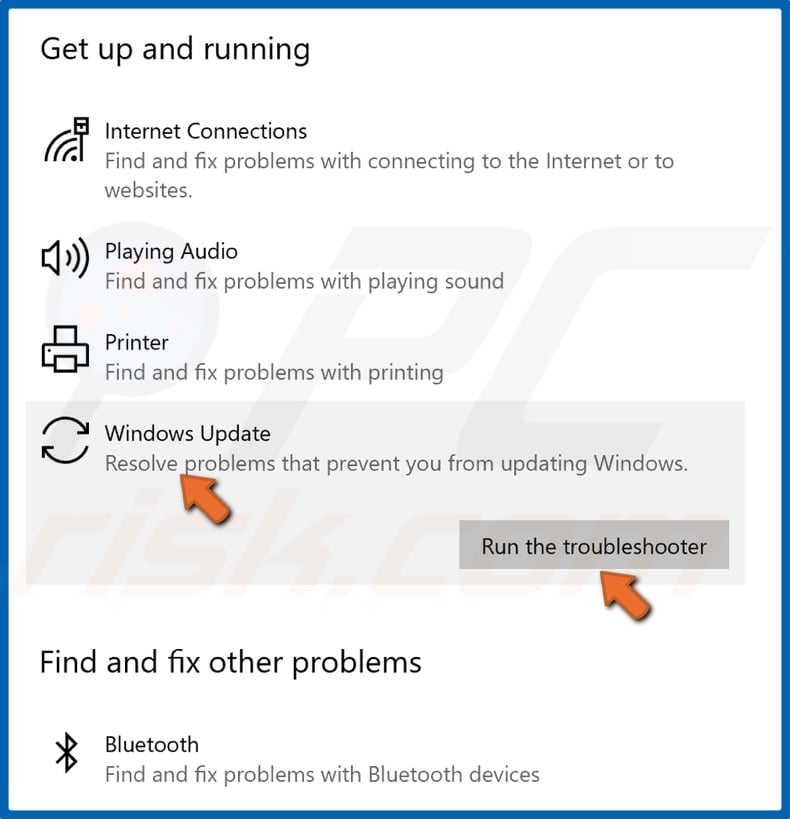
4. Select Windows Update and click Run the troubleshooter.
5. The troubleshooter should provide fixes and apply them automatically.
[Back to Table of Contents]
Solution 2. Flush the SoftwareDistribution Folder
To clean the SoftwareDistribution, make sure that the Microsoft Store isn’t running. Reboot your PC to ensure that the Microsoft Store or any other process won’t interfere with applying this fix.
1. Simultaneously hold down Windows+R keys to open Run.
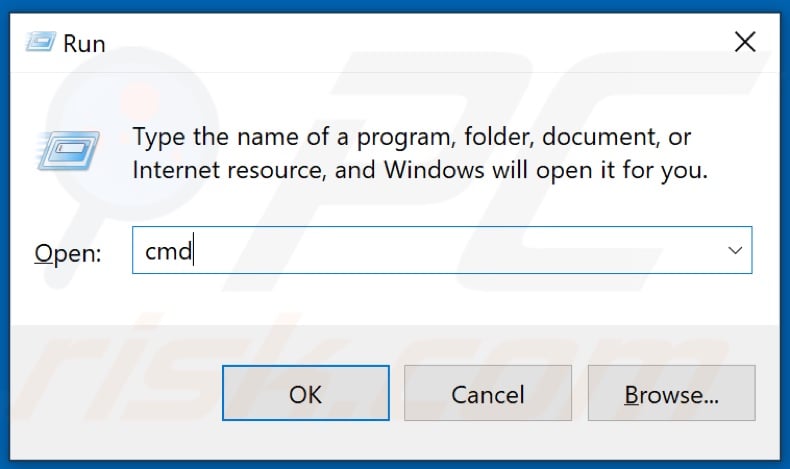
2. Then, in the Run dialog box, type in CMD and hold down Ctrl+Shift+Enter keys to open the elevated Command Prompt.
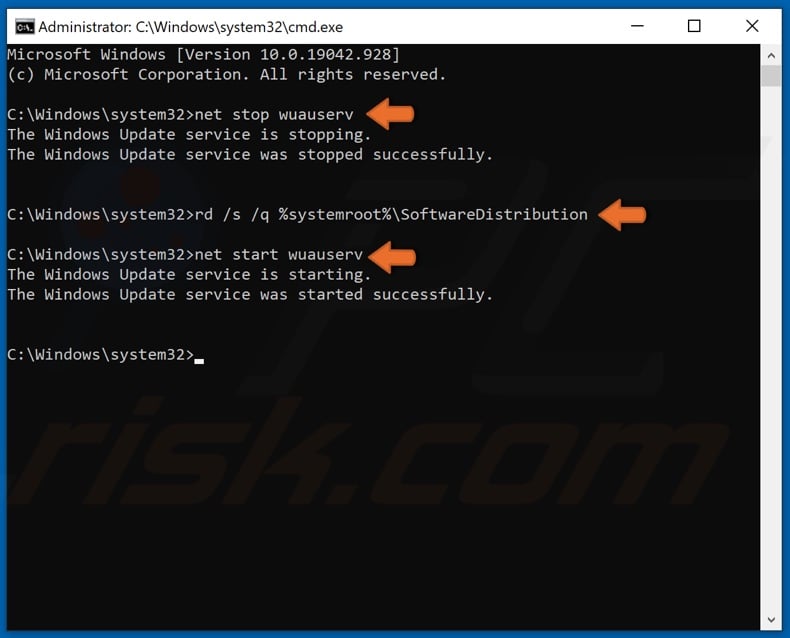
3. In the Command prompt window, type in net stop wuauserv and press Enter.
4. Then, type in rd /s /q %systemroot%\SoftwareDistribution and press Enter to clear the Update cache folder.
5. Lastly, type in net start wuauserv and press Enter.
[Back to Table of Contents]
Solution 3. Perform a System File Checker (SFC) Scan
System File Checker or SFC is a built-in command-line tool that helps restore corrupted and missing system files. It downloads and replaces the corrupt and missing files that may be the cause for error 0x80073701.
1. Simultaneously hold down Windows+R keys to open Run.
2. Then, in the Run dialog box, type in CMD and hold down Ctrl+Shift+Enter keys to open the elevated Command Prompt.
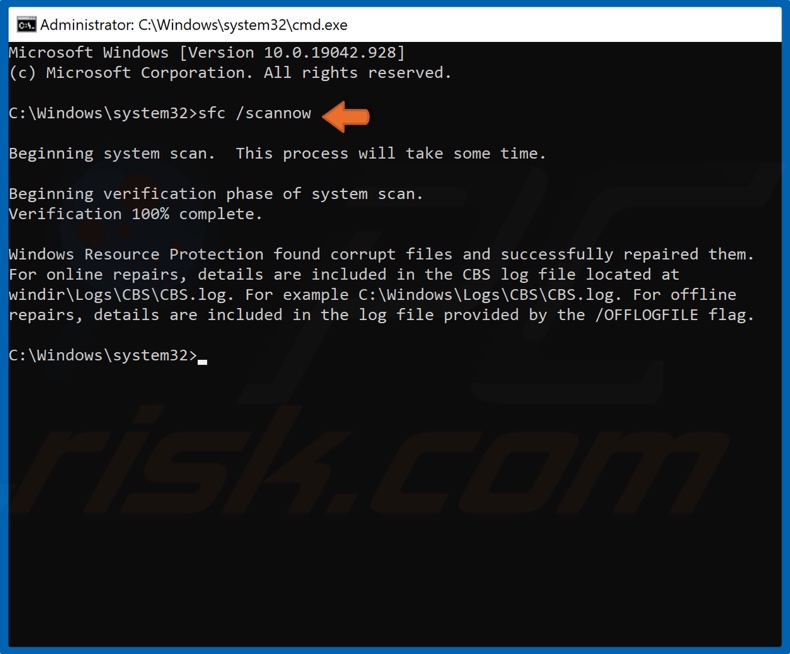
3. In the Command Prompt window, type in SFC /Scannow and press Enter.
4. Restart your PC.
[Back to Table of Contents]
Solution 4. Perform a Deployment Image Servicing and Management (DISM) scan
The Deployment Image Servicing and Management, a.k.a DISM, is a command-line tool designed to service a Windows Image. With this tool, you can fix corrupt system files.
1. Simultaneously hold down Windows+R keys to open Run.
2. Then, in the Run dialog box, type in CMD and hold down Ctrl+Shift+Enter keys to open the elevated Command Prompt.
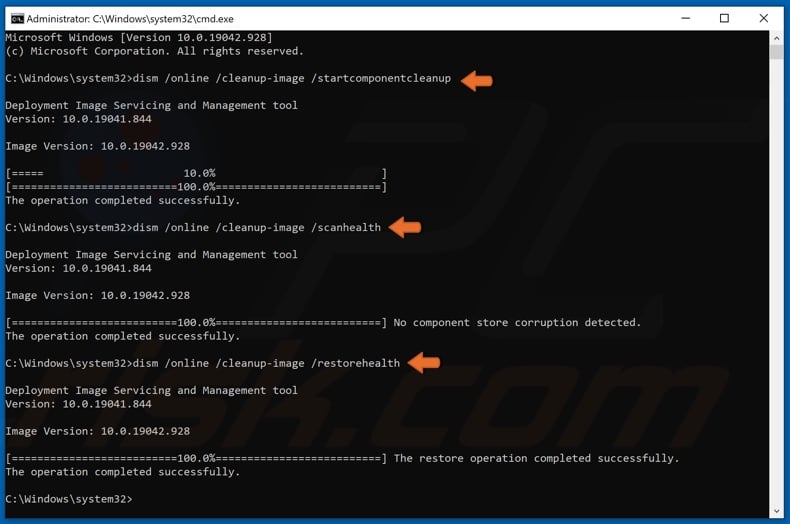
3. In the Command Prompt window, type in DISM /Online /Cleanup-image /StartComponentCleanup and press Enter.
4. Type in DISM /Online /Cleanup-Image /ScanHealth in the Command Prompt window, and press the Enter key.
5. Then, type in DISM /Online /Cleanup-Image /RestoreHealth and press the Enter key.
6. Restart your PC and try updating Windows.
[Back to Table of Contents]
Solution 5. Reset Windows Update Components
1. Simultaneously hold down Windows+R keys to open Run.
2. Type in CMD in the Run dialog box and hold down Ctrl+Shift+Enter keys to open the elevated Command Prompt.
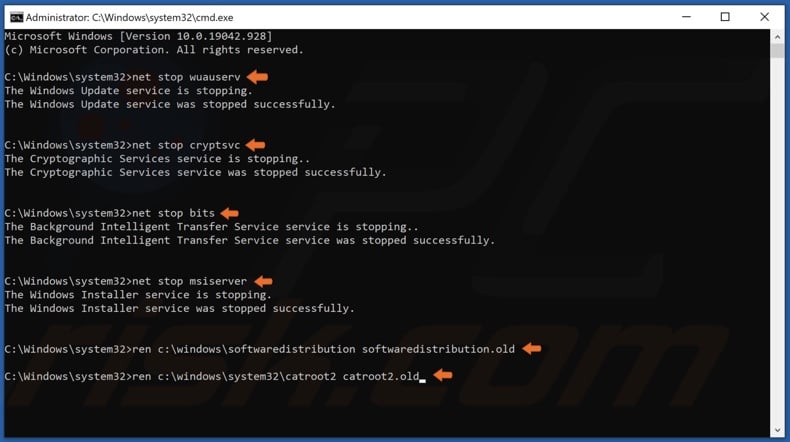
3. Type in the commands listed below, and press the Enter key after entering each one:
- net stop wuauserv
- net stop cryptSvc
- net stop bits
- net stop msiserver
Then, rename the SoftwareDistribution and Catroot2 folders.
4. Type in ren C:\Windows\SoftwareDistribution SoftwareDistribution.old and press the Enter key.
5. Then, type in ren C:\Windows\System32\catroot2 Catroot2.old and press the Enter key.
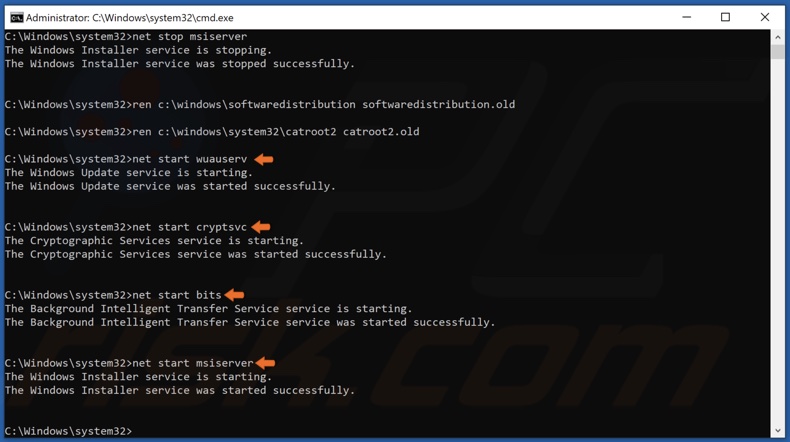
6. Type in the commands listed below, and press the Enter key after entering each one to restart the previously stopped services:
- net start wuauserv
- net start cryptSvc
- net start bits
- net start msiserver
7. Try updating windows once you’ve reset the Windows Update components.
[Back to Top]