
Все способы:
- Способ 1: Автоматическое средство устранения неполадок
- Способ 2: Чистая загрузка
- Способ 3: Очистка кеша обновлений
- Способ 4: Выключение стороннего антивируса
- Способ 5: Восстановление системных файлов
- Способ 6: Установка .NET Framework
- Вопросы и ответы: 0
Способ 1: Автоматическое средство устранения неполадок
Как правило, с ошибкой под кодом 0x8007007e пользователи сталкиваются при попытке установить обновления. Чаще всего проблема связана с автоматизированным инструментом для загрузки и инсталляции апдейтов – «Центром обновления Windows». Для исправления возможных программных неисправностей стоит проверить упомянутый компонент, а в Windows 10 для этого предусмотрено специальное средство:
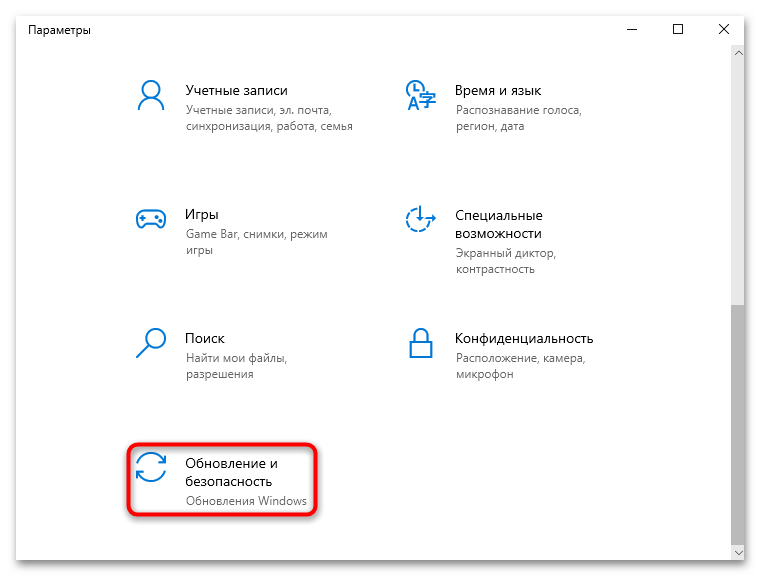
- Через главное меню запустите штатное приложение «Параметры».
- Перейдите в раздел «Обновление и безопасность».
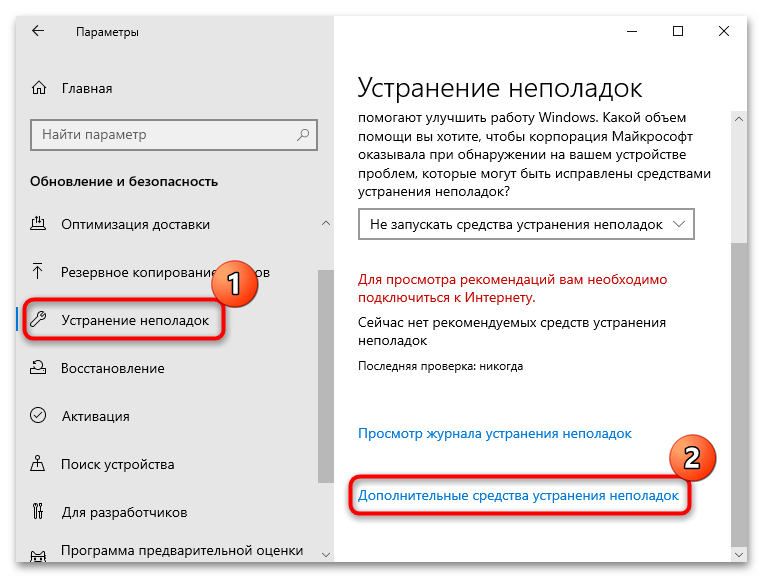
- В появившемся окне переключитесь на вкладку «Устранение неполадок» на панели слева, затем в центральной части щелкните по строке «Дополнительные средства устранения неполадок».
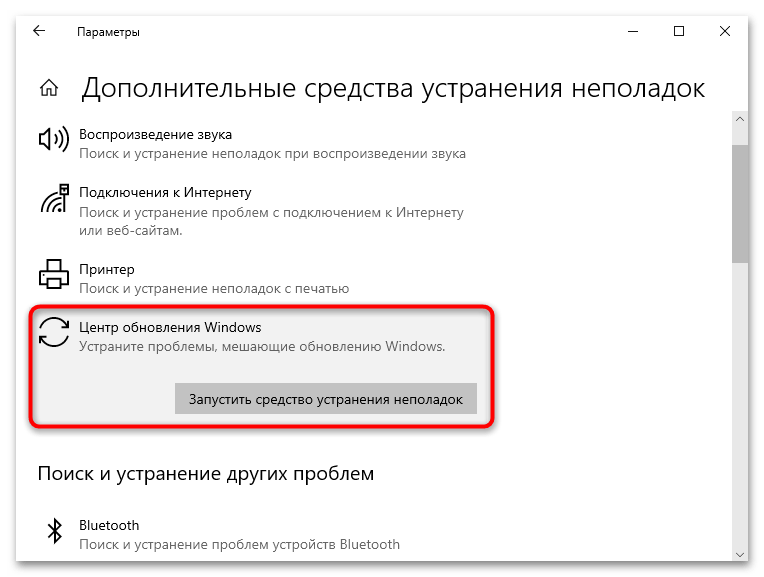
- В списке средств найдите «Центр обновления Windows» и кликните по соответствующей строке. Появится кнопка для запуска проверки.
Сканирование системы и компонента на наличие ошибок займет некоторое время. Следите за процессом и выполняйте действия, которые будут предложены по ходу проверки. Чаще всего средство самостоятельно исправляет неполадки, а если никаких проблем выявлено не будет, переходите к следующим рекомендациям этой статьи.
Способ 2: Чистая загрузка
Чистая загрузка ОС позволяет запустить Windows 10 только с системными службами и процессами, когда как пользовательский софт будет отключен. Этот метод поможет избежать конфликтов, которые могут возникать между различными программами и средствами «десятки», задействованными при обновлении.
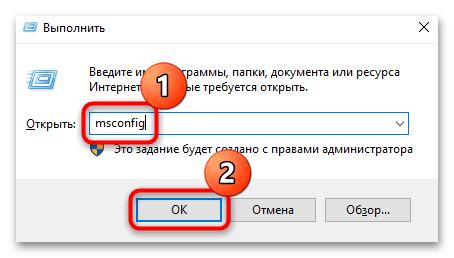
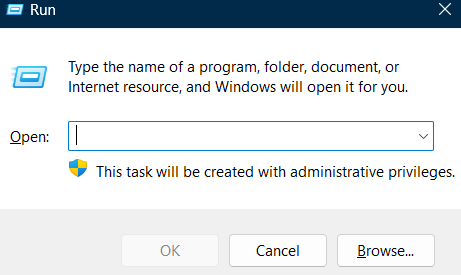
- Используйте сочетание клавиш «Win + R» для вызова окна «Выполнить». В текстовом поле введите запрос
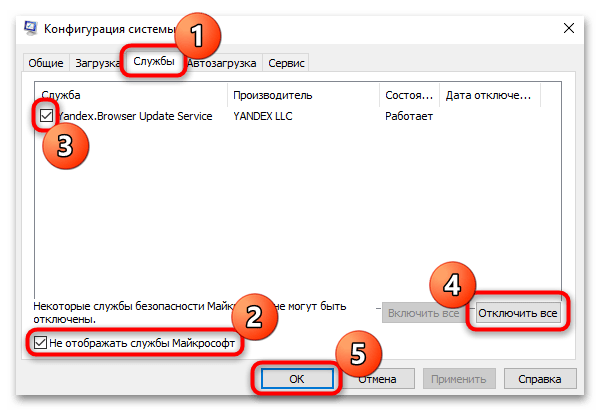
msconfigи нажмите на кнопку «ОК» для выполнения. - Откроется утилита «Конфигурация системы», где можно настроить параметры запуска Виндовс. Сначала переключитесь на вкладку «Службы», отметьте пункт «Не отображать службы Майкрософт», затем отключите сторонние процессы, нажав на соответствующую кнопку. Сохраните настройки, кликнув по «ОК».
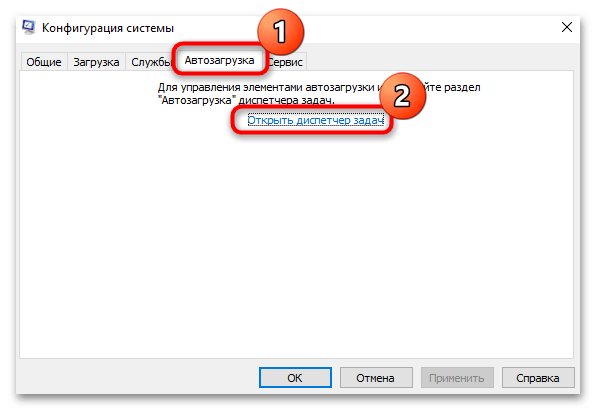
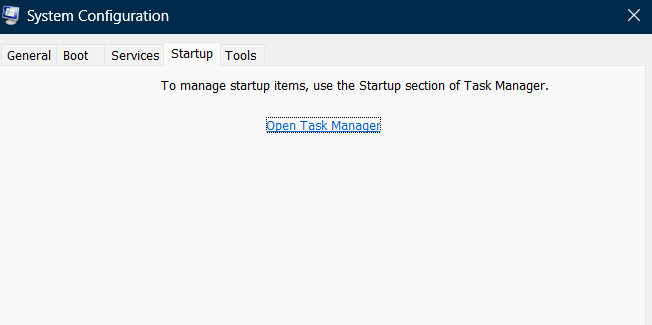
- Перейдите на вкладку «Автозагрузка» и нажмите на ссылку для запуска встроенного «Диспетчера задач», через который можно быстро отключить все сторонние программы, запускающиеся вместе с системой.
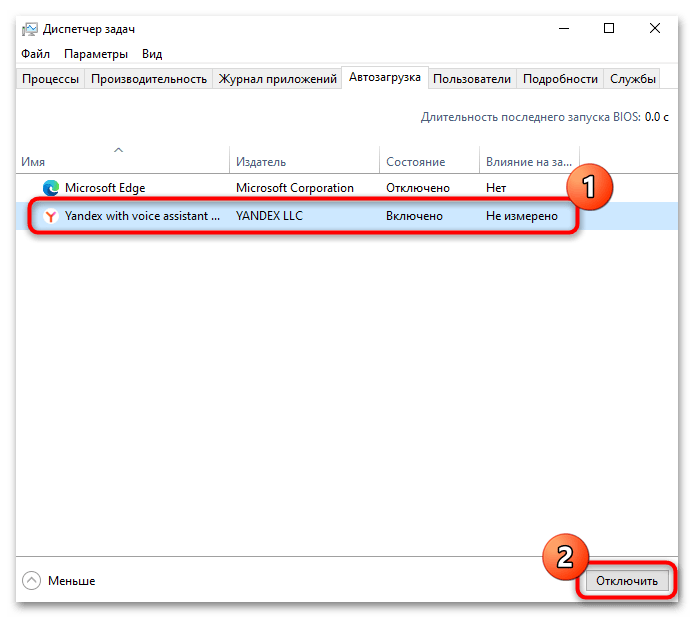
- Отключите все приложения в автозагрузке, поочередно нажимая на каждое из них и выбирая соответствующую кнопку внизу.
После того как все пользовательские программы и службы были отключены, нужно перезагрузить Виндовс, чтобы она запустилась только с системным софтом. Теперь попытайтесь повторить установку обновлений. Она должна пройти успешно, если дело действительно было в стороннем программном обеспечении. Работу деактивированных служб и приложений в автозагрузке можно вернуть аналогичным образом – через утилиты «Конфигурация системы» и «Диспетчер задач».
Способ 3: Очистка кеша обновлений
Накопившиеся в кеше файлы обновлений нередко становятся причиной невозможности инсталлировать новые компоненты в систему, вызывая различного рода конфликты и ошибки. Исправить ситуацию получится, очистив папку временных данных, причем сделать это можно вручную (предварительно отключив «Центр обновления Windows» и связанные с ним службы, иначе они будут препятствовать удалению апдейтов, хранящихся на системном диске), а процедуру упростит использование консольной оболочки, куда достаточно ввести несколько команд:
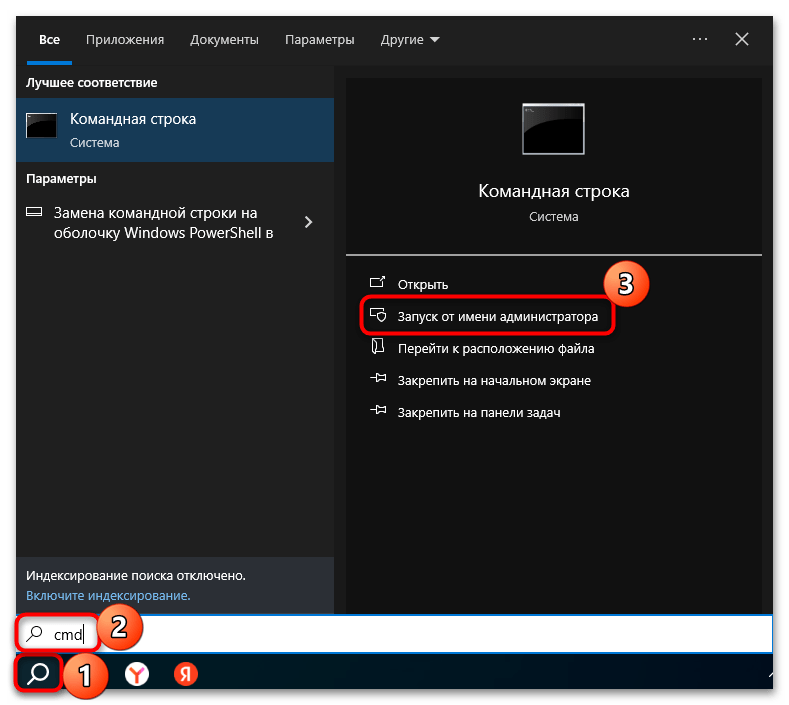
- Откройте меню «Пуск» или нажмите по системному поиску на нижней панели и введите запрос
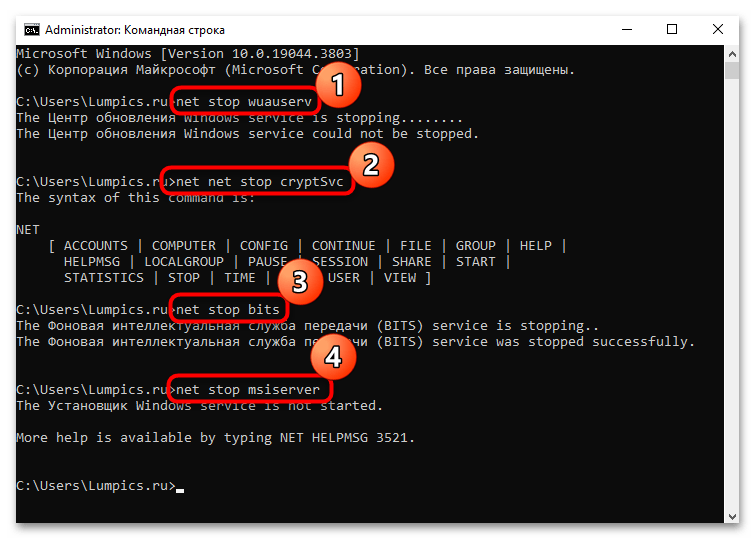
cmd, после чего выберите «Запуск от имени администратора». - Для начала нужно остановить процессы, о которых мы упоминали выше. Для этого поочередно вводите следующие команды, нажимая после каждой на клавишу «Enter» для их выполнения:
net stop wuauserv
net stop cryptSvc
net stop bits
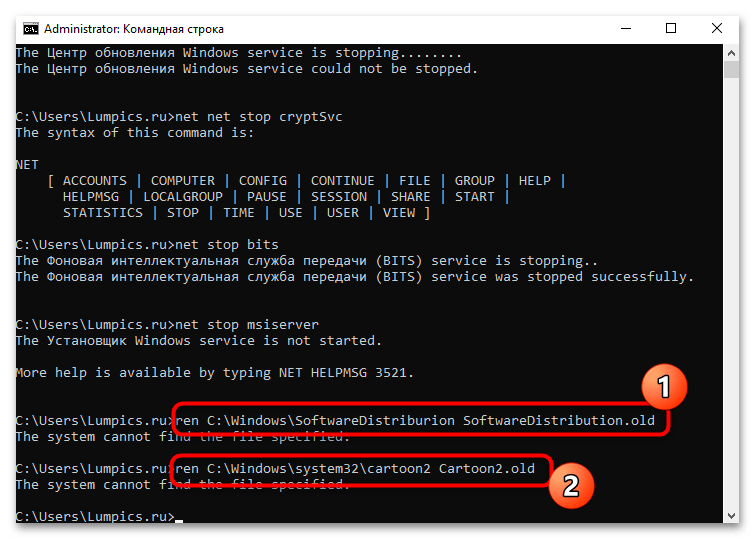
net stop msiserver - Далее переходим к непосредственной очистке папок с кешем данных. Мы применим команды, которые переименовывают каталоги, в результате чего система больше не сможет к ним обращаться для попытки установки обновления. При этом сами файлы на время останутся в качестве резервной копии. Если вернуть им прежнее название, они снова начнут взаимодействовать с ОС и «Центром обновления Windows». Выполните две команды для переименования:
ren C:\Windows\SoftwareDistribution SoftwareDistribution.old
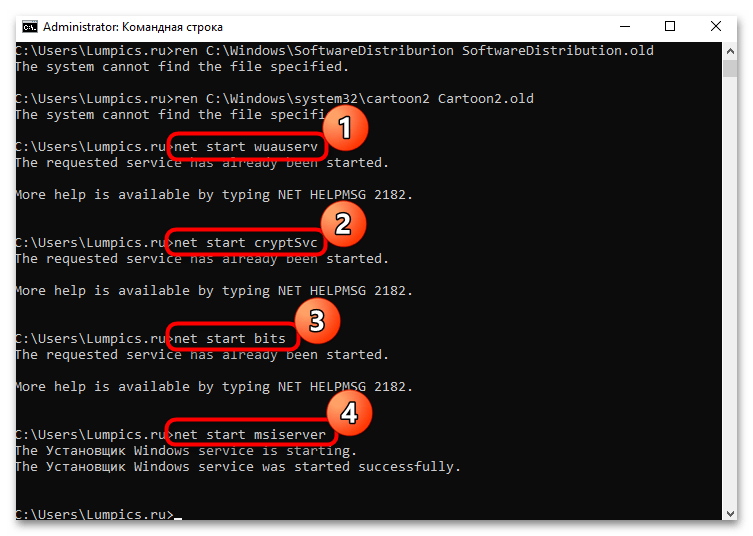
ren C:\Windows\System32\catroot2 Catroot2.old - Теперь потребуется вновь запустить ранее остановленные службы, чтобы активировать автоматическое обновление:
net start wuauserv
net start cryptSvc
net start bits
net start msiserver
Закройте окно консоли, перезагрузите компьютер и проверьте, возможна ли установка апдейтов. Виндовс автоматически создаст новые папки на системном диске, где будет храниться кеш с новыми компонентами. Если все прошло успешно, папки, путь к которым указан в командах на Шаге 3 инструкции выше, можно удалить и тем самым освободить место на диске.
Способ 4: Выключение стороннего антивируса
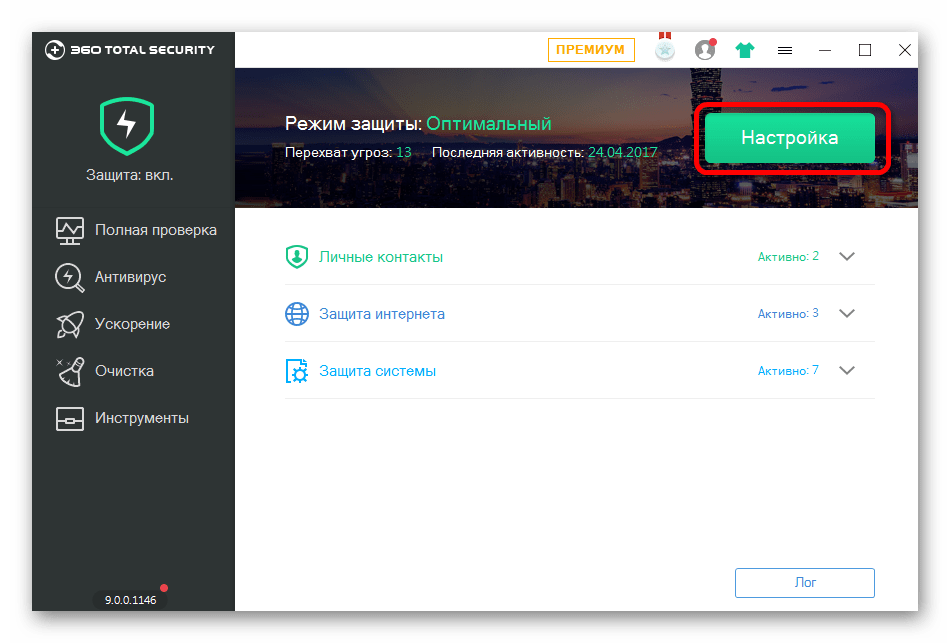
Антивирусы, не считая встроенного, иногда провоцируют появление ошибок при установке системных обновлений, ошибочно считая такие действия подозрительными. Если у вас установлен такой софт, отключите его на время инсталляции апдейтов. Когда проблема действительно связана с таким ПО, приостановка его работы позволит выполнить обновление Виндовс, после чего можно вновь активировать защиту.
В некоторых антивирусах для остановки работы достаточно кликнуть правой кнопкой мыши по значку программы в трее, затем из контекстного меню выбрать пункт выключения или остановки. В других случаях может потребоваться зайти в раздел с настройками и отключить работу софта там. Ранее мы разбирали несколько наиболее популярных продуктов и алгоритм действий в отдельном материале на сайте.
Подробнее: Отключение антивируса
Способ 5: Восстановление системных файлов
Поврежденные системные файлы также нередко вызывают проблемы при установке обновлений в Windows 10. Если их целостность была нарушена по каким-либо причинам (чаще всего в результате критических системных сбоев или деятельности стороннего ПО, в том числе вредоносных утилит), можно применить встроенные в «десятку» утилиты, которые позволят проверить Виндовс на целостность и восстановить поврежденные файлы и их хранилище:
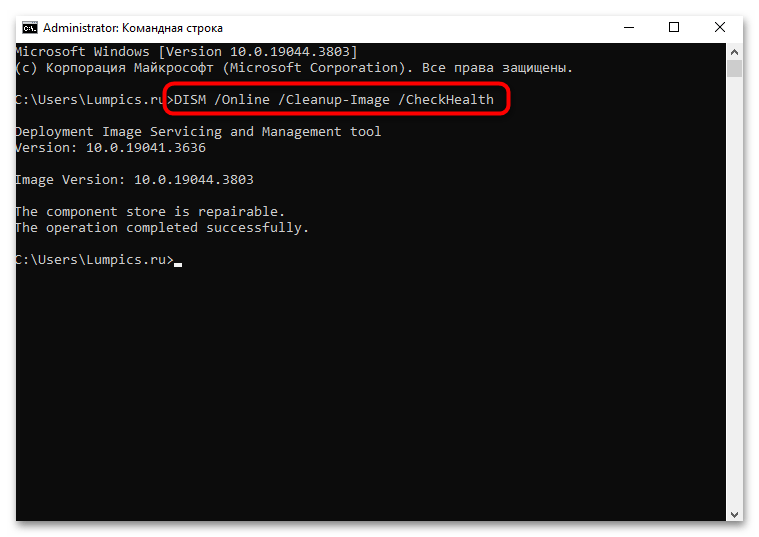
- Запустите «Командную строку» от имени администратора так же, как было продемонстрировано ранее. Для отображения состояния хранилища компонентов в образе Windows сначала введите команду
DISM /Online /Cleanup-Image /CheckHealthи выполните ее, нажав на клавишу «Enter». Утилита проверит, есть ли повреждения и возможно ли их исправить. Появившееся сообщение «No component store corruption detected. The operation completed successfully» говорит о том, что никаких проблем с образом не выявлено. Всего возможно несколько вариантов:- «No component store corruption detected» – поврежденных компонентов не обнаружено;
- «The component store is repairable» – ошибки в хранилище есть, и утилита сможет их исправить;
- «The component store is not repairable» – исправить хранилище компонентов не представляется возможным.
В последнем случае может потребоваться восстанавливать образ из резервной копии или сбрасывать настройки системы к заводским.
Подробнее:
Восстановление DISM в Windows 10
Восстановление Windows 10 с флешки
Возвращаем Windows 10 к заводскому состоянию
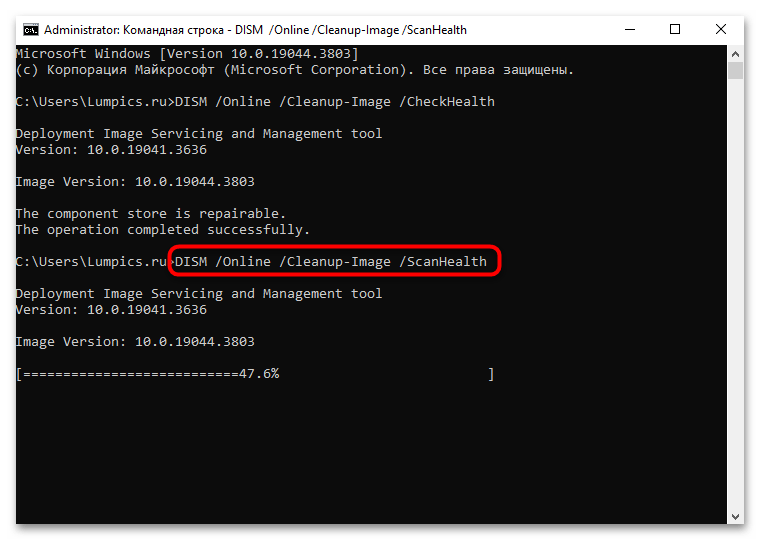
Для полной проверки хранилища системных файлов также можно использовать команду
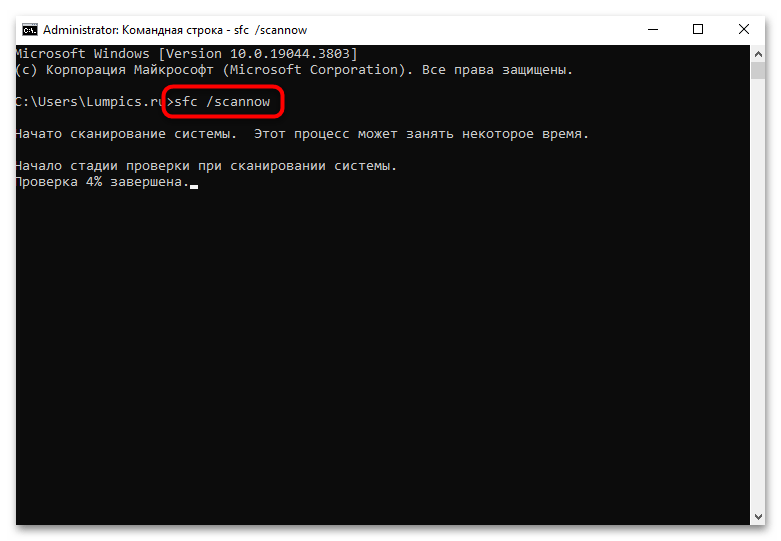
DISM /Online /Cleanup-Image /ScanHealth. Процедура займет куда больше времени, чем в первом случае, но просканирует детальнее. - Разобравшись с системным хранилищем, используйте другую встроенную утилиту – SFC («System File Checker») для проверки системных файлов на целостность. Введите
sfc /scannowи нажмите на «Enter». Если SFC обнаружит и исправит проблемы, после сканирования отобразится соответствующее уведомление.
При условии, что целостность файлов была восстановлена с помощью утилит либо в соответствии с их подсказками, перезагрузите компьютер и снова обновите систему.
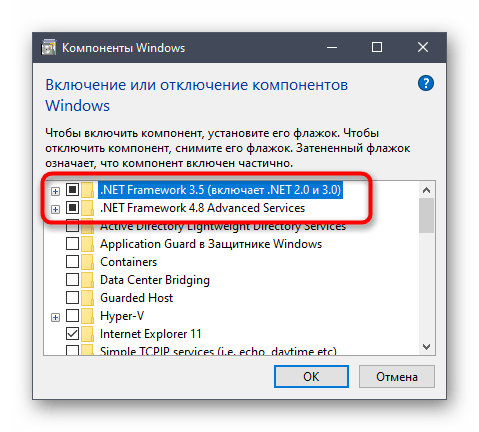
Способ 6: Установка .NET Framework
Случается, что обновления не устанавливаются из-за отсутствия или повреждения компонентов .NET Framework, который, в свою очередь, предназначен для корректного запуска и использования различных приложений, веб-служб, а также установки апдейтов для Windows 10. По умолчанию нужные библиотеки уже инсталлированы в ОС, но если в их работе появились проблемы, может потребоваться переустановка, которая способна нормализовать работу .NET Framework. О том, как это правильно сделать, мы писали в отдельном материале.
Подробнее: Переустановка .NET Framework в Windows 10
Наша группа в TelegramПолезные советы и помощь
Last Updated :
24 Nov, 2023
The Windows error with code 0x8007007e can occur in Windows 10/11 due to various factors such as third-party antivirus software causing interference or incompatible drivers not supporting the latest version of Windows In this article, we will be going through a few methods and tips and tricks to resolve this error.
Table of Content
- What is the 0x8007007e error?
- Why do we face the 0x8007007e error?
- Method 1: Turn OFF Windows Defender or third-party antivirus
- Method 2: Troubleshooting Windows updates
- Method 3: Enable the Windows Update service
- Method 4: Delete the windows update cache.
- Method 5: Perform a clean boot on your windows.
Before getting into the methods to solve this error let us understand what is this error 0x8007007e and why we face it in Windows.
What is the 0x8007007e error?
The Windows 0x8007007e/8007007e error is a common issue many people encounter while using Microsoft Windows operating systems. It’s a code that represents a problem with the Windows Update service when a user is trying to install updates that are not compatible with the system’s drivers. This error can also be caused if the Windows update service is disabled and a user is trying to update Windows.
Note: the «0x8007007e» error and «8007007e» error are essentially the same. The «0x» at the beginning of the code denote that it’s a hexadecimal number, but both codes refer to the same issue or error in Windows.
Why do we face the 0x8007007e error?
There can be several causes for this error and a few of them are mentioned below :
- Software Conflicts: Some third-party software or applications such as antivirus installed on your computer can interfere with system processes leading to errors. This can happen if a program is not compatible with your current Windows version or if it modifies system files.
- Outdated or Incompatible Device Drivers: Device drivers are essential software components that allow your hardware devices to communicate with the operating system. Outdated or incompatible drivers can cause system instability and trigger error codes like 8007007e.
How to fix the 8007007e Error?
Below, I’ve outlined several methods to resolve this error, each with a step-by-step guide. Please follow these methods sequentially to address the issue.
Method 1: Turn OFF Windows Defender or third-party antivirus
Follow these steps to disable the Windows Defender:
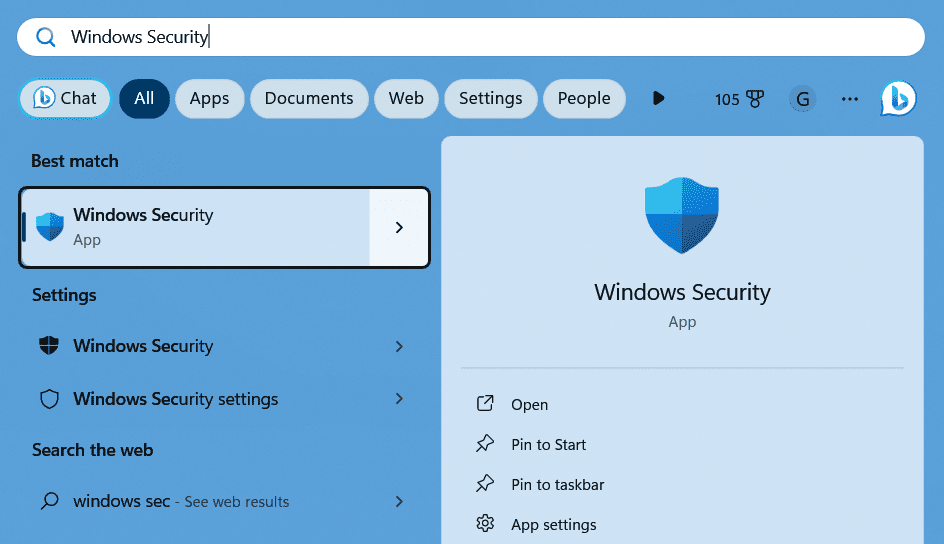
1. Go to Windows security.
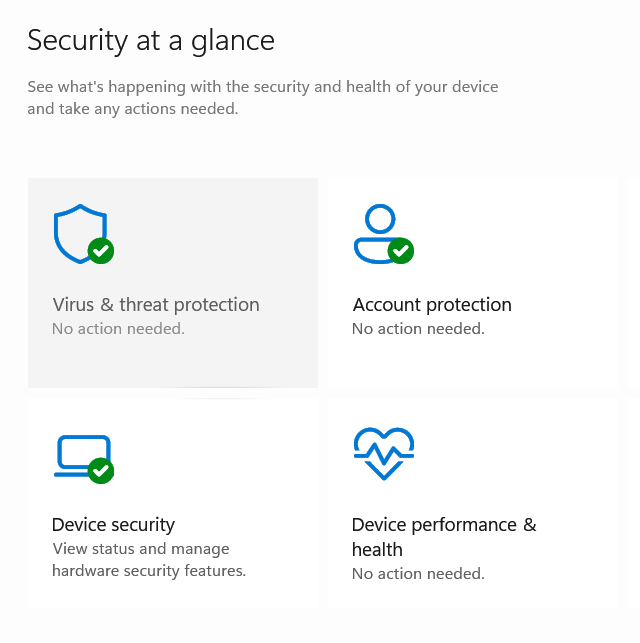
2. Click on virus and threat protection.
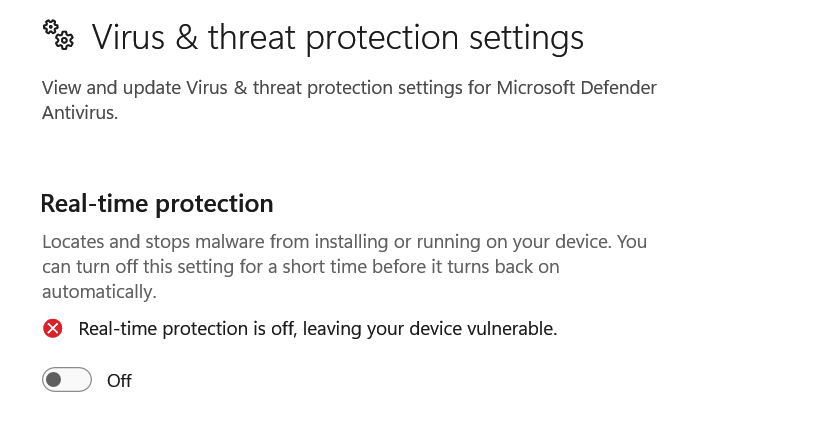
3. Click on manage settings.

4. Turn off the real-time protection.
5. Restart your PC and check if the error persists or not.
Method 2: Troubleshooting Windows updates
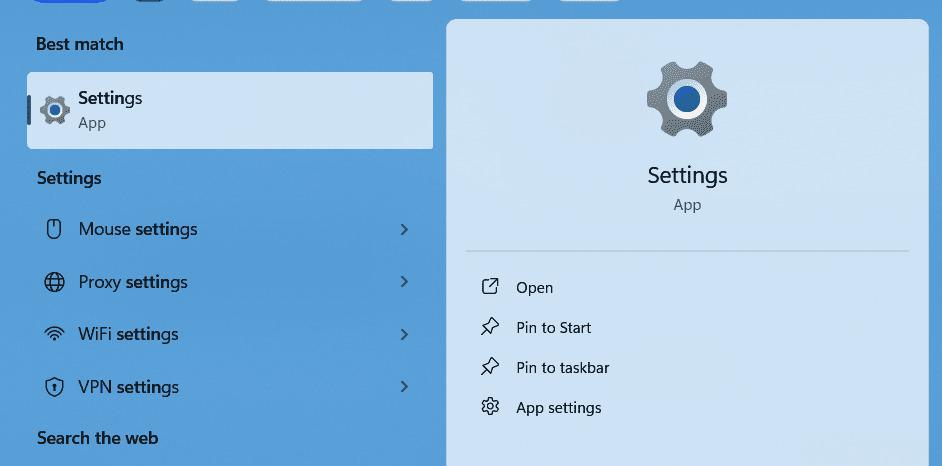
1. Go to settings.
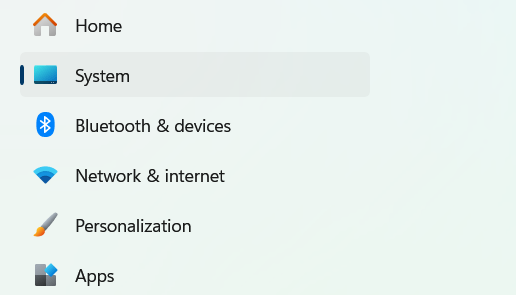
2. Select the System tab.
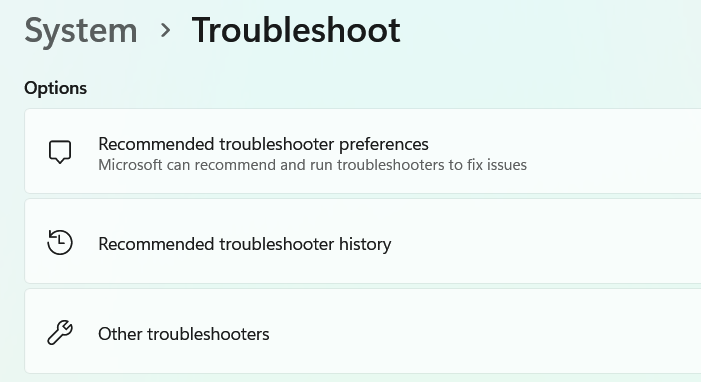
3. Scroll down a little bit and click on the troubleshooting tab.

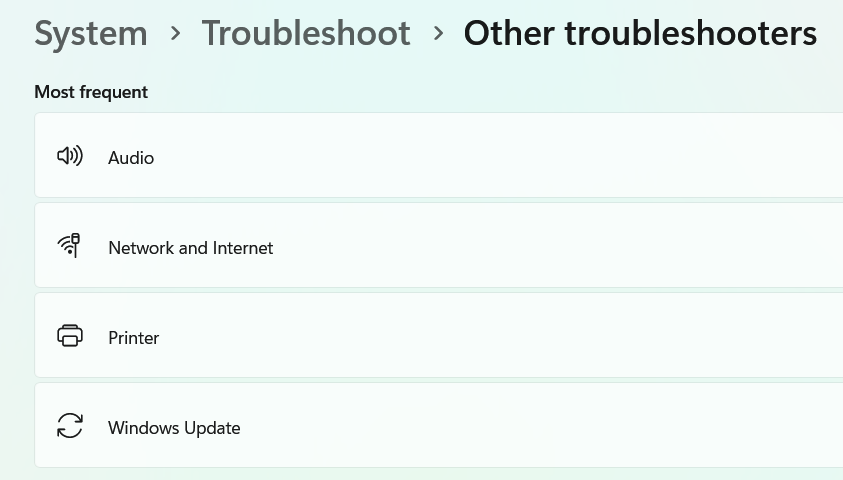
4. Click on other troubleshooters.
5. Under the most frequent section click on the Windows update option.
6. Click on run, and the troubleshooter will start detecting the problems.
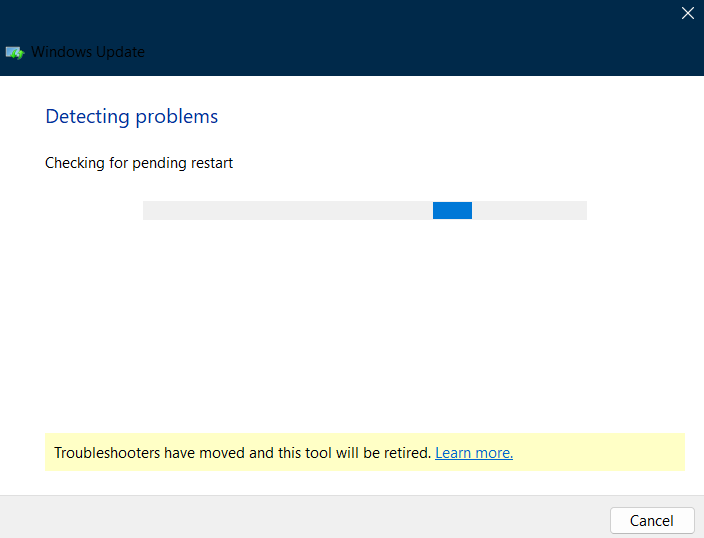
7. If any Windows Updates problems are found by the troubleshooter then, the troubleshooter will fix them automatically. When the process is done, retry to update Windows to see if error code 0x8007007e disappears.
Method 3: Enable the Windows Update service
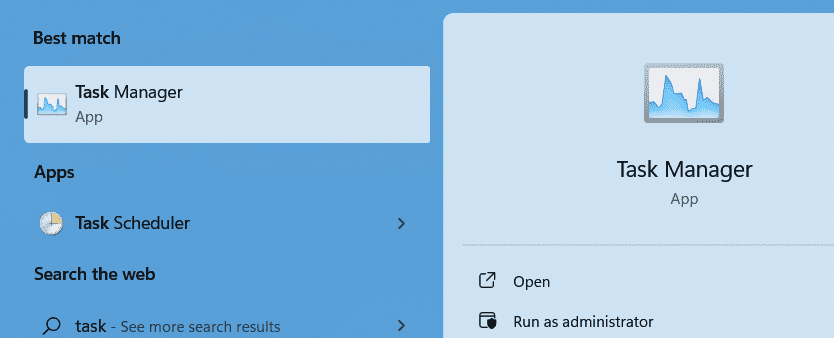
1. Go to start and search for task manager.
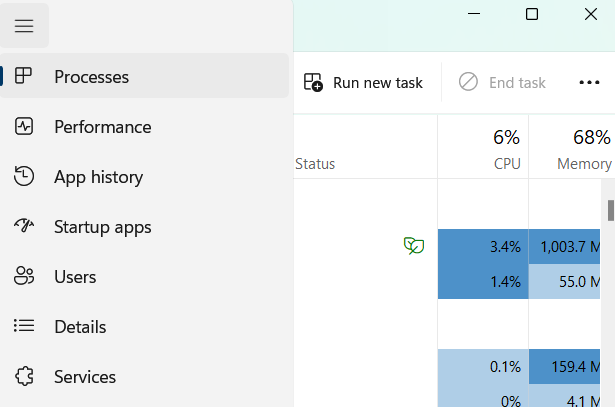
2. Click on services.
3. In the search bar search for the service wuauserv. This is the name of the service for Windows updater.
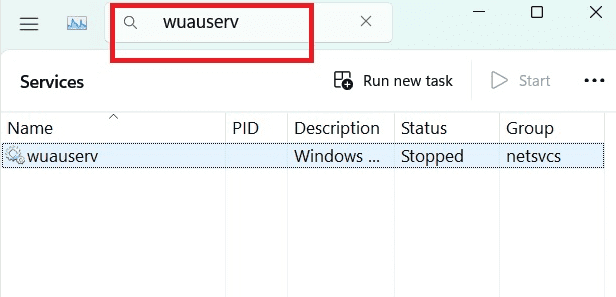
4. Right-click on the service wuauserv and click on start.
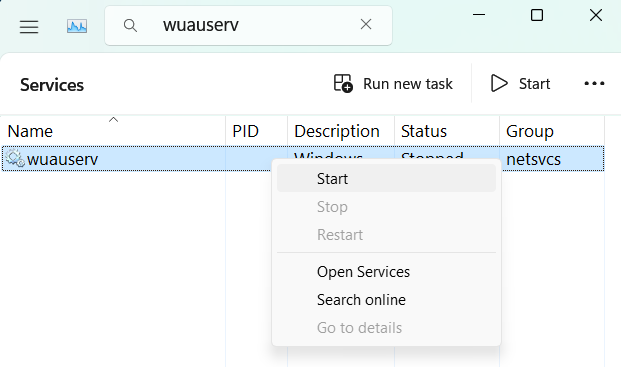
5. Close the task manager and restart your computer. Now try reinstalling the updates the error will be fixed.
Method 4: Delete the Windows update cache.
Sometimes the cache related to the old Windows update may create trouble for the users. So to fix this error we can delete all the old cache related to the previous Windows update and try updating our Windows freshly. Follow the below steps to do the same.
1. Press the windows key + r to get the run dialog box.
2. Search for the following directory and click on OK:
C:\Windows\SoftwareDistribution\Download
3. Press Ctrl+A to select all the files and folders and delete them permanently.

4. Restart your computer and try updating now.
Windows stores all the update-related files in the software distribution folder. If any of the previous updates are corrupted or interrupted in between then we can delete the corrupted files from here to fix the error.
Method 5: Perform a clean boot on your windows.
If the above 5 methods didn’t work for you then you can try to perform a clean boot on your windows to check if the error is caused by any 3rd party application or not.
What is a clean boot?
Clean boot is a troubleshooting method that helps in identifying the application that is causing an error. By performing a clean boot, users can effectively diagnose the issues caused by non-Microsoft products that might be causing software conflicts.
Follow the below steps to perform the clean boot:
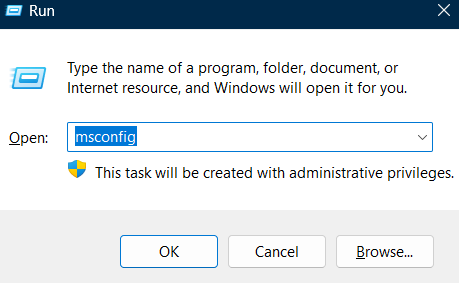
1. Press the windows key + r to open the run dialog box type msconfig and press enter.
2. Enable the use original boot configuration option and move to services.
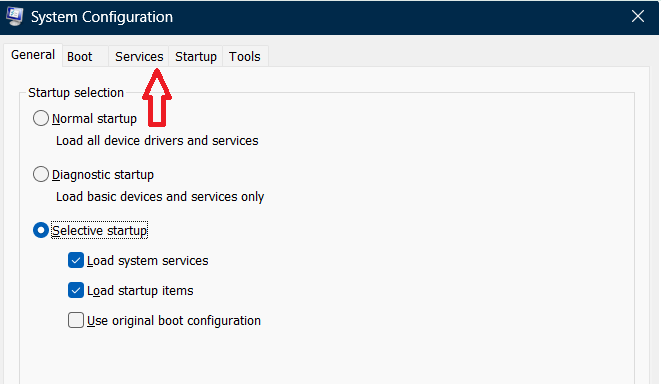
3. Click on Hide all Microsoft services and click on the Disable All option.

4. Go to Startup and click on Open Task Manager.
5. Now Right-click on each task and disable it.

6. Restart your PC now and try to install the updates freshly the error will be fixed now.
Ultimately, We hope that the methods and solutions We’ve suggested in this article will prove helpful in resolving your Windows Error Code 0x800700e: issue. We wish you the best of luck in resolving your issues. Stay connected, stay informed, and enjoy your online journey!
Also Read
- How to Fix Runtime Errors
- How to Fix Windows Update Error 0x80248007
- How to Fix Right-Click Not Working in Windows 11?
- How to Fix Microsoft Store Error 0x80080206?
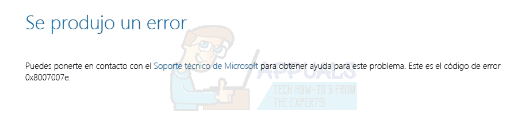
You can get the 0x8007007e error while upgrading to Windows 10 or performing a Windows update. This error usually prevents you from upgrading or updating your system. Sometimes the error shows up with a “Windows have encountered and unknown error” or “Failed to install the update/build. Please Try again” message as well.
There are usually two things that can cause this issue. The first one is any third party software, especially an antivirus, preventing the update or upgrade. The second is a corrupted windows file or a system file or a registry file.
The issue can be solved by checking what is causing the issue. If a third party software is the reason behind the error then disabling it during the upgrade solves this problem. But if that doesn’t solve the problem then fixing Windows files solves the problem.
First try the method 1 which will most likely solve the issue. If that doesn’t solve the problem then try method 3 to check if a software or service is causing the problem. At the end, try the method 2 which will definitely solve the issue.
Method 1: Disable 3rd party Antivirus
- Right click the antivirus icon in the system tray (on the right bottom corner) and select Disable.
- If that doesn’t work, double click the antivirus icon. Select the Disable option from the pop up.
Now try to upgrade and see if the issue is still there.
Note: Having an antivirus is important as it protects your computer from threats. Do not forget to enable your antivirus after you are finished upgrading the Windows.
To enable the antivirus, follow these steps
- Right click the antivirus icon in the system tray (on the right bottom corner) and select Enable.
- If that doesn’t work, double click the antivirus icon. Select the Enable option from the pop up.
Method 2: Manually reset Windows Update Components
In this method we will manually restart the BITS, Cryptographic, MSI Installer and the Windows Update Services and rename the SoftwareDistribution and Catroot2 folders which definitely solves the problem.
- Hold Windows Key and press X (release Windows Key). Click Command Prompt (Admin)
- Type net stop wuauserv and press Enter
- Type net stop cryptSvc and press Enter
- Type net stop bits and press Enter
- Type net stop msiserver and press Enter
- Type ren C:\Windows\SoftwareDistribution SoftwareDistribution.old and press Enter
- Type ren C:\Windows\System32\catroot2 Catroot2.old and press Enter
- Type net start wuauserv and press Enter
- Type net start cryptSvc and press Enter
- Type net start bits and press Enter
- Type net start msiserver and press Enter
- Close the Command Prompt
Sometimes one of the services will start on its own so you don’t have to worry. Now try to upgrade the Windows again and it should work without any problems.
Method 3: Clean Boot
Performing a clean boot will help you identify if the problem is because of the interference of a third party software or a service.
- Hold Windows Key and press R (release Windows Key)
- Type msconfig and press Enter
- Click the Services tab
- Check Hide All Microsoft Services and click Disable All (if the button is not greyed out)
- Click Startup tab and select Disable All. If there is not disable all option then click the Open Task Manager. Now select each task and click Disable.
- Now restart your computer
- Check Don’t show this message or launch the System when the System Configuration Utility window appears.
You can also view and read detailed steps to clean boot.
NOTE: Check step 5 before posting. The step 5 wasn’t working for me so I added what I thought might work
Now check if you can download and install the update without any issue.
Kevin Arrows
Kevin Arrows is a highly experienced and knowledgeable technology specialist with over a decade of industry experience. He holds a Microsoft Certified Technology Specialist (MCTS) certification and has a deep passion for staying up-to-date on the latest tech developments. Kevin has written extensively on a wide range of tech-related topics, showcasing his expertise and knowledge in areas such as software development, cybersecurity, and cloud computing. His contributions to the tech field have been widely recognized and respected by his peers, and he is highly regarded for his ability to explain complex technical concepts in a clear and concise manner.
Автор
Taker1993
Добрый день. Борюсь с этим майнером уже приличное время, пробовал разные антивирусы и думал что он пропал, так как используя несколько разных антивирусов от основной части майнера я вроде избавился, но заметил ещё тогда что много ошибок в системе 0xc0000017 при исполнении команд dism в командной строке (которую я вчера исправил), при обновлении всех компонентов windows и т.п. (пробовал откатывать удаляя по гайдам папку с апдейтами используя утилиты для активации обнов — но безрезультатно), также есть ошибка с безопасностью, в начале была проблема с целостностью ядра и я удалил два мешающих файла исправив проблему, но ошибка с этим так до конца и не решилась и он пишет про отсутствие TPM — а конкретно NET HELPMSG 2182 Problem with BITS; также есть проблема с невозможностью запуска диспетчера устройств и других подобных окон и некоторых команд в комбинации Win+R. Почему я думал, что избавился от майнера полностью: грузить систему перестало на постоянке и сильных нагрузок не было, а с остальным думал уже ничего не сделаешь и нужно переустанавливать Windows, оставил на потом, так как есть немало сторонних лицензионных программ,, которые шли вместе с ноутбуком и я боялся к ним потерять доступ, ну и так как не было точек восстановления и если даже они были я не могу к ним получить доступ, а оказывается всё-таки нет майнер на месте.
Несколько месяцев спустя заметил, а конкретно вчера: что изменилась возможность администрирования и я не могу получить доступ к системным файлам, не мог удалить, изменять, переименовывать файлы которые вызывали нарушение целостности ядра (xusb21.sys и STTub30.sys), но по итогу через стороннюю утилиту я их удалил (один из них STTub30.sys я потом воcстановил найдя на github). Вернул также сегодня в ночь через реестр доступ к DISM и сделал успешный запуск и восстановление по команде Dism /Online /Cleanup-Image /RestoreHealth, а SFC и прежде работала, но это ничего не поменяло; вообще все последние именно операции делал по одному гайду и там после восстановления DISM советовали воспользоваться Farbar Recovery Scan Tool 64-бит, но наткнулся поздновато и это не помогло, так как нужен составленный fixlist.txt, да и Fabar раз 6 выдал ошибку при сканировании bcdedit.exe (в процессе написания текста сделал повторное сканирование c Fabar и ошибок было уже штуки 3-4 bcdedit.exe, а результаты этого сканирования прикрепил в качестве файлов Addition.txt и FRST.txt вдруг пригодятся).
Сегодня заметил, что даже с включённым лицензионным Касперычем майнер снова поменял и ограничил что-то там в брандмауэре Windows — было уведомление (понимаю, что он уже давно в исключениях, но всё же). Ни Kaspersky Virus Removal Tool, ни Dr.Web Cruelt! ни нашли ничего, вероятно майнер добавил их уже в исключения, так как при удалении основных компонентов майнера я уже пользовался ими раньше, но до этого я пользовался AV block Remover и он удалял майнер, но спустя время он появляется снова.
Был бы очень рад если бы получилось решить данную проблему, Windows лицензионный шедший вместе с ноутом переустанавливать всё же не хочется и я не уверен что и там не будет ошибок в процессе.
Заранее всем откликвнушимся большое спасибо и с пасхой!
CollectionLog-2025.04.20-14.19.zip Addition.txt FRST.txt
Jun. 23, 2022 / Updated by
Bessie Shaw to
Windows 10
The error 0x8007007e is a common Windows update error in Windows 10. It occurs due to several factors, including corrupt Windows Update component, software conflict, etc. Here are 4 ways to fix the Windows Update error 0x8007007e in Windows 10.
1. Run Windows Update Troubleshooter to Fix Windows Update error 0x8007007e in Windows 10
To resolve the Windows update error 0x8007007e, you could use Microsoft’s Windows Troubleshooter tool which could specifically fix the Windows Update issues. Follow these steps:
Step 1. Go to Microsoft’s official site to download Windows 10 Troubleshooter.
Step 2. Install Windows troubleshooter and run it.
Step 3. Wait for the troubleshooting process to be completed.
2. Disable Antivirus Software
It has been proved that some third party Antivirus software could interfere with the Windows Update, and then the error 0x8007007e takes place. You could turn off the Antivirus program temporarily, once the Windows Update is complete, and then you enable it to protect your PC.
3. Perform a Clean Boot
The software conflict could also lead to the Windows Update error 0x8007007e in Windows 10. To prevent this happen, you’d better perform a clean boot. Follow these steps:
Step 1. Press Windows key + R simultaneously on your keyboard to launch the Run prompt.
Step 2. Type “msconfig” and click OK.

Step 3. In the System Configuration window, click the Services tab, check the box next to “Hide all Microsoft services”, and then click Disable all.

Step 4. Switch to the Startup tab, click Open Task Manager.
Step 5. Select each startup item, and then click Disable.
Step 6. Exit Task Manager.
Step 7. Repeat Step 1-3 and then click the Startup tab, and click OK.
Step 8. Reboot your PC.
See Also: How to Use Windows 10 Clean Boot to Fix PC Errors
4. Update Windows 10 Drivers
The driver issue is also related to the Windows update error 0x8007007e in Windows 10. You could use a trustworthy driver update utility like Driver Talent to check your driver conditions. If there are outdated, corrupt, broken or missing drivers, it will automatically download and install the best-matched drivers for your Windows 10 PC.
Click the button below to grab Driver Talent directly.
Download Now
To download and update Windows 10 drivers with Driver Talent, you could refer to this article: Quickly Download and Install Drivers after Window 10 Update. For specific instructions on how to use Driver Talent, you could check out the User Guide of Driver Talent.
In addition to Windows 10 drivers download and update, Driver Talent also comes with further advanced features, such as drivers restore, drivers uninstall, system restore, drivers pre-download for another PC, PC Repair, DLL files repair, hardware detection, VR support check and PC speed up, etc..
Method 5. Use a System Restore
You could also perform a system restore to get rid of the Windows update error 0x8007007e in Windows 10. A system restore allows you to roll your PC back to an earlier working state. Here’s how to use it.
Step 1. Reboot your PC and log on as an administrator.
Step 2. Right-click the Start button and then select System.
Step 3. In the left pane, click System Protection.

Step 4. Click System Restore to open the System Restore window.
Step 5. Click Next.
Step 6. Select the most recent system restore point and then click Next.
Step 7. Click Finish.
You may also like to check out:
-
How to Tell If Your Computer Has Bluetooth
-
How to Determine If Windows 10 Is 32-bit or 64-bit
-
How to Remove Test Mode Watermark in Windows 10
-
How to Enter Safe Mode in Windows 10, 8.1, 8, 7, Vista, XP
-
How to Launch Command Prompt on Windows 10, 8.1, 8, 7, Vista, XP
If you think this article is useful, please share it on Facebook, Twitter, LinkedIn, Google+, Reddit or Digg to help your friends solve the similar issues.
If you discover other effective ways to fix the Windows Update error 0x8007007e in Windows 10, welcome to share with us in the Comment section below. Any other PC issues, like PC slow, no WiFi available, no sound, USB not working, Bluetooth not available, mouse and keyboard not working, please check for solutions in the Windows 10 Fix section.
Recommended Download
|
ExplorerMax |
Driver Talent for Network Card | |||
| Smart and advanced file explorer tool for Windows platforms | Download & Install Network Drivers without Internet Connection | |||
|
30-day Free Trial |
Free Download |