
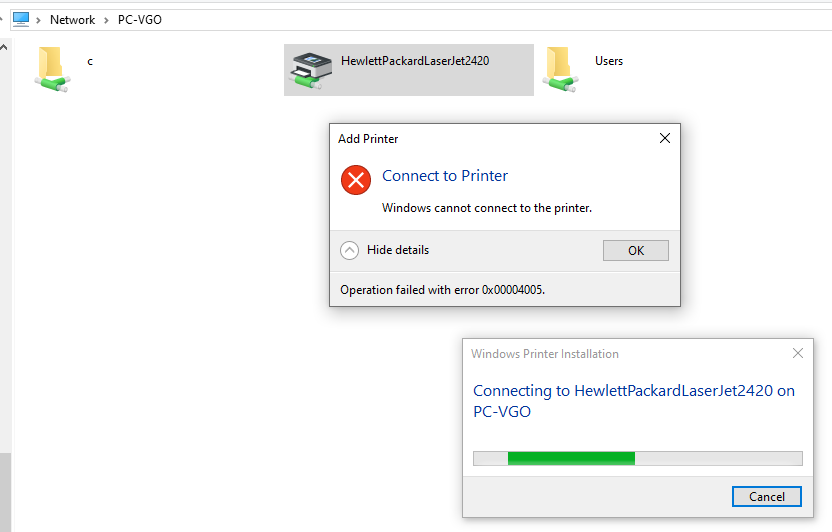
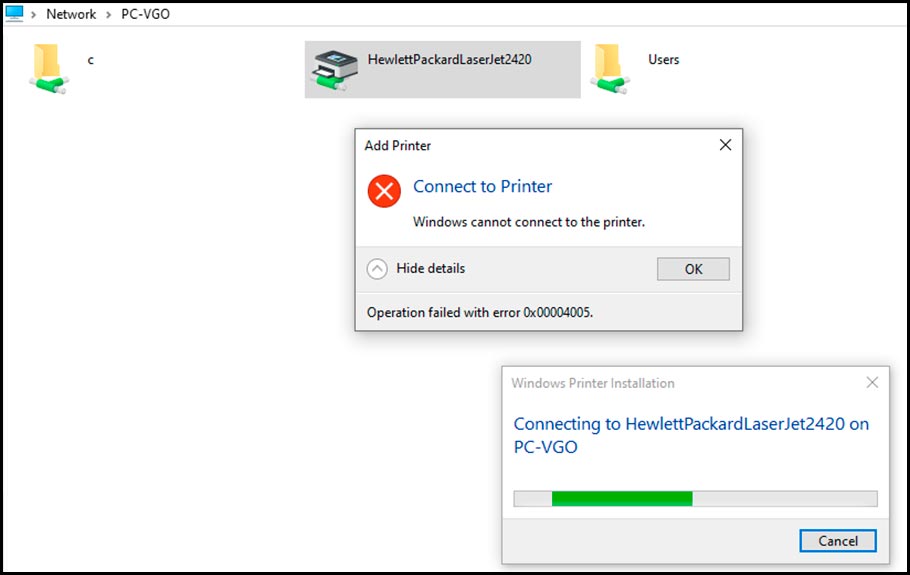
Ошибка 0x00004005 может возникать при попытке добавить сетевой принтер, например, в локальную сеть. Версия ОС Windows не играет никакой роли. Как правило, появление ошибки 0x00004005 вызвано внезапной остановкой службы очереди печати (spooler) либо устаревшими драйверами для самого принтера. Тем не менее в некоторых отдельных случаях причина может крыться за неправильными сетевыми настройками.
Решение ошибки 0x00004005
Средство устранения неполадок
Прежде чем заниматься чем-то «серьезным», вам нужно опробовать в деле встроенное в Windows средство устранения неполадок. Подобное средство способно быстро и, что важнее всего, в автоматическом режиме выявить те или иные несоответствия в параметрах печати принтера, а после — устранить их, если это, конечно, возможно.
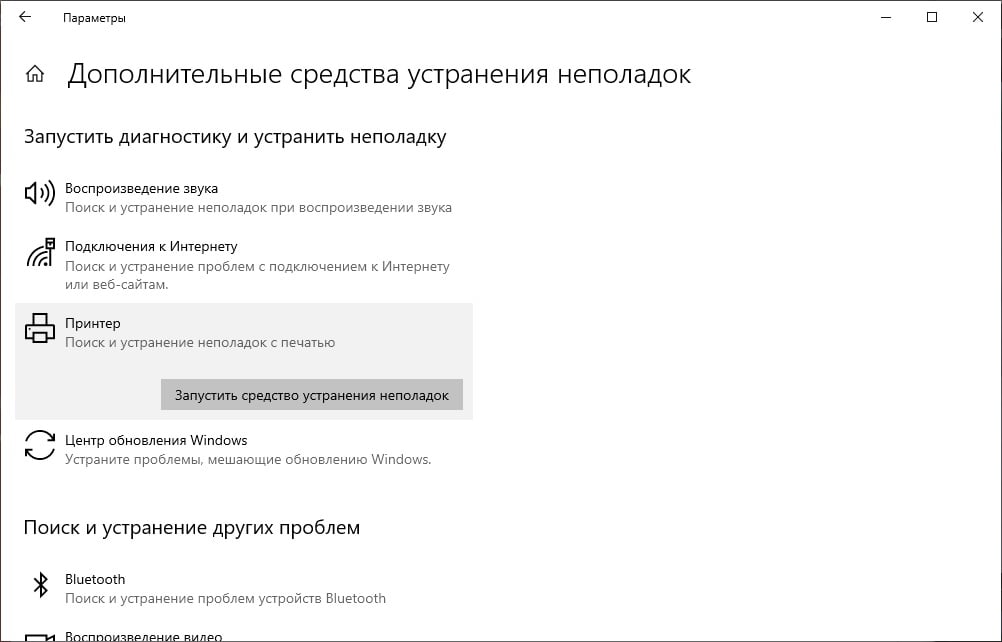
Чтобы запустить средство устранения неполадок с печатью на Windows 10, вам нужно сделать следующее:
- нажмите WIN+I для открытия системных параметров;
- перейдите в раздел «Обновление и безопасность», далее — в подразделы «Устранение неполадок»→«Дополнительные средства устранения неполадок»;
- выберите пункт «Принтер» и нажмите на кнопку для запуска средства;
- выполняйте все указания, которые видите перед собой.
Закончив работу со средством, перезагрузите свой ПК и проверьте наличие ошибки 0x00004005.
Обновление драйвера принтера
Абсолютно все устройства должны иметь в наличии актуальные драйвера. Устаревшие драйвера (либо и вовсе их полное отсутствие) может привести к ряду серьезных проблем, включая и нашу сегодняшнюю 0x00004005. ОС Windows должна автоматически подгружать из сети наиболее актуальные драйвера для устройств, но иногда этого не происходит. Чтобы обновить драйвер вручную:
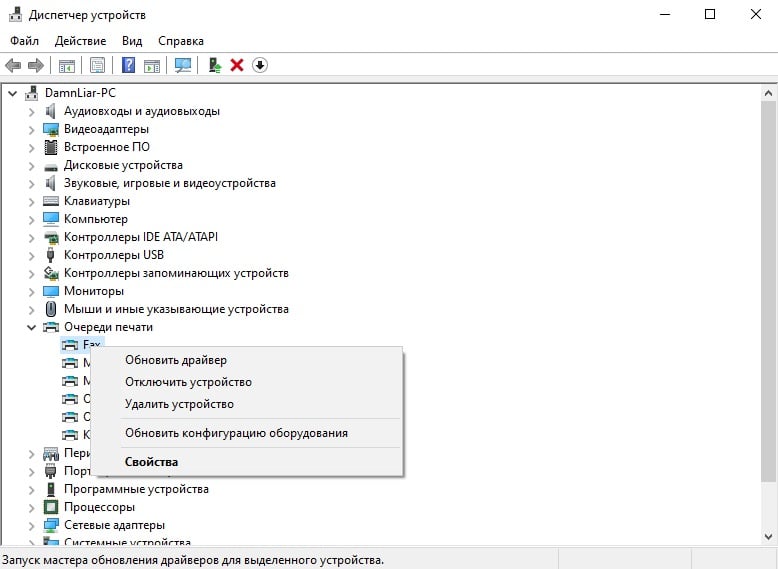
- нажмите ПКМ на меню Пуск и выберите «Диспетчер устройств»;
- раскройте раздел «Очереди печати» и найдите в списке устройств нужный вам принтер;
- нажмите на него ПКМ и выберите «Обновить драйвер»;
- далее нажмите на кнопку «Автоматический поиск драйверов».
Если драйвера вашего принтера действительно устарели, Windows найдет драйвера поновее и установит их в автоматическом режиме. Если же подобный метод не сработал в вашем случае, то рекомендуем установить подходящие драйвера вручную, воспользовавшись официальным сайтом производителя принтера.
Перезапуск «спулера»
Служба диспетчера печати (spooler) — один из важнейших системных компонентов Windows, без нормальной работы которого печать невозможна в принципе. Если данная служба начала работать с ошибками либо и вовсе перестала работать — жди беды. Чтобы перезапустить «spooler» и восстановить его нормальную работу:
- нажмите на клавиатуре WIN+R для вызова окошка «Выполнить»;
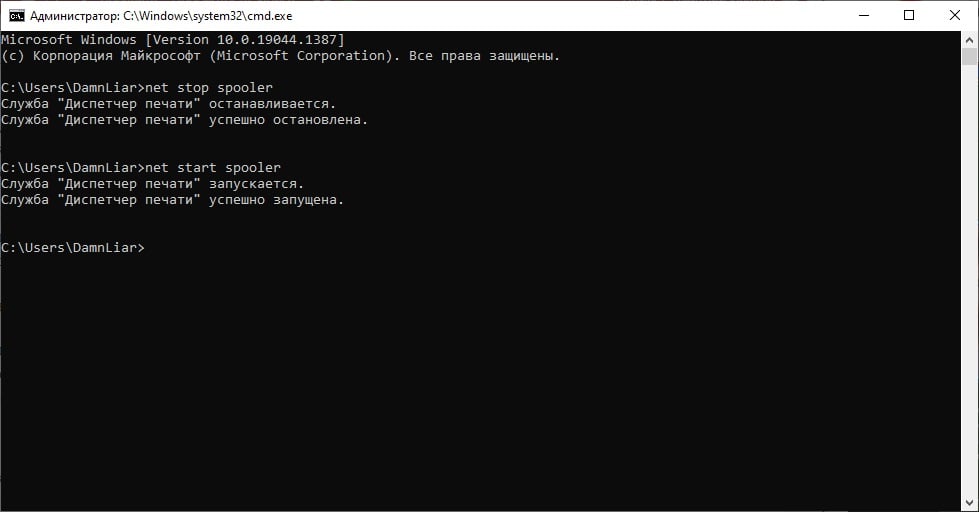
- пропишите в пустой строке «cmd» и нажмите CTRL+SHIFT+ENTER (запуск Командной строке от имени администратора);
- вставьте в консоль «net stop spooler» и нажмите ENTER;
- теперь вставьте «net start spooler» и нажмите ENTER.
Чтобы вы долго не думали: первой командой мы приостановили работу службы диспетчера печати, второй — снова ее запустили. Завершив манипуляции в Командной строке, проверьте, были ли исправлена 0x00004005 или нет.
Отключение проверки подписи драйверов
Проблемы с принтером могут возникать из-за проверки цифр. подписи драйверов, которая в последних версиях Windows максимально ужесточена. Возможно, вашим принтером используется драйвер, у которого отсутствует «валидная» цифровая подпись, т.е. он не был утвержден Майкрософт. Проблема решается деактивацией этой самой проверки. Очевидный минус — повышенная уязвимость системы.
Чтобы отключить проверку цифровых подписей драйверов в Windows:
- нажмите WIN+I для открытия окошка «Параметры»;
- перейдите в раздел «Обновление и безопасность», далее — в подраздел «Восстановление»;
- кликните на кнопку «Перезагрузить сейчас» в разделе «Особые варианты загрузки»;
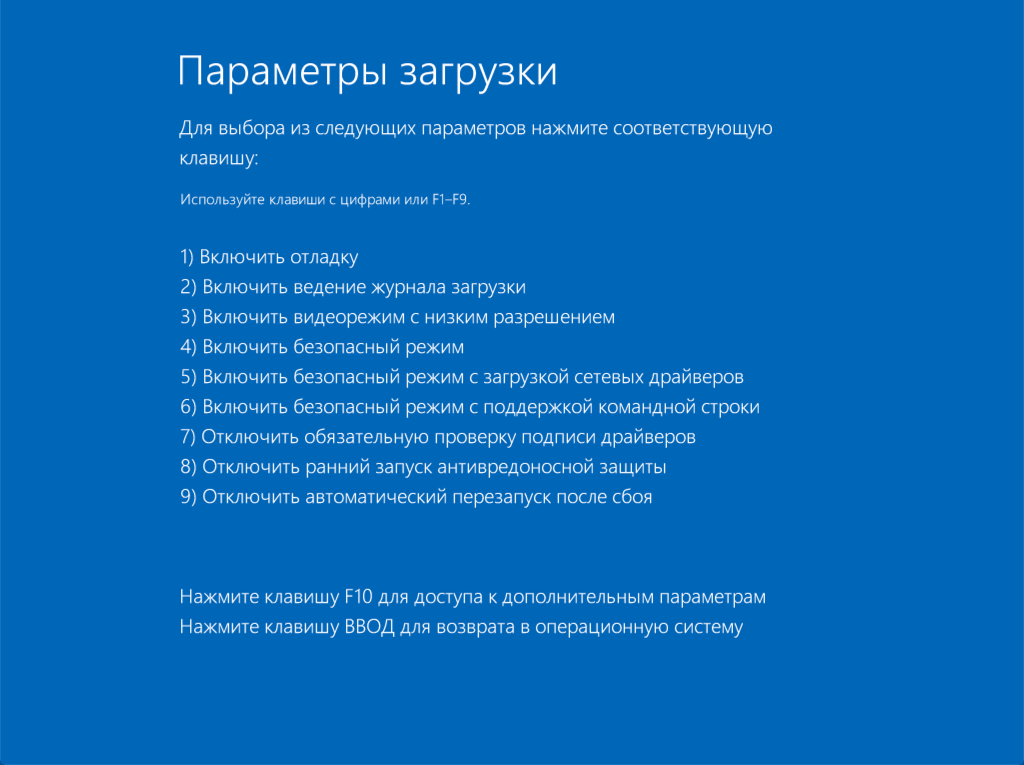
- выберите раздел «Диагностика», потом — подразделы «Дополнительные параметры» и «Параметры загрузки»;
- кликните «Перезагрузить» в правом нижнем углу, после чего нажмите на кнопку F7, чтобы загрузить ОС без обязательной проверки подписи драйверов.
Попробуйте добавить принтер, установить для него драйвер — проверьте наличие ошибки 0x00004005.
Удаление последнего накопительного обновления
К сожалению, накопительные обновления Майкрософт могут ломать некоторые функции ОС Windows, включая и печать. Никак не можете разобраться со своим принтером после установки свежего апдейта? Тогда попробуйте избавиться от последнего. Чтобы удалить последнее накопительное обновление в Windows 10:
- откройте окно «Параметры» и перейдите в раздел «Обновление и безопасность»;
- перейдите в подраздел «Центр обновления Windows» и кликните на пункт «Журнал обновлений»;
- кликните на кнопку «Удалить обновления», чтобы открыть список обновлений, установленных в вашей системе;
- найдите последнее накопительное обновление, выделите его и нажмите на «Удалить»;
- после удаления апдейта перезагрузите ПК.
Как только получите полный контроль над системой, проверьте наличие ошибки 0x00004005.
Printer problems are nightmare for Windows 10 or 11 users as they are constantly reporting error code 0x00000077, 0x0000052e, 0x00000709, 0x0000011b and several other. 0x00004005 is such an issue that appears when trying to add a shared network printer to the laptop or computer and it started after a bug that arrived with Windows update. Fortunately, you can fix it with some solutions having modifications in settings, configuration, and registry entries.
Full message that appears during the problem is “Windows cannot connect to printer. Operation failed with error 0x00004005”. This error occurs mostly due to outdated printer driver, incorrect registry entries, corrupted system files, and buggy Windows update. To keep yourself away from this printer error, here we are sharing a few simple ways for fixing the error on a possible early basis.
Shared Network Printer Operation failed with error 0x00004005
Here is how to fix Printer Operation failed with error 0x00004005 windows 10, 11 –
Way-1: Run the Printer Troubleshooter
The best solution to this problem is running the printer Troubleshooter because this is a default program moreover it detects the Print Spooler and other necessary services automatically and corrects them if required. Most of all, the Fixit utility is easy to use which you can start by following the steps –
- Press the Windows key.
- Type – troubleshoot.
- Hit Enter.
- When the Settings app appears, click on – Additional troubleshooter.
- Click on Printer.
- Now click – Run the Troubleshooter.
- Follow the instructions shared.
- Restart your system to check if Printer Operation failed with error 0x00004005 is resolved.
Way-2: Update the printer driver
In addition, if you are planning to invest in a new printer, you should get a CD that has all the necessary drivers. Try reinstalling all drivers which match your printer. If CD is not available, you can get all the required drivers from the manufacturer’s official website. Furthermore, Device Manager allows updating the driver staying at your Windows which is an advisable method.
- Press – Windows + R.
- Type – devmgmt.msc.
- Click on OK.
- Once the Device Manager appears, find the printer in the list and double-click on it.
- If you can’t see the device, click on View from the top menu bar.
- Select – Show hidden devices.
- Now go to the printer and right-click on it.
- Select – Update driver.
- From the Window, click on Search driver automatically.
- Restart the computer.
Way-3: Uninstall and reinstall the printer driver
When a shared network printer refuses to add to a computer there might be glitches in either the software of the printer or in Windows. Most important component of the printer is the driver which deals with the connection between Windows PC and printer. We have updated the driver in the previous method and the printer is still not working means it is not properly installed on the computer. Therefore, this method will tell you to Uninstall and reinstall the printer driver by following the steps –
- Right-click on the Start.
- Select Device Manager.
- Go to the Printer and double-click on it to expand.
- On the device right-click and select – Uninstall device.
- Click on – Uninstall.
- Reboot the computer and hopefully, the error will be solved.
Way-4: Uninstall Windows update
Sometimes, buggy Windows update is a culprit that triggers Printer Operation failed with error 0x00004005 in Windows 10 and 11. In this condition, you will need to uninstall the update and pause the same until it is not officially resolved. First of all, make sure that the error code started after installing Windows update and then uninstall it using the below steps –
- Click Start.
- Type – updates.
- Press – Enter.
- Click – View update history.
- On the next Settings page, check if any update is installed recently.
- If yes then click on – Uninstall updates.
- A separate window pops up; select the update on that.
- Click on – Uninstall.
- Select Yes on the confirmation prompt.
Way-5: Configure the LAN Manager authentication level
On many occasions, Printer Operation failed with error 0x00004005 can even occur due to the incorrect configuration of the network security settings. Follow the steps below to handle it easily –
- Press Windows.
- Type – gpedit. msc.
- Once Group Policy Editor opens, Navigate to – “
Computer Configuration > Windows Settings > Security Settings > Local Policies > Security Options > Network security: LAN Manager authentication level“. - Double click on Network security: LAN Manager authentication level.
- On the properties window, click on drop down.
- Select – “Send LM and NTLM – Use NTLMv2 session security if negotiated”.
- Click on Apply and OK.
- Close the Group Policy editor and restart the computer.
Way-6: Manually add the printer
If all the methods above fail to solve Printer Operation failed with error 0x00004005 in Windows 10, 11 you will need to reconfigure the printer and manually add it to the computer. Windows 10 and 11 as well allow you to add printer and scanner through Device Settings manually if the Operating system does not detect the device automatically. Using the section add the shared network printer –
- Press Winkey+I.
- Select – Devices.
- From the next page of Settings, select – Printers & scanners from the left pane.
- Click Add a printer or scanner from the right.
- After a while you will see a link – The printer that I want isn’t listed.
- Check the box for – Add a printer using a TCP/IP address or hostname.
- Click – Next.
- On the next window, type Hostname or IP address.
- Write Port name and click on Next.
- Follow the instructions on the screen and connect the p0rinter.
Way-7: Install Windows update
If the printer error occurred because of faulty Windows update Microsoft should acknowledge this and find a resolution. Then they push it through another update to officially resolve the bug. Therefore, install the pending update after getting the printer problem in Windows 11 or 10 using the below guidelines –
- Click on Search from the taskbar.
- Type updates.
- Press Enter.
- Now, click on – Check for updates.
- Allow the system to download the update as it will consume some time depending on internet speed.
- Once, a dialog box asks you to restart the computer, click on – Restart now.
Way-8: Manually restart Print spooler service
Print Spooler Service is the most essential component to run any printing device without any hitch and glitch. Many times, Printer Troubleshooter checks the service and repairs if its misbehave causes the Operation failed with error 0x00004005 in Windows 11 or 10. But some users experience that the service needs to be manually restarted to fix this error code. So follow the method –
- Click on Search.
- Type – services.
- Hit – Enter.
- On the Services window, right click on Print spooler.
- Select – Restart.
- Hopefully, the error should be resolved now.
Methods list:
Way-1: Run the Printer Troubleshooter
Way-2: Update the printer driver
Way-3: Uninstall and reinstall the printer driver
Way-4: Uninstall Windows update
Way-5: Configure the LAN Manager authentication level
Way-6: Manually add the printer
Way-7: Install Windows update
Way-8: Manually restart Print spooler service
That’s all!!
,
Several users with Windows 10 and usually after installing updates, cannot connect to a shared printer because of error «Windows cannot connect to the printer – Operation failed with error 0x00004005 or 0x0000011b».
The printer errors 0x00004005 & 0x0000011b with decryption «Operation Failed – Windows Cannot add/connect to Printer», occurs when you try to add a shared printer to Windows 10 that is shared on another computer running Windows 10 or Server 2016 or Server 2019. To fix the problem, follow the instructions below:
How to FIX Printer Error 0x00004005: Cannot Connect to Printer in Windows 10.
Method 1. Install KB5006738 to fix Printing Error 0x00004005.
Microsoft released update KB5007253 on November 22, 2021, which is supposed to fix printing issues that occurred after installing KB5006670, KB5007186, KB5008212 or KB5006738 updates. So, before you continue further…
1. Download and install the 2021-11 Cumulative Update Preview for Windows 10 (KB5007253) from the Microsoft Update Catalog.
2. After installation, reboot the computer and then check if the printing problem persists.
Method 2. Uninstall Recently Installed Updates.
If you cannot print to a shared printer, or if you cannot add/connect to a shared printer after the installation of Windows updates, proceed to uninstall them and see if that fixes the problem. To do that:
1. Go to Settings -> Update and Security.
2. Click View update history.

3. Click Uninstall updates.

4. Now under «Microsoft Windows» section, proceed and remove any recently installed updates or any of the following KB updates that can cause the printing problem.
- KB5008212
- KB5007186
- KB5006738
- KB5006670
- KB5005573
- KB5005565

5. Restart your PC.
6. After rebooting, try to print or to add the shared printer. If the problem is not solved, continue to next method, otherwise proceed and prevent the removed update(s) to be re-installed, by doing the following:
1. Download the Show or Hide updates tool «wushowhide.diagcab» tool from: https://www.majorgeeks.com/files/details/wushowhide.html
2. Run the tool, click Next and then select Hide updates.
3. Let the tool to find the available update and when this done, select the update you removed and click Next.

4. When the troubleshooting is complete close the troubleshooter and restart your PC


Method 3. Delete Print Spooler Jobs.
1. Press Windows + R keys to open the run command box.
2. In the Search box, type: services.msc & click OK.
3. In Services panel, right-click on Print Spooler service and click Stop.

4. Without closing the Services window, open File Explorer and navigate to the following location on disk.
- C:\Windows\system32\spool\printers
5. Delete all files inside the PRINTERS folder and close Explorer.
6. Back in Services window, right-click on Print Spooler service and click Start.
7. Now try to print/connect again to the shared printer.
Method 4. FIX «0x00004005 Cannot Connect to Printer» error via Registry.
Another method to solve the error 0x00004005 when tryin to connect to shared printer, is to modify the RpcAuthnLevelPrivacyEnabled REG_DWORD value in registry on both PCs. To do that: *
* Important: You have to apply the below modification in Registry on both PCs.
1. Press Windows + R keys to open the run command box.
2. Type regedit and press Enter.
3. In Registry Editor navigate to the following key:
- HKEY_LOCAL_MACHINE\SYSTEM\CurrentControlSet\Control\Print
4. Right-click at an empty space at the right pane and choose New > DWORD (32-bit) Value

5. Give at new value the name: RpcAuthnLevelPrivacyEnabled
6. Double-click at the RpcAuthnLevelPrivacyEnabled value, set the value data to 0 and click OK.
7. Close the registry editor.
8. Restart your computer.
9. Now try to connect to your network printer. The error 0x00004005 should be resolved.
Method 5. Add the Shared Printer using a Local Port.
Another way to bypass the error 0x00004005 when installing a network printer on Windows 10, is to manually add the printer by using a local port.
1. Navigate to Control Panel > Devices and Printers.
2. Click Add a printer. *
* Note: If the shared printer is already in the list, remove it before proceeding to re-add it.

3. At the next screen, click The printer that I want isn’t listed.

4. Select Add a local printer or network printer with manual settings and click Next.

5. Click Create a new port and select Local Port from the drop-down menu. Click Next.

6. At the screen specify the port name in one of the following formats and click OK:*
- \\ComputerName\SharedPrinterName
- \\ComputerIPAdress\SharedPrinterName
* Examples:
a. If the computer name of the computer that shares the network printer is «Computer01» and the printer’s share name is «HP1100» then the port name is «\\Computer01\HP1100»
b. If the IP Address of the computer that shares the network printer is «192.168.1.20» and the printer’s share name is «HP1100» then the port name is «\\192.168.1.20\HP1100»
7. At the next screen select the network printer model and click Next. *
* Note: If you cannot find the printer’s model here, then download the printer driver from the manufacturer and then install the printer locally on your PC (LPT1). After installation, perform again the steps on this method to manually install the printer by using the «Local Port» option.

8. When the printer installation is completed print a test page to test the printer and you’re done.
That’s all folks! Did it work for you?
Please leave a comment in the comment section below or even better: like and share this blog post in the social networks to help spread the word about this problem.
If this article was useful for you, please consider supporting us by making a donation. Even $1 can a make a huge difference for us.
- Author
- Recent Posts
Konstantinos is the founder and administrator of Repairwin.com. Since 1995 he works and provides IT support as a computer and network expert to individuals and large companies. He is specialized in solving problems related to Windows or other Microsoft products (Windows Server, Office, Microsoft 365, etc.).
Подключение к принтеру иногда сопровождается возникновением определенных ошибок, из-за которых пользователи не могут задавать печать документов и в полной мере использовать возможности печатающего устройства. Сегодня мы поговорим о самых распространенных ошибках подключения к сетевому принтеру, а главное, подскажем, как от них избавиться. Рассматривать будем преимущественно простые в понимании способы, благодаря чему, при наличии достаточного терпения, с устранением ошибок подключения к принтеру справится любой продвинутый пользователь, имеющий опыт работы с системой Windows 10.
Общие сведения об ошибках подключения к принтеру в Windows 10
Прежде чем приступить к прочтению инструкций по конкретным кодам ошибок, рекомендуем ознакомиться со статьей, в которой мы описали универсальные методы устранения ошибок, связанных с подключением к принтерам и установкой их устройствами по умолчанию («Как исправить ошибку «Windows не удается подключиться к принтеру»). Если приведенные там рекомендации не помогли, тогда есть смысл приступать к ознакомлению с инструкциями по распространенным кодам ошибок.
Чтобы не повторяться, мы поделили упомянутые коды на несколько групп, к каждой из которых приложили подробный перечень действий. Сразу скажем, что мы не можем гарантировать работоспособность методов в 100% случаев, так как обстоятельства возникновения ошибок часто различаются. Но многие пользователям далее приведенные советы помогли. Будем надеяться, что они окажутся полезными и для наших читателей.
Важно: Многие приведенные способы работают не только в Windows 10, но и более ранних версиях ОС от Microsoft. Поэтому если нужно устранить ошибку подключения к принтеру в Windows 7 или 8, испробуйте те же варианты. Они должны помочь.
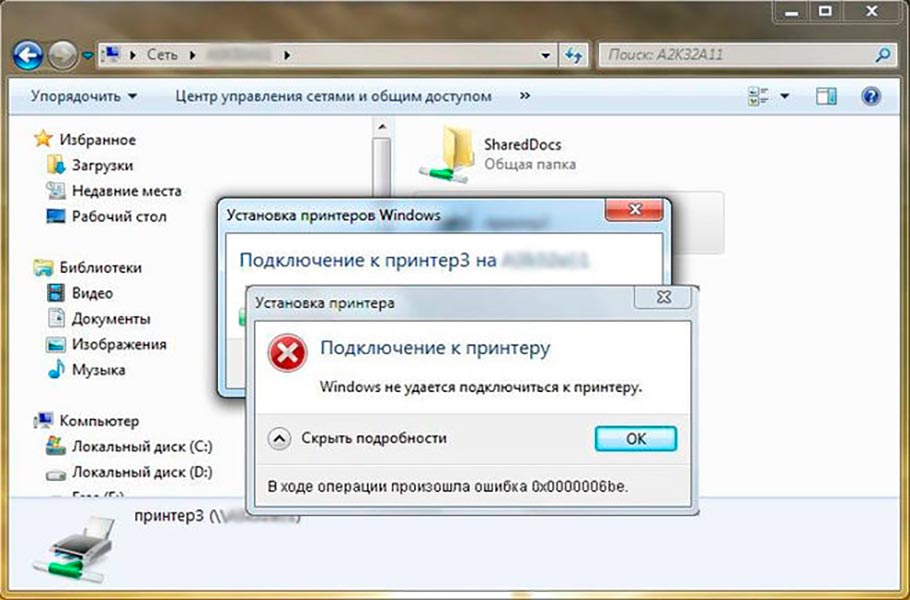
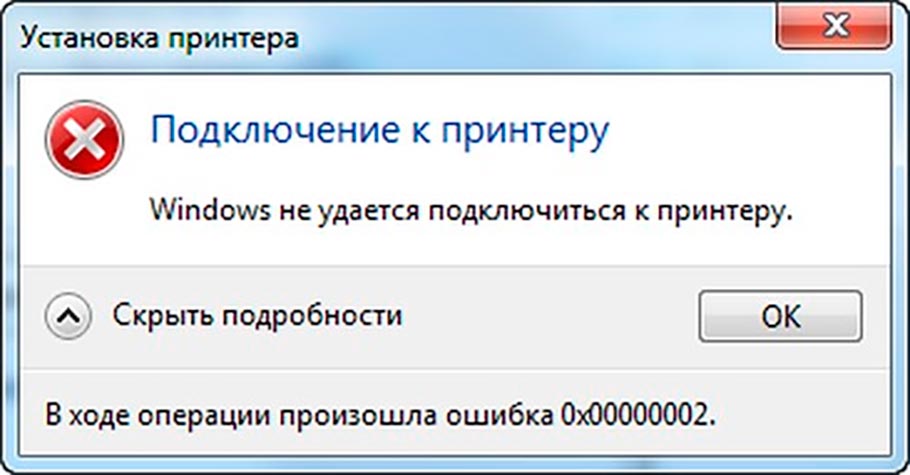
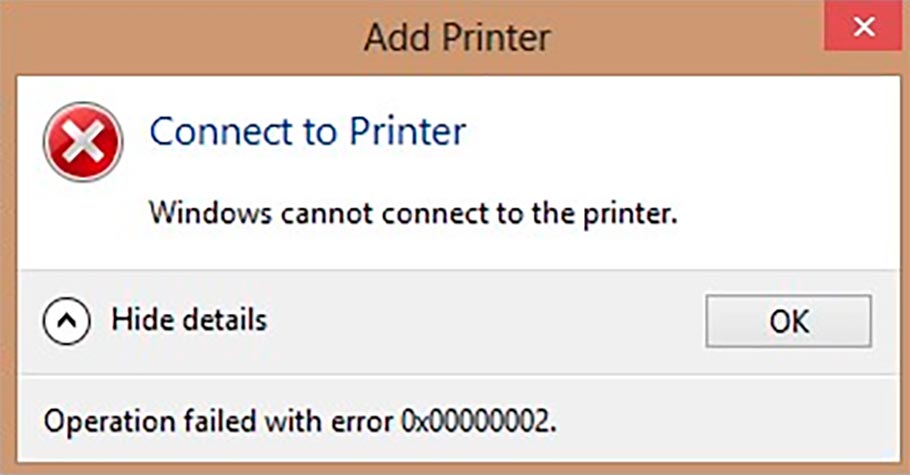
Ошибки 0x00000002 и 0x00000006 при подключении к сетевому принтеру
Обозначенные ошибки возникают по одинаковым причинам, поэтому решения тоже идентичны. Загвоздка в том, что код может появляться вследствие стечения множества обстоятельств, поэтому часто для решения проблемы приходится последовательно пробовать все далее приведенные методы. И даже в этом случае нет гарантии получения требуемого результата. Однако попытаться определенно стоит.
Итак, первым способом достижения цели является выполнение официальной инструкции от Microsoft. Она предполагает осуществление таких шагов:
- Установите все доступные обновления системы, затем перезагрузите ПК и попробуйте подключить принтер еще раз.
- Запустите встроенные службы диагностики неполадок (как операционной системы в целом, так и проблем, не позволяющих завершить печать, в частности). Дождитесь завершения мониторинга и автоматического устранения найденных неполадок. Затем попробуйте добавить принтер заново.
- Подключите принтер через локальный порт, указав данные хоста и наименование оргтехники, а затем установите драйверы. После выполнения перечисленных действий для внесения изменений перезагрузите компьютер. Демонстрация процесса в видеоформате прилагается чуть ниже.
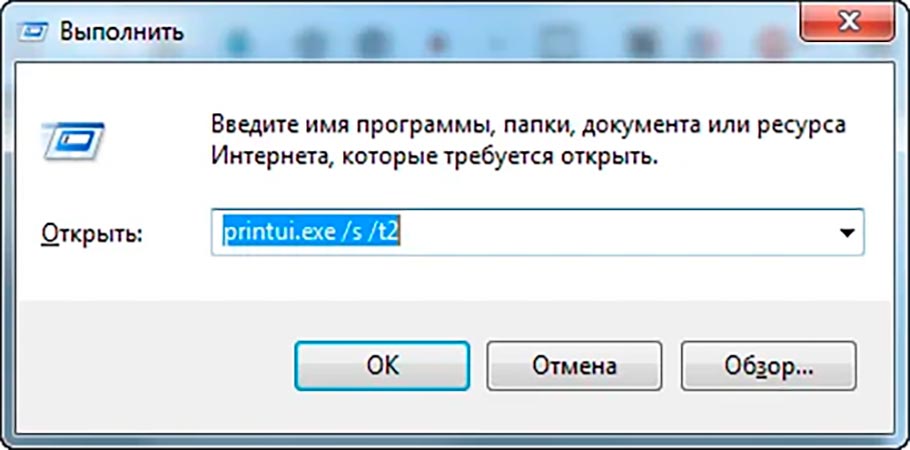
Вторым способом ликвидации ошибок 0x00000002 и 0x00000006 является полная переустановка драйверов. Алгоритм таков:
- Зайдите в Свойства: Сервер печати (нажмите Win+R, затем введите printui.exe /s /t2).
- Выберите нефункционирующий пакет драйверов и нажмите Удалить.
- Скачайте с официального сайта свежие драйверы для конкретного принтера, а затем установите их в соответствии с подсказками инсталлятора.
Третий способ исправления ошибок подключения к сетевому принтеру 0x00000002 и 0x00000006 в Windows 10 (и других версиях ОС) тоже связан с обновлением/установкой драйверов. Он подходит при двух условиях – разрядность системы хоста составляет х64 и на клиенте установлена ОС той же версии, что и на сервере (например, Windows 7 на обоих компьютерах). Порядок действий таков:
- Включите Панель управления и перейдите в раздел Устройства и принтеры.
- Выберите нужный принтер и через контекстное меню откройте Свойства.
- Найдите Дополнительные драйверы (вкладка Доступ) и поставьте галочку на x86.
- Дождитесь старта автоматической установки драйверов (если действия не последует – установите их вручную).
Приведенные способы помогают избавиться от ошибок подключения принтера 0x00000002 и 0x00000006 в подавляющем большинстве случаев. Если они не срабатывают (и советы из рекомендованной ранее статьи тоже не помогли), то остается обратиться за помощью к Microsoft или к производителю принтера.
Важно: Есть и другие методы достижения результата. Но они довольно сложны, а малейшая неточность в их реализации с большой вероятностью может привести к критическим последствиям в работе ПК. Поэтому мы опубликовали только безопасные решения, чье применение не помешает функционированию системы.
Ошибки подключения к принтеру 0х00004005 и 0x0000007e
Эти ошибки целесообразно попробовать убрать ранее упомянутыми методами. Если они не помогли, нужно выполнить установку принтера, как в вышеприведенном видео. При этом в пункте Имя порта надо указать данные в виде ||hostname|printer, где hostname – название хоста (находится в поле Hostname в реестре по пути HKEY_LOCAL_MACHINE/SYSTEM/CurrentControlSet/Services/Tcpip/Parameters), а printer – IP-адрес печатающего устройства (можно узнать в свойствах принтера). В результате должно получиться что-то вроде ||user2-PC|172.0.0.1 (это лишь пример, ваши данные будут отличаться).
Если при вводе возникает ошибка, то необходимо использовать вариант со стандартными косыми чертами: \\hostname\printer. Эти решения работают через раз (возможно, зависят от версии ОС). В целом, метод не особо отличается от варианта, представленного на видео. Разница только в том, что вместо имени принтера понадобится вводить его адрес.
Со значительной вероятностью применение метода поможет избавиться от ошибок подключения к принтеру 0х00004005 и 0x0000007e, тем самым обеспечив прямое подключение к оргтехнике с клиентского ПК и, соответственно, возможность выполнения удаленной печати.
Ошибки подключения к принтеру 0x0000000a, 0x00000214, 0x0000052e
Представленные ошибки появляются довольно редко, а их исправление требует минимального количества действий:
- При возникновении кода ошибки 0x0000000a достаточно активировать гостевую учетную запись на сервере. Также не помешают остановка и последующий запуск службы Диспетчер печати.
- Ошибка 0x00000214 свидетельствует о проблемах, связанных с отсутствием драйверов (в основном из-за различий в разрядности ОС хоста и клиента). Устранить проблему можно переустановкой драйверов.
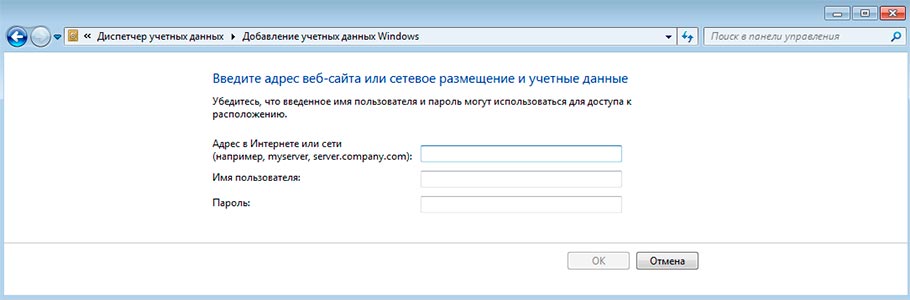
- При появлении кода ошибки 0x0000052e следует зайти в Диспетчер учетных данных, выбрать Добавить учетные данные Windows и ввести требуемые данные.
Важно: Большинство ошибок, связанных с подключением к сетевому принтеру, обосновано проблемами с драйверами или отсутствием нужных прав у пользователей. Поэтому решению этих вопросов нужно уделить внимание еще на стадии изначальной настройки доступа к принтеру.
Ваше Имя:
Ваш вопрос:
Внимание: HTML не поддерживается! Используйте обычный текст.
Оценка:
Плохо
Хорошо
Введите код, указанный на картинке:
Several users complained of encountering an error 0x00004005 when they attempt adding a network printer to their PCs. When this error appears, you also receive an error message that reads the following –
Windows can't connect to the printer, the operation failed with error 0x00004005
This error (0x00004005) occurs mainly due to stopped print spooler service, or outdated drivers. In certain cases, this may also arise because of misconfigured network settings. Whatever the reason in your case, you may resolve it by applying the workarounds discussed in this tutorial.

Printer Error 0x00004005 Solutions
To solve the printer error 0x00004005, try out the below suggestions sequentially –
- Restart Print Spooler Service
- Initiate Printer Troubleshooter
- Install Appropriate Drivers
- Update Printer Driver
- LAN Manager authentication level
- Add Printer Manually
1] Uninstall the Latest Cumulative update
If you had recently installed a cumulative update (security/non-security) on your PC, try uninstalling that patch update to fix Printer Error 0x00004005. Here’s how to uninstall lately installed updates on your computer –
Win 11:
- Launch Settings (Win + I) and select Windows Update.
- On the right pane, click Update History.
- Under Quality updates, note down the latest cumulative update number.
- Scroll down to the bottom and click Uninstall updates.

Win 10:
- Press Win + I to launch the Settings window.
- Go to Update & Security > Windows Update next.
- Click the “View update history” option on the right pane.

- Here, you will find an option – “Uninstall updates”, click on it.
When you click uninstall updates, the system will redirect you to the Control Panel. When Control Panel launches, do the following –
- Click “Uninstall a program” on the left pane. A list of all recent patch updates will appear on the right side.
- Right-click on the recently installed update, and hit the option – Uninstall.
- When the warning message comes into the display, hit Yes.
- Your device will restart immediately afterward, and start removing the chosen update.
- Wait for this cumulative update to remove successfully.
After this cumulative update uninstalls, restart your PC again, and see if you can now print your documents.
Alternatively, you may also CMD (Admin) to uninstall recently installed updates from your computer. After you open the Command Prompt, copy/paste this code, and press Enter.
wusa /uninstall /kb:5006670
Note: If the KB number differs in your case, use that number in this format kb_colon_kb number i.e. kb:5006670.
After running this code successfully, restart your PC and see if it helps to solve the printing issues.
2] Restart Print Spooler Service
The Print Spooler service allows you to connect your printer to your computer. For Printers to work smoothly, this service should stay enabled. So, go and check if this is running properly or has stopped working. All you require is to follow these steps –
Solved: How to Fix Print Spooler Service issues on Windows 10
- Open the Run command first by pressing the Win key and R.
- Type “
services.msc” and press Enter. - On the opened window, scroll down and double-click over the service – Print Spooler Services.

- Make sure the Startup type is on Automatic mode.
- If Service Status is showing stopped, you need to click on Start. Similarly, if the Service Status is displaying running, you need to stop it first and then start again.

- Lastly, hit OK to save the above configuration.
- Now it’s done, Restart your PC and check whether the error 0x00004005 is retained or solved.
3] Initiate Printer Troubleshooter
In case the error persists even after enabling the Print Spooler service, try troubleshooting your Printer using the below guideline –
- First of all, press Win + I to open the Settings app.
- Select Update & Security > Troubleshoot on the left pane.
- Move to the right pane and click over the link – Additional troubleshooters.
- Here, click to expand the Printer under the “Get up and running” section, and hit “Run the troubleshooter”.

- When the troubleshooter starts, check the option – “Printer not working”.
- Follow the on-screen instructions to complete the remaining process.
Restart your PC next and see if the error 0x00004005 gets resolved or not. If not, try out the next solution –
4] Install the Appropriate Printer Driver
When you purchase a new printer, you also get a CD containing all the required drivers in it. Try re-installing all the drivers that come along with the printer. If you were not provided any CD during the purchase or just lost access to that, you may get the essential drivers by visiting the manufacturer’s official site.
Download and install the printer-related drivers and see if it solves the error 0x00004005.
5] Update the Printer Driver
As discussed above, drivers play a vital role in the smooth running of a Printer. The presence of an outdated driver may cause printers to stop working and instead generate errors. In such a scenario, what you can do is open the Device Manager and update all printer-related drivers.
- Open Run Command (Win key + R).
- Type “
devmgmt.msc”. - When Device Manager comes into the display, expand Print Queues.
- Right-click on each one of the adapters inside and hit the option – Update driver.

- On the succeeding screen, click – “Search automatically for drivers”.
- Let the system search and install the pending updates that it discovers online.
Note: Similar to that of Print Queues, you should also update all the drivers present inside the “Network Adapter”. Doing so will fix any network-related issues that may occur while printing documents.
6] Configure LAN Manager Authentication level
Sometimes, the error 0x00004005 simply occurs because the Network Security Setting is not configured properly. To do so, use these steps –
- Right-click on the Windows icon and select Run.
- Type “
gpedit.msc” in the text field and press OK. - When the Local Group Policy window opens up, reach out to the path below –
Computer Configuration > Windows Settings > Security Settings >
Local Policies > Security Options
- Move to the right pane and locate the policy – “Network security: LAN Manager Authentication Level”.

- Once found, double-click over it to edit this policy.
- Use the drop-down menu to select “Send LM & NTLM – use NTLMv2 session security if negotiated”.

- Hit Apply then OK to confirm the above changes.
- Reboot your PC next and see if the error gets resolved by now or is still occurring while printing documents.
7] Manually add Printer to Windows 10
I hope the error 0x00004005 must have been resolved by now. If not, you need to re-configure the Printer and manually add it to your device again.
Here’s how to manually set up a printer on the computer –
- Launch Control Panel.
- Proceed as follows – Hardware and Sound > Devices and Printers.
- Subsequently, click over the option – “Add a printer“.
- On the “Add a device” window, hit the link – “The printer that I want isn’t listed”.
- Check the “Add a local printer or network printer with manual settings” box and hit Next.

- Type your Local Port number inside the “Use an existing port” and hit OK. Alternatively, you may also choose to “Create a new port” as well.

- Hit Windows Update and let the system adds your printer to the computer.

- In the end, hit Next, and the printer gets attached to your device.
Now that you have manually attached the Printer to your computer, try initiating a print job. I hope this time, the print job occurs successfully.
If you have any queries or suggestions related to this article, let us know in the comment section below.